Publicité
Les langues disponibles
Les langues disponibles
Liens rapides
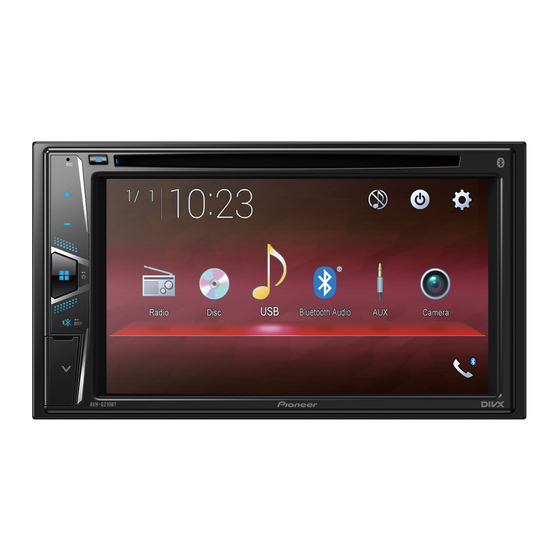
AVH-G210BT
AVH-G110DVD
DVD RDS AV RECEIVER
AUTORADIO AV RDS AVEC LECTEUR DE DVD
RICEVITORE AV RDS CON DVD
RADIO AV RDS CON DVD
DVD-RDS-AV-EMPFÄNGER
DVD RDS AV-ONTVANGER
Installation Manual
Manuel d'installation
Manuale d'installazione
Manual de instalación
Installationsanleitung
Installatiehandleiding
Publicité

Manuels Connexes pour Pioneer AVH-G210BT


Sommaire des Matières pour Pioneer AVH-G210BT
- Page 1 AVH-G210BT AVH-G110DVD DVD RDS AV RECEIVER AUTORADIO AV RDS AVEC LECTEUR DE DVD RICEVITORE AV RDS CON DVD RADIO AV RDS CON DVD DVD-RDS-AV-EMPFÄNGER DVD RDS AV-ONTVANGER Installation Manual Manuel d'installation Manuale d'installazione Manual de instalación Installationsanleitung Installatiehandleiding...
- Page 2 , use speakers over 50 W an external power amp’s system remote Pioneer does not recommend that you • It is extremely dangerous to allow cables (Maximum input power) and between 4 control terminal, the auto-aerial relay install this product yourself.
- Page 3 through the blue/white lead, even if the Red (3*) Grey/black: Front right – or high range Power cord audio source is switched off. Connect to terminal controlled by right – ignition switch (12 V DC). Green: Rear left + or middle range left + Connect leads of the same colour to Green/black: Rear left –...
- Page 4 USB port With internal amp External video component USB - micro USB cable (Type USB A - micro USB B) (supplied with CD-MU200 and the display Important (sold separately)) Front speaker and Rear speaker are output USB Type-C cable (Type USB A - USB C) from the speaker leads when this (supplied with CD-CU50 (sold connection is in use.
- Page 5 Installation cables, the wiring position might differ resulting in disturbed images and sounds. L : Left audio (White) R : Right audio (Red) V : Video (Yellow) Precautions before Before installing G : Earth installation • Consult with your nearest dealer if installation requires drilling holes or other modifications of the vehicle.
- Page 6 you leave ample space behind the rear Groove Be sure to use the screws supplied Installation with the panel and wrap any loose cables so they Attach the trim ring with the side with this product. are not blocking the vents. holder with a groove facing downward.
- Page 8 à un qu’ils ne gênent pas la conduite. risquerait de vous distraire et de technicien agréé Pioneer, qui possède les • Assurez-vous que les fils et les câbles ne compromettre votre sécurité à bord du dommages compétences et l’expérience nécessaires...
- Page 9 À raccorder à la borne commandée par Panneau arrière Câble d’alimentation l’interrupteur d’allumage (12 V c.c.). Raccordez les fils de même couleur ensemble. Orange/blanc À la borne de l’interrupteur d’éclairage. Position ACC Pas de position ACC Noir (terre) À la carrosserie (métal) du véhicule. •...
- Page 10 Blanc/noir : Avant gauche – ou aigus permet également de contrôler les objets Avec amplificateur interne Smartphone gauche – derrière vous lorsque vous conduisez. Gris : Avant droit + ou aigus droit + (périphérique Android™) Important ATTENTION Gris/noir : Avant droit – ou aigus droit – Le son du haut-parleur avant et du haut- UTILISEZ CETTE ENTRÉE UNIQUEMENT Vert : Arrière gauche + ou médiums...
- Page 11 Entrée de la caméra de rétrovisée (R.C Composant vidéo PRÉCAUTION Veillez à utiliser un câble AV mini-jack Alimentation externe et écran (vendu séparément) pour le raccordement. Câble d’alimentation Si vous utilisez d’autres câbles, la position Violet/blanc (REVERSE-GEAR SIGNAL de raccordement pourra différer selon les INPUT) images et les sons déformés.
- Page 12 Installation Tirez sur l’appareil pour le dégager de son support. connaître la zone de déploiement des Précautions avant airbags avant. • Lors de l’installation, laissez suffisamment l’installation d’espace derrière le panneau arrière pour Avant l’installation Clé d’extraction permettre une dissipation correcte de la chaleur et enroulez les câbles volants de PRÉCAUTION •...
- Page 13 Garniture Rainure Fixez la garniture en orientant le côté avec la rainure vers le bas. Support de montage de la radio fourni en standard Si le cliquet vous empêche d’installer Installation à l’aide des le produit, vous pouvez le plier vers trous de vis situés sur le bas.
- Page 14 4 Ω e gli 8 Ω (valore di Pioneer, adeguatamente formati e dotati modo che non impediscano o ostacolino impedenza). Per questa unità, non dell’esperienza necessaria con i dispositivi...
- Page 15 • Per la connessione di un amplificatore di Uscita subwoofer/posteriore Accessorio (o back-up) Bianco: Sinistro anteriore + o sinistro potenza o altri dispositivi a questo Rosso (3*) gamma alta + prodotto, fare riferimento al manuale del Effettuare il collegamento al terminale Bianco/nero: Sinistro anteriore –...
- Page 16 inoltre di controllare la presenza di oggetti Ingresso telecamera di retrovisione (R.C Smartphone o persone dietro il veicolo durante la guida. (dispositivo Android™) Alimentazione AVVERTENZA Cavo di alimentazione UTILIZZARE L’INGRESSO SOLO PER LA Viola/bianco (REVERSE-GEAR SIGNAL VIDEOCAMERA A VISTA POSTERIORE CON INPUT) IMMAGINE SPECULARE O INVERTITA.
- Page 17 Installazione Componente video ATTENZIONE Per il collegamento utilizzare un cavo AV esterno e display mini-jack (venduto separatamente). Se si usano altri tipi di cavo, la posizione del cablaggio potrebbe essere diversa e Precauzioni prima Prima dell’installazione causare disturbi all’audio e al video. dell’installazione •...
- Page 18 Estrarre l’unità dal supporto. • Per assicurare un’adeguata dispersione Chiave di estrazione del calore del prodotto nel corso del suo utilizzo, durante l’installazione si Installazione con il raccomanda di lasciare ampio spazio Ghiera dietro il pannello posteriore e di supporto Scanalatura avvolgere i cavi allentati affinché...
- Page 20 4 Ω y 8 Ω (valor de impedancia). No de servicio autorizado de Pioneer con conducción. utilice altavoces de 1 Ω a 3 Ω para esta formación y experiencia especial en...
- Page 21 producto, consulte el manual del Rojo (3*) Blanco: Delantero izquierdo + o Cable de alimentación producto que quiera conectar. Conéctelo al terminal controlado por el izquierdo de rango alto + • El símbolo gráfico colocado en el interruptor de encendido (12 V CC). Blanco/negro: Delantero izquierdo –...
- Page 22 Violeta/blanco (REVERSE-GEAR Smartphone ADVERTENCIA SIGNAL INPUT) UTILICE ESTA ENTRADA ÚNICAMENTE (dispositivo Android™) Consulte la sección Cable de PARA IMÁGENES EN MARCHA ATRÁS O DE alimentación en la página 3. LA CÁMARA DE VISIÓN TRASERA NOTAS ESPECULAR. CUALQUIER OTRO USO • Para instalar la cámara, siga las PODRÍA DERIVAR EN LESIONES O DAÑOS.
- Page 23 Instalación Cable AV minijack (vendido por separado) Amarillo Rojo, blanco Al amarillo del vehículo. Consulte el manual del Al rojo, blanco Precauciones previas a propietario de su vehículo para obtener Cables RCA (vendido por separado) la instalación información sobre el área de uso de los A la salida de vídeo airbags delanteros.
- Page 24 la pantalla de ubicación del vehículo, y Anillo embellecedor Coloque el anillo embellecedor. podría disminuir el rendimiento de dicha Introduzca las llaves de extracción pantalla. suministradas en ambos lados de la unidad hasta que queden encajadas en su sitio. Extraiga la unidad del soporte. •...
- Page 26 • Beachten Sie alle Vorschriften und Anleitung an dem Punkt außer Kraft setzen, an dem Sicherheitshinweise des Kfz-Herstellers, Pioneer empfiehlt nicht, dieses Produkt das Kabel von der Fahrgastzelle in den insbesondere die Vorschriften zu eigenhändig zu installieren. Dieses Produkt • Dieses Produkt, Applikationen und die Motorraum führt.
- Page 27 von einem anderen Produkt. Beispiel: Sie Antennenrelais-Steuerungsterminal oder Rot (3*) Stromkabel müssen einen Verstärker fern von der zum Antennenverstärker- Mit dem durch den Zündschalter (12 V Masse dieses Produktes erden. Die Leistungssteuerungsterminal her (max. DC) gesteuerten Terminal verbinden. Verbindung von Massen kann einen 300 mA, 12 V DC).
- Page 28 Lautsprecherleitungen Ihnen auch die Prüfung dessen, was sich Smartphone Weiß: Front links + oder Hochton links + während der Fahrt hinter Ihnen befindet. Weiß/Schwarz: Front links – oder (Android™-Gerät) WARNUNG Hochton links – EINGANG NUR FÜR DIE RÜCKWÄRTSFAHR- Grau: Front rechts + oder Hochton ODER SPIEGELBILDFUNKTION DER rechts + HECKKAMERA VERWENDEN.
- Page 29 Dieses Produkt Externe VORSICHT Heckkameraeingang (R.C IN) Achten Sie darauf, ein Mini-Buchsen-AV- Netzteil Videokomponente und Kabel (separat erhältlich) für die Stromkabel Verdrahtung zu verwenden. Wenn Sie ein Display Violett/Weiß (REVERSE-GEAR SIGNAL anderes Kabel verwenden, kann die INPUT) Verdrahtungsposition abweichen und zu Beachten Sie die Informationen zum Bild- und Tonstörungen führen.
- Page 30 Installation Fahrzeugpositionsanzeige; zudem kann Führen Sie die mitgelieferten dies die Anzeigeleistung beeinträchtigen. Entriegelungsschlüssel bis zum Einrasten an beiden Seiten des Geräts ein. Ziehen Sie das Gerät aus der Einzelheiten zum Entfaltungsbereich der Vor der Installation zu Halterung. Frontairbags finden Sie im beachten Benutzerhandbuch Ihres Fahrzeugs.
- Page 31 Senkschrauben, je nach Form der Schraubbohrungen an der Halterung. Armaturenbrett Bringen Sie den Abdeckring an. Abdeckring Vorinstallierte Radio- Befestigen Sie den Abdeckring mit Montagehalterung nach unten zeigender Nut. Falls die Sperrklinke bei der Installation stört, können Sie sie nach Installation mit Hilfe unten biegen.
- Page 32 Als de handleiding • Gebruik dit product uitsluitend met een Pioneer raadt het u af om dit product zelf isolatie van de gele draad slijt als gevolg 12-volt batterij en negatieve aarde. Als u te monteren. Dit product is gemaakt om van contact met metalen onderdelen, de •...
- Page 33 alleen een zekering gebruikt met de Rood (3*) Achterpaneel Stroomkabel sterkte die op dit product vermeld staat. Aansluiten op de aansluiting die onder • Dit product kan niet worden gemonteerd aansturing van de contactschakelaar in een voertuig zonder ACC (accessoire)- staat (12 V DC).
- Page 34 Handremschakelaar Smartphone WAARSCHUWING Kant van de massa GEBRUIK DE INGANG UITSLUITEND VOOR Luidsprekerdraden (Android™-toestel) ACHTERUIT OF SPIEGELBEELD VAN DE Wit: Links vóór + of hoge tonen links + ACHTERUITKIJKCAMERA. ANDER GEBRUIK Wit/zwart: Links vóór – of hoge tonen KAN RESULTEREN IN LETSEL OF SCHADE. links –...
- Page 35 Stroomkabel Extern video- LET OP Lichtpaars/wit (REVERSE-GEAR Zorg dat u voor de bedrading een AV-kabel SIGNAL INPUT) onderdeel en het met ministekker gebruikt (apart verkocht). Raadpleeg het hoofdstuk Stroomkabel Als u andere kabels gebruikt, kan de beeldscherm op pagina 3. posities van draden afwijken wat tot OPMERKINGEN storingen in beeld- en geluidweergave...
- Page 36 Installatie tolerantiewaarde, dan neemt de kans op fouten in de beeldweergave in het voertuig toe en kan anderzijds een slechte beeldweergave veroorzaken. • Monteer dit product nooit vóór of naast Voorzorgsmaatregelen de locatie in het dashboard, de deur, of voor installatie de stijl van waaruit de airbag geactiveerd kan worden.
- Page 37 Dashboard Monteer de sierrand. Standaard montagebeugel voor de Sierrand radio Gleuf Als de pal de installatie in de weg zit, Bevestig de sierrand met de kant dan kunt u deze verbuigen. met de gleuf erin naar beneden Dashboard of console gericht.
- Page 40 © 2018 PIONEER CORPORATION. All rights reserved. <QRD3612-A> EU...