Publicité

Les langues disponibles
  • FR

Les langues disponibles

  • FRANÇAIS, page 1

Liens rapides

Meteoclock
"Humidifier Weather Station"
®
SM2000
Mode d'emploi – Instruction manual
SM2000IM0298_changed.indd 1
4/8/08 16:47:16

Publicité

Table des Matières
loading

Sommaire des Matières pour LEXIBOOK MeteoClock

  • Page 1 Meteoclock “Humidifier Weather Station” ® SM2000 Mode d’emploi – Instruction manual SM2000IM0298_changed.indd 1 4/8/08 16:47:16...
  • Page 2 SM2000IM0298_changed.indd 2 4/8/08 16:47:18...
  • Page 3 SM2000IM0298_changed.indd 3 4/8/08 16:47:19...
  • Page 4 SM2000IM0298_changed.indd 4 4/8/08 16:47:20...
  • Page 5: Présentation

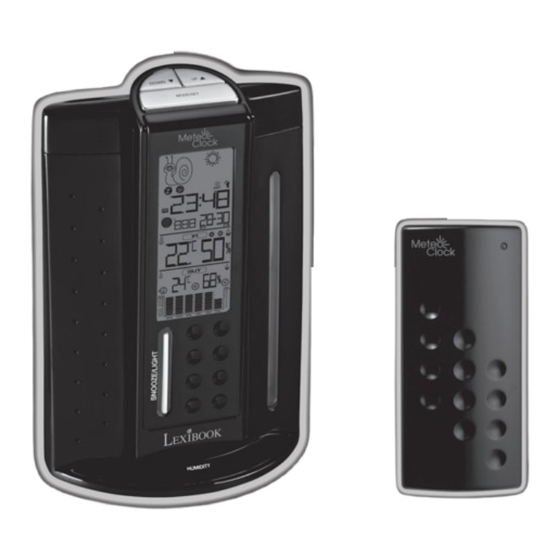
    PRÉSENTATION Présentation de l’unité principale Présentation de l’humidificateur Voir image A Voir image C 1. Touche « BAS ». 1. Réservoir avec niveau d’eau. 2. Touche « HAUT ». 2. Senseur d’humidité. 3. Touche « MODE/SET » . 3. Touche « Humidificateur marche/arrêt ». 4.
  • Page 6: Préparations

    PRÉPARATIONS Préparation du capteur à distance 1. Utilisez un tournevis pour ouvrir le compartiment des piles situé à l’arrière du capteur à distance. 2. Insérez 2 piles de type LR6/AA 1,5V (non fournies) en respectant la polarité indiquée au fond du compartiment et selon le schéma ci-contre. 3.
  • Page 7 Synchronisation automatique de l’unité principale et du capteur à distance 1. Une fois que les piles ont été insérées dans l’unité principale, la fonction de synchronisation se lance automatiquement et dure environ 3 minutes. 2. Durant ces 3 minutes, l’unité principale recueille les signaux de température et d’humidité...
  • Page 8: Réglage De L'humidificateur

    • Jusqu’à ce que le signal soit bien reçu, la plupart des touches de l’unité principale ne fonctionneront pas durant la synchronisation. • Après 10 minutes, si la réception échoue ou si l’unité est hors de portée de l’horloge automatique, le scan s’interrompt et l’icône RCC disparaît de l’écran LCD.
  • Page 9: Selection Du Canal De Reception

    Réglage du mode de l’humidificateur (manuel/automatique) 1. En mode normal, appuyez une fois sur la touche MODE/SET pour accéder au mode de réglage de l’humidificateur. 2. Utilisez les touches pour sélectionner le mode automatique (« AUT » / ou le mode manuel (« MAN » / 3.
  • Page 10: Réglage De L'horloge Et De La Date

    Les canaux de réception vous permettent également d’utiliser plusieurs capteurs. L’unité principale identifie chaque capteur à distance grâce au canal qui lui est associé (canal 1, 2 ou 3). Si vous avez un ou deux capteurs additionnels, vous pouvez les placer à...
  • Page 11 3. L’unité affiche l’écran d’accueil et l’icône RCC clignote . 4. Lorsque la réception est complète, l’icône cesse de clignoter et reste immobile. Note : • Le sélecteur RCC doit être positionné sur DCF ou sur MSF pour que vous puissiez utiliser cette option.
  • Page 12: Réglage De L'alarme

    RÉGLAGE DE L’ALARME 1. En mode normal, appuyez cinq fois sur la touche MODE/SET pour accéder au mode de réglage de l’alarme. 2. Appuyez et maintenez la touche MODE/SET jusqu’à ce que les chiffres des heures commencent à clignoter. 3. Utilisez les touches pour régler l’heure, puis appuyez sur MODE/SET pour confirmer et passer au réglage des minutes.
  • Page 13: Prévisions Météorologiques

    Conditions acceptables Conditions défavorables Température: de 18.0 à Température: pas comprise 19.9°C ou de 22.1 à 24.0 °C. entre 18.0 et 24.0 °C. Humidité : entre 35% et 44% ET/OU Humidité : pas comprise ou entre 56% et 65%. entre 35% et 65%. PRÉVISIONS MÉTÉOROLOGIQUES Symboles animés de prévisions météorologiques La SM2000 est capable de détecter les changements de pression atmosphérique, et en...
  • Page 14: Affichage De La Pression Atmosphérique

    AFFICHAGE DE LA PRESSION ATMOSPHÉRIQUE Mesure de la pression atmosphérique Votre station affiche la pression atmosphérique actuelle en inHg (onces de mercure) et en hectopascal (hPa). Il est communément admis qu’un niveau de 1015 Hpa est la limite entre un anticyclone (beau temps > 1015 hPa) et une dépression (mauvais temps <...
  • Page 15: Rétroeclairage

    Affichage des phases lunaires 1. Nouvelle lune 5. Pleine lune 2. Premier croissant 6. Lune gibbeuse décroissante 3. Premier quartier 7. Dernier quartier 4. Lune gibbeuse croissante 8. Dernier croissant RÉTROECLAIRAGE Pour activer le rétro-éclairage de l’écran LCD de l’unité principale, appuyez sur la touche «...
  • Page 16 • En mode normal, appuyez et maintenez la touche pendant environ 2 secondes pour synchroniser manuellement le capteur à distance et l’unité principale. • Il peut y avoir des interférences provoquées par des appareils électriques : changez le canal de réception. •...
  • Page 17: Entretien / Garantie

    (telle que démontage, exposition à la chaleur ou à l’humidité…). Référence : SM2000 Conçu et développé en Europe – Fabriqué en Chine Lexibook S.A, 2, avenue de Scandinavie, 91953 Courtaboeuf Cedex, France. Service consommateurs : 0892 23 27 26 (0.34€ TTC/min) www.lexibook.com...
  • Page 18: Declaration De Conformite

    2, avenue de Scandinavie 91953 Courtaboeuf Cedex déclarons sous notre seule responsabilité que le produit : Désignation: MeteoClock® « Active Weather Station » Référence / type: SM2000 Marque : Lexibook® Auquel se réfère cette déclaration est conforme aux exigences essentielles et aux autres dispositions pertinentes de la directive R&TTE (1999/5/CE).
  • Page 19: Product Description

    PRODUCT DESCRIPTION Main unit description Humidifier description Refer to image Refer to image C 1. “Down” key. 1. Water tank with water-level window. 2. “Up” key. 2. Humidity sensor. 3. “MODE/SET” key. 3. “Humidifier Start/Stop” button. 4. “SNOOZE/LIGHT” key. 4. Water tank lid. At the back, inside the battery compartment 5.
  • Page 20: Getting Started

    GETTING STARTED Remote sensor 1. Using a screwdriver, open the battery compartment located at the back of the remote sensor. 2. Insert 2 x LR6/AA 1,5V type batteries (not included) observing the polarity indicated at the bottom of the battery compartment, and as per the diagram shown opposite.
  • Page 21 Automatic synchronization of the main unit and the remote sensor 1. After batteries have been inserted in the main unit, the synchronization is launched automatically and runs for approximately 3 minutes. 2. Within these 3 minutes, the main unit (receiver) picks up the temperature & humidity signals from the remote sensor and displays the readings.
  • Page 22 Note: • For an optimal reception, place the weather station away from metal objects and electrical appliances (i.e. television, computer, monitor, etc.) to minimize interference. • The clock automatically scans the time signal everyday between 1:00 a.m. and 5:00 p.m. hourly to maintain accurate timing. •...
  • Page 23: Channel Selection

    Humidifier function mode setting (manual/automatic) 1. In normal mode (idle screen), press the MODE/SET key once to choose the humidifier function mode. 2. Use the keys to select the automatic (“AUT” / ) or the manual mode (“MAN” / 3. Press the MODE/SET key to confirm your selection and go to the channel setting. Note: After a few seconds of inactivity, the unit will go back to normal mode.
  • Page 24 Multiple sensor use 1. Make sure you set each sensor to a different channel. 2. Press and hold the key for 2 or 3 seconds to synchronize manually the remote sensors and the main unit. The weather station will detect automatically the new sensors.
  • Page 25: Alarm Setting

    1. In normal mode (idle screen), press the MODE/SET key four times to go the clock setting. 2. Press and hold the MODE/SET key until the hour’s digits start flashing. 3. Use the keys to increase or reduce the values, then press MODE/SET to confirm and adjust the next setting.
  • Page 26 6. When the alarm rings, press the “SNOOZE/LIGHT” key to switch on the snooze function. The icon is displayed on the LCD screen and the alarm will ring again 10 minutes later. Press the MODE/SET, keys to stop it. The alarm will ring again the next day at the same time.
  • Page 27 Heavy Rain Sunny Sunny intervals Cloudy Rainy (Storm Risk) Note: Absolute accuracy cannot be guaranteed regarding weather forecasting. The weather forecasting feature is estimated to have an accuracy level of about 75% due to the varying areas the Weather Station has been designed to be used in. TEMPERATURE &...
  • Page 28: Backlight

    As the moon rotates around the Earth, the appearance of its lightened side changes continuously. This phenomenon creates moon phases. The moon phase on your MeteoClock® is automatically updated according to the year / month / day.
  • Page 29 TROUBLESHOOTING Problem: 1. Main unit cannot receive radio control DCF-77 or MSF signals to update the clock. 2. Temperature reading of outdoor remote sensor seems too high. 3. Main unit is no longer receiving remote sensor signals or display. 4. The humidifier does not switch on in automatic mode or when the “Humidifier On/Off” key is pressed.
  • Page 30: Maintenance / Warranty

    (such as dismantling, exposure to heat or damp, etc.). Reference: SM2000 Designed and developed in Europe – Made in China Lexibook UK Ltd, Unit 10 Petersfield Industrial Estate, Bedford Road, Petersfield, Hampshire, GU32 3QA, United Kingdom.
  • Page 31: Declaration Of Conformity

    2, avenue de Scandinavie 91953 Courtaboeuf Cedex, France hereby declare under our full and sole responsibility, that the product: Name: MeteoClock® « Active Weather Station » Reference / type: SM2000 Maker: Lexibook® to which this declaration refers, complies with the essential requirements and any other provisions stated in Directive R&TTE (1999/5/EC).
  • Page 32: Descripción Del Producto

    DESCRIPCIÓN DEL PRODUCTO Descripción del humidificador Descripción de la unidad principal Véase la figura C Véase la figura A 1. Depósito de agua con visor de nivel 1. Botón “Down”. del agua. 2. Botón “up”. 2. Sensor de humedad. 3. Botón “MODE/SET”. 3.
  • Page 33: Preparación De La Unidad

    PREPARACIÓN DE LA UNIDAD Sensor remoto 1. Abra el compartimento de las pilas, situado en la parte posterior del sensor, utilizando un destornillador. 2. Coloque 2 pilas de tipo LR6/AA 1,5V (no incluidas), respetando la polaridad que se indica en el fondo del compartimento de las pilas, como dificador.
  • Page 34 Sincronización automática de la unidad principal y el sensor remoto 1. Después de colocar las pilas en la unidad principal, se activa automáticamente la sincronización, que dura aproximadamente 3 minutos. 2. En esos 3 minutos, la unidad principal (receptor) lee las señales de temperatura y de humedad enviadas por el sensor remoto y visualiza las lecturas.
  • Page 35 • Para mantener una hora precisa, el reloj se sincroniza automáticamente con la señal de radio cada día, entre la 1:00 y las 5:00 horas pm. • La mayoría de los botones dejan de funcionar mientras se sintoniza el reloj. •...
  • Page 36: Selección De Canal

    Ajuste del modo de funcionamiento del humidificador (manual/automático) 1. En modo normal (pantalla de espera), pulse una vez el botón MODE/SET para seleccionar el modo de funcionamiento del humidificador. 2. Utilice los botones para seleccionar modo (“AUT / ) o (“MAN / 3.
  • Page 37: Ajuste De Hora Y Fecha

    La función de selección de canal permite utilizar hasta 3 sensores adicionales. La unidad principal puede identificar cada sensor remoto gracias a su canal asignado (canal 1, 2 ó 3). Si tiene uno o dos sensores adicionales, puede colocarlos en diferentes lugares de su casa, por ejemplo en un dormitorio.
  • Page 38 Nota: • Para utilizar esta función, el selector RCC debe ponerse en la posición DCF o en la posición MSF. • Si pasados 10 minutos la unidad no recibe ninguna señal, se detiene el rastreo RCC. Ajuste manual del reloj Si el SM2000 se lleva fuera del alcance de la señal de radio Frankfurt DCF77 o de la señal MSF, o si se producen interferencias, ajuste manualmente la hora y fecha siguiendo el procedimiento que se indica a continuación.
  • Page 39: Ajuste De La Alarma

    AJUSTE DE LA ALARMA 1. En modo normal (pantalla de espera), pulse cinco veces el botón MODE/SET para acceder al modo de ajuste de la alarma. 2. Mantenga pulsado el botón MODE/SET hasta que los dígitos de la hora comiencen a parpadear.
  • Page 40 Condiciones aceptables Condiciones inaceptables Temperatura: 18,0 a 19,9°C o Temperatura: fuera del intervalo 22,1 a 24,0°C. 18,0 a 24,0 °C. Humedad: 35% a 44% o 56% a 65%. Humedad: fuera del rango 35% a 65%. PREDICCIÓN DEL TIEMPO Y VISUALIZACIÓN Símbolos animados de predicción del tiempo Esta estación meteorológica es capaz de detectar cambios en la presión atmosférica y predecir, basándose en los datos registrados, el tiempo para las próximas 8 a 24 horas.
  • Page 41 Este fenómeno crea las fases de la luna. La fase actual de la luna en el MeteoClock® se actualiza automáticamente de acuerdo con el año / mes / día.
  • Page 42: Iluminación De La Pantalla

    Fases de la luna 1. Luna nueva 5. Luna llena 2. Nueva creciente 6. Gibosa iluminante 3. Primer cuarto 7. Último cuarto 4. Gibosa iluminante 8. Vieja creciente ILUMINACIÓN DE LA PANTALLA Pulse una vez el botón “BACKLIGHT/SNOOZE” para que se ilumine la pantalla LCD de la unidad durante 5 segundos.
  • Page 43 • En modo normal, mantenga pulsado el botón durante unos 2 segundos para sincronizar manualmente el sensor remoto y la unidad principal. • Puede haber alguna interferencia causada por aparatos eléctricos: cambie el canal del sensor. • La temperatura puede estar por debajo de –30 ºC. •...
  • Page 44 En nuestro constante afán de superación, podemos proceder a la modificación de los colores y detalles del producto mostrado en el embalaje. Referencia: SM2000 Diseñado y desarrollado en Europa – Fabricado en China Lexibook Ibérica S.L, C/ de las Hileras 4, 4° dpcho 14, 28013 Madrid, España. Servicio consumidores: 902 102 191 www.lexibook.com...
  • Page 45: Declaración De Conformidad

    2, avenue de Scandinavie 91953 Courtaboeuf Cedex, Francia declara por la presente, bajo su entera responsabilidad, que el producto: Nombre: MeteoClock® « Active Weather Station » Referencia / tipo: SM2000 Fabricante: Lexibook® al que se refiere esta declaración, cumple con los requerimientos esenciales y otras disposiciones señaladas en la Directiva R&TTE (1999/5/EC).
  • Page 46: Descrição Do Produto

    DESCRIÇÃO DO PRODUTO Descrição da unidade principal Descrição do humidificador Consulte a imagem A Consulte a imagem C 1. Botão “Para baixo”. 1. Depósito da água com janela do nível 2. Botão “Para cima”. da água. 3. Botão “MODE/SET”. 2. Sensor da humidade. 4.
  • Page 47 INICIAR Sensor remoto 1. Com uma chave de fendas, abra a tampa do compartimento das pilhas, nível que se encontra na parte traseira do sensor remoto. 2. Coloque 2 pilhas LR6/AA 1,5V (não incluídas), tendo em conta a polaridade indicada na parte inferior do compartimento das pilhas e de cador”.
  • Page 48 Sincronização automática da unidade principal e do sensor remoto 1. Após ter colocado as pilhas na unidade principal, a sincronização é iniciada automaticamente e funciona durante cerca de 3 minutos. 2. Nestes 3 minutos, a unidade principal (receptor) recolhe os sinais da temperatura e da humidade a partir do sensor remoto e apresenta as leituras.
  • Page 49: Configurar O Humidificador

    • O relógio procura automaticamente o sinal das horas todos os dias entre a 1:00 e as 17:00 para manter a precisão das horas. • Grande parte dos botões não funciona durante a procura. • Se, após 10 minutos, a recepção falhar ou a unidade estiver fora do alcance do e da acerto automático, a procura pára e o ícone RCC desaparece do ecrã...
  • Page 50 Configuração do modo da função de humidificador (manual/automático) 1. No modo normal (ecrã inactivo), prima o botão MODE/SET para escolher o modo da função de humidificador. 2. Use os botões para escolher o modo automático (“AUT” / ) ou manual (“MAN”...
  • Page 51 A função do canal permite-lhe usar até 3 sensores adicionais. A unidade principal consegue identificar cada sensor remoto, graças aos seus canais nomeados (canal 1, 2 ou 3). Se tiver um ou dois sensores adicionais, pode colocá-los em diferentes locais da sua casa, no quarto, por exemplo.
  • Page 52 Nota: • Para usar esta função, o selector RCC tem de ser definido para a posição DCF ou MSF. • Se a unidade não receber qualquer sinal, a busca RCC pára após 10 minutos. Acerto manual do relógio Se o SM12000 for levado para fora do alcance do sinal de rádio DCF77 ou MSF, ou se o sinal tiver interferências, por favor, acerte a hora e a data manualmente, de acordo com as instruções apresentadas abaixo: 1.
  • Page 53 3. Use os botões para acertar a hora e prima o botão MODE/SET para confirmar e acertar os minutos. 4. Use os botões para acertar os minutos e prima MODE/SET para confirmar e passar para o acerto seguinte. 5. Use os botões para escolher “ON”...
  • Page 54 PREVISÃO METEOROLÓGICA E APRESENTAÇÃO Símbolos animados da previsão meteorológica Esta estação meteorológica é capaz de detectar alterações na pressão barométrica e, com base nos dados recolhidos, prevê o estado do tempo para as próximas 8 a 24 horas. Existem 5 símbolos diferentes para a previsão meteorológica. Tromba d’água Intervalos Chuva...
  • Page 55 Como a lua gira em torno da Terra, a aparência do xterior é seu lado iluminado muda continuamente. Este fenómeno cria as fases da lua. A fase da lua no seu MeteoClock® é actualizada automaticamente de acordo com o ano / mês / dia. SM2000IM0298_changed.indd 55 4/8/08 16:47:49...
  • Page 56: Luz De Fundo

    Fases da lua 1. Lua Nova 5. Lua Cheia 2. Primeira Falcada 6. Segunda Giba 3. Quarto Crescente 7. Segunda Falcada 4. Primeira Giba 8. Quarto Minguante LUZ DE FUNDO Prima o botão “BACKLIGHT/SNOOZE” para ligar a luz de fundo LCD da unidade principal durante 5 segundos.
  • Page 57: Especificações

    • No modo normal, prima e mantenha premido o botão durante cerca de 2 segundos, para sincronizar manualmente o sensor remoto e a unidade principal. • Pode haver alguma interferência causada por aparelhos eléctricos: Mude o canal do sensor. • A temperatura pode estar abaixo dos -30 °C. •...
  • Page 58 Na procura de uma constante melhoria, poderemos modificar as cores ou características do produto apresentadas na caixa. Referência: SM2000 Criado e desenvolvido na Europa – Fabricado na China Lexibook Electrónica Lda, Quinta dos loios, Praceta José Domingos dos Santos, 6B-8A, 2835-343 Lavradio-Barreiro, Portugal.
  • Page 59: Declaração De Conformidade

    2, avenue de Scandinavie 91953 Courtaboeuf Cedex, France ha a declaramos por este meio e com a nossa total responsabilidade que o produto: Nome: “Estação Meteorológica Activa” MeteoClock® tempo. Referência / tipo: SM2000 Fabricante: Lexibook® a que esta declaração se refere, que se encontra em conformidade com os nossa requerimentos essenciais e quaisquer outras provisões indicadas na Directiva R&TTE...
  • Page 60: Descrizione Del Prodotto

    DESCRIZIONE DEL PRODOTTO Descrizione unità principale Descrizione umidificatore Fare riferimento all’immagine A Fare riferimento all’immagine C 1. Tasto “Down” (giù). 1. Serbatoio dell’acqua con finestra di 2. Tasto “Up” (su). osservazione del livello. 3. Tasto “MODE/SET” (modalità / imposta). 2. Sensore umidità. 4.
  • Page 61: Per Iniziare

    PER INIZIARE Sensore remoto 1. Servendosi di un cacciavite, aprire lo scomparto batterie situato sul retro del sensore remoto. 2. Inserire 2 batterie LR6/AA 1,5V (non in dotazione) rispettando le polarità indicate sul fondo dello scomparto batterie e secondo la figura qui a lato. 3.
  • Page 62 2. Nel corso di questi 3 minuti, l’unità principale (ricevitore) raccoglie i segnali di temperatura e umidità inviati del sensore remoto e visualizza a display le letture. 3. Qualora l’unità principale non dovesse mostrare a display le letture dopo 3 minuti, in modalità...
  • Page 63 • La maggior parte dei tasti non funzionerà durante la scansione. eratura • Se dopo 10 minuti la ricezione fallisce o l’apparecchio è fuori dalla portata dell’orologio automatico, la scansione s’interrompe e l’icona RCC scompare dallo schermo LCD. AVVERTENZA: in caso di malfunzionamento dell’apparecchio o se questo dovesse uto.
  • Page 64 Configurazione modalità d’uso dell’umidificatore (manuale / automatica) 1. In modalità normale (schermo vuoto), premere una volta il tasto MODE/SET per scegliere la modalità di funzionamento dell’umidificatore. 2. Servirsi dei tasti per selezionare la modalità automatica (“AUT” / manuale (“MAN” / 3.
  • Page 65: Impostazione Ora E Data

    La funzione canale permette di utilizzare fino a un numero di 3 sensori aggiuntivi. L’unità principale è in grado di identificare ciascun sensore remoto grazie al canale ad essi assegnato (canale 1, 2 o 3). Se si hanno uno o due sensori aggiuntivi, è possibile collocarli in un punto diverso dalla casa, ad esempio in una camera da letto.
  • Page 66 3. L’apparecchio visualizza a display l’unità principale e l’icona RCC lampeggia . 4. Quando la ricezione è completa, l’icona RCC rimarrà costante. Nota: • Per servirsi di questa funzione, il selettore RCC deve essere impostato su DCF o MSF. • Se l’apparecchio non riceve alcun segnale, la scansione RCC si interromperà dopo 10 minuti.
  • Page 67: Impostazione Della Sveglia

    IMPOSTAZIONE DELLA SVEGLIA 1. In modalità normale (schermo vuoto), premere cinque volte il tasto MODE/SET per recarsi alla modalità di configurazione della sveglia. 2. Tenere premuto il tasto MODE/SET fino a quando le cifre dell’ora non iniziano a lampeggiare. 3. Servirsi dei tasti per regolare l’ora, quindi premere MODE/SET per confermare e regolare i minuti.
  • Page 68 Condizioni accettabili Condizioni non accettabili Temperatura: compresa tra Temperatura: non compresa 18,0 e 19,9°C o tra 22,1 e tra 18.0 e 24.0 °C. 24,0 °C. Umidità: non compresa tra Umidità: dal 35% al 44% o dal 56% al 65%. 35% e 65%. PREVISIONI DEL TEMPO E VISUALIZZAZIONE A DISPLAY Simboli animati di previsione del tempo Questa stazione meteorologica è...
  • Page 69: Fasi Lunari

    è sempre mezzo illuminata dal sole. Man mano che la luna ruota attorno alla Terra, l’aspetto del suo lato illuminato cambia continuamente. Questo fenomeno determina le fasi lunari. Le fasi lunari indicate dal MeteoClock® vengono aggiornate automaticamente in base ad anno / mese / giorno.
  • Page 70: Risoluzione Di Problemi

    Fasi lunari 1. Luna nuova 5. Luna piena 2. Falce crescente 6. Luna calante 3. Primo quarto 7. Ultimo quarto 4. Luna crescente 8. Falce calante RETROILLUMINAZIONE Premere una volta il tasto “BACKLIGHT/SNOOZE” per accendere la retroilluminazione dell’LCD dell’unità principale per 5 secondi. RISOLUZIONE DI PROBLEMI Problema: 1.
  • Page 71: Specifiche Tecniche

    • In modalità normale, tenere premuto il tasto per circa 2 secondi per sincronizzare manualmente il sensore remoto e l’unità principale. • Vi potrebbero essere interferenze causate da dispositivi elettrici: cambiare il canale del sensore. • La temperatura potrebbe essere inferiore a -30°C. •...
  • Page 72: Manutenzione / Garanzia

    è possibile che i colori e i dettagli dei prodotti illustrati sulla confezione differiscano dal prodotto effettivo. Riferimento: SM2000 Progettato e sviluppato in Europa – Fabbricato in China Lexibook Italia S.r.l, Via Eustachi, 45, 20129 Milano, Italia. Servizio consumatori : 022040 4959 (Prezzo di una chiamata locale).
  • Page 73: Dichiarazione Di Conformità

    91953 Courtaboeuf Cedex, Francia dichiariamo con il presente documento, dietro la nostra sola e piena responsabilità, che il prodotto: Nome: MeteoClock® “Stazione meteorologica attiva” Riferimento / tipo: SM2000 Produttore: Lexibook® cui la presente dichiarazione fa riferimento, è conforme con i requisiti essenziali e qualsiasi altra indicazione stabilita dalla Direttiva R&TTE (1999/5/EC).
  • Page 74 PRODUKTBESCHREIBUNG Hauptgerät Beschreibung Luftbefeuchter-Beschreibung Bitte sehen Sie Abbildung A Bitte sehen Sie Abbildung C 1. „Abwärts” Taste 1. Wassertank mit Wasserpegel-Fenster 2. „Aufwärts” Taste 2. Leuchtfeuchte-Sensor 3. „MODUS/EINSTELLEN” Taste 3. „Luftbefeuchter Start/Stopp”-Taste 4. „SNOOZE/LICHT” Taste 4. Wassertankdeckel Auf der Rückseite, im Batteriefach 5.
  • Page 75 INBETRIEBNAHME Fernsensor 1. Öffnen Sie mit Hilfe eines Schraubendrehers das Batteriefach auf der Rückseite des Fernsensors. ster 2. Legen Sie 2 Batterien des Typs LR6/AA 1,5V (nicht im Lieferumfang enthalten) unter Beachtung der Polarität ein, die auf dem Boden des Batteriefachs markiert und im Schaubild gegenüber dargestellt ist.
  • Page 76 Automatische Synchronisation des Hauptgerätes und Fernsensors 1. Nachdem in das Hauptgerät Batterien eingelegt wurden, wird die Synchronisation automatisch gestartet und läuft für etwa 3 Minuten. 2. Innerhalb dieser 3 Minuten fängt das Hauptgerät (Empfänger) die Temperatur- & Luftfeuchtigkeitssignale vom Fernsensor auf und zeigt die Messungen an. 3.
  • Page 77 • Die Uhr fragt jeden Tag zwischen 1:00 und 17:00 Uhr stündlich das Zeitsignal ab, um eine akkurate Zeitanzeige beizubehalten. • Die meisten Tasten funktionieren während der Zeitsignalsuche nicht. • Falls nach 10 Minuten der Empfang fehlschlägt oder das Gerät ist außerhalb der Reichweite der Atomuhr, wird die Suche abgebrochen und das RCC-Symbol verschwindet vom LC-Display.
  • Page 78 Luftbefeuchter Funktionsmodi-Einstellungen (manuell/automatisch) 1. Drücken Sie im normalen Modus (inaktives Display) die MODE/SET –Taste einmal, um den Luftbefeuchter-Funktionsmodus zu wählen. 2. Wählen Sie mit den Tasten den automatischen („AUT” / ) oder manuellen Modus („MAN” / 3. Drücken Sie die MODE/SET-Taste, um Ihre Auswahl zu bestätigen und zur Kanal-Einstellung zu gelangen.
  • Page 79: Temperaturanzeige In °C Oder °F

    Die Kanal-Funktion ermöglicht Ihnen bis zu 3 Fernsensoren zu benutzen. Das Hauptgerät kann jeden Fernsensor dank seines zugeordneten Kanals (Kanal 1, 2 oder 3) identifizieren. Wenn Sie einen oder zwei weitere Sensoren haben, können Sie diese an verschiedenen Stellen in Ihrem Haus positionieren, z.B. in einem Schlafzimmer. Ihr Hauptgerät kann die Temperatur- und Luftfeuchtigkeitsdaten von bis zu drei Fernsensoren sammeln.
  • Page 80 3. Das Gerät zeigt das inaktives Display an und das RCC-Symbol blinkt. 4. Wenn der Empfang beendet ist, hört das RCC -Symbol auf zu blinken und wird gleichbleibend angezeigt. Hinweis: • Um diese Funktion zu nutzen, muss der RCC-Selektor auf die DCF oder MSF- Position gestellt sein.
  • Page 81: Weckalarm Einstellen

    WECKALARM EINSTELLEN 1. Drücken Sie im normalen Modus (inaktives Display) die MODE/SET-Taste fünfmal, um zur Weckalarm-Einstellung zu gelangen. 2. Halten Sie die MODE/SET-Taste gedrückt, bis die Stundenstellen zu blinken beginnen. 3. Stellen Sie mit den Tasten die Stunden ein, drücken Sie dann die MODE/ SET-Taste, um zu bestätigen und die Minuten einzustellen.
  • Page 82 Akzeptable Bedingungen Nicht akzeptable Bedingungen Temperatur: 18,0 bis 19,9°C Temperatur: nicht zwischen 18,0 oder 22,1 bis 24,0 °C und 24,0 °C Luftfeuchtigkeit: 35% bis 44% UND/ODER Luftfeuchtigkeit: nicht zwischen oder 56% bis 65%. 35% und 65%. WETTERVORHERSAGE UND ANZEIGE Animierte Wettervorhersage-Symbole Diese Wetterstation erkennt Änderungen des Luftdrucks und sagt das Wetter basierend auf den gesammelten Daten für die nächsten 8 bis 24 Stunden vorher.
  • Page 83 Mond, da er kugelförmig ist, immer halb von der Sonne erleuchtet. Während der Mond um die Erde kreist, ändert sich das Äußere seiner beleuchteten Seiten fortlaufend. Dieses gkeit. Phänomen erzeugt Mondphasen. Die Mondphase auf Ihrer MeteoClock® wird automatisch dem Jahr / Monat / Tag entsprechend aktualisiert. Trend...
  • Page 84 Mondphasen 1. Neuer Mond 5. Vollmond 2. Junger Halbmond 6. Abnehmender Dreiviertelmond 3. Erstes Viertel 7. Letztes Viertel 4. Zunehmender Dreiviertelmond 8. Alter Halbmond HINTERGRUNDBELEUCHTUNG Drücken Sie einmal die „LIGHT/SNOOZE”-Taste, um die Hintergrundbeleuchtung des LC-Displays des Hauptgeräts für 5 Sekunden einzuschalten. FEHLERBEHEBUNG Problem: 1.
  • Page 85: Technische Daten

    • Halten Sie im normalen Modus die Taste für 2 Sekunden gedrückt, um den Fernsensor und das Hauptgerät manuell zu synchronisieren. • Es könnten Störungen durch elektrische Geräte verursacht werden: ändern Sie den Sensorkanal. • Die Temperatur ist möglicherweise unter -30°C. •...
  • Page 86 Verpackung für spätere Konsultationen aufzubewahren. Bedingt durch unser ständiges Bemühen nach Verbesserung, kann das Produkt möglicherweise in Farben und Details von der Verpackungsabbildung abweichen. Referenznummer: SM2000 Design und Entwicklung in Europa - Made in China Lexibook Deutschland - Service-Hotline/Kundendienst Tel. 01805 010931(0,14 Euro/Minute) E-Mail: savcomfr@lexibook.com www.lexibook.com www.lexibookjunior.com ©2008 LEXIBOOK®...
  • Page 87: Konformitätserklärung

    2, avenue de Scandinavie 91953 Courtaboeuf Cedex, Frankreich erklären hiermit unsere volle und alleinige Verantwortung, dass das Produkt: Name: MeteoClock® « Aktive Wetterstation » Referenznummer / Typ: SM2000 Hersteller: Lexibook® auf das sich diese Erklärung bezieht, den grundlegenden Anforderungen und jedweden anderen Bestimmungen, die in der Direktive R&TTE (1999/5/EG).
  • Page 88: Productbeschrijving

    PRODUCTBESCHRIJVING Beschrijving hoofdeenheid Beschrijving bevochtiger Raadpleeg afbeelding A Raadpleeg afbeelding C 1. “Down” (Omlaag) toets. “Up” (Omhoog) toets. 1. Waterreservoir met venster die het 2. “Up” (Omhoog) toets. waterniveau aangeeft. 3. “MODE/SET” (MODUS/INSTELLEN) toets. 2. Vochtigheidssensor. 4. “SNOOZE/LIGHT” (SLAAP/LAMPJE) toets. 3.
  • Page 89: Aan De Slag

    AAN DE SLAG Afstandsensor 1. Door gebruik te maken van een schroevendraaier opent u het batterijcompartiment aan de achterkant van de afstandsensor. 2. Plaats 2 x LR6/AA 1,5V type batterijen (niet inbegrepen) waarbij u de polariteit naleeft die aangegeven staat op de onderkant van het batterijcompartiment, alsook volgens de afbeelding die aan de andere kant getoond wordt.
  • Page 90 Automatische synchronisatie van het hoofdapparaat en de afstandsensor 1. Nadat de batterijen in het hoofdapparaat geplaatst werden, wordt de synchronisatie automatisch gestart en draait ongeveer 3 minuten. 2. In deze 3 minuten pikt het hoofdapparaat (ontvanger) de temperatuur- en vochtigheidsignalen op van de afstandsensor en geeft hij de waarden weer. 3.
  • Page 91: De Bevochtiger Instellen

    • De klok scant het tijdsignaal elke dag automatisch elk uur tussen 1u en 17u om een nauwkeurig tijdstip te behouden. • De meeste knoppen zullen niet werken tijdens het scannen. • Als na 10 minuten de ontvangst wegvalt of als het apparaat zich buiten het autoklok bereik bevindt, stopt het scannen en het RCC icoon zal van het LCD scherm verschijnen.
  • Page 92 Bevochtiger functie modusinstelling (manueel/automatisch) 1. In normale modus (inactief scherm), drukt u eenmaal op de MODE/SET (MODUS/ INSTELLEN) toets om de modus van de bevochtiger funtie te kiezen. 2. Gebruik de toetsen om de automatische (“AUT” / ) of de manuele modus (“MAN”...
  • Page 93 Met de kanaalfunctie kunt u tot 3 extra sensoren gebruiken. Het hoofdapparaat kan elke afstandsensor identificeren dankzij hun toegewezen kanaal (kanaal 1, 2 of 3). Als u één of twee extra sensoren hebt, kunt u ze op een andere plaats in uw huis zetten, bijvoorbeeld in uw slaapkamer.
  • Page 94 3. Het apparaat geeft het inactief scherm weer en het RCC icoon knippert. 4. Als er volledige ontvangst is, zal het RCC icoon stoppen met knipperen en ononderbroken blijven staan. Opmerking: • Om deze functie te gebruiken, moet de RCC keuzeschakelaar in de DCF of de MSF stand ingesteld worden.
  • Page 95 ALARMINSTELLING 1. In normale modus (inactief scherm), drukt u vijfmaal op de MODE/SET toets om naar de alarminstelling te gaan. 2. Houd de MODE/SET toets ingedrukt totdat de uurcijfers beginnen te knipperen. 3. Gebruik de toetsen om het uur aan te passen, druk vervolgens op de MODE/ SET toets om te bevestigen en de minuten aan te passen.
  • Page 96 Aanvaardbare toestand Onaanvaardbare toestand Temperatuur: 18.0 tot 19.9°C Temperatuur: niet tussen of 22.1 tot 24.0 °C. 18.0 en 24.0 °C. Vochtigheid: 35% tot 44% EN/OF Vochtigheid: niet tussen of 56% tot 65%. 35% en 65%. WEERSVOORSPELLING EN WEERGAVE Geanimeerde weersvoorspellingsymbolen Dit weerstation kan veranderingen in barometerdruk waarnemen en op basis van de verzamelde gegevens, het weer voorspellen voor de volgende 8 tot 24 uur.
  • Page 97 Daar de maan rond de aarde draait, verandert het uitzicht van de belichte zijde voortdurend. Dit fenomeen creëert maanfasen. De maanfasen op uw MeteoClock® worden automatisch geüpdatet volgens het jaar / de maand / de dag.
  • Page 98: Achtergrondverlichting

    Maanfasen 1. Nieuwe maan 5. Volle maan 2. Jonge halvemaan 6. Verminderend tussen half en vol 3. Eerste kwartier 7. Laatste kwartier 4. Opkomend tussen half en vol 8. Oude halvemaan ACHTERGRONDVERLICHTING Druk eenmaal op de “BACKLIGHT/SNOOZE” (ACHTERGRONDVERLICHTING/SLAAP) toets om de LCD achtergrondverlichting van het hoofdapparaat gedurende 5 seconden in te schakelen.
  • Page 99: Specificaties

    • In de normale modus houdt u de toets ongeveer 2 seconden ingedrukt om de afstandsensor en het hoofdapparaat manueel te synchroniseren. • Er kan storing zijn die veroorzaakt wordt door elektrische apparaten: wijzig het kanaal van de sensor. • Temperatuur kan onder de -30°C zijn. •...
  • Page 100 Ontworpen en ontwikkeld in Europa - Gemaakt in China www.lexibook.com www.lexibookjunior.com ©2008 LEXIBOOK® Richtlijnen voor milieubescherming Gebruikte elektronische apparaten horen niet thuis in het huisafval ! Wij vragen u daarom een bijdrage aan de bescherming van ons milieu te leveren en dit apparaat op de voorziene verzamelplaatsen af te geven.
  • Page 101: Verklaring Van Overeenstemming

    2, avenue de Scandinavie 91953 Courtaboeuf Cedex, Frankrijk verklaren bij deze, op onze volledige en exclusieve verantwoordelijkheid, dat het product: Naam: MeteoClock® « Actief weerstation » Referentie / type: SM2000 fabrikant: Lexibook® waarnaar deze verklaring verwijst, in overeenstemming is met de essentiële vereisten en alle andere bepalingen die bepaald zijn in Richtlijn R&TTE (1999/5/EG).

Table des Matières