Table des Matières
Publicité
Les langues disponibles
Les langues disponibles
Liens rapides
Frost-Free Top Mount
User Manual
Guide de l'Utilisateur
Refrigerator / Freezer
Manual del Usuario
Réfrigérateur/congélateur sans
Model
HT SERIES
givre à compartiments superposés
Refrigerador/congelador sin
escarcha, de puertas horizontales
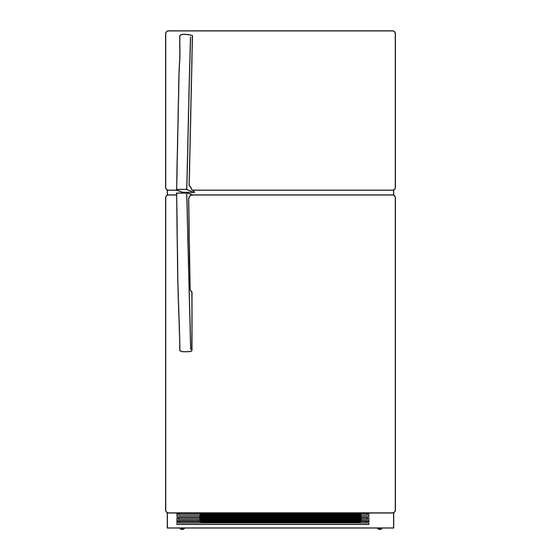
Design may vary by model number.
La configuration peut varier selon le numéro de modèle.
El diseño puede variar conforme al número de modelo.
Publicité
Chapitres
Table des Matières
Dépannage

Manuels Connexes pour Haier HT Série


Sommaire des Matières pour Haier HT Série
- Page 1 Frost-Free Top Mount User Manual Guide de l’Utilisateur Refrigerator / Freezer Manual del Usuario Réfrigérateur/congélateur sans Model HT SERIES givre à compartiments superposés Refrigerador/congelador sin escarcha, de puertas horizontales Design may vary by model number. La configuration peut varier selon le numéro de modèle. El diseño puede variar conforme al número de modelo.
-
Page 3: Table Des Matières
Troubleshooting ............................ 20-21 Customer Service ............................22 Limited Warranty ............................23 PRODUCT REGISTRATION Thank you for purchasing our Haier product. This easy-to-use manual will guide you in Model number getting the best use of your product. Remember to record the model and serial numbers. -
Page 4: Safety Information
IMPORTANT SAFETY INSTRUCTIONS WARNING READ ALL INSTRUCTIONS BEFORE USING THIS APPLIANCE: WHEN USING THIS APPLIANCE, ALWAYS EXERCISE BASIC SAFETY PRECAUTIONS, INCLUDING THE FOLLOWING: NOTE: If the refrigerator has been placed in a horizontal or tilted position for any period of time, wait 24 hours before plugging the unit in. - Page 5 IMPORTANT SAFETY INSTRUCTIONS CONT. 8) Do not use any electrical device or any sharp instrument in defrosting your refrigerator. 9) Unplug your refrigerator before cleaning or before making any repairs. NOTE: If for any reason this product requires service, we strongly recommend that a certified technician perform service.
-
Page 6: Electrical Requirements
ELECTRICAL REQUIREMENTS GROUNDING INSTRUCTIONS WARNING ELECTRICAL REQUIREMENT - SHOCK HAZARD • Make sure there is a suitable power outlet. 115 Volts, 15 Amps, 3 Prong (Grounded) power outlet with proper grounding to power the refrigerator. • Avoid the use of three prong adapters or cutting off the third grounding prong in order to accommodate a two prong outlet. -
Page 7: Instructions For Unpacking
INSTALLATION GUIDE CONT. LEVELING YOUR REFRIGERATOR • Your refrigerator has two leveling legs that are located in the front bottom corners of your refrigerator. After properly placing your refrigerator in its final position, you can level your refrigerator. • Leveling legs can be adjusted by turning them counterclockwise to raise your refrigerator or by turning them clockwise to lower your refrigerator. -
Page 8: Installing Your Refrigerator
• 1 Front Grille • 2 Door face mounting screws • 4 Handle attachment screws • 4 Door edge mounting screw • 1 Extra Haier logo badge • 1 Extra Haier logo badge • 1 Color-matched screw-plug • 1 White screw-plug •... -
Page 9: Parts & Features
PARTS & FEATURES Freezer Door Shelves Air Flow Control Temperature Control with Dairy Interior Light Compartment Full-Width Shelves Crisper Humidity Controls Crisper Bins Full-Width Door Shelves Front Grille Leveling Legs Diagram for instructional purposes only. Design may vary by model number. PAGE 7 •... -
Page 10: Door Handle Installation
DOOR HANDLE INSTALLATION DOOR HANDLE INSTALLATION REFRIGERATOR DOOR HANDLE For refrigerators with a mounting screw installed 1. Place the tapered end of the handle over the on the face of both doors: mounting screw on the refrigerator door and gently slide handle in the direction of the flat Remove both handles from inside freezer end of the handle. - Page 11 DOOR HANDLE INSTALLATION CONT. DOOR HANDLE INSTALLATION REFRIGERATOR DOOR HANDLE For refrigerators without a mounting screw 1. Mount the tapered end of the handle to the installed on the face of both doors: door face using the enclosed screw. (Fig. 3) Do not use the screw hole closest to the center of Remove both handles from the freezer the handle.
-
Page 12: Reversing The Door
REVERSING THE DOOR DOOR SWING REVERSAL 5. Remove the door by (a) pulling the top of the door away from the cabinet and (b) lifting it at On black or white models, the door hinges and the same time. (Fig. 8) handles can be reversed to accommodate your needs. - Page 13 REVERSING THE DOOR CONT. 10. Remove the bottom hinge by unscrewing the 4. Remove the top thimble cover on the hinge side bolts mounting it to the cabinet. of the refrigerator door and relocate it to the opposite thimble hole. Use both hands to mount NOTE: It is easier to remove and re-install the the door on bottom hinge pin, making sure the bottom hinge pin while the hinge is itself is...
-
Page 14: Features And Use
To re-install handles, please see the Door Handle Installation section. NOTE: Prior to re-installing handles, remove the Haier logo badge from the face of the © door using a putty knife to gently pry it from the door face. Any residue left on the... -
Page 15: Operation Instructions
OPERATION INSTRUCTIONS LIGHTING FREEZER LIGHT (NOT ALL MODELS) All models come with an interior light located on the ceiling of the refrigerator compartment. For models with a single bulb, no cover is provided. For models with dual bulbs, a cover is provided. Some models may feature a light in the freezer and/or a “mid-level”... -
Page 16: Crispers And Crisper Cover
OPERATION INSTRUCTIONS CONT. To adjust a half-width shelf, remove any items NOTE: To remove a crisper on the same side as on the shelf and tilt the front of the shelf up with the door, remove the bottom door bin first. one had while stabilizing the shelf with the other. -
Page 17: Door Features
OPERATION INSTRUCTIONS CONT. CRISPERS AND CRISPER COVER (CONT.) DOOR FEATURES To Remove the Crisper Cover: Depending on the model, your refrigerator comes with either full-width door racks or a combination 1. Remove both crisper pans using the instructions of a full-width door rack and half-width bins. To above. -
Page 18: Food Storage Information
FOOD STORAGE INFORMATION FRESH FOOD: FROZEN FOOD • When storing fresh food that is not prepackaged, • Wipe containers before storing to avoid needless be sure to wrap or store food in airtight and spills. moisture proof material unless otherwise noted. •... -
Page 19: Cleaning And Care
PROPER CARE AND MAINTENANCE Never use a dirty cloth to clean the exterior of WARNING the refrigerator. Dirty cloths may leave residue Before cleaning your refrigerator, ALWAYS on the refrigerator that can damage the finish. unplug it from the power source. Failure to heed Also, avoid the use of harsh chemicals, ammonia, this warning could result in injury or death from chlorine bleach, concentrated detergent, solvents,... -
Page 20: Power Interruptions
PROPER CARE AND MAINTENANCE LIGHT BULB REPLACEMENT GUIDE VACATION Use the guide below to determine the appropriate For long vacations or absences, unplug your bulb for each fixture: refrigerator and remove all food from it. Turn the temperature control knob in the refrigerator Upper Refrigerator Light - 40 W Daylight Appliance section to the OFF position and clean the Bulb (1 or 2 depending on model) -
Page 21: Trouble Shooting & Warranty
NORMAL OPERATING SOUNDS Whirring • There are a lot of things going on in your refrigerator at any given time. Additional noises you may hear, and possible causes include: There are multiple high-speed fans inside • Gurgling is most likely due to the circulation of your refrigerator which help it to maintain the refrigerant through the cooling coils. -
Page 22: Troubleshooting
TROUBLESHOOTING PROBLEM POSSIBLE CAUSE(S) SOLUTION Refrigerator does Temperature Control Knob is set to Turn temperature knob clockwise to turn on not run cooling system Refrigerator is unplugged Plug power cord into power source Breaker is tripped or turned off / Fuse is Reset / Turn on breaker or replace fuse blown Refrigerator is in defrost mode... - Page 23 TROUBLESHOOTING CONT. PROBLEM POSSIBLE CAUSE(S) SOLUTION Frost or ice crystals Freezer door left open or opened Turn knob counter-clockwise to change to a on frozen food frequently warmer setting; allow 24 hours to adjust Items blocking freezer air vents and Move items away from rear wall preventing proper air flow Hot or warm air...
-
Page 24: Customer Service
CUSTOMER SERVICE IMPORTANT CUSTOMER DO NOT RETURN THIS PRODUCT TO THE STORE SERVICE If you have a problem with this product, please contact the Haier SERVICE DU CENTRE DE Customer Satisfaction Center at 1-877-337-3639. REPARATION A LA CLIENTELE DATED PROOF OF PURCHASE, MODEL # AND SERIAL #... -
Page 25: Limited Warranty
Contact your nearest authorized service center. state. For the name of the nearest service center, please call 1-877-337-3639. Haier America New York, NY 10018 PAGE 23 • TROUBLE SHOOTING & WARRANTY... -
Page 26: Enregistrement Du Produit
Service à la clientèle ........................... 22 Garantie limitée ............................23 ENREGISTREMENT DU PRODUIT Merci d'avoir acheté un produit Haier. Ce guide con- vivial vous aidera à utiliser votre réfrigérateur de Numéro de modèle façon optimale. Rappelez-vous de prendre en note les numéros de modèle et de série. - Page 27 TABLE DES MATIÈRES AVERTISSEMENT LISEZ TOUTES LES INSTRUCTIONS AVANT D'UTILISER CET APPAREIL ÉLECTROMÉNAGER. LORS DE L’UTILISATION DE CET APPAREIL, IL EST IMPORTANT DE RESPECTER CERTAINES PRÉCAUTIONS D’USAGE, Y COMPRIS LES INSTRUCTIONS SUIVANTES : REMARQUE: Si le réfrigérateur a été entreposé en position horizontale ou inclinée pour une certaine période de temps, attendez 24 heures avant de le rebrancher.
-
Page 28: Renseignements Sur La Sécurité
CONSIGNES DE SÉCURITÉ IMPORTANTES 8 N'utilisez aucun appareil électrique ou instrument coupant pour dégivrer votre réfrigérateur. 9 Débranchez votre réfrigérateur avant de le nettoyer ou de procéder à des réparations. REMARQUE : Si pour une raison ou une autre, ce produit nécessite un entretien, nous vous recommandons fortement de faire appel aux services d'un technicien agréé. -
Page 29: Exigence Électrique - Risque D'électrocution
EXIGENCES CONCERNANT L'ALIM. ÉLECTRIQUE DIRECTIVES DE MISE À LA TERRE AVERTISSEMENT EXIGENCE ÉLECTRIQUE - RISQUE D’ÉLECTROCUTION • Assurez-vous de la proximité d'une prise de courant adéquate pour alimenter le réfrigérateur : une prise de 115 volts, 15 ampères tripolaire (mise à la terre) avec mise à la masse appropriée. •... -
Page 30: Instructions De Désemballage
GUIDE D’INSTALLATION NIVELAGE DE VOTRE RÉFRIGÉRATEUR • Votre réfrigérateur est muni de deux pattes de nivellement, situées aux coins avant de l'appareil. Après avoir correctement positionné votre réfrigérateur dans sa position finale, vous pouvez procéder au nivelage. • Pour ajuster la hauteur des pattes de nivellement, tournez-les dans le sens inverse des aiguilles d'une montre pour relever l'appareil, ou dans le sens des aiguilles d'une montre pour l'abaisser. -
Page 31: Installation De Votre Réfrigérateur
• 1 grille avant • 2 vis de fixation pour façade de • 4 vis de fixation de poignée porte • 1 plaque logo Haier • 4 vis de fixation pour rive de supplémentaire porte • 1 bouchon à vis de couleur •... -
Page 32: Pièces Et Caractéristiques
PIÈCES ET CARACTÉRISTIQUES Balconnets de congélateur Commande de débit d’air Régulateur de température avec lumière intérieure Casier laitier Étagères en treillis pleine largeur Régulateurs d’humidité du bac à légumes Bacs à légumes Balconnets pleine largeur Grille avant Pattes de nivellement Schéma utilisé... -
Page 33: Installation Des Poignées De Porte
Fig. 1 5. La plaque du logo Haier peut être soulevée de la façade de la porte au moyen d’un couteau à mastic ou d’un tournevis à lame plate qui servira de levier, en prenant soin de ne pas abîmer la surface. - Page 34 Fig. 3 5. La plaque du logo Haier peut être soulevée de la façade de la porte au moyen d’un couteau à mastic ou d’un tournevis à lame plate qui N’UTILISEZ PAS...
-
Page 35: Inversion Des Portes
INVERSION DE LA PORTE INVERSION DU BATTANT DE PORTE 5. Retirez la porte (a) en tirant celle-ci vers vous et en (b) en la soulevant simultanément. (Fig. 8) Sur les modèles blancs ou noirs, les charnières et les poignées de porte peuvent être inversées Fig. -
Page 36: Réinstallation Des Charnières Et Des Portes
INVERSION DE LA PORTE 10. Retirez la charnière inférieure en dévissant les 4. Retirez le couvercle du manchon supérieur du boulons d’articulation la retenant au caisson. côté à charnières de la porte du réfrigérateur et installez-le sur le trou du manchon opposé. REMARQUE: Il est plus facile de retirer et de Avec les deux mains, installez la porte sur l’axe remettre en place l’axe de charnière... -
Page 37: Caractéristiques Et Utilisation
à la partie Installation des portes. REMARQUE: Avant de réinstaller les poignées, retirez la plaque du logo Haier© de la façade de la porte en la soulevant doucement au moyen d’un couteau à mastic, qui servira de levier. Tout résidu laissé... -
Page 38: Éclairage
INSTRUCTIONS D'UTILISATION ÉCLAIRAGE LUMIÈRE DE CONGÉLATEUR (EXCLUSIF À CERTAINS MODÈLES) Tous les modèles sont munis d’un plafonnier, situé sur la paroi supérieure du réfrigérateur. Dans le cas des modèles à ampoule unique, aucun couvercle n’est fourni. Dans le cas des modèles à ampoule double, un couvercle sera fourni. -
Page 39: Directives D'utilisation
DIRECTIVES D’UTILISATION BACS À LÉGUMES ET COUVERCLE DE Pour ajuster une clayette demi-largeur, retirez tout article qui s’y trouve et inclinez le devant BAC À LÉGUMES de la clayette vers le haut avec une main tout Pour retirer un bac à légumes : en stabilisant la clayette avec l’autre. -
Page 40: Bacs À Légumes Et Couvercle De Bac À Légumes (Suite)
DIRECTIVES D’UTILISATION BACS À LÉGUMES ET COUVERCLE DE CARACTÉRISTIQUES DE LA PORTE BAC À LÉGUMES (SUITE) Selon le modèle, votre réfrigérateur est muni soit de balconnets pleine largeur ou d’une combinaison Pour retirer un couvercle de bac à légumes : de balconnets pleine largeur et de casiers demi- 1. -
Page 41: Renseignements Sur Le Stockage De Nourriture
RENSEIGNEMENTS SUR LE STOCKAGE DE NOURRITURE ALIMENTS FRAIS: ALIMENTS SURGELÉS • Sauf avis contraire, lorsque vous stockez des • Essuyez les contenants avant de les ranger pour aliments frais n’ayant pas été préemballés, éviter tout déversement inutile. assurez-vous de bien emballer ou stocker ces •... -
Page 42: Nettoyage Et Entretien
ENTRETIEN APPROPRIÉ Les joints de porte devraient être nettoyés AVERTISSEMENT tous les trois mois en suivant les directives de Débranchez TOUJOURS le réfrigérateur de la nettoyage de l'intérieur. La propreté des joints prise de courant avant de le nettoyer. Le non- assurera une plus grande étanchéité. -
Page 43: Guide De Remplacement Des Ampoules
SOIN APPROPRIÉ GUIDE DE REMPLACEMENT DES VACANCES AMPOULES Si vous prévoyez vous absenter pour une longue période, débranchez votre réfrigérateur et videz- Utilisez le guide ci-dessous pour déterminer le complètement. Mettez le bouton de réglage l’ampoule appropriée à chaque luminaire. de température à... -
Page 44: Dépannage Et Garantie
BRUITS NORMAUX PENDANT LE FONCTIONNEMENT Claquements Cliquetis Gargouillements Vrombissement Craquements Grésillements • Plusieurs choses se passent dans votre réfrigérateur à tout moment. Voici quelques Votre réfrigérateur comporte de multiples bruits que vous pourriez également entendre ventilateurs à débit élevé qui contribuent au ainsi que les causes possibles : maintien de la température sélectionnée. -
Page 45: Dépannage
DÉPANNAGE PROBLÈME CAUSE(S) POSSIBLE(S) SOLUTION Le réfrigérateur ne Le bouton de réglage de température est Tournez le bouton de réglage de température vers la fonctionne pas. en position OFF (Arrêt). droite pour actionner le système de refroidissement. Le réfrigérateur est débranché. Branchez la fiche dans une prise de courant. - Page 46 DÉPANNAGE PROBLÈME CAUSE(S) POSSIBLE(S) SOLUTION La lumière ne Le réfrigérateur est débranché. Branchez le réfrigérateur à une source s’allume pas. d’alimentation. L’ampoule est mal vissée. Resserrez l’ampoule en la tournant dans le sens des aiguilles d’une montre. L’ampoule est grillée. Suivez les instructions de la partie Remplacement des ampoules.
-
Page 47: Service À La Clientèle
NE RETOURNEZ PAS CE PRODUIT CHEZ LE DÉTAILLANT SERVICE SERVICE DU En cas de problème avec ce produit, veuillez contacter le service CENTRE DE des consommateurs « Haier Customer Satisfaction Center » au REPARATION A LA CLIENTELE 1-877-337-3639. SERVICIO UNE PREUVE D’ACHAT DATÉE, LE NUMÉRO DE MODÈLE ET LE AL CLIENTE NUMÉRO DE SÉRIE SONT REQUIS POUR OBTENIR DU SERVICE EN... -
Page 48: Garantie Limitée
1-877-337-3639 état ou d’une province à l'autre. CETTE GARANTIE COUVRE LES APPAREILS DANS Haier America LES LIMITES DES ÉTATS CONTINENTAUX DES New York, NY 10018 ÉTATS-UNIS ET DU CANADA. ELLE NE COUVRE PAS LES ÉLÉMENTS SUIVANTS:... -
Page 49: Registro Del Producto
Solución de problemas ......................... 20-21 Servicio al cliente ............................22 Garantía limitada ............................23 REGISTRO DEL PRODUCTO Gracias por adquirir nuestro producto Haier. Este manual de fácil uso lo guiará para que aproveche al Número de modelo máximo su producto. -
Page 50: Información De Seguridad
INSTRUCCIONES IMPORTANTES DE SEGURIDAD ADVERTENCIA LEA TODAS LAS INSTRUCCIONES ANTES DE USAR ESTE APARATO: CUANDO UTILICE ESTE APARATO, SIEMPRE TOME LAS PRECAUCIONES BÁSICAS DE SEGURIDAD, INCLUIDAS LAS SIGUIENTES: NOTA: Si el refrigerador se coloca en posición horizontal o inclinada durante un lapso de tiempo, espere 24 horas antes de enchufar la unidad.. - Page 51 IMPORTANT SAFETY INSTRUCTIONS CONT. 8) No utilice ningún dispositivo eléctrico o instrumento filoso para quitar el hielo del refrigerador. 9) Desconecte el refrigerador antes de limpiarlo o hacer cualquier reparación. NOTA: Si por algún motivo este producto requiere servicio, le recomendamos ampliamente que un técnico certificado lo realice.
-
Page 52: Requisitos Eléctricos
REQUISITOS ELÉCTRICOS INSTRUCCIONES DE CONEXIÓN A TIERRA ADVERTENCIA REQUISITOS ELÉCTRICOS - RIESGO DE DESCARGA • Asegúrese de que haya un tomacorriente adecuado: 115 voltios, 15 amperios, 3 clavijas (con conexión a tierra) con conexión a tierra apropiada para suministrar energía al refrigerador. •... -
Page 53: Cómo Nivelar El Refrigerador
GUÍA DE INSTALACIÓN CÓMO NIVELAR EL REFRIGERADOR • El refrigerador tiene dos patas niveladoras ubicadas en las esquinas frontales inferiores del refrigerador. Después de colocar correctamente el refrigerador en la posición final, puede nivelarlo. • Las patas niveladoras pueden ajustarse girándolas hacia la izquierda para elevar el refrigerador o hacia la derecha para bajarlo. -
Page 54: Instalación Del Refrigerador
• 4 tornillos de fijación para frente de la puerta. manija. • 4 tornillos de montaje para el • 1 emblema adicional de Haier. borde de la puerta. • 1 tapón de tornillo de color • 1 emblema adicional de Haier. -
Page 55: Partes Y Características
PARTES Y CARACTERÍSTICAS Repisas de la puerta del congelador Control de flujo de aire Control de temperatura Compartimiento con luz interior para lácteos Repisas completas Controles de humedad para el cajón de verduras Cajones para verduras Repisas completas en las puertas Rejilla frontal Patas niveladoras El diagrama es únicamente para fines instructivos. -
Page 56: Instalación De La Manija De La Puerta
INSTALACIÓN DE LA MANIJA DE LA PUERTA INSTALACIÓN DE LA MANIJA DE LA MANIJA DE LA PUERTA DEL PUERTA REFRIGERADOR Para los refrigeradores con un tornillo de montaje 1. Coloque el extremo curvo de la manija sobre el instalado al frente de ambas puertas: tornillo de montaje en la puerta del refrigerador y deslice suavemente la manija en dirección Retire ambas manijas desde el interior del... - Page 57 INSTALACIÓN DE LA MANIJA DE LA PUERTA INSTALACIÓN DE LA MANIJA DE LA MANIJA DE LA PUERTA DEL PUERTA (CONTINUACIÓN) REFRIGERADOR Para los refrigeradores sin un tornillo de montaje 1. Monte el extremo curvo de la manija en el frente instalado al frente de ambas puertas: de la puerta con la ayuda del tornillo incluido (Figura 3).
-
Page 58: Para Cambiar La Dirección De Apertura De La Puerta
PARA CAMBIAR LA DIRECCIÓN DE APERTURA DE LA PUERTA PARA CAMBIAR LA DIRECCIÓN DE 5. Retire la puerta (a) sacando la parte superior de la puerta fuera del gabinete y (b) levantándola al APERTURA DE LA PUERTA mismo tiempo (Fig. 8) En los modelos negro o blanco, las bisagras y manijas de la puerta se pueden cambiar de sentido para ajustarse a sus necesidades. - Page 59 PARA CAMBIAR LA DIRECCIÓN DE APERTURA DE LA PUERTA 10. Retire la bisagra inferior desatornillando los 4. Retire la cubierta del guardacabo superior en el tornillos que la fijan en el gabinete.. lado de la bisagra de la puerta del refrigerador y vuelva a colocarla en el guardacabo opuesto.
-
Page 60: Características Y Uso
Para volver a instalar las manijas, consulte la NOTA: Antes de volver a instalar las manijas, retire sección Instalación de la manija de la puerta. el emblema de Haier© del frente de la puerta con la ayuda de la espátula para levantarla con cuidado. CARACTERÍSTICAS Y USO NOTE: No todas las características están... -
Page 61: Instrucciones De Funcionamiento
INSTRUCCIONES DE FUNCIONAMIENTO ILUMINACIÓN 3. Levante la parte superior de la cubierta hacia arriba y hacia afuera. Todos los modelos vienen con una luz interior en el techo del compartimiento del refrigerador. LUZ DEL CONGELADOR (NO TODOS LOS Para modelos con un solo foco, no se incluye MODELOS) tapa. - Page 62 INSTRUCCIONES DE FUNCIONAMIENTO REPISAS DE VIDRIO ENCAPSULADO DE 3. Saque el compartimiento completamente de su guía. MEDIO ANCHO Se pueden ajustar a 4 niveles diferentes y se 4. Siga las instrucciones anteriores para ajustar la pueden mover de manera independiente unas de repisa a la altura deseada.
-
Page 63: Características De La Puerta
INSTRUCCIONES DE FUNCIONAMIENTO CARACTERÍSTICAS DE LA PUERTA Para volver a colocar la cubierta, vuelva a insertar el marco del cajón para verduras en el refrigerador, Dependiendo del modelo, el refrigerador viene vuelva a colocar con cuidado el vidrio en el espacio con rejillas completas en la puerta o con una en el que quedó... -
Page 64: Información Para Almacenar Los Alimentos
INFORMACIÓN PARA ALMACENAR LOS ALIMENTOS ALIMENTOS FRESCOS: ALIMENTOS CONGELADOS • Cuando almacene alimentos frescos que no • Limpie los recipientes antes de guardarlos para vengan empacados, asegúrese de envolverlos o evitar derrames innecesarios. almacenarlos con material a prueba de humedad •... -
Page 65: Limpieza Y Cuidado
CUIDADO Y MANTENIMIENTO ADECUADOS ADVERTENCIA meses siguiendo las instrucciones para la limpieza del interior. Con empaques limpios las puertas Antes de limpiar el refrigerador, desconéctelo sellarán mejor que con empaques sucios. SIEMPRE de la fuente de energía. Si se hace caso omiso de esta advertencia podría producir una Aplique un poco de gel de petróleo en el lado de las bisagras del empaque para mantenerlo flexible y... - Page 66 CUIDADO Y MANTENIMIENTO ADECUADOS GUÍA PARA REEMPLAZO DE BOMBILLAS VACACIONES Utilice la guía que se muestra a continuación para Si va a salir de vacaciones o se va a ausentar por determinar el foco apropiado para cada accesorio: mucho tiempo, desconecte el refrigerador y saque todos los alimentos que tenga guardados.
-
Page 67: Solución De Problemas Y Garantía
SONIDOS NORMALES DE FUNCIONAMIENTO Estallido Chasquido Gorgoteo Zumbido Crujido Crepitación • Suceden muchas cosas en el refrigerador a la vez. Otros sonidos que puede escuchar y sus Hay muchos ventiladores de alta velocidad dentro posibles causas son los siguientes: del refrigerador que lo ayudan a mantener la •... -
Page 68: Solución De Problemas
SOLUCIÓN DE PROBLEMAS PROBLEMA CAUSAS POSIBLES SOLUCIÓN El refrigerador no La perilla de control de temperatura está en Gire la perilla de temperatura hacia la derecha para funciona. OFF (apagado). encender el sistema de enfriamiento. El refrigerador está desconectado. Conecte el cable de suministro eléctrico a la fuente de energía. - Page 69 SOLUCIÓN DE PROBLEMAS PROBLEMA CAUSAS POSIBLES SOLUCIÓN La luz no enciende. El refrigerador está desconectado. Conecte el refrigerador a la fuente de energía. El foco está flojo. Apriete el foco girándolo hacia la derecha. El foco está fundido. Siga las instrucciones de la sección Reemplazo de las bombillas.
-
Page 70: Servicio Al Cliente
SERVICIO AL CLIENTE IMPORTANTE CUSTOMER SERVICE NO DEVUELVA ESTE PRODUCTO A LA TIENDA SERVICE DU Si tiene algún problema con este producto, comuníquese con el CENTRE DE Centro de satisfacción del cliente al 1-877-337-3639. REPARATION A LA CLIENTELE ES NECESARIO TENER EL COMPROBANTE DE COMPRA SERVICIO FECHADO, EL NÚMERO DE MODELO Y EL NÚMERO DE SERIE AL CLIENTE... -
Page 71: Garantía Limitada
Para obtener el nombre del centro de que varían en cada estado. servicio más cercano, llame al 1-877-337-3639. Haier America New York, NY 10018 PÁGINA 23 • SOLUCIÓN DE PROBLEMAS Y GARANTÍA... - Page 72 Assembled in U.S.A. Printed in the U.S.A. Haier America Issued: January 2012 Fabriqué en É.-U. Imprimé aux É.-U. New York, NY 10018 115 V, 60 Hz Hecho en EE. UU. Impreso en los EE. UU. ©2012 Haier America Trading, LLC.