LENCO MC-020 Guide D'utilisation
Masquer les pouces Voir aussi pour MC-020:

Publicité

Les langues disponibles
  • FR

Les langues disponibles

Liens rapides

Model: MC-020
User manual Micro system with bluetooth, FM radio and USB
Gebruikshandleiding Microsysteem met Bluetooth, FM-radio en USB
Bedienungsanleitung Mikrosystem mit Bluetooth, UKW-Radio und USB
Guide d'utilisation de Micro système avec Bluetooth, radio FM et USB
Manual de usuario de sistema Micro con Bluetooth, radio FM y USB

Publicité

Table des Matières
loading

Sommaire des Matières pour LENCO MC-020

  • Page 1 Model: MC-020 User manual Micro system with bluetooth, FM radio and USB Gebruikshandleiding Microsysteem met Bluetooth, FM-radio en USB Bedienungsanleitung Mikrosystem mit Bluetooth, UKW-Radio und USB Guide d'utilisation de Micro système avec Bluetooth, radio FM et USB Manual de usuario de sistema Micro con Bluetooth, radio FM y USB...
  • Page 2: Table Des Matières

    Index English ..................................... 3 Nederlands .................................... 10 Deutsch ....................................17 Français ....................................24 Español ....................................31 Version 1.0...
  • Page 3: English

    English MC-020 CAUTION: Usage of controls or adjustments or performance of procedures other than those specified herein may result in hazardous radiation exposure. This unit should not be adjusted or repaired by anyone except qualified service personnel. PRECAUTIONS BEFORE USE KEEP THESE INSTRUCTIONS IN MIND: Do not use this device near water.
  • Page 4 40. This product is intended for household use only and not for commercial or industrial use. 41. Make sure the unit is adjusted to a stable position. Damage caused by using this product in an unstable position or by failure to follow any other warning or precaution contained within this user manual will not be covered by warranty.
  • Page 5 Description 1. LCD screen Standby/Function button Play/Pause/Stop button Bluetooth mode Volume-/Snooze button Volume+/Alarm set button Backward button Forward button Sleep/Time set button Earphone jack USB port Speaker jack right side Speaker jack left side AC/DC adaptor jack 15. AUX IN jack 16.
  • Page 6 17. Batteries compartment 18. Stand auxiliary peripheral Installing batteries (Backup for the clock in case of a power outage) - Open the battery compartment on the back of the appliance (17). - Insert 2 LR3 1.5V batteries, respecting the indicated polarity. - Close the battery compartment.
  • Page 7: Snooze Function

    - The alarm icon (Alarm 2) appears and the TIME display is blinking. - Repeat same step as alarm 1 in order to set Alarm 2. To select which of the 2 alarms should be active, press the ALARM SET button repeatedly while the unit is in standby mode (clock display).
  • Page 8: Maintenance And Cleaning

    This product is suited for this purpose within all EU counties. Guarantee Lenco offers service and warranty in accordance with the European law, which means that in case of repairs (both during and after the warranty period) you should contact your local dealer.
  • Page 9 In so doing, you will help to conserve natural resources and improve standards of environmental protection in treatment and disposal of electrical waste (Waste Electrical and Electronic Equipment Directive). Service For more information and helpdesk support, please visit www.lenco.com Lenco Benelux BV, Thermiekstraat 1a, 6361 HB Nuth, The Netherlands.
  • Page 10: Nederlands

    Nederlands MC-020 LET OP: Gebruik van bedieningen of afstellingen of uitvoer van procedures anders dan gespecificeerd in deze documentatie kan leiden tot blootstelling aan schadelijke straling. Dit apparaat dient uitsluitend te worden aangepast of gerepareerd door gekwalificeerd onderhoudspersoneel. VOORZORGSMAATREGELEN VOOR GEBRUIK ONTHOUD DE VOLGENDE INSTRUCTIES: Gebruik dit apparaat niet in de buurt van water.
  • Page 11 34. De ventilatie mag niet worden gehinderd door het bedekken van de ventilatieopeningen met voorwerpen zoals kranten, tafelkleden, gordijnen etc. 35. Plaats geen bronnen met een open vlam, zoals brandende kaarsen, op het apparaat. 36. Aandacht voor het milieu is nodig bij het verwijderen van de batterijen. 37.
  • Page 12 Omschrijving 1. LCD-scherm Stand-by/Functietoets Start/Pauze/Stoptoets Bluetooth-modus Volume-/Sluimertoets Volume+/Alarminstellingstoets Achteruittoets Vooruittoets Slaap/Tijdinstellingstoets Hoofdtelefoonuitgang USB-poort Luidsprekeruitgang rechts Luidsprekeruitgang links AC/DC-adapteringang 15. AUX-ingang 16. FM ANT radioantenne...
  • Page 13: De Kloktijd Instellen

    17. Batterijhouder 18. Aanvullende steun Batterijen installeren (Back-up voor de klok in geval van stroomuitval) - Open de batterijhouder op de achterzijde van het apparaat (17). - Installeer 2 type LR3 1,5V batterijen en let daarbij op de polariteit. - Sluit de batterijhouder. Het product installeren - Installeer de steun boven op het geluidsstation - Sluit de luidsprekers aan op de ingangen (12) en (13) van het geluidsstation...
  • Page 14: Alarm Uitschakelen

    Gewekt worden door USB Druk op de toets totdat het icoontje “USB” op de display verschijnt. Deze functie werkt alleen wanneer u een USB-disk in de USB-poort (11) hebt gestoken. Deze USB zal worden afgespeeld op de ingestelde alarmtijd. - Druk nogmaals op de toets ALARM SET om uw instellingen voor Alarm 1 te bevestigen. - Het alarmicoontje (Alarm 2) verschijnt en de tijdweergave begint te knipperen.
  • Page 15: Bluetooth-Verbinding

    Dit product is geschikt voor dit doel binnen alle EU-landen. Garantie Lenco biedt service en garantie aan overeenkomstig met de Europese wetgeving. Dit houdt in dat u, in het geval van reparaties (zowel tijdens als na de garantieperiode), uw lokale handelaar moet contacteren.
  • Page 16 (Afgedankte Elektrische en Elektronische Apparatuur). Service Bezoek voor meer informatie en helpdeskondersteuning www.lenco.com Lenco Benelux BV, Thermiekstraat 1a, 6361 HB, Nuth, Nederland.
  • Page 17: Deutsch

    Deutsch MC-020 ACHTUNG: Die zweckentfremdete Bedienung, Benutzung oder Einstellung der Prozeduren kann zu gefährlichen Unfällen durch Strahlen führen. Dieses Gerät darf außer von qualifizierten Fachleuten von niemand anderem repariert oder eingestellt werden. VORSICHTSMASSNAHMEN VOR DER BENUTZUNG BEFOLGEN SIE IMMER FOLGENDE ANWEISUNGEN: Benutzen Sie das Gerät nicht in der Nähe von Wasser.
  • Page 18 34. Die Ventilation darf nicht durch Abdecken der Ventilationsöffnungen durch Gegenstände wie Zeitungen, Tischdecken, Gardinen o.ä. behindert werden. 35. Stellen Sie kein offenes Feuer wie z.B. angezündete Kerzen auf das Gerät. 36. Bei der Batterieentsorgung sind die Entsorgungsvorschriften einzuhalten. 37. Das Gerät kann nur bei moderaten Temperaturen verwendet werden. Eine Nutzung in extrem kalten oder heißen Umgebungen sollte vermieden werden.
  • Page 19 Beschreibung 1. LCD-Display Taste Standby/Funktion Taste Wiedergabe/Pause/Stopp Bluetooth-Modus Taste Lautstärke–/Schlummermodus Taste Lautstärke+/Wecker einstellen Taste Zurück Taste Vor Taste Einschlafautomatik/Uhrzeit einstellen Kopfhörerbuchse USB-Anschluss Buchse rechter Lautsprecher Buchse linker Lautsprecher Netzadapterbuchse 15. AUX-Eingangsbuchse 16. UKW-Radioantenne...
  • Page 20: Einstellen Der Uhrzeit

    17. BATTERIEFACH 18. Standfläche für externe Geräte Einlegen der Batterien (zum Sichern der Uhrzeit bei Stromausfall) - Öffnen Sie das Batteriefach auf der Rückseite des Geräts (17). - Legen Sie 2 Mikrozellen (AAA) mit 1,5 V in der angezeigten Polrichtung ein. - Schließen Sie das Batteriefach wieder.
  • Page 21: Ausschalten Des Weckers

    Wecken mit USB Drücken Sie die Taste solange, bis „USB“ auf dem Display angezeigt wird. Diese Funktion können Sie nur dann nutzen, wenn Sie einen USB-Stick in den USB-Port (11) gesteckt haben. Zur eingestellten Weckzeit beginnt dann die Wiedergabe des USB-Stickinhaltes. - Drücken Sie die Taste ALARM SET noch einmal, um Ihre Einstellungen für den Wecker 1 zu bestätigen.
  • Page 22: Wartung Und Pflege

    Ihnen nachdrücklich, dass Sie das WLAN Ihres externen Geräts deaktivieren, wenn Sie über Bluetooth wiedergeben. - Drücken Sie die Taste STANDBY (2) solange, bis das Symbol bl auf dem Display erscheint. - Aktivieren Sie das Bluetooth Ihres Mobilgeräts. Suchen Sie nach Lenco MC-020. Koppeln und verbinden Sie Ihr Mobilgerät mit Lenco MC-020.
  • Page 23 Garantie Lenco bietet Leistungen und Garantien im Einklang mit Europäischem Recht. Im Falle von Reparaturen (sowohl während als auch nach Ablauf der Garantiezeit) sollten Sie deshalb Ihren Einzelhändler kontaktieren. Wichtiger Hinweis: Es ist nicht möglich, Geräte für Reparaturen direkt an Lenco zu schicken.
  • Page 24: Français

    Français MC-020 ATTENTION : L’utilisation de commandes ou de réglages ou l’exécution de procédures autres que ceux spécifiés dans ce manuel peut entraîner une exposition à des rayonnements dangereux. Cet appareil ne doit pas être réglé ou réparé par quiconque d’autre que du personnel qualifié.
  • Page 25 33. Laissez un espace de 10 cm tout autour de l’appareil pour assurer une ventilation suffisante. 34. L’aération ne doit pas être bloquée en obstruant les orifices d’aération avec des objets tels que des journaux, des nappes, des rideaux, etc. 35.
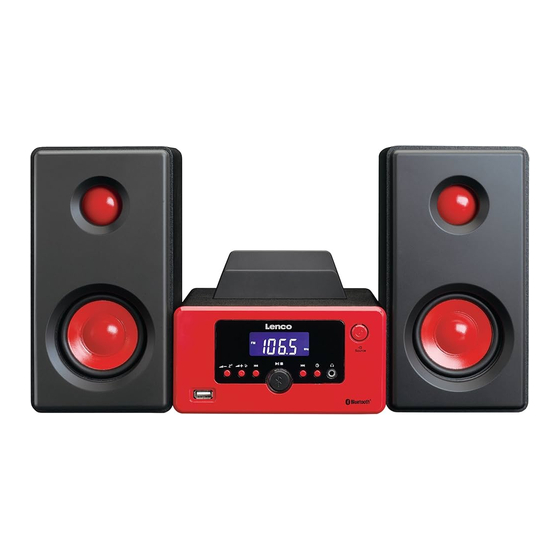
  • Page 26 Description 1. Écran à cristaux liquides Touche Veille/Fonction Touche Lecture/Pause/Arrêt Mode Bluetooth Touche Diminuer le volume/Rappel d’alarme Touche Augmenter le volume/Réglage de l’alarme Touche retour rapide Touche avance rapide Touche veille automatique/Réglage de l’heure Sortie casque Port USB Prise pour enceinte côté droit Prise pour enceinte côté...
  • Page 27: Pour Régler L'heure De L'horloge

    18. Support pour appareil auxiliaire Installation des piles (Pour assurer une alimentation de secours en cas de coupure de courant) - Ouvrez le compartiment à piles situé au dos de l'appareil (17). - Insérez 2 piles LR3 1,5V, en respectant les polarités indiquées. - Fermez le compartiment à...
  • Page 28: Fonction De Répétition Du Réveil

    - Appuyez de nouveau sur la touche Réglage de l’alarme pour confirmer vos réglages de l’alarme 1. - L’icône d’alarme (Alarme 2) apparaît et l’heure de l’alarme se met à clignoter à l’écran. - Répétez la même procédure de réglage de l’alarme 1 pour régler l’alarme 2. Pour sélectionner l'alarme à...
  • Page 29: Entree Auxiliaire

    Ce produit convient à cet usage pour tous les pays de I’UE. Garantie Lenco propose un service et une garantie conformément à la législation européenne, ce qui signifie qu’en cas de besoin de réparation (aussi bien pendant et après la période de garantie), vous pouvez contacter votre revendeur le plus proche.
  • Page 30 électriques (directive sur les déchets des équipements électriques et électroniques). Service après-vente Pour en savoir plus et obtenir de l’assistance, visitez www.lenco.com Lenco Benelux BV, Thermiekstraat 1a, 6361 HB, Nuth, Pays-Bas...
  • Page 31: Español

    Español MC-020 ¡PRECAUCIÓN! El uso de los controles o ajustes o el funcionamiento de los procedimientos excepto a aquellos especificados aquí pueden provocar una exposición peligrosa a la radiación. Esta unidad no debe ajustarse o repararse por ninguna persona salvo personal de servicio cualificado.
  • Page 32 34. No debe impedirse la ventilación cubriendo las aperturas con objetos como periódicos, manteles, cortinas, etc. 35. No deben colocarse fuentes de llama, como velas encendidas, sobre este aparato. 36. Se debe prestar atención a los aspectos medioambientales sobre la eliminación de baterías. 37.
  • Page 33 Descripción 1. Pantalla LCD Botón En espera / función Botón Reproducción / Pausa / Parada Modo Bluetooth Botón Volumen -/ Posponer Botón Volumen +/Fijar alarma Botón Hacia atrás Botón Hacia delante Botón Retardo / Fijar hora Toma de auriculares Puerto USB Lateral derecho de la toma del altavoz Lateral izquierdo de la toma del altavoz Toma del adaptador CA / CC...
  • Page 34: Fijar La Hora Del Reloj

    17. Compartimento de las pilas 18. Soporte periférico auxiliar Instalación de las pilas (Soporte para el reloj en caso de fallo de alimentación) - Abra el compartimento de las pilas situado en la parte posterior del aparato (17). - Inserte 2 pilas LR3 1.5V, respetando la polaridad indicada. - Cierre el compartimento de las pilas.
  • Page 35: Apagar La Alarma

    Despertarse con USB Pulse el botón hasta que el icono “USB” aparezca en la pantalla. Esta propiedad solo funciona cuando tiene un disco USB insertado en el puerto USB (11). Este USB se reproducirá a la hora fijada de la alarma. - Vuelva a pulsar el botón ALARM SET para confirmar la configuración para la Alarma 1.
  • Page 36: Toma De Entrada Auxiliar

    Este producto es adecuado para este propósito en todos los países de la UE. Garantía Lenco ofrece servicio y garantía en cumplimiento con las leyes de la Unión Europea, lo cual implica que, en caso de que su producto precise ser reparado (tanto durante como después del periodo de garantía), deberá contactar directamente con su distribuidor.
  • Page 37 (Directiva sobre la Eliminación de Equipos Eléctricos y Electrónicos). Servicio Para obtener más información y soporte del departamento técnico, por favor, visite la página web www.lenco.com Lenco Benelux BV, Thermiekstraat 1a, 6361 HB, Nuth, Países Bajos.

Table des Matières