Publicité

Les langues disponibles

Les langues disponibles

Liens rapides

OWNER'S MANUAL
Important: Read all instructions carefully before using this product. Retain this owner's manual for future reference.
BH North America | 20155 Ellipse, Foothill Ranch, California 92610 | p.949.206.0330 | f.949.206.0013 | www.BHFitnessUSA.com

Publicité

Chapitres

Table des Matières
loading

Sommaire des Matières pour BH LK700 Core Rower

  • Page 1 OWNER’S MANUAL Important: Read all instructions carefully before using this product. Retain this owner’s manual for future reference. BH North America | 20155 Ellipse, Foothill Ranch, California 92610 | p.949.206.0330 | f.949.206.0013 | www.BHFitnessUSA.com...
  • Page 2: Table Des Matières

    TABLE OF CONTENTS Title Page Introduction Safety Information Exercise Instruction Training Guidelines Workout and Stretching Overview Assembly Instructions Console Overview Console Operations Exploded View Drawing Parts List Warranty...
  • Page 3 CONGRATULATIONS Congratulations on your purchase of BH Fitness equipment. We hope you appreciate the style, quality, and value that exercisers around the world have come to expect from BH Fitness. If you have any questions, concerns or product issues, please call our Customer Service Team at 1-866-325-2339 or email us at CustomerSupport@BHNorthAmerica.com.
  • Page 4: Safety Information

    6. This rower must only be used for the purposes described in this manual. DO NOT use accessories that are not recommended by BH Fitness. 7. Do not place sharp objects near the rower.
  • Page 5: Exercise Instruction

    EXERCISE INSTRUCTION Use of the rower offers various benefits; it can improve fitness, muscle tone, flexibility and circulation. When used in conjunction with a calorie controlled diet, it can help you lose weight. 1. Consult your doctor before starting any exercise program. It is advisable to undergo a complete physical examination.
  • Page 6: Training Guidelines

    TRAINING GUIDELINES Exercise is one of the most important factors in the overall health of an individual. Listed among its benefits are: • Increased capacity for physical work (strength endurance) • Increased cardiovascular (heart and arteries/veins) and respiratory efficiency • Decreased risk of coronary heart disease •...
  • Page 7 OXYGEN UPTAKE The effort that you can exert over a prolonged period of time is limited by your ability to deliver oxygen to the working muscles. Regular vigorous exercise produces a training effect that can increase your aerobic capacity by as much as 20 to 30%. An increased VO2 Max indicates an increased ability of the heart to pump blood, of the lungs to ventilate oxygen, and of the muscles to take up oxygen.
  • Page 8 HEART RATE As you exercise, your heart beat increases. This is often used as a measure of the required intensity of an exercise. You need to exercise hard enough to condition your circulatory system, and increase your pulse rate, but not enough to strain your heart. Your initial level of fitness is important when developing an exercise program for you.
  • Page 9 MUSCLE SORENESS For the first week or so, muscle soreness may be the only indication you have that you are on an exercise program. This, of course, does depend on your overall fitness level. A confirmation that you are on the correct program is a very slight soreness in most major muscle groups. This is quite normal and will disappear in a matter of days.
  • Page 10 SUGGESTED STRETCHES Head Rolls Rotate your head to the right for one count while feeling the stretch up the left side of your neck. Next, rotate your head back for one count, stretching your chin to the ceiling. Rotate your head to the left for one count, and finally, drop your head to your chest for one count.
  • Page 11 SUGGESTED STRETCHES Inner Thigh Stretch Sit with the soles of your feet together with your knees pointing outward. Pull your feet as close into your groin as possible. Gently push your knees towards the floor. Hold for 15 counts. Toe Touches Slowly bend forward from your waist, letting your back and shoulders relax as you stretch toward your toes.
  • Page 12: Overview

    OVERVIEW...
  • Page 13 ASSEMBLY PARTS ITEM Description Main frame assembly Front support Rear support Rail Seat Pedal assembly Foot pedal rear cover Computer console Plastic cover (B) Plastic cover (A) Rail end cap...
  • Page 14 HARDWARE PACK ITEM Description Phillips screw (stainless) Phillips screw (stainless) Phillips screw (ST) Hex screw (steel) Spring washer Washer Hollow screw Bushing screw Washer Hex screw Spring washer Hex screw Hex wrench + Phillips screwdriver Hex wrench (5mm) Hex wrench (4mm) Washer Phillips screw...
  • Page 15: Assembly Instructions

    ASSEMBLY INSTRUCTIONS STEP 1: Attaching the Main Frame to the Front Support Use 4-(K04) Screws, 4-(K05) Spring Washers, and 4-(K16) Washer to attach the (A) Main Frame to the (B) Front Support. Tighten securely. STEP 2: Attaching the Rail to the Rear Support and assembling the Seat Attach the (C) Rear Support to the (D) Rail, using 4-(K04) Screws, 4-(K05) Spring...
  • Page 16 STEP 4: Connecting and Mounting the Computer Console Connect the (H21) Generator Wire (upper) to the (B11) Generator Wire (lower). Then connect the (H23) Computer Wire (upper) with the (H25) Computer Wire (lower). After the Computer Console connections are made, attach the computer console to the console mast on the Frame (A) with 4-(K03) Phillips Screws (ST).
  • Page 17 STEP 6: Installing the Cosmetic Covers Connect the larger Plastic Cover (I) to the smaller Plastic Cover (J). There are 2 notches on the Plastic Cover (I) that the two posts on the underside of the Plastic Cover (J) seat into. Fold up the Plastic Cover (I) and slide the bottom part of the Plastic Cover (I) onto the front of the Rail (D).
  • Page 18 Folding The Machine folding handle Step 1: 1. Hold the rail about 4 inches behind the joint cover and lift up. 2. After lifting the rail, pull the folding handle toward you. The machine should start to fold down. Set the foot pad on the ground. Step 2: Fold up the rail until you hear a "click"...
  • Page 19 Unfolding The Machine Rear Support Frame Release Lever Step 1: Hold the rear support frame and use your foot to press the release lever, then lower the rail to the ground. Hear the "CLICK" sound Step 2: Hold onto the rail about 4 inches behind the plastic cover and lift until you hear a "click". Press down on the rail to make sure the machine is locked.
  • Page 20 Foot Strap Adjustment Step 1: Thread the footstraps through the holes on either side of the foot pedals. Thread it through making sure that the back of the buckle is "up". Step 2: Take the loose side of the strap and fit it through the larger hole in the buckle.
  • Page 21: Console Overview

    CONSOLE OVERVIEW...
  • Page 22: Console Operations

    CONSOLE OPERATIONS CONSOLE OPERATIONS Note: This is a self generating machine but to maintain the console power without exercise, 2 D-Cell Batteries are required. (Batteries not included) Display Key Functions After powering on the console, in the start up screen press START, this START automatically starts the QUICK START program.
  • Page 23 SLEEP MODE • If the machine is not in use or no keys have been pressed for 10 seconds the computer will turn off the backlight and enter into power saving mode. • If the machine is not in use or no keys have been pressed for 30 seconds the computer will enter into sleep mode.
  • Page 24 • SETTING CALORIES After setting the time value and pressing the enter key the next setting is calories. To set the calories use the plus or minus buttons to enter the desired calories. The default value is 150 calories. • SETTING METERS After setting the calories value and pressing the enter key the next setting is meters.
  • Page 25 RECOVERY PROGRAM • If you press the recovery button in any program the program begins a one minute countdown and detects the current heart rate. • The program detects the heart rate once per second, when the actual heart rate cannot be detected the display says no pulse.
  • Page 27: Parts List

    PARTS LIST To order replacement parts: provide your customer service representative with the product model number and the part number located on the Parts List below, along with the quanity you require. Part # Description Part # Description Part # Description (A) Main Frame LK700RW-A36...
  • Page 28 PARTS LIST CONTINUED Part # Description Part # Description Part # Description (C) Front support assembly LK700RW-G15 Hex screw (I) Rubber accessory set LK700RW-C01 Front frame support LK700RW-G16 LK700RW-I01 Pedal cover (rear) LK700RW-C02 Foot pad LK700RW-G17 Seat pad LK700RW-I04 Foot pedal LK700RW-C03 Hex nut LK700RW-G18...
  • Page 29: Warranty

    WARRANTY CLUB COMMERCIAL WARRANTY* BH North America will repair or replace, free of charge, at its option, parts that are defective as a result of material or workmanship. Lifetime replacement warranty coverage on frame and three (3) years on other parts. Labor warranty coverage is two (2) years. Warranty covers the original consumer purchaser only.
  • Page 30 OWNER’S MANUAL Important: Read all instructions carefully before using this product. Retain this owner’s manual for future reference. BH North America | 20155 Ellipse, Foothill Ranch, California 92610 | p.949.206.0330 | f.949.206.0013 | www.BHFitnessUSA.com...
  • Page 31 TABLE OF CONTENTS Titre Page Introduction Étiquettes de mise en garde Renseignements relatifs à la sécurité Lignes directrices sur l'entraînement Étirements suggérés Aperçu Instructions d'assemblage Fonctionnement de la console Vue éclatée Liste des pièces Garantie...
  • Page 32 TOUTES NOS FÉLICITATIONS! Félicitations pour votre achat d'un équipement BH Fitness. Nous espérons que vous apprécierez le style, la qualité et la valeur auxquels BH Fitness a habitué les adeptes de l'exercice physique du monde entier. Si vous avez des questions ou en cas de problème relatif à l'appareil, communiquez avec notre Service à...
  • Page 33: Renseignements Relatifs À La Sécurité

    6. Ce rameur ne doit être utilisé qu'aux fins auxquelles il est destiné, décrites dans ce guide. N’utilisez PAS d'accessoires non recommandés par BH Fitness. 7. Ne placez pas d’objets tranchants près du rameur.
  • Page 34 INSTRUCTIONS RELATIVES À L’EXERCICE L'utilisation du rameur comporte de nombreux avantages; elle peut améliorer votre forme physique, votre tonus musculaire, votre flexibilité et votre circulation. De pair avec un régime alimentaire faible en calories, elle peut aussi vous aider à perdre du poids. 1.
  • Page 35: Lignes Directrices Sur L'entraînement

    LIGNES DIRECTRICES SUR L'ENTRAÎNEMENT L'exercice est l'un principaux facteurs contribuant à la santé globale d'une personne. En voici quelques bienfaits : • Capacité accrue de travail physique (force-endurance) • Capacité cardiovasculaire (cœur et artères/veines) et respiratoire accrue • Diminution du risque de maladie coronarienne •...
  • Page 36 CONSOMMATION D'OXYGÈNE L'effort que vous pouvez déployer au cours d'une période prolongée est limité par votre capacité à approvisionner en oxygène les muscles au travail. L'exercice intense régulier a un effet d'entraînement qui peut augmenter la capacité aérobie de 20 à 30 %. Une amélioration de la VO  max indique une capacité...
  • Page 37 FRÉQUENCE CARDIAQUE Votre fréquence cardiaque augmente durant l'exercice. Elle sert d'ailleurs souvent de mesure de l'intensité d'un exercice. Vous devez pousser suffisamment l'exercice pour améliorer votre appareil circulatoire et élever la fréquence de votre pouls, mais sans imposer un effort excessif au cœur. Votre forme physique initiale compte pour beaucoup dans l'élaboration d'un programme d'exercice adapté...
  • Page 38 Ne vous poussez pas trop en tentant d'atteindre les chiffres suggérés par ce tableau. Un exercice excessif risquerait de vous occasionner un malaise important. Laissez la fréquence cardiaque évoluer naturellement à mesure que votre programme avance. N'oubliez pas que la cible est un guide, pas une règle, et qu'il n'y a pas de problème à...
  • Page 39: Étirements Suggérés

    ÉTIREMENTS SUGGÉRÉS Rotations de la tête Tournez la tête vers la droite sur un temps et sentez l'étirement du côté gauche de votre cou. Continuez ensuite la rotation vers l'arrière et étirez le menton vers le ciel. Enfin, tournez la tête vers la gauche sur un temps et laissez-la tomber sur la poitrine sur un temps.
  • Page 40 ÉTIREMENTS SUGGÉRÉS Étirement de l'intérieur de la cuisse Assoyez-vous en ramenant les plantes des pieds l'une contre l'autre, les genoux pointés vers l'extérieur. Rapprochez le plus possible les pieds des aines. Poussez délicatement les genoux vers le sol. Comptez 15 temps. Flexions avant Penchez-vous lentement vers l'avant à...
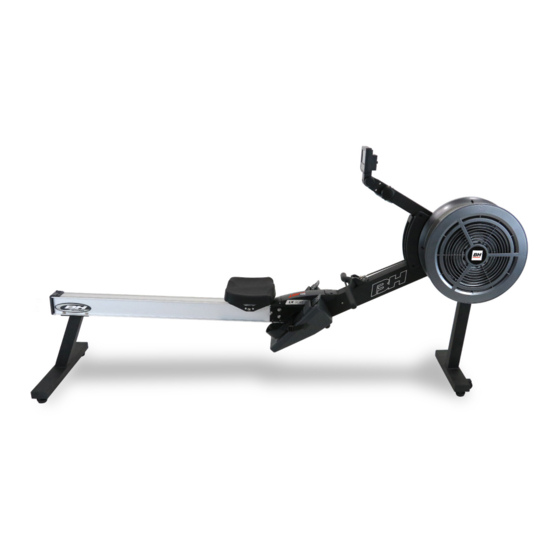
  • Page 41: Aperçu

    APERÇU...
  • Page 42 PIÈCES D’ASSEMBLAGE ITEM Description Assemblage du châssis principal Support avant Support arrière Glissière Siège Assemblage de la pédale Couvre la pédale Console Protecteur en plastique (b) Protecteur en plastique (a) Embout du rail...
  • Page 43 ENSEMBLE DE MATÉRIELS ITEM Description Qté Vis phillips (stainless) Vis phillips (stainless) Vis phillips (st) Vis (acier) Rondelle à ressort Rondelle Vis creux Vis à douille Rondelle Vis à tête hexagonale Rondelle à ressort Vis à tête hexagonale Clé à vis à tête hexagonale + tournevis phillips Clé...
  • Page 44: Instructions D'assemblage

    INSTRUCTIONS D’ASSEMBLAGE ÉTAPE 1: Fixez le châssis principal au support avant Utilisez 4 vis (K04), 4 rondelles à ressort (K05) et 4 rondelles (k16) pour fixer le châssis principal (A) au support avant (B). Assurez-vous que cela soit bien serré. ÉTAPE 2: Fixez le la glissière au support arrière et assembler le siège Tout d’abord, Fixez le support arrière (c) À...
  • Page 45 ÉTAPE 4: Branchez et installez la console Branchez le câble électrique (du haut) (h21) au câble électrique (du bas) (b11). Ensuite, branchez le câble de la console (du haut) (h23) au câble de la console (du bas) (h25) Quand le branchement de la console est terminé, installez la console au support de la console (a) à...
  • Page 46 ÉTAPE 6: Posez les protecteurs cosmétiques Fixez le grand protecteur en plastique (i) au petit protecteur en plastique (j). Pour ce faire, faites glisser les deux fentes en dessous du protecteur en plastique (j) au 2 encoches du protecteur en plastique (i). Il faut alors plier le protecteur en plastique (i) avant de glisser la partie du bas du protecteur en plastique (i) à...
  • Page 47 REPLIER LA MACHINE poignée de déployage Étape 1: 1. Tenez la glissière à peu près à 4 pouces du protecteur de joint et maintenez-la à la verticale. 2. Après avoir soulevé la glissière, tirez sur la poignée de déployage. La machine devrait commencer à...
  • Page 48 Déployer La Machine châssis du support arrière levier de déploiement Étape 1: Tenez le châssis du support arrière et, avec l’un de vos pieds, appuyez sur le levier de déploiement avant de descendre au sol. Hear the "CLICK" sound Étape 2: Tenez la glissière à...
  • Page 49 Ajustement des pédales Étape 1: Enfilez les courroies pour les pieds aux trous pour les deux pédales. Assurez-vous que le dos de la boucle pointe vers le haut après les avoir enfilées. Étape 2: Insérez la partie lâche du courroie et insérez-la dans le gros trou de la boucle et faites-la passer dans le petit trou avant de la tirer dessus.
  • Page 50 APERÇU DE LA CONSOLE...
  • Page 51 CONFIGURION DE LA CONSOLE Note : Même si c’est un appAreil autonome, deux piles d-cell sont nécessaires à son fonctionnement. (les piles ne sont pas incluses) Affichage des fonctions principales À l’écran d’accueil, après que la console soit démarrée, appuyez sur la touche « START start », cela débutera automatiquement le programme rapide.
  • Page 52 MODE VEILLE • Si vous n’utilisez pas la machine ou que vous n’avez pas pesé de touche, pendant 10 secondes, la lumière arrière de la console s’éteindra et le mode économie s’enclenchera. • Si vous n’utilisez pas la machine ou que vous n’avez pas pesé de touche pendant 30 secondes, la console entrera en mode veille.
  • Page 53 PROGRAMME PERSONNALISÉ • Au menu d’accueil, appuyez sur la touche «plus» ou «moins» pour sélectionner un programme. Ensuite, appuyez sur la touche «enter» pour confirmer la sélection. • CONFIGURATION DU TEMPS Après avoir choisi le programme personnalisé, appuyez sur la touche «enter» pour que la valeur de temps s’affiche.
  • Page 54 • Après avoir sélectionné le programme « race », appuyez sur la touche « enter », vous serez dirigés à la configuration « meter » (mètre). • Appuyez sur la touche « plus » ou « moins » pour configurer la valeur des mètres voulue et appuyez sur la touche «...
  • Page 56: Liste Des Pièces

    LISTE DES PIÈCES Pour commander des pièces de rechange, précisez au représentant du service à la clientèle le numéro du modèle du produit et le numéro de la pièce inscrite dans le tableau qui suit, ainsi que la quantité désirée. Part # Description Part #...
  • Page 57 SUITE DE LA LISTE DES PIÈCES Part # Description Part # Description Part # Description (C) Assemblage du support avant LK700RW-G15 Vis à tête hexagonale (I) Ensemble d’accessoires en caoutchouc LK700RW-C01 Support avant du châssis LK700RW-G16 Écrou LK700RW-I01 Embout de pédale (arrière) LK700RW-C02 Appuie-pied LK700RW-G17...
  • Page 58: Garantie

    GARANTIE POUR CLUB COMMERCIALE* BH North America réparera ou fournira, sans frais, à son choix, les parties défectueuses, à défaut de matériaux ou de fabrication. La couverture de garantie de remplacement à vie pour son chassis est de trois ans (3) pour les autres composantes.

Ce manuel est également adapté pour:

Lk700rw

Table des Matières