
Manuels Connexes pour beautyrest SmartMotion Base 1.0

Sommaire des Matières pour beautyrest SmartMotion Base 1.0
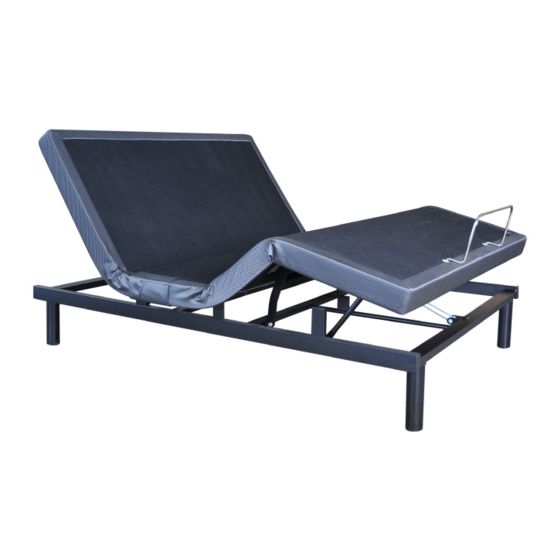
- Page 1 Owner’s Manual Actual product appearance and functionality may vary from photographs, illustrations and descriptions included in this manual.
-
Page 2: Table Des Matières
table of contents Disclaimers ................1-2 Parts List . -
Page 3: Disclaimers
disclaimers Important Safety Information Read all instructions before using your adjustable base. Save these instructions. WARNING WARNING For optimal safety and operation, plug bed base into a surge protector Always unplug the base from the electrical outlet before servicing any (not included). - Page 4 disclaimers the mattress support platform shall be ± 3°, which translates to a tolerance of up to 1 • Sit on corners/edges of base, this may warp the frame, struts or foam. ½”. • Tilt the base on its side. This can damage the legs and/or leg screws. The angle (designated “B”...
-
Page 5: Parts List
parts list Before discarding the packing materials, ensure all the parts are accounted for. All electronics and components that need to be installed are located in boxes under the base or attached to the frame. Wireless Remote Control and INCLUDED (3) AAA batteries Legs (4) Power Cord (1) -
Page 6: Base And Remote Overview
base and remote overview Head Motor Control Box Power Down Foot Motor Lifts and Lowers Head Lifts and Lowers Foot FLAT Preset Position Zero-G Preset Position Actual product appearance and functionality may vary from photographs, illustrations and descriptions included in this manual. -
Page 7: Quick Reference Guide
quick reference guide Not to scale. For illustration purposes only. Read all instructions before beginning installation. Connection ports to head and foot motors installed under the base. Control Input Power Cord Power Supply Power Cord Power Down... -
Page 8: Installation Guide
installation guide Always use two people when setting up the base To install the legs, thread the washer over the bolt of the STEP 1 leg with the recessed side facing the leg, and tighten by hand. Do not over tighten. Place the bed base box in a desired location with the top of the box facing up. - Page 9 installation guide Always use two people when setting up the base STEP 6 STEP 9 Uncoil the Power Cord and connect to the Power Supply. Ensure batteries are correctly installed in the back of Place Power Supply on the ground and extend from the remote.
- Page 10 headboard bracket installation guide (optional) A 9/16” (14 mm) & 1/2” (13 mm) socket and crescent wrench are necessary to complete installation. HEADBOARD BRACKET COMPONENTS Headboard Bracket (2) T-Bracket (2) Spacer (2) Long Bolt (8) Short Bolt (10) Nut (18) STEP 1 a.) Align the hole in the bracket to the brass sleeve into which the leg threads.
-
Page 11: Headboard Bracket Installation Guide
headboard bracket installation guide (optional) STEP 2 Attach the plastic spacer and T-Bracket. a.) Measure the distance between the mounting holes on the headboard and install the spacer and attachment plate to accommodate the headboard. b.) To install the plastic spacer and attachment plate, you will need (2) long bolts and (2) nuts. Place the spacer and attachment plate in the desired location and slip the bolts through the holes with the head of the bolt facing outward. -
Page 12: Emergency Power Down Box
emergency power down box Store the power down box in a convenient location for emergency use. (2) 9 Volt batteries are required to operate the power down feature and are NOT included. FOR EMERGENCY USE ONLY. In the event that the base is stuck in an articulated position during a power outage, the Power Down Box will return the base to a flat position. -
Page 13: Pair Remote
pair remote The original remote that comes in the box is already paired to the bed base. No further action is required. In the event that the remote is not paired with the base, follow the steps below. STEP 1 STEP 3 Remove back cover from remote Press and hold button on the back... -
Page 14: Setting Up Two Bases
setting up two bases Connecting straps are secured to the base frame upon delivery. If a split setup is being installed, plastic connecting straps are provided (one per base) to secure the bases together. Use both straps to secure the head and foot portions together. STEP 1 With the bases in their desired location, slightly loosen both legs to allow the strap to fit on the leg bolt, between the leg washer... -
Page 15: Syncing Two Bases
syncing two bases If simultaneous operation of two bases is desired, use the SmartSync™ Cord to connect the electronics of both bases together. STEP 1 STEP 4 Unplug base from power source. Connect each power-down box male connection to the sync cord female connection (Refer to the illustration below). -
Page 16: Troubleshooting
troubleshooting If one or more functions on the bed base have stopped operating: • Check under the bed base to verify that the wired connections are secure and that there are no cords or bedding obstructing the movement of the base. •... -
Page 17: Notes
Notes... -
Page 18: Español
español PG 1-2 Sobre las precauciones y el uso: Atención: Restricciones importantes movimiento / ejercicio. Esto es un caso común con cualquier producto que sobre la seguridad Lea todas las instrucciones antes de usar su base ajustable. crea un movimiento de vibración y puede no afectar el marcapasos. Por favor, Guarde estas instrucciones. - Page 19 español TOLERANCIA motores de masaje no están diseñados para funcionar de forma continua Todas las bases ajustables Ergomotion, dependiendo de la marca y el durante más de 30 minutos a la vez. Por favor, deje que el sistema de modelo, están diseñados y fabricados para realizar y funcionar dentro de masaje descanse 30 minutos después de que el masaje se haya apagado los parámetros de control de calidad designados.
- Page 20 español utiliza y puede irradiar energía de radiofrecuencia. Si no se instala y emplea Pg. 3 - Componentes: Antes de eliminar los materiales de empaque, verifique este equipo de acuerdo con las instrucciones, el equipo podría causar que tiene todos los componentes. interferencias perjudiciales a las radiocomunicaciones.
- Page 21 español PASO 2: Saque la base de la cama de la caja, dejando la parte de abajo de la Tuercas (18) base hacia arriba. Para completar la instalación es necesario tener un socket y una llave inglesa PASO 3: Para instalar los soportes de la cabecera, vea las instrucciones de 9/16”...
- Page 22 español Ahora el remoto y la base están pareados. • Desconecte la base durante 1 hora para reponer los componentes electrónicos. Si el generador auxiliar de corriente no está disponible, presione el botón • Plug base de la cama a una toma eléctrica diferente, o toma de corriente de reinicio en la caja de control.
-
Page 23: Français
français Pg. 1-2 - Précautions de sécurité et déclarations d’utilisation pas affecter le stimulateur cardiaque. Veuillez consulter votre médecin avant d’utiliser la fonction massage. AVERTISSEMENT UTILISATION À DOMICILE : Les sommiers ajustables Ergomotion sont conçus seulement pour l’utilisation à • Gardez lit en position à... - Page 24 français tours par minute augmente, les vibrations changent simultanément. CLASSIFICATION DU PRODUIT Les moteurs de levage ne sont pas conçus pour opérer de manière continue TOLÉRANCE pour plus que [2] minutes pendant une période de [18] minutes ou environ Tous les sommiers ajustables Ergomotion, selon leur marque et modèle, 10 % du cycle de service.
- Page 25 français accepter toute interférence qui pourrait causer un mauvais fonctionnement. contrôlé. Cet appareil doit être installé et opéré à une distance minimale de 20cm entre le transmetteur et le corps humain. Cet appareil ne doit pas être Interférence Radio et de la Télévision co-localisé...
- Page 26 français Lift and Lowers Head= Soulève et Baisse Tête La configuration de base est maintenant terminée! Flat Preset Position= Allongé Position préréglée – Position Droite Pour service consommateurs, allez au site web www.ergomotion.com ou appelez le numéro vert : 1-888-550-3746. Pg.
- Page 27 français Pg. 11 - Grouper la Télécommande: La télécommande originale est déjà utilisez le fil connecteur SmartSyncTM pour attacher les systèmes électroniques appariée à la base du lit. Il n’y a pas besoin d’autres actions. Au cas où la des deux bases ensemble. télécommande ne soit pas appariée à...
- Page 28 ©2017 Ergomotion Inc US/Canada Customer Service Phone 1-888-550-3746 805-979-9399 Email info@ergomotion.com www.ergomotion.com V001_R03...