Table des Matières

Publicité

Les langues disponibles
  • FR

Les langues disponibles

  • FRANÇAIS, page 44

Liens rapides

Option Box
Installateurshandleiding
Installers manual
Installations Anleitung
Manuel de l'installateur
Manuale per l'installatore
Instrukcja obsługi dla instalatora
Manual para instaladores
Heating
Cooling
Fresh Air
Clean Air

Publicité

Table des Matières
loading

Sommaire des Matières pour Zehnder Option Box

  • Page 1 Option Box Installateurshandleiding Installers manual Installations Anleitung Manuel de l’installateur Manuale per l’installatore Instrukcja obsługi dla instalatora Manual para instaladores Heating Cooling Fresh Air Clean Air...
  • Page 2: Table Des Matières

    Inhoudsopgave Veiligheid ......................................3 Technische specificaties ................................4 Boostschakelaar ...................................8 Extern filter....................................8 Standby-schakelaar ..................................8 ComfoHood ....................................9 Foutmeldingscontact ..................................9 ComfoFond-L Q ...................................9 Naverwarmer ....................................10 0-10 V ingangen ..................................11 Geregelde klep aardwarmtewisselaar ............................12 Aansluiting netspanning ................................13 ComfoNet connector ..................................13 Storingsprocedures ..................................13 Proportional Integral Differential (PID) regelaar ..........................14 Regelingen instellen ..................................15 Alleen leverbaar in Zwitserland Niet toegestaan in België...
  • Page 3: Veiligheid

    Bij installatie door een Met dit document kunt u de Option Box voor de niet-erkend installateur kan persoonlijk ComfoAir Q, Comfort Vent Q en Aeris NEXT veilig en letsel ontstaan of kunnen de prestaties optimaal installeren en onderhouden.
  • Page 4: Technische Specificaties

    2 Technische specifi caties Positie Onderdeel Controle van levering Option Box Netsnoer 230 V (2,5 m) ComfoNet-snoer (2,5 m) Accessoires Beschermingsdeksel ComfoNet connectoren Typeplaatje Extra connectoren (zie aansluitschema voor meer informatie) Kabelwartel M20x1,5 4x5 Ingang voor maximaal 4 laagspanningskabels of 1 hoogspanningskabel bij...
  • Page 5 Aansluitschema Technische specificaties Code Betekenis Interface Umax Imax Lmax-bedrading Boostschakelaar Digitaal 3,3 Vdc 1 mA 30 m Ingang storing extern filter Digitaal 3,3 Vdc 1 mA 30 m Standby-schakelaar Digitaal 3,3 Vdc 1 mA 30 m Temperatuursensor ComfoHood Analoog 3,3 Vdc 1 mA 30 m Schakelaar ComfoHood...
  • Page 6 Menustructuur ventilatietoestel installateur menu‘s INSTELL. INSTALLATEUR Password: Zie handleiding van de ventilatietoestel INGEBRUIKNAME INSTELL. HOOFDPRINT INSTELL. OPTION BOX VENTILATIE STANDEN BOOSTSCHAKELAAR REGELING VENTILATIE COMFOHOOD FILTERINSTELLINGEN NAVERWARMER HOOGTE TOV ZEENIV 0-10 V INPUT 1 HAARD AANWEZIG 0-10 V INPUT 2 ONBALANS...
  • Page 7 Installatieprocedure Pas op voor elektromagnetische interferentie (EMC) Signaalkabel tij dens de installatie. Boostschakelaar ■ Gebruik voor de signaalkabels een kabel met de Ingang storing extern fi lter volgende specifi caties: Standby-schakelaar - Maximumlengte: 30 m Temperatuursensor ComfoHood - Aanbevolen Ø: 0,60 mm Schakelaar ComfoHood - Minimale Ø: 0,25 mm Storingscontact...
  • Page 8: Boostschakelaar

    Na installatie van de schakelaar, moet op het Inbedrijfstelling ventilatietoestel nog enkele parameters worden ingesteld in het menu INSTELL. OPTION BOX. De Na installatie van het storingscontact zijn geen volgende menu's moeten worden ingesteld: bijkomende instellingen op het ventilatietoestel vereist.
  • Page 9: Comfohood

    Installatie Als in het menu INSTELL. OPTION BOX een tijd is 1. Sluit de ComfoFond-L Q pomp aan op connector 6b ingesteld voor het ventilatietoestel, blijft de klep van (zie aansluitschema).
  • Page 10: Naverwarmer

    Na installatie van de naverwarmer, moet op het ComfoFond-L uit en verschijnt de foutmelding ventilatietoestel nog enkele parameters worden GROUND_HEAT_CONNECT_ERROR op het scherm van ingesteld in het menu INSTELL. OPTION BOX. het ventilatietoestel. De volgende menu's moeten worden ingesteld: Menu-item...
  • Page 11: 10 0-10 V Ingangen

    Functie moet op het ventilatietoestel nog enkele parameters PROPORTIONEEL het toestel zet het inkomende signaal worden ingesteld in het menu INSTELL. OPTION BOX. DEBIET van een 0-10 V sensor om in een verzoek Schakel de aangesloten ingang in. om een luchtdebiet dat ligt tussen de ingestelde minimum- en maximumwaarde.
  • Page 12: Geregelde Klep Aardwarmtewisselaar

    2,0 V (20% RH) specifi eke 0-10 V input ingesteld in het menu van de METHODE REGELEN Option Box nadat de input is geactiveerd. Standaard SETPOINT 7,0 V (70% RH) wordt 0% output aangeboden bij 0 V input, terwij l 100%...
  • Page 13: Aansluiting Netspanning

    13 ComfoNet connector Werking Het ventilatietoestel stuurt connector 6b (voeding) aan Elke ComfoNet connector kan op een met de informatie die is ontvangen van connector 6a willekeurig ComfoNet toestel worden (temperatuursensor). aangesloten. Wilt u meer ComfoNet In de eerste twee minuten na het inschakelen van het toestellen aansluiten dan het aantal ventilatietoestel heeft de sensor nog niet de juiste beschikbare ComfoNet connectoren, maak...
  • Page 14: Proportional Integral Differential (Pid) Regelaar

    15 Proportional Integral Differential (PID) regelaar Proportionele regelaar Proportionele band, fout fout instelwaarde Integrale regelaar ventilatie 0-10 V Integrerende tijd, totaal aantal fouten Differentiële regelaar Differentiële tijd, wijziging fout Meetwaarde 0-10 V sensor 0-10V De meeste regelaars in het ventilatietoestel zijn van het De output van de integrale regelaar hangt af van de type PID (Proportioneel Integrerend Differentiërend).
  • Page 15: Regelingen Instellen

    16 Regelingen instellen Sturen ComfoAir Q Toestel Besturing Ventilatie 0-10 V output Instellingen Sturen betekent dat de output van het verbonden Als een sensor wordt aangesloten, kan dat betekenen apparaat het volume rechtstreeks beïnvloedt. Dit kan in dat een hoog sensorniveau overeenkomt met een het bijzonder worden gebruikt voor sturingsapparaten, hoog volume.
  • Page 16 Table of Contents Safety ......................................17 Technical specifications................................18 Bathroom switch ..................................22 External filter ....................................22 Standby switch ..................................22 ComfoHood ....................................23 Error message contact ................................23 ComfoFond-L Q ..................................23 Post-heater ....................................24 0-10V inputs ....................................25 Regulated sub-soil heat exchanger valve .............................26 Main power connector ................................27 ComfoNet connector ..................................27 Malfunction procedures ................................27 Proportional Integral Differential (PID) controller..........................28...
  • Page 17: Safety

    Foreword a certified engineer unless instructed differently. A non-certified engineer can Read this document and the documentation of the cause personal injury or damage the ventilation unit carefully before installing this device. performance of the ventilation system; ■ Do not modify the device or the With this document you can install and perform the specifications given in this document.
  • Page 18: Technical Specifications

    2 Technical specifi cations Position Part Checking the delivery Option box Power cable 230V (2.5m) ComfoNet cable (2.5m) Accessories bag Protection cover ComfoNet connectors Identifi cation plate Ancillary connectors (see wiring diagram for more details) Cable gland M20x1.5 4x5 Input for a maximum of 4 low voltage cables or one high voltage cable when interchanged for a gland with one opening.
  • Page 19 Wiring diagram Technical specifications Code Meaning Interface Umax Imax Lmax-wiring Bathroom switch Digital External filter error input Digital Standby switch Digital ComfoHood temperature sensor Analog ComfoHood switch Digital ComfoHood valve 230Vac switched 230Vac Error contact Potential free contact 24Vac / 24Vdc ComfoFond-L Q temperature sensor / Analog Sub-soil heat exchanger valve sensor (10k @ 25°C)
  • Page 20 Menu structure ventilation unit installer menus INSTALLER SETTINGS Password: See manual of the ventilation unit COMMISSIONING MAIN BOARD SETTINGS OPTION BOX SETTINGS VENTILATION PRESETS BATHROOM SWITCH VENTILATION CONTROL COMFOHOOD SWITCH FILTER SETTINGS POSTHEATER ALTITUDE 0-10V INPUT 1 FIRE PLACE PRESENT...
  • Page 21 Installation procedure Be aware of electromagnetic interference (EMC) during Low voltage cable installation. Bathroom switch ■ For the low voltage cables use a cable with the External fi lter error input following requirements: Standby switch - Maximum length: 30m ComfoHood temperature sensor - Recommended Ø: 0,60mm ComfoHood...
  • Page 22: Bathroom Switch

    fi lter for the rest of the installation procedure. Commissioning Commissioning After installation, commission the switch in the After installation there is no need to commission the ventilation unit OPTION BOX SETTINGS menu. The switch on the ventilation unit. following menus must be set: Operation Menu item...
  • Page 23: Comfohood

    When a time is set in the ventilation unit OPTION BOX SETTINGS menu, the ComfoHood valve will remain Installation open and the ventilation unit will stay in PRESET 3 for 1.
  • Page 24: Post-Heater

    ComfoFond-L off After installation, commission the post-heater in the and give the error GROUND_HEAT_CONNECT_ERROR ventilation unit OPTION BOX SETTINGS menu. on the display of the ventilation unit. The following menus must be set:...
  • Page 25: 10 0-10V Inputs

    After installation, commission the connected sensor(s) incoming signal from a 0-10V sensor into and/or switch(es) in the ventilation unit OPTION BOX one of the airflow presets SETTINGS menu. Enable the connected input. You can set the response to the input and the method 0-10V PRIORITY ■...
  • Page 26: Regulated Sub-Soil Heat Exchanger Valve

    50% (40% RH) The input voltage at 0% output and the input voltage INTEGRAL TIME at 100% output is set in the option box menu for each 0-10V FUNCTION FLOW-PROPORTIONAL specifi c 0-10V input, after enabling the input. By default,...
  • Page 27: Main Power Connector

    13 ComfoNet connector Operation The ventilation unit will control the 6b (power) connector Each ComfoNet connector can be with the information received from the 6a (temperature connected to any ComfoNet device. When sensor) connector. you would like to connect more ComfoNet The fi...
  • Page 28: Proportional Integral Differential (Pid) Controller

    15 Proportional Integral Differential (PID) controller Proportional controller Proportional band, error Setpoint error Integral controller process Integral time, sum of errors Differential controller Differential time, change of error measured value measurement Most controllers of the ventilation unit are of the PID The output of the integral controller is depending on the type (Proportional Integral Differential).
  • Page 29: Control Method

    16 Control method Steer ComfoAir Q Device Steering ventilation 0-10V output Settings To steer means, the output of the connected device In case a sensor would be connected, this would directly infl uences the volume. Typically, this should be mean that a high sensor level corresponds with a high used for steering devices, such as SAG 0-3, SAG 0-5 or volume.
  • Page 30 Inhalt Sicherheit ....................................31 Technische Spezifikationen .................................32 Badezimmerschalter ...................................36 Externer Filter ....................................36 Standby-Schalter ..................................36 ComfoHood ....................................37 Fehlermeldungskontakt ................................37 ComfoFond-L Q ..................................37 Nachheizregister ..................................38 0-10 V Eingänge ..................................39 Geregeltes Erdwärmetauscher-Ventil ............................40 Hauptnetzanschluss ...................................41 ComfoNet-Anschluss ..................................41 Verfahren bei Störungen ................................41 Proportional-Integral-Differenzregler (PID-Regler) ...........................42 Regelverfahren ...................................43 Nur in der Schweiz erhältlich In Belgien nicht erlaubt...
  • Page 31: Sicherheit

    Leistungsfähigkeit des auf sichere und optimale Weise montieren und warten. Lüftungssystems führen. Die Option Box wird in diesem Dokument als „Gerät“ und das ComfoAir Q, Comfort Vent Q und Aeris NEXT ■ Nehmen Sie keine Änderungen als „das Lüftungsgerät“ bezeichnet. Das Gerät wird am Gerät oder an den in diesem...
  • Page 32: Technische Spezifikationen

    2 Technische Spezifi kationen Position Teil Überprüfen der Lieferung Option Box Netzkabel 230 V (2,5 m) ComfoNet-Kabel (2,5 m) Beutel mit Zubehör Schutzabdeckung ComfoNet-Anschlüsse Typenschild Zusatzgeräteanschlüsse (für genauere Angaben siehe Schaltplan) Kabeldurchführung M20 x 1,5 4 x 5 Eingang für maximal 4 Signalkabel oder ein Stromkabel nach Austausch gegen Kabeldurchführung mit einer Öffnung.
  • Page 33 Schaltplan Technische Spezifikationen Code Bedeutung Schnittstelle Umax Imax Lmax- Verdrahtung Badezimmerschalter Digital 3,3 VDC 1 mA 30 m Eingang für Fehlermeldung für externen Filter Digital 3,3 VDC 1 mA 30 m Standby-Schalter Digital 3,3 VDC 1 mA 30 m ComfoHood -Temperatursensor Analog 3,3 VDC...
  • Page 34 Monteurmenu für das Lüftungsgerät MONTEUROPTIONEN Passwort: Siehe Dokument das Lüftungsgerät INBETRIEBNAHME STEUERPLATINE EINST. OPTION BOX LÜFT. VOREINST. BADEZIMMERSCHALTER LÜFT. STEUERUNG COMFOHOOD SCHALTER FILTEREINSTELLUNGEN NACHHEIZREGISTER MEERESHÖHE 0-10V EINGANG 1 FEUERST. VORHAND. 0-10V EINGANG 2 DISBALANCE 0-10V EINGANG 3 WÄRMETAUSCHERTYP 0-10V EINGANG 4 DIR.
  • Page 35 Montageverfahren Achten Sie bei der Montage auf elektromagnetische Signalkabel Interferenzen (EMV). Badezimmerschalter ■ Verwenden Sie als Signalkabel ein Kabel, das die Eingang für Fehlermeldung für externen Filter folgenden Anforderungen erfüllt: Standby-Schalter - Maximale Länge: 30 m ComfoHood -Temperatursensor - Empfohlener Durchmesser Ø: 0,60 mm ComfoHood -Schalter - Mindestdurchmesser Ø: 0,25 mm...
  • Page 36: Badezimmerschalter

    Handbuch des externen Filters. Inbetriebnahme Nach der Installation nehmen Sie den Schalter im Menü Inbetriebnahme OPTION BOX des Lüftungsgerätes in Betrieb. Die folgenden Menüs müssen eingestellt werden: Eine Inbetriebnahme des Schalters am Lüftungsgerät nach der Installation ist nicht notwendig. Menü-Eintrag Funktion VERZ.
  • Page 37: Comfohood

    Lüftungsgerät Eine Inbetriebnahme der Fehleranzeige am nach der Installation ist nicht notwendig. Sie können Lüftungsgerät nach der Installation ist nicht notwendig. jedoch einen Nachlauftimer im Menü OPTION BOX des Lüftungsgerätes einstellen. Betrieb Das Lüftungsgerät schließt den Anschluss 5, wenn im Betrieb Lüftungsgerät eine Störung vorliegt.
  • Page 38: Nachheizregister

    Unterstützung des ComfoFond-L liefern kann, Nach der Installation nehmen Sie das Nachheizregister bleibt der ComfoFond-L ausgeschaltet. Wenn das im Menü OPTION BOX des Lüftungsgerätes in Betrieb. ComfoFond-L unzuverlässige Ergebnisse bezüglich Die folgenden Menüs müssen eingestellt werden: der Außenlufttemperatur an das Lüftungsgerät liefert, Menü-Eintrag...
  • Page 39: 10 0-10 V Eingänge

    Inbetriebnahme Proportionalbereich und zum Integral-Timer. Nach der Installation nehmen Sie den angeschlossenen Die folgenden Menüs müssen für alle angeschlossenen Sensor(en) und/oder Schalter(s) im Menü OPTION BOX 0-10 V Eingänge eingestellt werden: des Lüftungsgerätes in Betrieb. Aktivieren Sie den angeschlossenen Eingang.
  • Page 40: Geregeltes Erdwärmetauscher-Ventil

    Betrieb 0-10 V PRIORITÄT ■ Menü-Eintrag Funktion Der Eingang des angeschlossenen Sensors oder Das Lüftungsgerät reagiert im Modus Schalters wird in ein neutrales 0-100 % Signal AUTO und im Modus MANUELL auf das umgewandelt. Dieses übersetzte Signal wird als 0-10 V Signal. Luftmengenanforderung an das Lüftungsgerät gesendet.
  • Page 41: Hauptnetzanschluss

    13 ComfoNet-Anschluss Betrieb Das Lüftungsgerät steuert den Anschluss 6b Jeder ComfoNet-Anschluss kann mit jedem (Stromversorgung) mit den Informationen, die vom ComfoNet-Gerät verbunden werden. Anschluss 6a (Temperatursensor) empfangen werden. Installieren Sie einen ComfoSplitter, wenn In den ersten zwei Minuten nach dem Einschalten des die Anzahl der ComfoNet-Geräte, die Sie Lüftungsgerätes hat der Sensor noch nicht die aktuelle anschließen möchten, die Anzahl der...
  • Page 42: Proportional-Integral-Differenzregler (Pid-Regler)

    15 Proportional-Integral-Differenzregler (PID-Regler) Proportionaler Regler Proportionalbereich, Fehler Sollwert Fehler Integralregler Lüftung 0-10 V Nachstellzeit, Fehlersumme Differentialregler Differentialzeit, Fehleränderung Messwert 0-10 V Sensor 0-10 V Die meisten Regler des Lüftungsgerätes sind PID- Das Ausgangssignal des Integralreglers hängt von der Regler. Die Regler versuchen, einen Fehler auf Null zu Summe der Fehler im Zeitverlauf und der Nachstellzeit reduzieren.
  • Page 43: Regelverfahren

    16 Regelverfahren Steuern ComfoAir Q Gerät Regelung Lüftung 0-10V Ausgang Werte Beim Steuern wird die Menge direkt vom Nach Anschließen eines Sensors würde dies bedeuten, Ausgangssignal des angeschlossenen Gerätes dass ein hoher Sensorpegel einem hohen Volumen beeinflusst. Dieses Verfahren sollte üblicherweise bei entspricht.
  • Page 44 Table des matières Sécurité .....................................45 Spécifications techniques ................................46 Interrupteur de salle de bains ..............................50 Filtre externe ....................................50 Interrupteur de veille ..................................50 ComfoHood ....................................51 Contact de message d'erreur ..............................51 ComfoFond-L Q ..................................51 Réchauffeur ....................................52 Entrées 0-10 V ...................................53 Clapet d’échangeur de chaleur souterrain régulé ..........................54 Connecteur de l’alimentation réseau ............................55 Connecteur ComfoNet ................................55 Procédures en cas de défauts ..............................55...
  • Page 45: Sécurité

    être Ce document vous permet d'installer et d'assurer exécutés par un technicien certifié, sauf la maintenance de l'Option Box pour le ComfoAir instruction contraire. Un technicien non Q, le Comfort Vent Q et l'Aeris NEXT de façon sûre certifié...
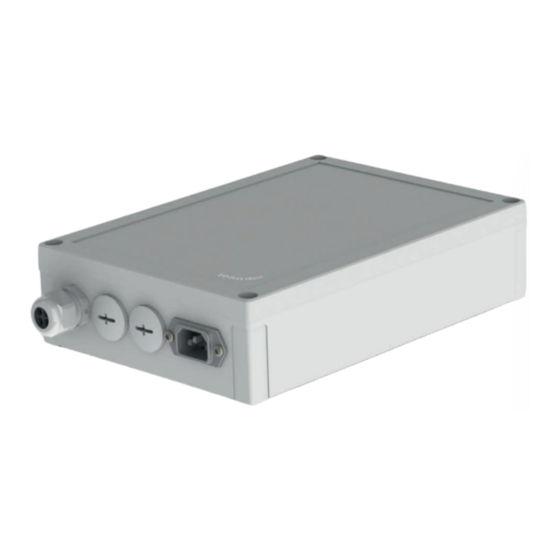
  • Page 46: Spécifications Techniques

    2 Spécifi cations techniques Position Élément Contrôle de réception Option Box Câble d'alimentation 230 V (2,5 m) Câble ComfoNet (2,5 m) Pochette d'accessoires Couvercle de protection Connecteurs ComfoNet Plaque signalétique Connecteurs auxiliaires (voir le schéma de câblage pour plus de détails)
  • Page 47 Schéma de câblage Spécifications techniques Code Signification Interface Umax Imax Câblage Lmax Interrupteur de salle de bains Numérique 3,3 V cc 1 mA 30 m Entrée d'erreur filtre externe Numérique 3,3 V cc 1 mA 30 m Interrupteur de veille Numérique 3,3 V cc 1 mA...
  • Page 48 Structure des menus avancés de l'unité de ventilation PARAMÈTR. INSTALL. Mot de passe: Voir le manuel de unité de ventilation MISE EN SERVICE PARAMÈTRES CARTE-MÈRE PARAMÈTR. OPTION BOX PRÉSELECTIONS VENTIL. INTERR. SALLE DE BAIN RÉGLAGES VENTILATION INTERR. COMFOHOOD PARAMÈTRES FITLRES...
  • Page 49 Procédure d'installation Prenez garde aux interférences électromagnétiques Câble basse tension (CEM) pendant l'installation. Interrupteur de salle de bains ■ Pour utiliser les câbles basse tension, respectez les Entrée d'erreur fi ltre externe exigences suivantes : Interrupteur de veille - Longueur maximale : 30 m Capteur de température ComfoHood - Ø...
  • Page 50: Interrupteur De Salle De Bains

    Après l'installation, il n'est pas nécessaire de mettre en Après l'installation, mettez en service l'interrupteur service l'interrupteur sur l'unité de ventilation. dans le menu PARAMÈTR. OPTION BOX de l'unité de ventilation. Les menus suivants doivent être réglés : Fonctionnement Élément du menu Fonction L'unité...
  • Page 51: Comfohood

    Si une durée est réglée dans le menu PARAMÈTR. OPTION BOX de l'unité de ventilation, la bouche du Installation ComfoHood restera ouverte et l'unité de ventilation 1. Installez la pompe du ComfoFond-L Q sur le restera en POSITION 3 pendant la durée paramétrée...
  • Page 52: Réchauffeur

    ComfoFond-L, le ComfoFond-L restera éteint. Si Après l'installation, mettez en service le réchauffeur le ComfoFond-L indique à l'unité de ventilation une dans le menu PARAMÈTR. OPTION BOX de l'unité de température d'air extérieur non significative, l'unité de ventilation. ventilation désactivera le ComfoFond-L.
  • Page 53 DÉBIT L’unité de ventilation va traduire le signal PROPORTIONNEL entrant d’un capteur 0-10 V en une OPTION BOX de l'unité de ventilation. Activez l'entrée demande de débit d'air correspondant connectée. compris entre le débit minimum et le débit maximum paramétrés.
  • Page 54: Clapet D'échangeur De Chaleur Souterrain Régulé

    à une sortie à 100 % sont réglées dans le Élément du menu Réglage menu de l'Option Box (boîtier d'options) pour chaque ENTRÉE À 0 % 10,0 V (100 % HR) entrée 0-10 V spécifi que, après l'activation de l'entrée.
  • Page 55: Connecteur De L'alimentation Réseau

    13 Connecteur ComfoNet Fonctionnement L'unité de ventilation va contrôler le connecteur Chaque connecteur ComfoNet peut être (de l'alimentation) 6b en fonction des informations connecté à un dispositif ComfoNet. Si vous transmises par le connecteur (du capteur de voulez connecter plus de dispositifs température) 6a.
  • Page 56: Régulateur Proportionnel Intégral Différentiel (Pid)

    15 Régulateur proportionnel intégral différentiel (PID) Régulateur proportionnel Réponse proportionnelle, erreur erreur Point de consigne Régulateur intégral ventilation 0-10 V Temps de réponse, somme des erreurs Régulateur différentiel Temps différentiel, variation de l'erreur valeur mesurée 0-10 V capteur 0-10 V La plupart des régulateurs de l'unité...
  • Page 57: Méthode De Contrôle

    16 Méthode de contrôle Diriger ComfoAir Q La méthode Diriger signifi e que la sortie de Si un capteur était connecté, une valeur élevée du l'appareil connecté infl ue directement sur le volume. capteur correspondrait à un volume élevé. Si un capteur Normalement, elle doit être utilisée pour contrôler des de CO 0-2000 ppm avec 0 V à...
  • Page 58 Sommario Sicurezza ....................................59 Specifiche tecniche ..................................60 Interruttore bagno ..................................64 Filtro esterno ....................................64 Interruttore standby ...................................64 ComfoHood ....................................65 Contatto messaggio di errore ..............................65 ComfoFond-L Q ..................................65 Post-riscaldatore ..................................66 Ingressi 0-10 V ...................................67 Valvola dello scambiatore di calore geotermico diretto ........................68 Connettore di rete elettrica ................................69 Connettore ComfoNet.................................69 Procedure in caso di guasto ...............................69 Controllo Proporzionale Integrale Differenziale (PID) ........................70...
  • Page 59: Sicurezza

    Introduzione provocare lesioni personali siano assicurati dietro al telaio. Per aprire il Leggere attentamente il presente documento e la telaio sono necessari degli attrezzi; documentazione dell'unità di ventilazione prima di ■ L'installazione, la messa in servizio installare il dispositivo. e la manutenzione devono essere eseguite da un tecnico qualificato se Il presente documento consente di installare ed non diversamente specificato.
  • Page 60: Specifiche Tecniche

    2 Specifi che tecniche Posizione Componente Controllo della fornitura Option Box Cavo alimentazione 230 V (2,5 m) Cavo ComfoNet (2,5 m) Borsa accessori Copertura di protezione Connettori ComfoNet Targhetta identifi cativa Connettori ausiliari (vedere lo schema dei collegamenti per maggiori informazioni)
  • Page 61 Schema dei collegamenti Specifiche tecniche Codice Significato Interfaccia Umax Imax Collegamento Lmax Interruttore bagno Digitale 3,3 V CC 1 mA 30 m Ingresso errore filtro esterno Digitale 3,3 V CC 1 mA 30 m Interruttore standby Digitale 3,3 V CC 1 mA 30 m Sensore temperatura ComfoHood...
  • Page 62 Struttura del menu installatore dell'unità di ventilazione IMPOST. INSTALLATORE Password: Vedere il documento l‘unità di ventilazione PROCEDURA GUIDATA IMPOSTAZIONI SCHEDA MADRE IMP. OPTION BOX PREIMPOSTAZIONI VENTILAZIONE INTERRUTTORE BAGNO CONTROLLO VENTILAZIONE INTERR. COMFOHOOD IMPOSTAZIONI FILTRI POSTRISCALDATORE ALTITUDINE 0-10V INGRESSO 1 CAMINETTO PRESENTE...
  • Page 63 Procedura di installazione Prestare attenzione alle interferenze elettromagnetiche Cavo di segnale (EMC) durante l'installazione. Interruttore bagno ■ Per i cavi di segnale, utilizzare un cavo con i seguenti Ingresso errore fi ltro esterno requisiti: Interruttore standby - Lunghezza massima: 30 m Sensore temperatura ComfoHood - Ø...
  • Page 64: Interruttore Bagno

    Messa in servizio Messa in servizio Dopo l'installazione, mettere in funzione l'interruttore Dopo l'installazione non è necessario mettere in funzione nel menu IMP. OPTION BOX dell'unità di ventilazione. È l'interruttore sull'unità di ventilazione. necessario impostare i seguenti menu: Funzionamento Voce di menu...
  • Page 65: Comfohood

    In caso di impostazione di un orario nel menu IMP. OPTION BOX dell'unità di ventilazione, la valvola del Installazione ComfoHood resterà aperta per il tempo preimpostato 1. Installare la pompa del ComfoFond-L Q sul dopo aver aperto l'interruttore.
  • Page 66: Post-Riscaldatore

    ComfoFond-L fornisce un risultato scarso all'unità di Dopo l'installazione, mettere in funzione il post- ventilazione sulla temperatura dell'aria esterna, l'unità di riscaldatore nel menu IMP. OPTION BOX dell'unità di ventilazione spegnerà il ComfoFond-L. ventilazione. Se si perde il collegamento con il sensore del È...
  • Page 67 Per tutti gli ingressi 0-10 V collegati è necessario impostare i seguenti menu: Messa in servizio Dopo l'installazione, mettere in funzione sensore(i) e/o ■ FUNZIONE 0-10 V interruttore(i) collegato nel menu IMP. OPTION BOX Voce di menu Funzione dell'unità di ventilazione. Abilitare l'ingresso collegato. MANDATA l’unità...
  • Page 68: Valvola Dello Scambiatore Di Calore Geotermico Diretto

    50% (800 ppm) di ingresso con uscita a 100% si impostano nel menu TEMPO INTEGRALE 300s dell'option box per ogni specifi co ingresso 0-10 V, dopo FUNZIONE 0-10 V MANDATA PROPORZION. aver abilitato l'ingresso. Di default, l'uscita a 0% viene PRIORITÀ...
  • Page 69: Connettore Di Rete Elettrica

    13 Connettore ComfoNet Funzionamento L'unità di ventilazione controllerà il connettore 6b Ogni connettore ComfoNet può essere (alimentazione) con le informazioni ricevute dal collegato a qualsiasi dispositivo ComfoNet. connettore 6a (sensore di temperatura). Nel caso si vogliano collegare più dispositivi I primi due minuti dopo l'accensione dell'unità di ComfoNet rispetto ai connettori disponibili, ventilazione il sensore non ha ancora raggiunto la installare un ComfoSplitter.
  • Page 70: Controllo Proporzionale Integrale Differenziale (Pid)

    15 Controllo Proporzionale Integrale Differenziale (PID) Controllo proporzionale Banda proporzionale, errore Valore errore nominale Controllo integrale ventilazione 0-10V Tempo integrale, somma di errori Controllo differenziale Tempo differenziale, variazione di errore valore misurato 0-10V sensore 0-10V La maggior parte dei dispositivi di controllo dell'unità di L'uscita del controllo integrale dipende dalla somma ventilazione sono del tipo PID (Proporzionale Integrale di errori nel tempo, e dal tempo integrale.
  • Page 71: Metodo Controllo

    16 Metodo controllo Comando ComfoAir Q Dispositivo Comando ventilazione uscita 0-10V Impostazioni Con il comando l'uscita del dispositivo collegato In caso di sensore collegato, un livello sensore elevato influenza direttamente il volume. Normalmente, si corrisponderà a un volume elevato. Se fosse collegato dovrebbe utilizzare per dispositivi di comando come un sensore CO da 0-2000 ppm, con 0 V@0 ppm e...
  • Page 72 Spis treści Bezpieczeństwo ..................................73 Specyfikacje techniczne ................................74 Przełącznik łazienkowy ................................78 Filtr zewnętrzny ...................................78 Przełącznik trybu gotowości ...............................78 ComfoHood ....................................79 Styk komunikatów o błędach ...............................79 ComfoFond-L Q ..................................79 Nagrzewnica wtórna ...................................80 Wejścia 0-10 V ...................................81 Regulowany zawór gruntowego wymiennika ciepła ........................82 Złącze zasilania sieciowego .................................83 Złącze ComfoNet ..................................83 Procedury postępowania w przypadku awarii ..........................83...
  • Page 73: Bezpieczeństwo

    Przedmowa ■ Po zamontowaniu, wszystkie części, które mogą spowodować obrażenia, są Przed przystąpieniem do instalacji urządzenia należy zabezpieczone obudową. Do otwarcia dokładnie przeczytać niniejszy dokument oraz obudowy potrzebne są odpowiednie dokumentację jednostki wentylacyjnej. narzędzia; ■ Montaż, uruchomienie i konserwacja Z pomocą tego dokumentu można zainstalować i powinny być...
  • Page 74: Specyfikacje Techniczne

    2 Specyfi kacje techniczne Pozycja Element Kontrola dostawy Moduł Option Box Kabel zasilający 230 V (2,5 m) Kabel ComfoNet (2,5 m) Torba z akcesoriami Osłona Złącza ComfoNet Tabliczka znamionowa Złącza dodatkowe (więcej informacji można znaleźć na schemacie połączeń) Dławik kablowy M20x1,5 4x5 Wejścia na maksymalnie 4 kable niskiego...
  • Page 75 Schemat połączeń Dane techniczne Znaczenie Interfejs Umax Imax Lmax- okablowanie Przełącznik łazienkowy Cyfrowy 3,3 V DC 1 mA 30 m Sygnał wejściowy błędów filtra zewnętrznego Cyfrowy 3,3 V DC 1 mA 30 m Przełącznik trybu gotowości (Stand-by) Cyfrowy 3,3 V DC 1 mA 30 m Czujnik temperatury ComfoHood...
  • Page 76 Struktura menu — menu instalatora jednostki wentylacyjnej USTAW. INSTALATORA Hasło: Patrz instrukcja jednostki wentylacyjnej URUCHOMIENIE USTAW. PŁ. GŁÓWNEJ USTAW. OPTION BOX WSTĘPNE UST. WENT. PRZEŁ. ŁAZIENKOWY STEROWANIE WENT. PRZEŁ. COMFOHOOD USTAWIENIA FILTRÓW NAGRZEW. WTÓRNA WYSOKOŚĆ WEJŚCIE 0–10 V 1 OBECNOŚĆ PALENISKA WEJŚCIE 0–10 V 2...
  • Page 77 Procedura instalacyjna Podczas instalacji należy pamiętać o zakłóceniach Kabel niskiego napięcia elektromagnetycznych (EMC). Przełącznik łazienkowy ■ W przypadku kabli niskiego napięcia użyj kabla Sygnał wejściowy błędów fi ltra zewnętrznego spełniającego następujące wymogi: Przełącznik trybu gotowości (Stand-by) – Maksymalna długość: 30 m Czujnik temperatury ComfoHood –...
  • Page 78: Przełącznik Łazienkowy

    fi ltra zewnętrznego. Procedury uruchomienia Procedury uruchomienia Po zainstalowaniu uruchom przełącznik w menu USTAWIENIA OPTION BOX jednostki wentylacyjnej. Po zainstalowaniu nie ma potrzeby uruchamiania Należy ustawić następujące menu: przełącznika w jednostce wentylacyjnej. Element menu Opis działania...
  • Page 79: Comfohood

    W przypadku ustawienia czasu w menu USTAW. specjalnie dla jednostki wentylacyjnej. OPTION BOX, zawór ComfoHood pozostanie otwarty, a jednostka wentylacyjna pozostanie w ST. WENT. 3 przez Montaż ustawiony czas po otwarciu przełącznika.
  • Page 80: Nagrzewnica Wtórna

    ComfoFond-L Q, pozostanie on wyłączony. Procedury uruchomienia Jeśli wymiennik ComfoFond-L daje słabe wyniki Po zainstalowaniu uruchom nagrzewnicę wtórną w pod względem temperatury powietrza zewnętrznego menu USTAW. OPTION BOX jednostki wentylacyjnej. w jednostce wentylacyjnej, wyłączy wymiennik Należy ustawić następujące menu: ComfoFond-L Q. Element menu Opis działania...
  • Page 81 0–10 V na żądanie odpowiedniego przepływu powietrza Po zainstalowaniu uruchom podłączone czujnik(i) i/lub między minimalnym i maksymalnym przełacznik(i) w menu USTAW. OPTION BOX jednostki ustawionym przepływem powietrza. wentylacyjnej. Włącz podłączone wejście. PRZEPŁ. USTAW. WST. urządzenie przetłumaczy sygnał...
  • Page 82: Regulowany Zawór Gruntowego Wymiennika Ciepła

    PRIORYTET 0–10 V TYLKO AUTO wejściowe przy wyjściu 100% ustawia się w menu Czujnik ciśnienia Option Box dla każdego konkretnego wejścia 0-10 V po jego aktywowaniu. Domyślnie wyjście 0% jest Element menu Nastawa generowane przy wejściu 0 V, natomiast wyjście 100% WEJŚCIE W 0%...
  • Page 83: Złącze Zasilania Sieciowego

    13 Złącze ComfoNet Obsługa Jednostka wentylacyjna będzie sterować złączem 6b Każde złącze ComfoNet można połączyć z (zasilanie) za pomocą informacji otrzymywanych od dowolnym urządzeniem ComfoNet. Jeśli złącza 6a (czujnik temperatury). chcesz podłączyć więcej urządzeń W pierwszych dwóch minutach po włączeniu zasilania ComfoNet niż...
  • Page 84: Sterownik Proporcjonalno-Całkująco-Różniczkujący (Pid)

    15 Sterownik proporcjonalno-całkująco-różniczkujący (PID) Sterownik proporcjonalny Pasmo proporcjonalne, błąd Nastawa błąd Sterownik całkujący wentylacja 0-10 V Czas całkowania, suma błędów Sterownik różniczkujący Czas różniczkowania, zmiana błędu zmierzona wartość 0–10 V czujnik 0-10 V Większość sterowników jednostki wentylacyjnej Sygnał wyjściowy sterownika całkującego zależy od to sterowniki typu PID (proporcjonalno-całkująco- sumy błędów w czasie oraz czasu całkowania.
  • Page 85: Metoda Kontroli

    16 Metoda kontroli Sterowanie ComfoAir Q Urządzenie Sterowanie wentylacja Sygnał wyjściowy 0–10 V Ustawienia Sterowanie oznacza, że wyjście podłączonego Gdyby podłączony był czujnik, oznaczałoby to, urządzenia bezpośrednio wpływa na wydajność. że wysoki poziom czujnika odpowiada wysokiej Zazwyczaj z tej możliwości należy korzystać w wydajności.
  • Page 86 Índice Seguridad ....................................87 Especificaciones técnicas ................................88 Interruptor de cuarto de baño ..............................92 Filtro externo ....................................92 Interruptor de modo en espera ..............................92 1 ................................................ 93 ComfoHood Contacto de mensajes de error ..............................93 ComfoFond-L Q ..................................93 Calentador posterior ...................................94 Entradas 0-10 V ..................................95 Válvula del intercambiador de calor del geotérmico regulado......................96 Conector de corriente .................................97 Conector ComfoNet ...................................97...
  • Page 87 ComfoAir Q, Comfort Vent Q y Aeris NEXT de forma causar lesiones físicas o perjudicar el óptima y segura. En este documento, se hará referencia al Option Box como «dispositivo» y a las rendimiento del sistema de ventilación. unidades ComfoAir Q, Comfort Vent Q y Aeris NEXT ■...
  • Page 88 2 Especifi caciones técnicas Posición Pieza Comprobación de entrega Option Box Cable de alimentación 230 V (2,5 m) Cable ComfoNet (2,5 m) Bolsa de accesorios Cubierta de protección Conectores ComfoNet Placa de identifi cación Conectores de elementos auxiliares (véase el diagrama de cableado para más...
  • Page 89 Diagrama de cableado Especificaciones técnicas Código Significado Interfaz Umax Imax Cableado Lmax Interruptor de cuarto de baño Digital 3,3 V CC 1 mA 30 m Entrada de error del filtro externo Digital 3,3 V CC 1 mA 30 m Interruptor de modo en espera Digital 3,3 V CC 1 mA...
  • Page 90 Estructura de los menús del instalador de la unidad de ventilación AJUSTES INSTALADOR Contraseña: Ver el documento de la unidad de ventilación PUESTA EN MARCHA AJUSTES PLACA PRINCIPAL AJUSTES OPTION BOX AJUSTES VENTILACIÓN INTERRUPTOR BAÑO TIPO CONTROL VENT. COMFOHOOD AJUSTES DE FILTROS...
  • Page 91 Procedimiento de instalación Sea consciente de la posible interferencia Cable de señal electromagnética (CEM) durante la instalación. Interruptor de cuarto de baño ■ Como cable de señal, utilice los que cumplan los Entrada de error del fi ltro externo siguientes requisitos: Interruptor de modo en espera - Longitud máxima: 30 m Sensor de temperatura ComfoHood...
  • Page 92 Puesta en marcha Tras la instalación, proceda a la puesta en marcha del interruptor en el menú AJUSTES OPTION BOX de la Tras la instalación, no es necesario poner en marcha el unidad de ventilación. Se deben ajustar los siguientes interruptor en la unidad de ventilación.
  • Page 93 Sin embargo, Funcionamiento es posible ajustar un temporizador de prolongación La unidad de ventilación cerrará el conector 5 cuando en el menú AJUSTES OPTION BOX de la unidad de aparezca un error en la misma. ventilación. 8 ComfoFond-L Q Funcionamiento El dispositivo está...
  • Page 94 Tras la instalación, proceda a la puesta en marcha del los resultados que aporta el ComfoFond-L Q a la unidad calentador posterior en el menú AJUSTES OPTION BOX de ventilación sobre la temperatura del aire del exterior de la unidad de ventilación.
  • Page 95 Tras la instalación, proceda a la puesta en marcha de la sensor(i) y/o interruptor(y) conectada en el menú Elemento del menú Función AJUSTES OPTION BOX de la unidad de ventilación. CAUDAL la unidad de ventilación traducirá la señal Habilite la entrada conectada.
  • Page 96 10,0 V (100 % HR) tensión de entrada para una salida del 100 % se ENTRADA A 100% 2,0V (20 % HR) ajustan en el menú del Option Box para cada entrada MÉTODO CONTROL 0-10 V específi ca, tras habilitar la entrada. De forma...
  • Page 97 13 Conector ComfoNet Puesta en marcha Tras la instalación, no es necesario poner en marcha el Cada conector ComfoNet se puede intercambiador de calor del geotérmico en la unidad de conectar a cualquier dispositivo ComfoNet. ventilación. Si desea conectar más dispositivos ComfoNet que la cantidad de conectores Funcionamiento disponibles para ello, instale un...
  • Page 98 15 Controlador Proporcional Integral Derivativo (PID) Controlador proporcional Banda proporcional, error Consigna error Controlador integral ventilación 0-10 V Tiempo integral, suma de errores Controlador derivativo Tiempo diferencial, cambio de error valor medido 0-10 V sensor 0-10 V La mayoría de los controladores de la unidad de La salida del controlador integral depende de la suma ventilación son de tipo PID (proporcional integral de errores a lo largo del tiempo y del tiempo integral.
  • Page 99 16 Método de control Mando ComfoAir Q Dispositivo Mando ventilación Salida 0-10 V Ajustes El mando significa que la salida del dispositivo En caso de que se conecte un sensor, significa que un conectado condiciona directamente el volumen. De nivel alto del sensor se corresponde con un volumen modo típico, se debe utilizar para los dispositivos de elevado.
  • Page 100 Deutschland (Germany) España (Spain) Zehnder Group Deutschland GmbH Österreich (Austria) Zehnder Group Iberica IC, S.A. Almweg 34 Wernig kunststoff- und lüftungstechnik Argenters, 7, 77933 Lahr T 04227.22130 Parque Tecnológico del Vallès T +49 7821 586 0 www.wernig.at...

Table des Matières