Velleman NETBPEM2 Mode D'emploi
NETBPEM2/NETBSEM2 – ENERGY METER 230V / 16A
1. Introduction
To all residents of the European Union
Important environmental information about this product
This symbol on the device or the package indicates that disposal of the device after its lifecycle could harm the
environment.
Do not dispose of the unit (or batteries) as unsorted municipal waste; it should be taken to a specialized
company for recycling.
This device should be returned to your distributor or to a local recycling service.
Respect the local environmental rules.
If in doubt, contact your local waste disposal authorities.
Thank you for choosing Velleman! Please read the manual thoroughly before bringing this device into service. If the device was
damaged in transit, don't install or use it and contact your dealer.
2. Safety Instructions
• Connect this meter to a 230VAC / 50~60Hz mains only.
• Note that damage caused by user modifications to the device is not covered by the warranty.
• Disconnect the device from the mains and remove the batteries to clean it or when not in use.
• Never insert objects into the meter.
• Do not use a damaged or deformed meter.
3. Use
Battery Instalment
Open the battery compartment using an appropriate screwdriver. Insert 2 x LR44 batteries minding the polarity. Close
the battery compartment and press the MASTER CLEAR button to reset the meter.
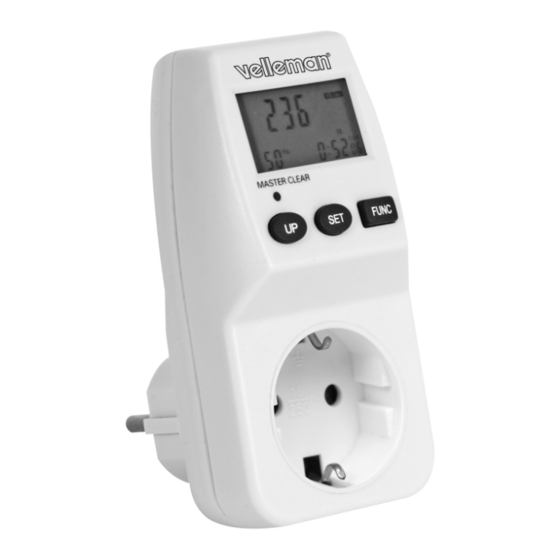
Description
1. value display
2. function display
3. value display
4. clock/weekday display
Function Display
Press
repeatedly to display the clock + line voltage (
clock + real power + power factor (
) → max. line power + time of max. line power + power factor (
→ clock + accumulative power factor (
) → total on time + total electrical charge (
price 1 + total electric charge price 1 (
(
).
Hold
pressed to erase the memory.
Setting the Clock
Press
until the clock is displayed. Press
, switch to the next item and confirm with
your appliance into the meter.
Function Setting
Price 1/2
Press
until
is displayed. Hold
to enter the setting mode for price 1, set the value of the blinking item with
with
. Press
and then
to enter the setting mode for price 2, set the value of the blinking item with
, switch to the next item and confirm with
Overload
After setting price modes 1 and 2, press
the value of the blinking item with
, switch to the next item and confirm with
the load value is exceeded.
4. Technical Specifications
Operating voltage
Max. Load
Current Measuring Range
Power Supply
For more info concerning this product, please visit our website www.velleman.eu.
The information in this manual is subject to change without prior notice.
NETBPEM2/NETBSEM2 – ENERGIEMETER 230V / 16A
1. Inleiding
Aan alle ingezetenen van de Europese Unie
Belangrijke milieu-informatie betreffende dit product
Dit symbool op het toestel of de verpakking geeft aan dat, als het na zijn levenscyclus wordt weggeworpen, dit
toestel schade kan toebrengen aan het milieu.
Gooi dit toestel (en eventuele batterijen) niet bij het gewone huishoudelijke afval; het moet bij een
gespecialiseerd bedrijf terechtkomen voor recyclage.
U moet dit toestel naar uw verdeler of naar een lokaal recyclagepunt brengen.
Respecteer de plaatselijke milieuwetgeving.
Hebt u vragen, contacteer dan de plaatselijke autoriteiten inzake verwijdering.
Dank u voor uw aankoop! Lees deze handleiding grondig voor u het toestel in gebruik neemt. Werd het toestel
beschadigd tijdens het transport, installeer het dan niet en raadpleeg uw dealer.
) → clock + line current + power factor (
) → total on time price 2 + total electric charge price 2
to enter the setting mode, set the value of the blinking item with
. After the clock has been set, plug the meter into the mains and plug
pressed until the meter enters the
, switch to the next item and confirm
.
to enter the
mode. Press
to enter the setting mode, set
.
230VAC / 50Hz
16A, 3600W
0.02 ~ 16A
2 x 1.5V LR44 (order code V13GA or V13GAC, incl.)
2. Veiligheidsinstructies
• Koppel deze meter enkel aan een stopcontact van 230VAC / 50~60Hz.
• Schade door wijzigingen die de gebruiker heeft aangebracht aan het toestel vallen niet onder de garantie.
• Ontkoppel de meter van het lichtnet en verwijder de batterijen na gebruik of om de meter schoon te maken.
• Steek nooit objecten in de meter.
• Vermijd gebruik van een beschadigde of vervormde meter.
3. Gebruik
Plaatsen van de batterijen
Open het batterijvak met een gepaste schroevendraaier en plaats 2 x LR44-batterijen. Let op de polariteit. Sluit het
batterijvak en druk op MASTER CLEAR om de meter terug te stellen.
Omschrijving
1. waardeaflezing
2. functieweergave
3. waardeaflezing
4. klok-/weekdagweergave
Functieweergave
Druk herhaaldelijk op
vermogenfactor (
lijnvermogen + vermogenfactor (
ingeschakeld + totale elektrische belasting (
belasting tarief 1 (
(
Houd
ingedrukt om de opgeslagen waarden te wissen.
Klokinstelling
Druk op
item met
the mains and plug your appliance into the meter.
Functie-instelling
Tarief 1/2
Druk op
instelmodus voor tarief 1 weer te geven, stel het knipperende item met
bevestig met
knipperende item met
Overbelasting
Na de instelling van tarief 1/2, druk op
geven, stel het knipperende item met
verschijnt op de display indien de ingegeven belastingwaarde wordt overschreden.
4. Technische specificaties
Werkspanning
Max. belasting
Meetbereik stroom
Voeding
Voor meer informatie omtrent dit product, zie www.velleman.eu.
De informatie in deze handleiding kan te allen tijde worden gewijzigd zonder voorafgaande kennisgeving.
NETBPEM2/NETBSEM2 – WATTMÈTRE 230V / 16A
1. Introduction
) →
Aux résidents de l'Union européenne
)
Des informations environnementales importantes concernant ce produit
Ce symbole sur l'appareil ou l'emballage indique que l'élimination d'un appareil en fin de vie peut polluer l'environnement.
) → total on time
Ne pas jeter un appareil électrique ou électronique (et des piles éventuelles) parmi les déchets municipaux non
sujets au tri sélectif ; une déchèterie traitera l'appareil en question.
Renvoyer les équipements usagés à votre fournisseur ou à un service de recyclage local.
Il convient de respecter la réglementation locale relative à la protection de l'environnement.
En cas de questions, contacter les autorités locales pour élimination.
Nous vous remercions de votre achat ! Lire la présente notice attentivement avant la mise en service de l'appareil. Si
l'appareil a été endommagé pendant le transport, ne pas l'installer et consulter votre revendeur.
2. Prescriptions de sécurité
mode. Press
• Raccorder le wattmètre à un réseau électrique de 230V / 50-60Hz.
• Les dommages occasionnés par des modifications à l'appareil par le client, ne tombent pas sous la garantie.
• Déconnecter le wattmètre du réseau électrique et retirer les piles après usage ou avant de le nettoyer.
• Ne jamais insérer d'objet dans le mètre.
• Éviter d'utiliser un wattmètre endommagé ou déformé.
will flash when
3. Emploi
Insertion des piles
Ouvrir le compartiment des piles à l'aide d'un tournevis approprié et insérer 2 piles LR44 en respectant la polarité.
Refermer le compartiment des piles et enfoncer MASTER CLEAR pour remettre à zéro le wattmètre.
Description
1. affichage de la valeur
2. affichage de la fonction
3. affichage de la valeur
4. affichage de l'heure/du jour de la semaine
Affichage de la fonction
Enfoncer
facteur de puissance (
+ heure de puissance en ligne max. + facteur de puissance (
(
) → durée de service + totalité de charge électrique (
charge électrique tarif 1 (
(
Maintenir enfoncé
Configuration de l'horloge
Enfoncer
digit clignotant avec
connecter le wattmètre au réseau électrique et insérer la fiche de l'appareil dans le wattmètre.
Configuration des fonctions
Tarif 1/2
Enfoncer
le mode
clignotant avec
mode de configuration du second tarif, configurer le digit clignotant avec
confirmer avec
om achtereenvolgens weer te geven: klok + lijnspanning (
) → klok + reëel vermogen + vermogenfactor (
) → klok + accumulatieve vermogenfactor (
) → totale tijd ingeschakeld tarief 1 + totale elektrische
) → totale tijd ingeschakeld tarief 2 + totale elektrische belasting tarief 2
).
tot de klok wordt weergegeven. Druk op
om de instelmodus weer te geven, stel het knipperende
in, schakel naar het volgend item en bevestig met
tot
verschijnt. Houd
ingedrukt tot de meter
. Druk op
en daarna op
om de instelmodus voor tarief 2 weer te geven, stel het
in, schakel naar het volgend item en bevestig met
om
weer te geven. Druk op
in, schakel naar het volgend item en bevestig met
230VAC / 50Hz
16A, 3600W
0.02 ~ 16A
2 x 1.5V LR44 (ordercode V13GA of V13GAC, meegelev.)
à plusieurs reprises pour afficher : heure + tension en ligne (
) → heure + puissance réelle + facteur de puissance (
) → durée de service tarif 2 + totalité de charge électrique tarif 2
).
pour effacer les données en mémoire.
jusqu'à ce que l'heure s'affiche. Enfoncer
pour accéder au mode de configuration, configurer le
, commuter vers le digit suivant et confirmer avec
jusqu'à ce que
s'affiche. Maintenir enfoncé
. Enfoncer
pour accéder au mode de configuration du premier tarif, configurer le digit
, commuter vers le digit suivant et confirmer avec
.
) → klok + lijnstroom +
) → max. lijnvermogen + uur van max.
) → totale tijd
. After the clock has been set, plug the meter into
weergeeft. Druk op
om de
in, schakel naar het volgend item en
.
om de instelmodus weer te
.
) → heure + courant en ligne +
) → puissance en ligne max.
) → heure + facteur de puissance accumulé
) → durée de service tarif 1 + totalité de
. Après la configuration de l'heure,
jusqu'à ce que the le wattmètre affiche
. Enfoncer
et
pour accéder au
, commuter vers le digit suivant et

Manuels Connexes pour Velleman NETBPEM2


Sommaire des Matières pour Velleman NETBPEM2
- Page 1 If in doubt, contact your local waste disposal authorities. Functie-instelling Tarief 1/2 Thank you for choosing Velleman! Please read the manual thoroughly before bringing this device into service. If the device was Druk op verschijnt. Houd ingedrukt tot de meter weergeeft.
- Page 2 Halten Sie gedrückt, um die gespeicherten Werte zu löschen. ¡Gracias por haber comprado el NETBPEM2/NETBSEM2! Lea atentamente las instrucciones del manual antes de usarlo. Einstellung der Uhr Si el aparato ha sufrido algún daño en el transporte no lo instale y póngase en contacto con su distribuidor.