Table des Matières
Publicité
Les langues disponibles
Les langues disponibles
Liens rapides
293 Wright Street • Delavan, WI 53115
Phone: 800.937.6664
www.omnifilter.com
Tools and Fittings Required
•
Pencil
•
Utility knife (for plastic tubing)
•
Phillips screwdriver
•
Towel
•
Tape measure
•
Wall anchors
For sinks without extra hole for faucet
•
Hand or electric drill
•
Center punch
•
3/32-inch, 1/4-inch and 1/2-inch drill bits
•
File
Parts Included
•
Filter head assembly
•
Fittings kit
•
Lead-free faucet kit
•
6 ft. of 1/4-inch plastic tubing
•
1750R filter cartridge
•
Mounting screws and bracket
•
Inlet supply adapter
•
Teflon
tape
®
Optional Materials
•
Shut-off valve
•
Saddle tap valve with shut-off
The US1750 with the 1500R replacement cartridge
is tested and certified to NSF/ANSI Standard 42
for the reduction of chlorine taste and odor, and
Particulate Class II.
The US1750 with the 1750R replacement cartridge is
tested and certified to NSF/ANSI Standard 42 for the
reduction of chlorine taste and odor, and Particulate
Class I and against Standard 53 for the reduction
of Cyst, Lead, Lindane, Atrazine, Turbidity, Mercury
and Asbestos.
For further operating, installation, maintenance,
parts or assistance:
Call OMNIFILTER Customer Service at:
800.937.6664
©2009 Pentair Residential Filtration, LLC
©2009 Pentair Residential Filtration, LLC
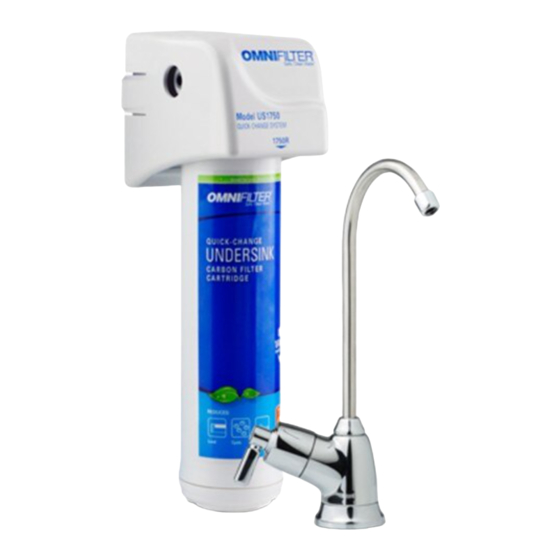
Model US1750
Quick-Change Filter System
INSTALLATION INSTRUCTIONS
English . . . . . . . . . . . . . . . . . . . . . . . . . . . . . . . . . . . . . Pages 2-7
Replacement Parts . . . . . . . . . . . . . . . . . . . . . . . . . . . . . .Page 6
Modelo US1750
Sistema de filtro de cambio rápido
INSTRUCCIONES DE INSTALACIÓN
Español . . . . . . . . . . . . . . . . . . . . . . . . . . . . . . . . . . Páginas 8-13
Piezas de repuesto . . . . . . . . . . . . . . . . . . . . . . . . . . . Página 12
Modèle US1750
Système de filtre à
changement rapide
CONSIGNES D'INSTALLATION
Français . . . . . . . . . . . . . . . . . . . . . . . . . . . . . . . . . . Pages 14-19
Pièces de rechange . . . . . . . . . . . . . . . . . . . . . . . . . . . . .Page 18
Herramientas y conexiones necesarias
•
Lápiz
•
Cuchillo multiuso (para tubo plástico)
•
Atornillador Phillips
•
Toalla
•
Cinta métrica
•
Anclajes de pared
Para fregaderos sin orificio adicional para llave
•
Taladro manual o eléctrico
•
Punzón de centrar
•
Brocas de 3/32 pulg., 1/4 pulg. y 1/2 pulg.
•
Lima
Piezas incluidas
•
Cabezal de filtros
•
Juego de acoples
•
Conjunto de llave sin plomo
•
Tubo plástico de 1,8 m (6 pies) x 1/4 pulg.
•
Cartucho filtrante 1750R
•
Soporte y tornillos de montaje
•
Adaptador de suministro de entrada
•
Cinta Teflon
®
Materiales opcionales
•
Válvula de cierre
•
Válvula de toma (tipo montura) con cierre
El US1750 con el cartucho de repuesto 1500R ha
sido probado y certificado de acuerdo con la Norma
42 de NSF/ANSI para la reducción del sabor y olor a
cloro, y de las partículas de clase II.
El US1750 con el cartucho de repuesto 1750R ha
sido probado y certificado de acuerdo con la Norma
42 de NSF/ANSI para la reducción del sabor y olor a
cloro, y de las partículas de clase I; y de acuerdo con
la Norma 53 para la reducción de parásitos, plomo,
lindano, atrazina, turbiedad, mercurio y asbesto.
Para mayor información sobre la operación,
instalación o el mantenimiento:
Llame al Servicio al Cliente de OMNIFILTER:
800.937.6664
Outils et raccords nécessaires
•
Crayon de bois
•
Couteau à lame rétractable
(pour tube plastique)
•
Tournevis cruciforme Phillips
•
Serviette
•
Mètre à ruban
•
Chevilles d'ancrage
Pour éviers sans trou supplémentaire
pour le robinet
•
Perceuse à main ou électrique
•
Pointeau
•
Forets de 3/32 po, ¼ po et 1/2 po
•
Lime
Pièces incluses
•
Ensemble de tête de filtre
•
Kit de raccords
•
Kit de robinet sans plomb
•
1,8 M (6 pieds) de tube plastique de ¼ po
•
Cartouche filtrante 1750R
•
Patte et vis de fixation
•
Adaptateur d'arrivée
•
Ruban Téflon
®
Matériels en option
•
Robinet d'arrêt
•
Robinet auto-forant avec arrêt
Le US1750 avec la cartouche de rechange 1500R a
été testé et homologué selon la norme NSF/ANSI 42
pour la réduction des goûts et odeurs de chlore et
des particules de Classe II.
Le US1750R avec la cartouche de rechange 1750R a
été testé et homologué selon la norme NSF/ANSI 42
pour la réduction des goûts et odeurs de chlore et des
particules de Classe I et selon la norme 53 pour la
réduction de la turbidité et de la teneur en parasites,
plomb, lindane, atrazine, mercure et amiante.
Pour de tout autre renseignement concernant le
fonctionnement, l'installation ou l'entretien :
Appelez le service à la clientèle en
composant le : 800.937.6664
Publicité
Table des Matières

Manuels Connexes pour Omnifilter US1750


Sommaire des Matières pour Omnifilter US1750
- Page 1 • Robinet auto-forant avec arrêt The US1750 with the 1500R replacement cartridge El US1750 con el cartucho de repuesto 1500R ha Le US1750 avec la cartouche de rechange 1500R a is tested and certified to NSF/ANSI Standard 42 sido probado y certificado de acuerdo con la Norma été...
-
Page 2: Operating Specifications
OPERATING SPECIFICATIONS INSTALLATION INSTRuCTIONS Continued 1. Water Supply Connection Pressure Range: 30–125 psi The inlet supply adapter fits 1/2-inch 14 NPS threads. If local codes permit, it may be used to Temperature Range: 40–100°F connect the system to the cold water supply line. Turbidity: 5 NTU max. NOTE: If local codes do not permit the use of the Rated Service Flow: inlet supply adapter, alternate connectors can be 1500R Cartridge 0.70 gpm obtained from your local retailer. 1750R Cartridge 0.60 gpm Turn off the cold water supply. If the cold water Filter Capacity: line does not have a shut-off valve under the 1500R Cartridge 2,500 gallons or sink, one should be installed. 6-month cartridge life Open the cold water faucet and allow water to 1750R Cartridge 750 gallons or drain from line. -
Page 3: Vertical Installation
INSTALLATION INSTRuCTIONS Continued 2. Faucet Location Selection continued NOTE: The drinking water faucet should be positioned with function, convenience and appearance in mind. An adequate flat area is required to allow the faucet base to rest securely. The faucet fits through a 1/2-inch hole. Most sinks have pre-drilled 1 ⁄ -inch or ⁄ -inch diameter holes that accommodate this system’s faucet. If a pre-drilled hole is not available, it will be necessary to drill a 1/2-inch hole into the sink (Figure 2). Line the bottom of the sink with newspaper to prevent debris, parts or tools from falling into drain or disposal. Place masking tape over area to be drilled to help prevent scratches if drill bit slips. Mark hole with a center punch. Use a 1/4-inch drill bit to drill the Small pilot hole. washer Using 1/2-inch drill bit, drill a hole completely through the sink. Smooth rough edges with a file and remove masking tape. Escutcheon Large plate washer 3. Mount the Faucet Use small parts bag from faucet bag. - Page 4 INSTALLATION INSTRuCTIONS Continued 5. Connect the System to Faucet CAUTION Do not bend or kink tube when inserting. Determine the length of plastic tubing needed to connect the outlet (right) side of the filter with the faucet. Be sure to allow enough tubing to prevent kinking and cut the tubing squarely. Slide compression nut and ferrule over the tubing. Slide the tubing insert into the tube. Push tube into the bottom of the faucet stem. Slide the compression nut up and tighten until slight resistance is felt. Then tighten with a wrench 1 ⁄ turns. NOTE: Do not over-tighten the compression nut. Tighten further only Tubing insert if leaks appear after putting the system into operation. Ferrule Use a marker to mark 5/8 inch from remaining end of the tubing. Compression nut Wet the end of the tube. Insert the end into the white collar fitting on the outlet (right) side of the system. The tube should go in up to the mark. NOTE: Routine maintenance and cartridge changes will not require you to disconnect the tubing from the filter system; however, tubing may be quickly and easily removed from the fitting if necessary. First 5/8"...
-
Page 5: Filter Cartridge Replacement
NOTE: A drinking water cartridge may contain carbon fines (very fine black powder). If carbon fines appear in the water, discard water. More flushing is required if carbon fines are present. NOTE: Initially, filtered water may appear cloudy. If cloudiness in a glass of water disappears from the bottom, fine air bubbles are present. This air within the water will disappear within a few weeks after installation. INSTALLATION IS NOW COMPLETE. FILTER CARTRIdGE REPLACEMENT NOTE: The life of the filter cartridge depends on water volume used and the quality of the feed water. It is recommended that the filter cartridge be replaced every 6 months, or when there is a noticeable change in taste, odor or flow of filtered water. OMNIFILTER 1500R or 1750R Cartridge for the system. Purchase an • Read all instructions before replacing the filter cartridge. • Relieve pressure by turning off the water supply to the system and opening faucet until water flow stops. Place a bucket or towel under the system to catch any water drips. Place hand on filter head assembly to steady the system. Rotate the filter cartridge 1/4 turn counterclockwise until no resistance is felt. Pull the cartridge down and straight out from the filter head assembly (Figure 1). Place hand on filter head assembly to steady the system. Align the tab on the back of the filter cartridge with the slot in the filter head assembly. Slide the cartridge filter up into the filter head... -
Page 6: Replacement Parts
Leaks from tubing fittings SH244771 Faucet Assembly Relieve pressure. Turn off the water supply to the system and SH144072-03 1/4-inch tubing 6 ft. open faucet until water flow stops. Place a bucket or towel SH244606 Teflon Tape 30" ® under the system to catch any water drips. SH147911 Manual Depress collet on system or inlet supply adapter tubing fittings and pull tubing from fitting. Inspect surface of tubing for scratches or debris. Clean or cut back tubing to access clean surface. Wet the end of the inlet tubing and press into the inlet fitting of the system. Ensure the tubing is fully pushed past the fitting o-rings. Place system into operation and check for leaks. If leaks persist, turn off the water supply and contact OMNIFILTER Customer Service at 800.937.6664 M–F 7:30 AM–5 PM CST. For replacement parts contact your local OMNIFILTER retailer or call OMNIFILTER Customer Service at 800.937.6664. • 6 •... -
Page 7: Performance Data
This system is designed to allow the installation of a1500R or a = 7.5 ±1 1750R filter cartridge. Each cartridge has specific performance Temperature = 68°F ±5F° claims that are listed below. Testing was performed under standard laboratory conditions; actual performance may vary. uS1750 System with 1500R Filter Cartridge installed Operating Requirements Pressure = 30–125 psi (2.11–8.79 kg/cm This system has been tested according to NSF/ANSI 42 for Temperature = 40–100°F reduction of the substances listed below. The concentration... -
Page 8: Especificaciones De Funcionamiento
ESPECIFICACIONES dE FuNCIONAMIENTO INSTRuCCIONES dE INSTALACIÓN 1. Conexión del suministro de agua 30–125 psi Gama de presión: El adaptador de suministro de entrada acopla en 4,4–37,8ºC (40–100°F) Gama de temperatura: roscas 14 NPS de 1/2 pulg. Si los códigos locales 5 NTU máx. lo permiten, éste puede utilizarse para conectar el Turbiedad: sistema al tubo de suministro de agua fría. Flujo de servicio nominal: NOTA: Si los códigos locales no permiten el uso Cartucho 1500R 2,65 Lpm (0,70 gpm) del adaptador de suministro de entrada, pueden Cartucho 1750R 2,27 Lpm (0,60 gpm) obtenerse conectores equivalentes en su distribuidor Capacidad del filtro: local de venta al por menor. Cartucho 1500R duración del cartucho: 9.463 litros Cierre el suministro de agua fría. Si el tubo de (2.500 galones) ó 6 meses agua fría no tiene válvula de cierre debajo del Cartucho 1750R duración del cartucho: 2.839 litros fregadero (lavaplatos), debe instalarse una válvula. - Page 9 INSTRuCCIONES dE INSTALACIÓN ContinuACiÓn 2. Selección de la ubicación de la llave NOTA: La llave de agua potable debe ubicarse teniendo en cuenta la función, comodidad y apariencia. Se requiere un área plana adecuada para permitir que la base de la llave se apoye firmemente. La llave cabe a través de un orificio de 1/2 pulgada.
- Page 10 INSTRuCCIONES dE INSTALACIÓN ContinuACiÓn 5. Conexión del sistema a la llave PRECAUCIÓN Al realizar la inserción, no pliegue ni retuerza el tubo. Determine la longitud necesaria del tubo de plástico para conectar el lado de salida (derecho) del filtro con la llave. Asegúrese de dejar suficiente longitud de tubo para evitar la formación de pliegues, y corte el tubo en ángulo recto. Deslice el collar y tuerca de compresión sobre el tubo. Deslice el elemento insertable del tubo de plástico dentro del tubo. Empuje el tubo dentro de la parte inferior del vástago de la llave. Deslice la tuerca de compresión hacia arriba y apriete hasta que se sienta una leve resistencia. Luego apriete realizando 1½ vuelta con una herramienta. Elemento insertable del tubo NOTA: No apriete excesivamente la tuerca de compresión. Apriete Collar adicionalmente sólo si aparecen fugas después de colocar en Tuerca de compresión funcionamiento el sistema.
- Page 11 Este aire dentro del agua desaparecerá dentro de unas pocas semanas después de la instalación. LA INSTALACIÓN AHORA ESTÁ TERMINAdA. REEMPLAZO dEL CARTuCHO FILTRANTE NOTA: La duración del cartucho filtrante depende del volumen de agua utilizado y la calidad del agua de entrada. Se recomienda reemplazar el cartucho filtrante cada 6 meses, o cuando haya un cambio evidente en el sabor, olor o flujo del agua filtrada. Compre un cartucho 1500R OMNIFiLteR ó un cartucho 1750R • OMNIFiLteR para el sistema. Lea todas las instrucciones antes de reemplazar los cartuchos filtrantes. • Descargue la presión cerrando el suministro de agua del sistema y abriendo la llave hasta que el flujo de agua se detenga. Coloque un balde o toalla debajo del sistema para recoger cualquier goteo de agua. Coloque la mano en el cabezal de filtros para estabilizar el sistema. Gire el cartucho filtrante 1/4 de vuelta en sentido antihorario hasta que no se sienta resistencia. Tire del cartucho hacia abajo y en...
-
Page 12: Solución De Problemas
Número de pieza Descripción Cant. Descargue la presión. Cierre el suministro de agua del sistema SH455911-127 Cartucho filtrante 1750R y abra la llave hasta que el flujo de agua se detenga. Coloque ó un balde o toalla debajo del sistema para atrapar cualquier goteo de agua. SH455910-127 Cartucho filtrante 1500R Remueva el cartucho e inspeccione los arosellos (anillos “O”) SH357268 Cabezal de filtros para verificar que estén limpios y asentados apropiadamente. SH244747 Conjunto US1750 Instale el cartucho filtrante. Coloque en funcionamiento el SH243210 Soporte de montaje en sistema y compruebe que no haya fugas. Si la fuga persiste, pared cierre el suministro de agua y comuníquese con Servicio al SH243217 Tornillos de montaje Cliente de OMNIFILTER al teléfono 800.937.6664, de lunes a viernes, 7:30 a 17:00 h, hora estándar del centro de los SH146985 Etiqueta adhesiva de EE.UU. (CST). indicación de cambio SH143431 Adaptador de suministro Fugas por los acoples del tubo de entrada Descargue la presión. Cierre el suministro de agua del sistema... -
Page 13: Datos De Rendimiento
= 20°C ±2,5C° (68°F ±5F°) cartucho tiene valores de rendimiento específicos que se El análisis se realizó bajo condiciones normales de laboratorio; el rendimiento real podría variar. enumeran a continuación. Requisitos de funcionamiento Sistema uS1750 con cartucho filtrante 1500R instalado Presión = 30–125 psi (2,1–8,62 bar; 2,11–8,79 kg/cm Temperatura = 4,4–37,8°C (40–100°F) -
Page 14: Caractéristiques Techniques D'utilisation
CARACTÉRISTIQuES TECHNIQuES d’uTILISATION CONSIGNES d’INSTALLATION Suite 1. Raccordement de l’arrivée d’eau Gamme de pression : 30–125 psi L’adaptateur d’arrivée convient à un filetage de ½ Gamme de température : 4,4-37,8°C po – 14 NPS. Si les règlements locaux l’autorisent, on peut l’utiliser pour raccorder le système au tuyau Turbidité : 5 NTU maxi d’arrivée d’eau froide. Débit nominal de service : REMARQuE : Si les règlements locaux ne Cartouche 1500R 2,65 lpm permettent pas l’utilisation de l’adaptateur d’arrivée, Cartouche 1750R 2,27 lpm vous pouvez vous procurer d’autres types de Capacité du filtre : raccords auprès de votre détaillant local. -
Page 15: Montage Du Robinet
CONSIGNES d’INSTALLATION Suite 2. Choix de l’emplacement du robinet Suite REMARQuE : Il faut placer le robinet d’eau potable là où il sera pratique et attrayant. Il convient de disposer d’une surface plate suffisante pour permettre à l’embase du robinet de reposer fermement. Le robinet est conçu pour passer dans un trou de ½... - Page 16 CONSIGNES d’INSTALLATION Suite 5. Raccordement du système au robinet ATTENTION : Ne faites pas de coudes ou de plis dans le tube lors de son insertion. Déterminez la longueur de tube plastique nécessaire au raccordement de la sortie du système (à droite) sur le robinet. Laissez suffisamment de mou pour empêcher que le tube ne fasse de plis et coupez le tube bien d’équerre. Glissez l’écrou à compression et la bague sur le tube. Enfilez le tube rapporté dans le tube. Enfoncez le tube à fond dans l’extrémité de la tige du robinet. Glissez l’écrou de compression vers le robinet et serrez-le jusqu’à ce que vous sentiez une légère résistance. Donnez-lui alors Tube rapporté 1½ tours à la clé. Bague REMARQuE : Ne serrez pas l’écrou de compression trop fort. Serrez- Écrou de compression le plus fort uniquement si une fuite apparaît après la mise en service du système.
-
Page 17: Remplacement Des Cartouches Filtrantes
Cet air mélangé à l’eau disparaîtra quelques semaines après la pose. LA POSE EST MAINTENANT TERMINÉE. REMPLACEMENT dES CARTOuCHES FILTRANTES REMARQuE : La durée de vie de la cartouche filtrante dépend du volume d’eau consommé et de la qualité de l’eau à l’arrivée. Il est conseillé de remplacer la cartouche filtrante tous les 6 mois, ou lorsqu’il y a un changement significatif dans le goût, l’odeur ou le débit de l’eau filtrée. OMNIFILTER 1500R ou 1750R pour le Procurez-vous une cartouche • système. Veuillez lire toutes les instructions avant de remplacer les cartouches • filtrantes. Dépressurisez le système en coupant son arrivée d’eau et en ouvrant le robinet jusqu’à ce que l’eau s’arrête de couler. Placez... -
Page 18: Dépannage
Fuites entre l’ensemble de tête de filtre Numéro de pièce Description Qté et la cartouche filtrante SH455911-127 Cartouche filtrante 1750R Dépressurisez le système en coupant l’alimentation en eau du système et en ouvrant le robinet jusqu’à ce que l’eau s’arrête SH455910-127 Cartouche filtrante 1500R de couler. Placez un seau ou une serviette sous le système pour recueillir l’eau qui pourrait s’égoutter. SH357268 Ensemble de tête filtrante SH244747 Kit US1750 Enlevez la cartouche et inspectez les joints toriques pour vous assurer qu’ils sont correctement positionnés et qu’ils sont SH243210 Patte de fixation au mur propres. SH243217 Vis de fixation Installez la cartouche filtrante. Mettez le système en service SH146985 Autocollant pour indiquer et contrôlez qu’il n’y a pas de fuite. Si les fuites persistent, la date de remplacement coupez l’arrivée d’eau et contactez le service client SH143431 Adaptateur d’arrivée d’OMNIFILTER au 800.937.6664 Lun–Ven 7h30–17h00... -
Page 19: Performances Techniques
Température = 20°C ±2,5C° cartouches apporte des performances spécifiques qui sont Les essais ont été effectués sous conditions standard de laboratoire; les performances réelles répertoriées ci-dessous. peuvent être différentes. Système uS1750 avec Conditions d’exploitation Pression = 2,1–8,62 bar (2,11–8,79 kg/cm cartouche filtrante 1500R installée Température = 4,4–37,8°C Turbidité... -
Page 20: Garantie Limitée Pour Le Système Rapide Quick Change
(2) incluir una prueba de la fecha de compra del producto Toutes les réclamations pour produits défectueux doivent : (1) en o de la pieza (3) devolverse a OMNIFILTER, a costa del cliente y con TO THE MAXIMUM EXTENT PERMITTED BY APPLICABLE LAW, cas de renvoi, être autorisées par OMNIFILTER avec un numéro de...