Télécharger Imprimer la page

Publicité

Les langues disponibles

Les langues disponibles

Liens rapides

USE AND CARE INSTRUCTIONS
MODE D'EMPLOI ET ENTRETIEN
INSTRUCCIONES DE USO Y MANTENIMIENTO
mod. 1660 - 1661 - 1662 - 1664
mod. 1647 - 1651 - 1656 - 1658 - 1659
MOD. 1647 - 1651 - 1656 - 1658
1659 - 1660 - 1661 - 1662 - 1664

Publicité

loading

Sommaire des Matières pour T-Fal 1647

  • Page 1 INSTRUCCIONES DE USO Y MANTENIMIENTO mod. 1660 - 1661 - 1662 - 1664 mod. 1647 - 1651 - 1656 - 1658 - 1659 MOD. 1647 - 1651 - 1656 - 1658 1659 - 1660 - 1661 - 1662 - 1664...
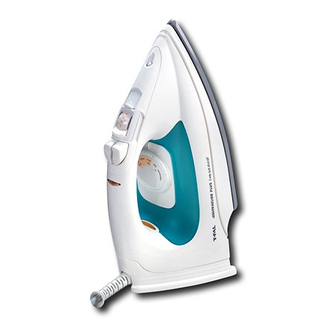
  • Page 2 1660 - 1661 - 1662 - 1664 mod. 1647 - 1651 - 1656 - 1658 - 1659 A. Boost of steam and vertical steam button (according to model) B. Spray button C. Steam adjustment control (dry/steam) and anti-clogging valve D.
  • Page 3 IMPORTANT SAFEGUARDS When using your iron, basic safety precautions should always be followed, including the following : READ ALL INSTRUCTIONS BEFORE USING Use iron only for its intended use To protect against a risk of electric shock, do not immerse the iron in water or other liquids When applicable, the iron should always be turned OFF (min.) before plugging or unplugging from outlet.
  • Page 4 1 - WARNING FOR SAFE IRONING Voltage. Your iron is designed for 120V only. Check that the power supply corresponds to the one shown on the rating plate of the appliance. If the iron is dropped, have it checked by an Approved After Sales Service Center before using it again. Non-visible damage might have occured and could endanger your safety.
  • Page 5 4 - SELECTION OF IRONING TEMPERATURES (according to model) The ironing temperature is adjusted using the thermostat knob (F) or the cursor. The thermostat lamp lights up (G) when the iron is heating and goes off when it reaches the chosen temperature. Hints We recommend that you iron fabrics according to the order...
  • Page 6 This will ensure the steam chambre is clean. During the first few ironing sessions, a small amount of innocuous smoke and a smell may occur. This phenomenon, which does not affect the use of the appliance, will soon disappear. 6. BOOST OF STEAM To obtain a greater burst of steam, press the boost of steam button (A) in burst Hint It is advisable to leave a lapse of time in between each use.
  • Page 7 9 - SPRAY You can use the spray during dry ironing or steam ironing as long as there is water in the reservoir. Simply press the spray control (B) in bursts. 10 - DRY IRONING Set the steam adjustment control (C) to dry “O” 11 - PRODUCT CARE AND MAINTENANCE Before carrying out any maintenance on your iron, please ensure that it is unplugged and that the soleplate has completely cooled down.
  • Page 8 - Rinse the tip with tap water - Insert it back into its housing and push into place. Caution: the iron cannot operate without the anti-clogging valve. Self-cleaning: twice a month - Fill the tank to the maximum filling mark. - Set the steam adjustment control (C) to dry “O”...
  • Page 9 14 - POSSIBLE PROBLEMS AND SOLUTIONS Is there a problem? Possible causes Solutions Water flows through the The selected temperature is Respect the colored zone on holes of the soleplate. too low for steam ironing the thermostat, indicating (synthetics...). the steam zone. You are using steam before Wait for the thermostat the iron is hot.
  • Page 10 Is there a problem? Possible causes Solutions Brown liquid comes through You are using chemical des- Do not use descaling the holes of the soleplate caling agents. products in your iron, as they and stains the clothing. will damage it. Follow self cleaning procedures instead.
  • Page 11 Is there a problem? Possible causes Solutions Little or no steam. Steam adjustment control set Set the cursor to between to zero. 2 and 8. Scale build-up. Remove the anti-clogging valve and soak it in white vinegar or pure lemon juice. See maintenance section.
  • Page 12 • In U.S.A. : Do not return the product to the retailer from whom it was purchased. T-Fal Corp. agrees to repair or replace the defective part or product at no charge provided product is returned with all shipping charges prepaid to your local service center accompanied by proof of purchase and a letter detailing the nature of the defect.
  • Page 13 à la suite d’une chute ou d’un choc. Afin d’éviter tout risque de déchar- ge électrique, n’essayez pas de démonter votre appareil vous-même. Envoyez-le à un centre de service autorisé T-Fal (voir garantie), où il sera examiné et réparé. Un remontage incorrect peut être à l’origine de décharges électriques lors de l’utilisa- tion du fer.
  • Page 14 En cas de chute de fer, faites-le vérifier par un professionnel avant de le réutiliser. Des dommages non visibles de l’appareil peuvent être préjudiciables à votre sécurité. Ne jamais démonter votre fer adres- sez-vous à une station après-vente agréée T-Fal. 2 - CONSEILS PRATIQUES...
  • Page 15 4 - SELECTION DE LA TEMPERATURE DE REPASSAGE (selon modèle) La température de repassage s’ajuste avec le curseur ou le bouton du thermostat. Le voyant de thermostat s’allume (G) lorsque le fer chauffe et s’éteint lorsqu’il a atteint la température choisie. Conseils Il est recommandé...
  • Page 16 Durant les premières utilisations, il peut se produire un léger dégagement de fumée et une odeur sans nocivité. Ce phénomène est inoffensif du à la nouveauté de votre produit. 6. FONCTION SUPERPRESSING Pour obtenir ponctuellement un débit vapeur plus important, appuyez sur le bouton “vapeur” (A) par impulsions.
  • Page 17 9 - LE VAPORISATEUR D’EAU Vous pouvez utiliser le pulvérisateur en repassant tout aussi bien à sec qu’à la vapeur. Il vous suffit d’appuyer sur le bouton du vaporisateur (B). Conseil : Assurez-vous qu’il y a toujours de l’eau dans le réservoir 10 - REPASSAGE A SEC Positionnez la commande de réglage vapeur (C) sur sec O 11 - ENTRETIEN...
  • Page 18 - Rincer la sous l’eau du robinet - La remettre en place dans son logement en l’enfonçant. Attention : le fer ne peut fonctionner sans la tige anti-calcaire. Conseil Nous vous conseillons de nettoyer une fois par mois la tige anti-calcaire. Auto-nettoyage : deux fois par mois - Remplir le réservoir - Positionnez la commande de réglage vapeur ©...
  • Page 19 (0) et rangez-le sur son talon. Thermostat déréglé : Adressez-vous à un centre température trop basse. de service après-vente agréé T-Fal. Le réservoir est rempli Videz partiellement le au-delà du niveau maximum. réservoir. Le fer est utilisé...
  • Page 20 éponge à ou utilisation d'amidon. récurer non-métallique humide. Veillez à bien pulvériser l'amidon sur l'envers de la face à repasser. Adressez-vous au Service à Le fer est tombé la clientèle de T-Fal. accidentellement : le thermo- stat ne marche plus.
  • Page 21 Adressez-vous à un centre service agréé. Ne démontez jamais l'appareil. S'il n'est pas possible de déterminer la cause d'une panne, adressez-vous à un centre de service après-vente agrée T-Fal, il nous fera plaisir de vous aider à résoudre votre problème.
  • Page 22 LEA TODAS LAS INSTRUCCIONES ANTES DE UTILIZAR SU APARATO. RECOMENDACIONES IMPORTANTES Cuando utilice su plancha, observe las indicaciones elementales de seguridad siguientes: Utilice solamente su aparato para el uso que ha sido diseñado Para evitar cualquier riesgo de descarga eléctrica, no sumerja su aparato o su caja en agua o en otro líquido.
  • Page 23 1 - CONSEJOS DE SEGURIDAD Verifique que la tensión de su instalación corresponde a la de la plancha. Cualquier error de conexión puede causar un daño irreversible en el aparato y anular la garantía. En caso de caída de la plancha, haga que un profesional la verifique antes de volverla a poner en funcionamiento.
  • Page 24 4 - SELECCION DE TEMPERATURAS DE PLANCHADO (según modelo) La temperatura de planchado se ajusta con el cursor o el botón del termostato. El indicador lumino- so del termostato se enciende (G) cuando la plancha se calienta y se apaga cuando ha alcanzado la temperatura escogida.
  • Page 25 Durante las primeras utilizaciones, puede producirse un ligero desprendimiento de humo y un olor que no son nocivos. Este fenómeno, sin consecuencias sobre el funcionamiento, desaparecerá rápidamente. 6. FUNCION EXTRA VAPOR Para obtener una cantidad mayor de vapor, presione el botón del extravapor (A) por impulsos. Consejo Le recomendamos esperar un intervalo de tiempo entre cada uso del extravapor.
  • Page 26 9 - EL ROCIADOR Usted puede utilizar el rociador para planchar tanto en seco como con vapor. Basta con apoyar el botón rociador (B). Consejo: Verificar que siempre tenga agua el depósito 10 - PLANCHADO EN SECO Colocar el mando de ajuste vapor (C) en seco O 11 - LIMPIEZA Antes de cualquier limpieza, asegurarse de que el aparato está...
  • Page 27 - Enjuagarla con agua de la llave - Volverla a colocar en su lugar, presionándola. Atención: la plancha no puede funcionar sin la varilla anticalcárea. Consejo - Le aconsejamos limpiar una vez al mes la varilla anticalcárea. Autolimpieza: dos veces al mes - Llenar el depósito - Colocar el mando de ajuste vapor ©...
  • Page 28 14 - PROBLEMAS EVENTUALES Y SOLUCIONES ¿Problema? Posibles causas Soluciones El agua fluye por los orificios Temperatura seleccionada Respetar la zona coloreada de la suela demasiado baja para utilizar en el termostato que indica el vapor (sintéticos, etc.) la zona de vapor. Vapor utilizado antes que la Espere que el indicador plancha esté...
  • Page 29 ¿Problema? Posibles causas Soluciones Se derrama un líquido de Usted utiliza productos No utilice en su plancha pro- color marrón por los orificios químicos desincrustantes. ductos de descalcificación, de la suela que manchan la ya que la dañan. ropa Utilización de agua Proceder a una autolimpieza.
  • Page 30 ¿Problema? Posibles causas Soluciones Hay poco vapor o no hay. Cursor de ajuste vapor colo- Ajustar el cursor entre 2 y 8 cado en cero. Sacar la varilla anticalcárea y Incrustación de la varilla remojarla en vinagre de alco- con cal. hol o zumo de limón puro por 2 horas aprox.

Ce manuel est également adapté pour:

165116561658165916601661 ... Afficher tout