
Manuels Connexes pour HEIDENHAIN TS 260


Sommaire des Matières pour HEIDENHAIN TS 260
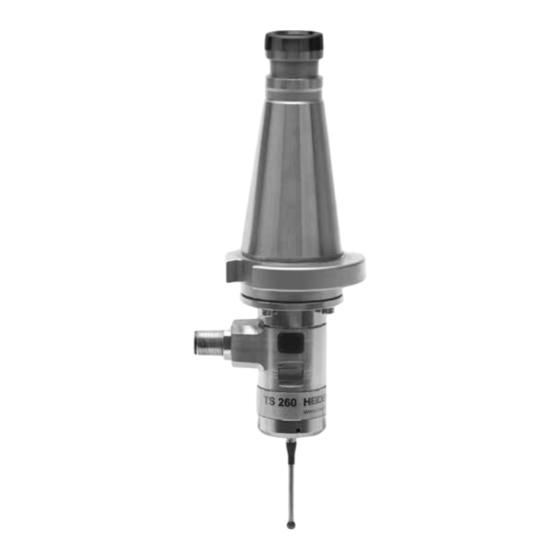
- Page 1 Mounting Instructions Montageanleitung Instructions de montage Istruzioni di montaggio Instrucciones de montaje 取付説明書 安装说明 安裝指導手冊 설치 지침 TS 260 1/2016...
- Page 2 Contents Page Seite Inhalt Warnings Warnhinweise Items supplied Lieferumfang Sommaire Indice 10 Dimensions 10 Abmessungen 12 Stylus Exchange 12 Taststiftwechsel Índice 14 Mounting 14 Montage 18 Taper exchange 18 Kegelwechsel 22 Replacing the Seal 22 Wechsel der Dichtung 26 Centering 26 Zentrieren 30 Specifications 30 Technische Kennwerte...
- Page 3 Contents Page ページ Warnings 目次 6 注意事項 Items supplied 目录 9 梱包品 11 Dimensions 目錄 11 寸法 13 Stylus Exchange 목차 13 スタイラスの交換 16 Mounting 16 取付け 20 Taper exchange 20 テーパ交換 24 Replacing the Seal 24 シールの交換 28 Centering 28 センタリング(校正)...
- Page 4 Warnings Warnhinweise Avertissement Avvertenze Notas de aviso Note: Mounting and commissioning is to be conducted by a qualified specialist under compliance with local safety regulations. Achtung: Die Montage und Inbetriebnahme ist von einer qualifizierten Fachkraft unter Beachtung der örtlichen Sicherheitsvorschriften vorzunehmen. Attention: le montage et la mise en service doivent être assurés par un personnel qualifié...
- Page 5 IP 67 EN 60 529 Do not drop the touch probe. Tastsystem nicht fallen lassen. Ne pas laisser tomber le palpeur. Non far cadere il tastatore. No dejar caer el palpador.
- Page 6 Warnings 注意事項 提示 警告 경고 Note: Mounting and commissioning is to be conducted by a qualified specialist under compliance with local safety regulations. 注意:取付け及び試運転は設置国の安全規格のもとで有資格の専門家により実施するようにし てください。 注意: 安装和调试时必须符合当地安全要求并由具有资质的专业人员操作 注意:安裝與調整要經由已認證的專業人員指導以符合當地安全規範要求。 주의: 설치 및 조정은 한국의 안전도 규정에 의하여 작업을 수행할 수 있는 공인된 기술자에 의해 수행되어야...
- Page 7 IP 67 EN 60 529 Do not drop the touch probe. タッチプローブを落とさないでください. 请不要使测头跌落. 探針請勿掉落. 터치 프루브를 떨어뜨리면 않됩니다.
-
Page 8: Lieferumfang
Items supplied Lieferumfang Objet de la fourniture Standard di fornitura Suministro Items supplied depending on the variant Inhalt des Lieferumfangs je nach Variante Contenu de la fourniture selon la variante Standard di fornitura secondo la variante Contenido del suministro en función de la variante... - Page 9 Items supplied 梱包品 零部件 供應的項目 제공 품목 Items supplied depending on the variant 梱包品は製品種類により異なります 供应的部件与具体型号有关 零組件項目因應料號而有不同 제공 품목은 모델에 따라 다릅니다...
- Page 10 Dimensions Abmessungen Dimensions Dimensioni Dimensiones 54.2 Tolerancing ISO 8015 ISO 2768 - m H < 6 mm: ±0.2 mm...
- Page 11 Dimensions 寸法 尺寸 尺寸 규격 54.2 Tolerancing ISO 8015 ISO 2768 - m H < 6 mm: ±0.2 mm...
- Page 12 Stylus Exchange Taststiftwechsel Changement de la tige de palpage Sostituzione dello stilo Cambio vástago palpación Ø 1.5 mm 5 mm M d = 0.4 ... 0.6 Nm Adapter for M4 stylus Adapter für Taststift M4 Adaptateur pour tige de palpage M4 Adattatore per stilo M4 Adaptador para vástago M4...
- Page 13 Stylus Exchange スタイラスの交換 更换测针 探針更換 스타일러스 교체 Ø 1.5 mm 5 mm M d = 0.4 ... 0.6 Nm Adapter for M4 stylus M4スタイラス用アダプタ M4测针适配器 M4 探針轉接器 M4 스타일러스용 어댑터...
- Page 14 Screw on cable connection with torque adapter ID 1037830-01 Mounting Montage Kabelverbindung mit Drehmomentadapter ID 1037830-01 anschrauben Montage Visser le câble avec l’adaptateur dynamométrique ID 1037830-01 Montaggio Avvitare il cavo con adattatore dinamometrico ID 1037830-01 Montaje Enroscar el empalme de cable con adaptador del par ID 1037830-01 = 0.4...0.6 Nm Order separately...
- Page 15 Tighten finger-tight Handfest anziehen Serrer à la main Stringere a mano Apretar fuertemente con la mano = 20 Nm SW28 Hold the touch probe with a wrench Tastsystem mit Schlüssel halten Tenir le palpeur avec la clef Fissare il tastatore con la chiave Sujetar el palpador con la llave...
- Page 16 Mounting Screw on cable connection with torque adapter ID 1037830-01 トルクレンチアダプタを用いてケーブル接続をねじ締めしてください ID 1037830-01 取付け 用扭矩扳手紧固电缆接头 ID 1037830-01 安装 使用扭力扳手的轉接配件鎖緊連接電纜 ID 1037830-01 安裝 토크 어댑터로 케이블 연결을 나사로 조입니다. ID 1037830-01 마운팅 = 0.4...0.6 Nm To be ordered separately: 別売品: 需单独订购: 須另外訂購的項目: 별도로...
- Page 17 Tighten finger-tight ネジを手締めしてください。 用手紧固 以手指鎖緊螺絲 나사를 손으로 단단히 조입니다. = 20 Nm SW28 Hold the touch probe with a wrench タッチプローブをレンチで支えてください。 用扳手保持测头不动 以開口板手固定接觸式探針 렌치로 터치 프로브를 고정시킵니다.
- Page 18 Taper exchange Kegelwechsel Changement de cône Sostituzione del cono Cambio del cono...
- Page 19 M30 x 0.5 Gewinde mit Loctite 222/S8 sichern Secure the thread with Loctite 222/S8 Freinage des filetages avec Loctite 222/S8 Bloccare il filetto con Loctite 222/S8 Asegurar la rosca con Loctite 222/S8 = 20 ±5 Nm 4 x M3 = 1.2...1.4 Nm...
- Page 20 Taper exchange テーパ交換 刀柄更换 調換錐柄 테이퍼 교환...
- Page 21 M30 x 0.5 Secure the thread with Loctite 222/S8 Loctite 222/S8でネジを固定してください 用Loctite 222/S8固定螺纹 使用螺絲固定劑 Loctite 222/S8 固定螺牙 Loctite 222/S8로 나사를 고정합니다. = 20 ±5 Nm 4 x M3 = 1.2...1.4 Nm...
- Page 22 Replacing the Seal Wechseln der Dichtung Changement du joint Sostituzione della guarnizione Cambio de la junta SW28...
- Page 23 = 2Nm...
- Page 24 Replacing the Seal シールの交換 更换密封圈 替換密封環 씰 교환 SW28...
- Page 25 = 2Nm...
- Page 26 Centering Zentrieren Centrage Centraggio Centrado Electronic centering: In NC through probing from opposite directions (calibration ring) Elektronisch Zentrieren: in NC durch Umschlagmessung (Kalibrierring) Centrage électronique: dans la CN via rotation à 180° (bague d'étalonnage) Centraggio elettronico: tramite NC eseguire la tastatura su due punti diametralmente opposti (anello di calibrazione) Centrado electrónico: en NC a través del palpado en direcciones opuestas (anillo de calibración)
- Page 27 Note: Mechanical centering. Only necessary if electronic centering is not possible. Achtung: Mechanisch Zentrieren, nur nötig wenn keine elektronische Zentrierung möglich ist. Attention: Centrage mécanique, seulement si le centrage électronique n'est pas possible. Attenzione: Centraggio meccanico: necessario solo se non è possibile il centraggio elettronico. Atención: Centrado mecánico, sólo requerido si no existe la posibilidad del centrado electrónico.
- Page 28 Centering センタリング(校正) 定心 中心定位 센터링 Electronic centering: In NC through probing from opposite directions (calibration ring) 電気的センタリング:反対方向からプローブしてNCに(校正リング) 电子定心: 用NC程序的探测功能进行相向探测(标准环规) 電子對心: 於 NC 機台上探測對應方向 (校正環規) 자동 센터링: NC의 반대 방향에서 프로빙(교정 링)
- Page 29 Note: Mechanical centering. Only necessary if electronic centering is not possible. 注意: 機械的センタリング 電気的センタリングが不可能のときのみ必要 注意: 机械定心。 只适用于不能进行电子定心时。 附註: 機械對心。 只有電子對心無效才需要。 유의사항: 기계식 센터링. 자동 센터링이 불가능한 경우에만 필요합니다. Spindle or tool-setting device スピンドルもしくは工具設定機器 主轴或对刀仪设备 主軸或刀具設定設備 스핀들 또는 공구 설정 장치...
- Page 30 Características técnicas > 100 mm > 100 mm > 200 mm TS 260: F ~ ~ 1N TS 260: F ~ ~ 7 N v = max. 3 m/min † 5 mm 2 s † 1.0 µm, v = max. 1m/min.
- Page 31 LED display depends on variant LED-Anzeige variantenabhängig Tenir le palpeur avec la clef Fissare il tastatore con la chiave Sujetar el palpador con la llave R £ 10 µs W ³ 25 ms...
- Page 32 사양 > 100 mm > 100 mm > 200 mm TS 260: F ~ ~ 1N TS 260: F ~ ~ 7 N v = max. 3 m/min † 5 mm 2 s † 1.0 µm, v = max. 1m/min.
- Page 33 LED display depends on variant LED表示は製品により異なります。 LED显示与具体型号有关 LED 顯示因應版本而有不同 LED 표시는 모델에 따라 다릅니다. R £ 10 µs W ³ 25 ms...
- Page 34 Electrical Data Elektrische Kennwerte Caractéristiques électriques Dati elettrici Catacterísticas eléctricas S, S = Trigger signal Schaltsignal Signal de commutation Segnale di commutazione Trigger NO = normally open Señal de conexión Trigger NC = normally closed Trigger NO Trigger NC...
- Page 35 Electrical Data 電気仕様データ 电气参数 電氣資料 전기 데이터 S, S = Trigger signal トリガー信号 触发信号 Trigger NO = normally open 觸發信號 Trigger NC = normally closed 트리거 신호 Trigger NO Trigger NC...
- Page 36 Pin Layout Anschlussbelegung Raccordements Piedinatura Distribución del conector Cable shield connected to housing Ready signal Kabelschirm mit Gehäuse verbunden Bereitschaft Blindage du câble relié au boîtier En service Collegare lo schermo del cavo alla carcassa Segnale di pronto Pantalla del cable conectada a carcasa Preparación...
- Page 37 Pin Layout ピン配列 针脚编号 接腳配置 핀 레이아웃 Cable shield connected to housing Ready signal シールドはハウジングへ レディ信号 电缆屏蔽层接外壳 就绪信号 電纜隔離層連結於外殼 備妥信號 하우징에 연결된 케이블 실드 준비 신호...
- Page 38 DR. JOHANNES HEIDENHAIN GmbH Dr.-Johannes-Heidenhain-Straße 5 83301 Traunreut, Germany { +49 8669 31-0 | +49 8669 32-5061 E-mail: info@heidenhain.de Technical support | +49 8669 32-1000 Measuring systems { +49 8669 31-3104 E-mail: service.ms-support@heidenhain.de TNC support { +49 8669 31-3101 E-mail: service.nc-support@heidenhain.de...