Table des Matières
Publicité
Liens rapides
Guida rapida - Quick Guide - Guide rapide
Guía rápida - Kurzanleitung - Guia de consulta rápida
دليل إرشادي سريع
Σύντομος οδηγός -
TAB
7539
Videocitofono Tab Free vivavoce
Tab Free speakerphone video unit
Portier-vidéo Tab Free mainslibres
Freisprech-Videohaustelefon Tab Free
Videoportero Tab Freemanos libres
Videoporteiro alta-voz Tab Free
Θυροτηλεόρ. ανοικτής ακρόασης Tab Free
بسماعة مكبرة للصوتTab Free جهاز إنتركم بالفيديو
Publicité
Table des Matières

Manuels Connexes pour Vimar ELVOX Videocitofonia TAB 7539


Sommaire des Matières pour Vimar ELVOX Videocitofonia TAB 7539
- Page 1 Guida rapida - Quick Guide - Guide rapide Guía rápida - Kurzanleitung - Guia de consulta rápida دليل إرشادي سريع Σύντομος οδηγός - 7539 Videocitofono Tab Free vivavoce Tab Free speakerphone video unit Portier-vidéo Tab Free mainslibres Freisprech-Videohaustelefon Tab Free Videoportero Tab Freemanos libres Videoporteiro alta-voz Tab Free Θυροτηλεόρ.
- Page 2 TAB: 7539...
- Page 3 TAB: 7539 Indice • Contents • Index • Inhalt • Índice • Índice • Περιεχόμενα - فهرس Descrizione - Caratteristiche tecniche Description - Technical characteristics Description - Caractéristiques techniques Beschreibung - Technische Merkmale Descripción - Características técnicas Descrição - Caraterísticas técnicas Περιγραφή...
- Page 4 • Outside wall or box mounted installation. Fits to the wall with • Installazione da esterno parete o ad una scatola. Applicabile wall plugs or a 3-vertical module flush mounting box )Vimar a muro con tasselli oppure ad una scatola da incasso 3 mo-...
-
Page 5: Caractéristiques Techniques
• Pose en saillie ou dans une boîte. Se pose au mur avec an einer vertikalen 3-Modul-Unterputzdose )Vimar V71303, des chevilles ou une boîte d’encastrement 3 modules ver- V71703( oder runden 60 mm Dose )Vimar V71701( installier- ticale )Vimar V71303, V71703( ou ronde de 60 mm )Vimar bar. V71701). • 3,5“-LCD-Display: •... -
Page 6: Conformidad Normativa
3 mó- na parede com buchas ou numa caixa de embeber de 3 dulos Vimar V71303, V71703( o redonda de 60 mm )Vimar módulos vertical )Vimar V71303, V71703( ou redonda de 60 V71701). - Page 7 • التركيب خارج الحائط أو على علبة. يمكن تثبيت الجهاز على الحائط باستخدام θήματα ακοής. Vimar( مراسي للبراغي أو في علبة مب ي َّتة التركيب 3 وحدات رأسية .)Vimar V71701( ) أو دائرية 06 ملمV71303, V71703 : حجم 5.3 بوصةLCD • شاشة...
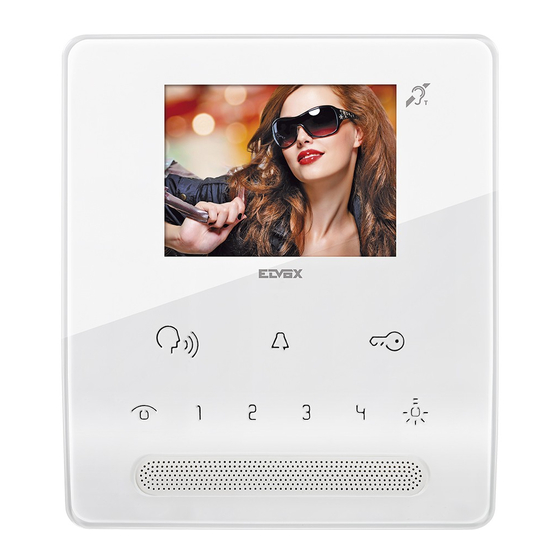
- Page 8 TAB: 7539 Vista frontale e laterale • Front and side view • Vue avant et latérale • Vorder- und rückansicht • Vista frontal y lateral • Vista frontal e lateral • Μπροστινη και πλαϊνη πλευρα - زاوية رؤية أمامية وجانبية Fig.
- Page 9 TAB: 7539 Funzione dei tasti • Function of the buttons • Fonction des touches • Tastenfunktionen • Función de las teclas • Função das teclas • Λειτουργία των πλήκτρων - وظائف أزرة التشغيل A: • Funzione autoaccensione/visualizzazione telecamere della targa anche in modalità ciclica. •...
- Page 10 TAB: 7539 Segnalazioni Signals - Lampeggia ad ogni chiamata ricevuta dal posto interno - Blinks with each call received by the indoor station )with a )con frequenza diversa tra chiamata interna o esterna(. different frequency between internal and external calls(. - Lampeggiante anche nel caso di memorizzazione chia- - Blinks also in the case of saving missed calls with the mate perse con configurazione “utente assente”.
- Page 11 TAB: 7539 Morsettiera di collegamento: Connection terminal block: Bornier de connexion : 1, 2 = Linea digitale BUS. 1, 2 = Digital BUS line. 1, 2 = Ligne numérique BUS. FP = Ingresso tasto chiamata fuoriporta FP = Input for landing call button )refer- FP = Entrée touche appel palier )réfé- )riferimento al morsetto M(.
- Page 12 60mm and 5B). 2. Câbler le bornier qui est soli- Gehäuse mit 60 mm )Vimar )Vimar V71701(. )fig. 5A e 5B(. daire de la plaque de fixation 2. Wire the terminal block which is V71701) Durchmesser befesti- 2.
- Page 13 TAB: 7539 Fig. 5A Fig. 4 > 5 cm Fig. 5B 1,20m 1,60 / 1,65m Aggancio superiore posto interno con piastra di fissaggio a muro Fig. 6 Top catch on indoor station with wall mounting plate Fixation supérieure poste intérieur avec plaque murale Obere Befestigung der Innensprechstelle mit Wand-Montageplatte Enganche superior aparato interno con placa de fijación a pared Encaixe superior do posto interno com placa de fixação à...
- Page 14 TAB: 7539 Fig. 7 Click Fig. 8 Inserimento vite per dispositivo antiestrazione Inserting screw for anti-theft device Pose de la vis pour dispositif anti-arrachement Einsetzen der Schraube für die Entnahmesicherung Apriete el tornillo anti- extracción Inserção do parafuso para o dispositivo anti-extracção Τοποθέτηση...
- Page 15 TAB: 7539 Terminazione Video Video Termination Terminaison Vidéo Selezionare Dip switch per la termi- Select DIP switch to terminate the Sélectionner le commutateur pour la nare il segnale video video signal terminaison du signal vidéo A) se il cavo del BUS entra nei morsetti A) if the BUS cable enters terminals 1, 2 A) si le câble du BUS arrive aux bornes 1, 2 e prosegue ad un altro posto in-...
-
Page 16: Operazioni Preliminari
TAB: 7539 Operazioni preliminari Configurazione codice identificativo ID secondario La configurazione del codice identificativo secondario si effet- tua quando una stessa chiamata deve attivare contemporane- Nota: le configurazioni BASE sono attribuibili manualmente in amente più posti interni )max 4 composti da 1 Capogruppo e 3 modalità... - Page 17 TAB: 7539 Regolazioni Funzionamento Regolazione del volume della suoneria Attenzione: per il funzionamento del posto interno è necessario che sia stata effettuata la configurazione dell’identificativo ID. Il volume della suoneria è regolabile su 10 livelli. Per la verifica premere un tasto del videocitofono )ad eccezione Premere il tasto - per diminuire il volume della melodia, Il tasto + per aumentare il volume della melodia )vedi fig.
-
Page 18: Preliminary Procedures
TAB: 7539 Preliminary procedures Configuring the secondary ID code in automatic mode The secondary identification code is configured when the same Note: The BASIC configurations can be assigned manually in call has to activate multiple indoor stations at the same time BASIC mode )as described below( or ADVANCED mode with the )max 4 composed of 1 Master and 3 secondary ones(. -
Page 19: Brightness Adjustment
TAB: 7539 Adjustments Operation Chime volume adjustment Caution: For the indoor station to work, the ID code must have The chime volume can be set to 10 levels. already been configured. To check this, press a button Press the - button to decrease the volume of the tune, the + the monitor )but not the buttons and the volume and brightness button to increase the volume of the tune )see Fig. -
Page 20: Opérations Préliminaires
TAB: 7539 Opérations préliminaires Configuration du code identifiant ID secondaire en mode automatique Configurer l'identifiant secondaire lorsqu'un même appel doit ac- Remarque: les configurations de BASE peuvent être attribuées tiver simultanément plusieurs postes intérieurs )au max 4 com- manuellement en mode BASE )décrit ci-après( ou AVANCÉES à prenant 1 Principal et 3 secondaires(. -
Page 21: Fonctionnement
TAB: 7539 Réglages Fonctionnement Réglage du volume de la sonnerie Attention pour que le poste d’appartement puisse fonctionner, configurer l’identifiant ID.Pour procéder à la vérification, appuyer Il est possible de régler le volume de la sonnerie sur 10 niveaux. Appuyer sur la touche - pour diminuer le volume de la mélodie sur une touche du portier-vidéo )à... - Page 22 TAB: 7539 Vorbereitung Automatische Konfiguration des sekundären Kenncodes ID Die Konfiguration des sekundären Kenncodes wird vorgenom- Hinweis: die BASISKONFIGURATIONEN lassen sich von Hand men, wenn derselbe Ruf gleichzeitig mehrere Innensprechstel- im Modus BASIS zuweisen )wie nachstehend beschrieben(, die len aktivieren soll )max. 4, nämlich 1 Haupt- und 3 Nebengerä- ERWEITERTEN KONFIGURATIONEN mithilfe der in einem PC te).
- Page 23 TAB: 7539 Einstellungen Funktionsweise Achtung: Die Innenstelle funktioniert nur, wenn zuvor die ID- Einstellung der Ruftonlautstärke Nummer konfiguriert wurde. Drücken Sie zum Nachweis der Die Ruftonlautstärke kann auf 10 Stufen eingestellt werden. Konfiguration eine Taste des Videohaustelefons )mit Ausnahme Mit der Taste - stellen Sie die Melodie leiser, mit Taste + lauter der Tasten und der Tasten Lautstärke sowie Helligkeit): Ist dem )Abb.
-
Page 24: Operaciones Previas
TAB: 7539 Operaciones previas Configuración del código de identificación ID secundario en modo automático La configuración del código de identificación secundario se Nota: las configuraciones BÁSICAS se pueden asignar manual- realiza cuando una llamada debe activar varios aparatos inter- mente en el modo BÁSICO )como se explica a continuación( y nos a la vez )hasta 4 integrados por 1 dispositivo principal y 3 las AVANZADAS a través del software SaveProg completo de secundarios(. - Page 25 TAB: 7539 Ajustes Funcionamiento Atención: para el funcionamiento del aparato interno, es Ajuste del volumen del timbre necesario realizar previamente la programación del identificador El volumen del timbre cuenta con 10 niveles de ajuste ID. Para la comprobación, pulse una tecla del videoportero )excepto las teclas y las teclas de volumen y brillo): si se Pulse la tecla - para bajar el volumen del tono o la tecla + para...
-
Page 26: Operações Preliminares
TAB: 7539 Operações preliminares Configuração do código identificativo ID secundário no modo automático A configuração do código identificativo secundário é feita quan- Nota: as configurações BASE são atribuíveis manualmente no do uma mesma chamada tem de activar simultaneamente vá- modo BASE )conforme descrito de seguida( ou AVANÇADAS rios postos internos )máx. - Page 27 TAB: 7539 Regulações Funcionamento Regulação do volume da campainha Atenção: para o funcionamento do posto interno é necessário que tenha sido efectuada a configuração do código identificativo O volume da campainha é regulável para 10 níveis. ID. Para a verificação prima uma tecla do videoporteiro Prima a tecla - para diminuir o volume da melodia, a tecla + para aumentar o volume da melodia )a fig.
- Page 28 TAB: 7539 Προκαταρκτικές διαδικασίες Διαμόρφωση δευτερεύοντος αναγνωριστικού κωδικού ID στον αυτόματο τρόπο λειτουργίας Η διαμόρφωση του δευτερεύοντος αναγνωριστικού κωδικού πραγ- Σημείωση: οι ΒΑΣΙΚΕΣ διαμορφώσεις μπορούν να πραγματοποι- ματοποιείται όταν μία κλήση πρέπει να ενεργοποιήσει ταυτόχρονα ηθούν χειροκίνητα στο ΒΑΣΙΚΟ τρόπο λειτουργίας )όπως περιγρά- πολλούς...
- Page 29 TAB: 7539 Ρυθμισεις Λειτουργία Ρύθμιση έντασης ήχου κουδουνιού Προσοχή: για τη λειτουργία του εσωτερικού σταθμού απαιτείται διαμόρφωση του αναγνωριστικού ID. Για επιβεβαίωση, πατήστε Η ένταση ήχου του κουδουνιού μπορεί να ρυθμιστεί σε 10 επίπεδα. ένα πλήκτρο της θυροτηλεόρασης )εκτός από τα πλήκτρα και τα Πατήστε...
- Page 30 TAB: 7539 التشغيل عمليات الضبط انتبه: لتشغيل المكان الداخلي يجب بالضرورة إجراء عملية ضبط وتهيئة للرقم التعريفي ضبط مستوى صوت نغمة التنبيه .يمكن ضبط مستوى صوت نغمة التنبيه على 01 مستويات . للتحقق اضغط على أي زر في جهاز اإلنتركم بالفيديو (باستثناء األزرةID وأزرة...
- Page 31 TAB: 7539 العمليات التحضيرية الثانويID ضبط وتهيئة كود الرقم التعريفي يتم ضبط وتهيئة الكود التعريفي الثانوي عند تقوم نفس المكالمة الهاتفية في نفس الوقت 3بتفعيل أكثر من مكان داخلي (بحد أقصى 4 مجموعات بمركز مجموعة رئيسي و مالحظة: الضبط األساسي لتهيئة إعدادات التشغيل يتم تخصيصه يدو ي ً ا في طريقة التشغيل ثانوية).
- Page 32 TAB: 7539 Tabella con le corrispondenze ID capogruppo e ID secondari Master ID and secondary ID correspondence table Tableau avec les correspondances id poste principal et ID secondaires Zuordnungstabelle ID Hauptgerät und ID Nebengeräte Tabla de correspondencia del ID del dispositivo principal y el ID de los secundarios Tabela com as correspondências entre o ID principal do grupo e os ID secundários Πίνακας...
- Page 33 TAB: 7539 Collegamento del posto interno art. 7539 in configurazione entra/esci (RIF. SI696) Connecting the indoor station art. 7539 in the in/out configuration (REF. SI696). Raccordement du poste intérieur art. 7539 en configuration entrer/sortir (RÉF.696) Anschluss der Innensprechstelle Art. 7539 in Konfiguration ein/aus (REF. SI696).
-
Page 34: Informations Pour Les Utilisateurs
TAB: 7539 RAEE - Informazione agli utilizzatori WEEE - Information for users Il simbolo del cassonetto barrato riportato If the crossed-out bin symbol appears on the sull’apparecchiatura o sulla sua confezione indica equipment or packaging, this means the product che il prodotto alla fine della propria vita utile deve must not be included with other general waste at essere raccolto separatamente dagli altri rifiuti. - Page 35 TAB: 7539 RAEE Información para REEE - Informação dos utilizadores usuarios O símbolo do contentor de lixo barrado com uma cruz, afixado no equipamento ou na embalagem, El símbolo del contenedor tachado, cuando se indica que o produto, no fim da sua vida útil, deve indica en el aparato o en el envase, indica que el ser recolhido separadamente dos outros resíduos.
- Page 36 Viale Vicenza, 14 36063 Marostica VI - Italy 49400581D0 01 1807 www.vimar.com...