Table des Matières
Publicité
Les langues disponibles
Les langues disponibles
Liens rapides
Guida rapida - Quick Guide - Guide rapide
Guía rápida - Kurzanleitung - Guia de consulta rápida
Σύντομος οδηγός
TAB
40605
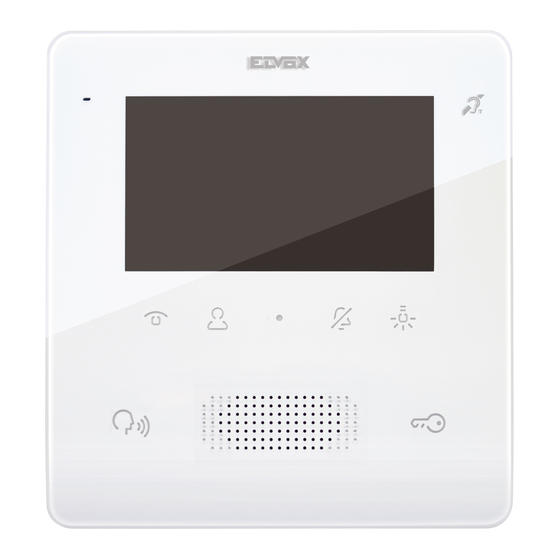
Videocitofono TAB 7 IP vivavoce
TAB 7 IP hands-free video entryphone
Portier-vidéo TAB 7 IP mains libres
Videoportero TAB 7 IP manos libres
Freisprech-Videohaustelefon TAB 7 IP
Videoporteiro TAB 7 IP alta-voz
Θυροτηλεόραση ανοικτής ακρόασης TAB 7 IP
Publicité
Table des Matières

Manuels Connexes pour Vimar TAB 7 IP


Sommaire des Matières pour Vimar TAB 7 IP
- Page 1 Guía rápida - Kurzanleitung - Guia de consulta rápida Σύντομος οδηγός 40605 Videocitofono TAB 7 IP vivavoce TAB 7 IP hands-free video entryphone Portier-vidéo TAB 7 IP mains libres Videoportero TAB 7 IP manos libres Freisprech-Videohaustelefon TAB 7 IP Videoporteiro TAB 7 IP alta-voz...
-
Page 2: Caratteristiche Tecniche
• 5 + 2 tasti capacitivi retroilluminati. • Vivavoce full-duplex con echo canceller e funzione teleloop. • Montaggio: a parete, con staffa metallica, su scatola: circolare 2M (Vimar V71701), 3M (Vimar V71303, V71703) orizzon- tale e verticale, 4+4M (Vimar V71318, V71718) e quadrata British standard. - Page 3 Nota: in fig. 1 le misure di installazione consigliate, salvo diverse indicazioni della normativa locale vigente in materia. 1. Fissare la piastra a parete, con staffa metallica, su scatola: circolare 2M (Vimar V71701), 3M (Vimar V71303, V71703) orizzontale e verticale, 4+4M (Vimar V71318, V71718) e quadrata British standard.
- Page 4 TAB: 40605 Fig. 3 Interfacce e morsetti • PoE: interfaccia RJ45 Ethernet 10/100 Mbps, PoE classe 0. • FP: Ingresso NO per contatto pulito, pulsante chiamata fuoriporta (riferimento al morsetto M). • M: Riferimento massa per pulsante fuoriporta. Indicazioni di installazione: •...
-
Page 5: Prima Accensione
TAB: 40605 Prima accensione Il dispositivo, opportunamente cablato e alimentato, presenta, quando non configurato, la seguente schermata su cui sono indicati: indirizzo IP (automatic link-local address temporaneo), indirizzo MAC, identificativo d’impianto, versione firmware. Di default, tutti i dispositivi hanno ID 00.00.000 ovvero identificativo non specificato: per semplificare l’attività di configurazione d’impianto tramite Video Door IP Manager, l’installatore può... - Page 6 TAB: 40605 Descrizione interfaccia utente A riposo, con schermo spento, la pressione di uno dei 5 tasti multifunzione (b) permette di visualizzare la schermata preferiti. La pressione dei tasti Parla/Ascolta (c) o Serratura (d), se configurati, determina l'esecuzione della funzione configurata.
-
Page 7: Regole Di Installazione
Per maggiori informazioni su schermate, tasti, funzioni di chiamata, impostazioni, e rubrica si consiglia di consultare il Manuale Utente scaricabile dal sito www.vimar.com Regole di installazione L’installazione deve essere effettuata con l’osservanza delle disposizioni regolanti l’installazione del materiale elettrico in vigore nel Paese dove i prodotti sono installati. -
Page 8: Technical Characteristics
• 5 + 2 backlit capacitive keys. • Full-duplex hands-free with echo canceller and teleloop function. • Assembly: wall-mounting, with metal bracket, in box: circular 2M (Vimar V71701), 3M (Vimar V71303, V71703) horizontal and vertical, 4+4M (Vimar V71318, V71718) and square, British standard. - Page 9 Note: Fig. 1 shows the recommended installation distances, unless otherwise specified by current regulations. 1. Secure the plate to the wall, with metal bracket, in box: circular 2M (Vimar V71701), 3M (Vimar V71303, V71703) horizon- tal and vertical, 4+4M (Vimar V71318, V71718) and square, British standard.
- Page 10 TAB: 40605 Fig. 3 Interfaces and terminals • PoE: interface RJ45 Ethernet 10/100 Mbps, PoE class 0. • FP: NO input for dry contact, landing call push button (reference to terminal M). • M: Earth reference for landing push button. Installation guidelines: •...
-
Page 11: Switching On The First Time
TAB: 40605 Switching on the first time The device, when correctly wired and powered up but not configured, displays the following screen on which are shown: IP address (automatic link-local address temporary), MAC address, system ID, firmware version. By default, all the devices have ID 00.00.000 that is a non-specified ID: to simplify system configuration via Video Door IP Manager, the installer can set the ID on each device by pressing the central button under the screen and assigning the desired ID. -
Page 12: Description Of The User Interface
TAB: 40605 Description of the user interface At rest, with the screen off, pressing one of the 5 multifunction buttons (b) will display the favourites screen. Pressing the Talk/ Listen (c) or Lock buttons (d), if configured, will execute the configured function. Date and time. -
Page 13: Installation Rules
For further information on the screens, buttons, call functions, settings and contacts list, refer to the User Manual, which can be downloaded from www.vimar.com Installation rules Installation must be carried out in compliance with the current regulations regarding the installation of electrical equipment in the country where the products are installed. -
Page 14: Caractéristiques Techniques
• Mains libres full-duplex avec compensation d'écho et fonction téléboucle. • Montage : en saillie, avec étrier métallique, sur boîtier : rond 2M (Vimar V71701), 3M (Vimar V71303, V71703) horizon- tal et vertical, 4+4M (Vimar V71318, V71718) et carré British standard. - Page 15 Remarque : la fig. 1 fournit les dimensions d'installation conseillées, sauf indications contraires de la norme locale en vigueur en la matière. 1. Fixer la plaque en saillie, avec étrier métallique, sur boîtier : rond 2M (Vimar V71701), 3M (Vimar V71303, V71703) hori- zontal et vertical, 4+4M (Vimar V71318, V71718) et carré British standard.
-
Page 16: Interfaces Et Bornes
TAB: 40605 Fig. 3 Interfaces et bornes • PoE : interface RJ45 Ethernet 10/100 Mbps, PoE classe 0. • FP : Entrée NO pour contact sec, bouton palier (référence à la borne M). • M : Référence de masse pour bouton palier. Consignes d'installation : •... -
Page 17: Premier Allumage
TAB: 40605 Premier allumage Le dispositif, convenablement câblé et alimenté, présente, lorsqu'il n'est pas configuré, la page suivante qui indique : adresse IP (automatic link-local address momentané), adresse MAC, identifiant d'installation, version microprogramme. Par défaut, tous les dispositifs ont l'ID 00.00.000, à savoir un identifiant non précisé : pour simplifier l’activité de configuration de l’instal- lation via Video Door IP Manager, l’installateur peut définir l’ID sur chaque dispositif en appuyant sur la touche centrale sous l'écran et en attribuant un identifiant au choix. -
Page 18: Description Interface Utilisateur
TAB: 40605 Description interface utilisateur Au repos, écran éteint, appuyer sur une des 5 touches multifonctions (b) pour afficher la page des favoris. Si les touches Parler/ Écouter (c) ou Gâche (d) sont configurées, il suffit d'appuyer dessus pour exécuter la fonction configurée. Date et heure. -
Page 19: Conformité Aux Normes
Pour des informations plus complètes sur les pages affichées, les touches, les fonctions d'appel, les réglages et le répertoire, il est conseillé de consulter le Manuel Utilisateur en le téléchargeant sur le site www.vimar.com Consignes d'installation Le circuit doit être réalisé... -
Page 20: Funciones Principales
• Manos libres full-duplex con supresor de eco y función transmisor inductivo. • Montaje: de superficie, con soporte metálico, sobre caja: circular 2M (Vimar V71701), 3M (Vimar V71303, V71703) hori- zontal y vertical, 4+4M (Vimar V71318, V71718) y cuadrada British standard. - Page 21 Nota: en la Fig. 1 se muestran las medidas de instalación recomendadas, salvo otras indicaciones de la norma local vigente. 1. Fije la placa a la pared, con soporte metálico, sobre la caja: circular 2M (Vimar V71701), 3M (Vimar V71303, V71703) horizontal y vertical, 4+4M (Vimar V71318, V71718) y cuadrada British standard.
- Page 22 TAB: 40605 Fig. 3 Interfaces y bornes • PoE: interfaz RJ45 Ethernet 10/100 Mbps, PoE clase 0. • FP: Entrada NO para contacto libre de tensión, pulsador de llamada desde fuera de la puerta (referencia al borne M). • M: Referencia de masa para el pulsador fuera de la puerta. Indicaciones de montaje: •...
-
Page 23: Primer Encendido
TAB: 40605 Primer encendido El dispositivo, adecuadamente cableado y alimentado, sin estar configurado, presenta la siguiente pantalla donde aparecen: dirección IP (automatic link-local address temporal), dirección MAC, identificación de la instalación, versión de firmware. Todos los dispositivos tienen predeterminado el ID 00.00.000, es decir una identificación no especificada: para simplificar la activi- dad de configuración de la instalación con Video Door IP Manager, el instalador puede configurar el ID en cada dispositivo pulsando la tecla central debajo de la pantalla y asignando la identificación deseada. -
Page 24: Descripción De La Interfaz De Usuario
TAB: 40605 Descripción de la interfaz de usuario Estando en reposo, con la pantalla apagada, al pulsar una de las 5 teclas multifunción (b) es posible ver la pantalla Favoritos. Al pulsar las teclas Hablar/Escuchar (c) o Cerradura (d) (si están configuradas), se ejecuta la función seleccionada. Fecha y hora. -
Page 25: Normas De Instalación
Para más información acerca de pantallas, teclas, funciones de llamada, ajustes y agenda, consulte el Manual de usuario que se puede descargar de la página www.vimar.com Normas de instalación La instalación debe realizarse cumpliendo con las disposiciones en vigor que regulan el montaje del material eléctrico en el país donde se instalen los productos. -
Page 26: Beschreibung
• 5 + 2 kapazitive hinterleuchtete Tasten. • Freisprechfunktion Vollduplex mit Echounterdrückung und Funktion Teleschlinge. • Aufputzmontage mit Metallbügel, auf Gehäuse: rund 2M (Vimar V71701), 3M (Vimar V71303, V71703) horizontal und vertikal, 4+4M (Vimar V71318, V71718) und quadratisch British Standard. - Page 27 Hinweis: Abb. 1 enthält die empfohlenen Einbaumaße, außer bei anderslautenden Vorgaben der einschlägigen lokalen Rechtsvorschriften. 1. Die Aufputzplatte mit Metallbügel auf Gehäuse montieren: rund 2M (Vimar V71701), 3M (Vimar V71303, V71703) horizon- tal und vertikal, 4+4M (Vimar V71318, V71718) und quadratisch British Standard.
- Page 28 TAB: 40605 Abb. 3 Schnittstellen und Klemmen • PoE: Schnittstelle RJ45 Ethernet 10/100 Mbps, PoE Klasse 0. • FP: Eingang NO für potentialfreien Kontakt, Etagenruftaste (Bezug auf Klemme M). • M: Massesignal für Etagenruftaste. Installationshinweise: • Die Netzschnittstelle RJ45 ist ausschließlich an ein Netz SELV (Safety Extra-Low Voltage) anzuschließen. •...
-
Page 29: Erstmalige Einschaltung
TAB: 40605 Erstmalige Einschaltung Solange es nicht konfiguriert ist, erscheint am verdrahteten und mit Strom versorgtem Gerät die folgende Bildschirmseite mit den Angaben: IP-Adresse (temporäre automatic link-local address), MAC-Adresse, Kennnummer der Anlage, Firmware- Version. Standardmäßig haben alle Geräte die ID 00.00.000 , d.h. keine angegebene Kennnummer: Zur Vereinfachung der Anlagenkonfiguration mittels Video Door IP Manager kann der Installateur die ID an jedem Gerät einstellen, indem er die mittlere Taste unter dem Bildschirm drückt und die gewünschte Kennnummer zuweist. -
Page 30: Beschreibung Der Benutzeroberfläche
TAB: 40605 Beschreibung der Benutzeroberfläche Mit dem Druck einer der 5 Multifunktionstasten (b) im Ruhezustand des Geräts bei erloschenem Bildschirm wird die Seite Favoriten eingeblendet. Sofern konfiguriert, hat der Druck der Tasten Sprechen/Hören (c) oder Türöffner (d) die Ausführung der konfigurierten Funktion zur Folge. Datum und Uhrzeit. -
Page 31: Installationsvorschriften
Rufe mit Klingelton und visuellem Feedback am Display gemeldet. Mehr Informationen zu Bildschirmseiten, Tasten, Ruffunktionen, Einstellungen und Namensverzeichnis können der zum Download auf der Website www.vimar.com verfügbarenBedienungsanleitungen entnommen werden Installationsvorschriften Die Installation hat gemäß den im jeweiligen Verwendungsland der Produkte geltenden Vorschriften zur Installation elektrischer Ausrüstungen zu erfolgen. -
Page 32: Funções Principais
• 5 + 2 teclas capacitivas retroiluminadas. • Alta-voz full-duplex com echo canceller e função teleloop. • Montagem: na parede, com suporte metálico, em caixa: circular 2M (Vimar V71701), 3M (Vimar V71303, V71703) hori- zontal e vertical, 4+4M (Vimar V71318, V71718) e quadrada British standard. -
Page 33: Instalação
Nota: na fig. 1 estão as medidas de instalação aconselhadas, salvo indicações em contrário por parte da normativa local vigente na matéria. 1. Fixe a placa à parede, com suporte metálico, em caixa: circular 2M (Vimar V71701), 3M (Vimar V71303, V71703) hori- zontal e vertical, 4+4M (Vimar V71318, V71718) e quadrada British standard. - Page 34 TAB: 40605 Fig. 3 Interfaces e terminais • PoE: interface RJ45 Ethernet 10/100 Mbps, PoE classe 0. • FP: Entrada NO para contacto limpo, botão de chamada de patamar (referência ao terminal M). • M: Referência de massa para botão de patamar. Indicações de instalação: •...
-
Page 35: Primeira Ligação
TAB: 40605 Primeira ligação O dispositivo, convenientemente cablado e alimentado, apresenta, quando não configurado, o seguinte ecrã no qual estão indicados: endereço IP (automatic link-local address temporário), endereço MAC, identificação do sistema, versão do firmwa- re. Por defeito, todos os dispositivos têm ID 00.00.000, ou seja, um código identificativo não especificado: para simplificar a atividade de configuração do sistema através do Video Door IP Manager, o instalador pode definir o ID em cada dispositivo premindo a tecla central sob o ecrã... - Page 36 TAB: 40605 Descrição da interface do utilizador Em repouso, com o ecrã desligado, premir uma das 5 teclas multifunções (b) permite visualizar o ecrã de favoritos. Premir as teclas Falar/Escutar (c) ou Trinco (d), se configuradas, determina a execução da função configurada. Data e hora.
-
Page 37: Regras De Instalação
No estado Online as chamadas recebidas são sinalizadas através de um toque e feedback visual no display. Para mais informações sobre ecrãs, teclas, funções de chamada, definições e contactos, recomendamos que consulte o Manual do Utilizador que pode descarregar no site www.vimar.com Regras de instalação A instalação deve ser efetuada de acordo com as disposições que regulam a instalação de material elétrico, vigentes no País... - Page 38 • Ανοικτή ακρόαση full-duplex (ταυτόχρονη αμφίπλευρη επικοινωνία) με echo canceller (καταστολή ηχούς) και λειτουργία teleloop. • Τοποθέτηση: επιτοίχια, με μεταλλική βάση, σε κουτί: στρογγυλό 2M (Vimar V71701), 3M (Vimar V71303, V71703) οριζό- ντιο και κατακόρυφο, 4+4M (Vimar V71318, V71718) και τετράγωνο σύμφωνα με τα βρετανικά πρότυπα.
-
Page 39: Εγκατάσταση
Σημείωση: στην εικ. 1 παρουσιάζονται οι συνιστώμενες διαστάσεις για την εγκατάσταση, εκτός εάν καθορίζεται διαφορετικά από την ισχύουσα νομοθεσία. 1. Στερεώστε την πλάκα στον τοίχο, με μεταλλική βάση, σε κουτί: στρογγυλό 2M (Vimar V71701), 3M (Vimar V71303, V71703) οριζόντιο και κατακόρυφο, 4+4M (Vimar V71318, V71718) και τετράγωνο σύμφωνα με τα βρετανικά πρότυπα. - Page 40 TAB: 40607 Εικ. 3 Interface και επαφές κλέμας • PoE: interface RJ45 Ethernet 10/100 Mbps, PoE κατηγορία 0. • FP: Είσοδος NO για καθαρή επαφή, μπουτόν κλήσης από εξώπορτα (βλ. επαφή κλέμας M). • M: Αναφορά γείωσης για μπουτόν εξώπορτας. Ενδείξεις...
-
Page 41: Πρώτη Ενεργοποίηση
TAB: 40607 Πρώτη ενεργοποίηση Ο μηχανισμός, κατάλληλα συνδεδεμένος και τροφοδοτούμενος, παρουσιάζει, όταν δεν είναι διαμορφωμένος, την παρακάτω οθόνη όπου αναφέρονται τα εξής: διεύθυνση IP (προσωρινή αυτόματη τοπική διεύθυνση σύνδεσης), διεύθυνση MAC, ανα- γνωριστικό εγκατάστασης, έκδοση υλικολογισμικού. Βάσει προεπιλογής, όλοι οι μηχανισμοί έχουν ID 00.00.000 ή μη καθορι- σμένο... - Page 42 TAB: 40607 Περιγραφή interface χρήστη Στην κατάσταση ηρεμίας και με την οθόνη απενεργοποιημένη, όταν πατήσετε ένα από τα 5 πλήκτρα πολλαπλών λειτουργιών ( β ) μπορείτε να εμφανίσετε την οθόνη αγαπημένων. Όταν πατήσετε τα πλήκτρα ομιλίας/ακρόασης ( γ ) ή κλειδαριάς ( δ ) , εάν έχουν...
- Page 43 Στην κατάσταση Σε σύνδεση, οι εισερχόμενες κλήσεις επισημαίνονται μέσω κουδουνιού και οπτικού σήματος στην οθόνη. Για περισσότερες πληροφορίες σχετικά με τις οθόνες, τα πλήκτρα, τις λειτουργίες κλήσης, τις ρυθμίσεις και τον κατάλογο, συνιστάται να ανατρέξετε στο Εγχειρίδιο χρήστη που διατίθεται για λήψη από την ιστοσελίδα www.vimar.com Κανονισμοί εγκατάστασης...
- Page 44 Viale Vicenza, 14 36063 Marostica VI - Italy 49400924A0 00 1709 www.vimar.com...