Table des Matières
Publicité
Les langues disponibles
Les langues disponibles
Liens rapides
Publicité
Table des Matières

Manuels Connexes pour Alesis MELODY54


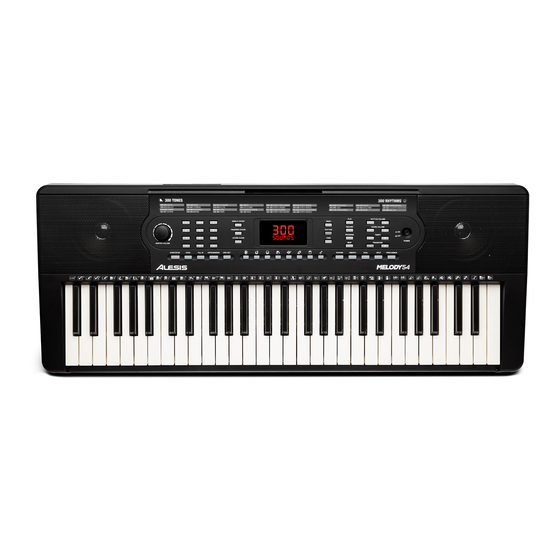
Sommaire des Matières pour Alesis MELODY54
- Page 1 User Guide English ( 3 – 11 ) Guía del usuario Español ( 12 – 21 ) Guide d’utilisation Français ( 22 – 31 ) Guida per l’uso Italiano ( 32 – 41 ) Benutzerhandbuch Deutsch ( 42 – 51 ) Appendix English ( 53 )
-
Page 3: Connection Diagram
User Guide Safety & Warranty Manual Support For the latest information about this product (system requirements, compatibility information, etc.) and product registration, visit alesis.com. For additional product support, visit alesis.com/support. Setup Connection Diagram Items not listed in Introduction > Box Contents are sold separately. -
Page 4: Top Panel
Features Top Panel 16 17 18 7 8 9 10 11 Power On/Off: Press this button to turn the keyboard on or off. Note: After 5 minutes of inactivity, Melody 54 will power off. If you press any key, it will turn back on. Display: This LED Display will update when you make changes to settings such as the tone, rhythm, tempo, etc. -
Page 5: Rear Panel
17. Fill In: While an accompaniment rhythm is playing, press this button to make the keyboard temporarily play a new rhythm or “drum fill.” See Operation > Adding Background Music > Accompaniment Rhythms for more information. 18. Intro/Ending: Press this button to make the keyboard play either an introductory or ending drumbeat, depending on whether an accompaniment rhythm is already playing. - Page 6 Operation Choosing Your Keyboard Tone Melody 54 comes with 300 unique tones for you to choose from. To select a tone for the keyboard: 1. Press the Tone button. 2. Use the Number buttons to pick a specific tone or use the + / – buttons to cycle through the tones one-by-one.
- Page 7 Split Mode Split Mode allows you to split the 54 keys into two zones so that you can have one tone for each hand on the keyboard. For example, you may want one of the piano tones for your right hand and one of the bass tones for your left hand.
- Page 8 To insert a drum fill into the accompaniment rhythm, press the Fill In button while the accompaniment rhythm is playing. The accompaniment rhythm will automatically return to its regular pattern after the fill. The drum fill will vary depending on when you press the Fill In button. To play an introductory drumbeat for the selected accompaniment rhythm, press the Intro/Ending button while the accompaniment rhythm is not playing.
- Page 9 Single Chord: If you press the Single Chord button, you can use a condensed set of keys to quickly produce an accompaniment chord. To produce a chord, press the keys corresponding to the chord that you want to play (as diagrammed below).
- Page 10 Rhythm Programming You can use the rhythm programming feature to create your own custom drum rhythm to accompany you while you play the keys. To create a custom accompaniment rhythm: 1. Press the Program button to enter Programming Mode. Prg will appear on the Display, and the keys will automatically shift to percussion sounds.
-
Page 11: Demo Songs
Recording You can use the recording feature on Melody 54 to record yourself playing the piano. To record your playing: 1. Press the Record button to enter Recording Mode. REC will remain on the Display. 2. When you are finished playing what you wanted to record, press the Play button to stop the recording and automatically hear it play back. -
Page 12: Contenido De La Caja
Manual sobre la seguridad y garantía Soporte Para obtener la información más reciente acerca de este producto (requisitos de sistema, información de compatibilidad, etc.) y registrarlo, visite alesis.com. Para obtener soporte adicional del producto, visite alesis.com/support. Instalación Diagrama de conexión Los elementos que no se enumeran en Introducción >... -
Page 13: Características
Características Panel superior 16 17 18 7 8 9 10 11 Power (Encendido/apagado): Pulse este botón para encender y apagar el teclado. Nota: Tras 5 minutos de inactividad, el Melody 54 se apagará. Si pulsa cualquier tecla, volverá a encenderse. Pantalla: Esta pantalla de LED se actualizará... - Page 14 15. Start/Stop: Pulse este botón para iniciar o detener un ritmo de acompañamiento. Consulte Funcionamiento > Agregado de música de fondo > Ritmos de acompañamiento para obtener más información. 16. Sync: Pulse este botón para activar la característica de sincronización. Cuando la característica de sincronización está...
-
Page 15: Panel Trasero
Panel trasero Mic: Conecte aquí el micrófono incluido para cantar mientras interpreta el teclado. Auriculares (TRS de 1/8 pulg. / 3.5 mm): Conecte auriculares (no incluidos) a esta salida para escuchar el PHONES DC 12V DC 9V teclado. Nota: Al enchufar los auriculares a la salida se silenciarán los altavoces internos del teclado. -
Page 16: Modo De División
Modo dual El modo dual permite disponer dos tonos diferentes juntos en capas. Cómo superponer dos tonos: Pulse el botón Dual. Aparecerá dOU momentáneamente en la pantalla. El tono que estaba seleccionado antes de pulsar el botón Dual se usará automáticamente como el primer tono de la capa. Para modificar el tono de la capa añadida, utilice los botones numéricos para seleccionar un tono específico o utilice los botones + / –... - Page 17 Agregado de música de fondo Ritmos de acompañamiento Si desea tener un rulo de tambores como acompañamiento mientras toca el teclado, el Melody 54 viene con 300 ritmos únicos para elegir. Cómo seleccionar un ritmo de acompañamiento: Pulse el botón Rhythm. Utilice los botones numéricos para seleccionar un ritmo específico o utilice los botones + / –...
- Page 18 Acordes de acompañamiento Si desea tener tanto un ritmo como acordes armónicos que lo acompañen mientras toca el teclado, puede utilizar la característica de acordes de acompañamiento. Con esta característica activada, el teclado comenzará de forma automática a tocar música centrándose en un acorde específico del piano, el cual puede ser arpegiado y/o interpretado por otros instrumentos (tales como un bajo).
- Page 19 Para ajustar el volumen del acorde de acompañamiento, pulse el botón Chord Vol + o Chord Vol –. Pulse los botones Chord Vol + y Chord Vol – simultáneamente para restaurar el nivel de volumen predeterminado (indicado en la pantalla como u07). Para evitar que el acorde de acompañamiento se reproduzca de forma automática, pulse el botón Chord Clear.
- Page 20 Programación de ritmos Puede utilizar la característica de programación de ritmos para crear un propio ritmo de percusión que lo acompañe mientras toca el teclado. Cómo crear un ritmo de acompañamiento personalizado: Pulse el botón Program para entrar al modo de programación. Aparecerá Prg en la pantalla y las teclas cambiarán automáticamente a sonidos de percusión.
- Page 21 Grabación Puede utilizar la característica de grabación del Melody 54 para grabarse a usted mismo mientras toca el piano. Cómo grabar su interpretación: Pulse el botón Record para entrar al modo de grabación. REC permanecerá en la pantalla. Una vez que termine de tocar lo que desea grabar, pulse el botón Play para detener la grabación y escuchar su reproducción automáticamente.
-
Page 22: Présentation
Consignes de sécurité et informations concernant la garantie Assistance technique Pour les toutes dernières informations concernant la configuration système requise, la compatibilité, etc., et l’enregistrement du produit, veuillez visiter alesis.com. Pour de l’assistance supplémentaire, veuillez visiter alesis.com/support. Installation Schéma de connexion Les éléments qui ne figurent pas dans la section... -
Page 23: Caractéristiques
Caractéristiques Panneau supérieur 16 17 18 7 8 9 10 11 Interrupteur Power : Cette touche permet de mettre le clavier sous et hors tension. Remarque : Après 5 minutes d'inactivité, le Melody 54 se met automatiquement en mode veille. Si vous appuyez sur une des touches, il se rallumera. - Page 24 15. Start/Stop : Cette touche permet de lancer ou d’arrêter un rythme d’accompagnement. Veuillez consulter la section Fonctionnement > Ajouter de la musique de fond > Rythme d’accompagnement afin d’en savoir plus. 16. Sync : Cette touche permet d'activer la fonction de synchronisation. Lorsque la fonction de synchronisation est activée, jouer une touche à...
-
Page 25: Panneau Arrière
Panneau arrière Microphone : Cette entrée permet brancher microphone fourni afin de chanter tout en jouant du clavier. Sortie casque (TRS 3,5 mm) : Cette sortie permet de brancher un casque d’écoute (non inclus) afin d’écouter les PHONES DC 12V DC 9V sons du clavier. -
Page 26: Mode De Séparation Du Clavier
Superposition Le mode de superposition permet de superposer deux sonorités différentes. Pour superposer deux sonorités : Appuyez sur la touche Dual. dOU s’affichera temporairement à l'écran. La sonorité sélectionnée avant d’appuyer sur la touche Dual sera automatiquement sélectionnée comme sonorité principale pour créer la superposition. - Page 27 Ajouter de la musique de fond Rythme d'accompagnement Si vous souhaitez vous accompagner d'une boucle de batterie, vous pouvez choisir parmi l’un des 300 rythmes uniques du Melody 54. Pour sélectionner un rythme d’accompagnement : Appuyez sur la touche Rhythm. Utilisez les touches numériques pour sélectionner un rythme ou utilisez les touches +/- pour parcourir les rythmes un par un.
-
Page 28: Accords D'accompagnement
Accords d'accompagnement Si vous souhaitez vous accompagner d'un rythme de batterie et d’accord d’accompagnement, vous pouvez utiliser la fonction d’accord d’accompagnement. Lorsque cette fonction est activée, le clavier joue automatiquement de la musique centrée sur un accord de piano spécifique, qui peut être arpégé et/ou accompagné d’autres instruments (comme une guitare basse). La musique jouée correspond au style du rythme d’accompagnement sélectionné. - Page 29 Pour régler le volume de l’accord d’accompagnement, utilisez les touches Chord Vol + et Chord Vol –. Appuyez simultanément sur les touches Chord Vol + et Chord Vol – pour réinitialiser la valeur par défaut du volume (l’écran affiche u07). Pour que l'accord d'accompagnement ne joue pas automatiquement, appuyez sur la touche Chord Clear.
-
Page 30: Programmation D'un Rythme D'accompagnement
Programmation d’un rythme d’accompagnement Vous pouvez utiliser la fonction de programmation d’un rythme pour créer votre propre rythme de batterie et vous accompagner pendant que vous jouez. Pour créer un rythme d’accompagnement personnalisé : Appuyez sur la touche Program afin de passer en mode de programmation d’un rythme. Prg s'affiche à... -
Page 31: Chansons De Démonstration
Enregistrement Vous pouvez utiliser la fonction d'enregistrement du Melody 54 pour vous enregistrer en train de jouer du piano. Pour enregistrer votre performance : Appuyez sur la touche Record pour passer en mode d’enregistrement. REC reste affiché à l'écran. Lorsque vous avez terminé de jouer ce que vous vouliez enregistrer, appuyez sur la touche Play pour arrêter d’enregistrer et lancer automatiquement la lecture. -
Page 32: Contenuti Della Confezione
Istruzioni di sicurezza e garanzia Assistenza Per le ultime informazioni in merito a questo prodotto (requisiti di sistema, informazioni sulla compatibilità, ecc.) e per la registrazione del prodotto, recarsi alla pagina alesis.com. Per ulteriore assistenza sul prodotto, recarsi alla pagina alesis.com/support. Configurazione... -
Page 33: Pannello Superiore
Caratteristiche Pannello superiore 16 17 18 7 8 9 10 11 Power On/Off (accensione/spegnimento): premere questo tasto per accendere e spegnere la tastiera. Nota bene: dopo 5 minuti d’inattività, il Melody 54 si spegnerà. Premendo qualsiasi tasto, tornerà in funzione. Display: questo display a LED si aggiorna quando si apportano modifiche alle impostazioni quali tonalità, ritmo, tempo, ecc. - Page 34 15. Start/Stop: premere questo tasto per avviare o interrompere un ritmo di accompagnamento. Per maggiori informazioni, si veda Operazione > Aggiungere musica di sottofondo > Ritmi di accompagnamento. 16. Sync: premere questo tasto per attivare la funzione di sincronizzazione (Sync). Quando la funzione di sincronizzazione Sync è...
-
Page 35: Pannello Posteriore
Pannello posteriore Mic: collegare il microfono in dotazione a questo livello per cantare mentre si suona la tastiera. Cuffie (1/8” / 3,5 mm TRS): collegare le cuffie (non in dotazione) a questa uscita per sentire la tastiera. PHONES DC 9V DC 12V Nota bene: collegandole all’uscita cuffie si silenziano gli altoparlanti interni della tastiera. - Page 36 Modalità doppia (Dual) La modalità Dual consente la stratificazione di due tonalità diverse. Per sovrapporre due tonalità: Premere il tasto Dual. A Display appare temporaneamente la scritta dOU. La tonalità selezionata prima di premere il tasto Dual verrà utilizzata automaticamente come prima tonalità nello strato. Per modificare la tonalità...
- Page 37 Aggiungere musica di sottofondo Ritmi di accompagnamento Se si desidera essere accompagnati da un loop di batteria mentre si suona la tastiera, il Melody 54 è dotato di 300 ritmi unici tra cui scegliere. Per selezionare un ritmo di accompagnamento: Premere il tasto Rhythm.
- Page 38 Accordi di accompagnamento Se si desidera avere un accompagnamento con un beat di batteria e con accordi armonici mentre si suona la tastiera, è possibile utilizzare la funzione di accordo di accompagnamento. Con questa funzione attivata, la tastiera riprodurrà automaticamente musica centrata su uno specifico accordo di pianoforte, che può...
- Page 39 Per regolare il volume dell'accordo di accompagnamento, premere il tasto Chord Vol + o Chord Vol –. Premere contemporaneamente i tasti Chord Vol + e Chord Vol – per ripristinare il livello di volume predefinito (indicato a Display come u07). Per fermare la riproduzione automatica dell’accordo di accompagnamento, premere il tasto Chord Clear.
- Page 40 Programmazione del ritmo Si può utilizzare la funzione di programmazione del ritmo per creare il proprio ritmo di batteria personalizzato per accompagnarsi mentre si suonano i tasti. Per creare un ritmo di accompagnamento personalizzato: Premere il tasto Program per entrare in modalità di programmazione. Prg appare a Display, e i tasti passano automaticamente ai suoni di percussione.
- Page 41 Registrazione Si può utilizzare la funzione di registrazione del Melody 54 per registrarsi mentre si suona il piano. Per registrare la propria esibizione: Premere il tasto Record per entrare in modalità di registrazione. REC rimarrà a Display. Una volta finito di suonare ciò che si desidera registrare, premere il tasto Play per fermare la registrazione e, automaticamente, sentirne la riproduzione.
-
Page 42: Lieferumfang
Notenständer Benutzerhandbuch Sicherheitshinweise und Garantieinformationen Kundendienst Für die neuesten Informationen zu diesem Produkt (Systemanforderungen, Informationen zur Kompatibilität etc.) und für die Produktregistrierung besuchen Sie alesis.com. Für zusätzlichen Produkt-Support besuchen Sie alesis.com/support. Setup Anschlussdiagramm Teile, die nicht unter Einführung > Lieferumfang angegeben sind, sind separat erhältlich. - Page 43 Funktionen Oberseite 16 17 18 7 8 9 10 11 Power Ein/Aus: Drücken Sie diese Taste, um das Keyboard ein-/auszuschalten. Hinweis: Nach 5 Minuten Inaktivität schaltet sich Melody 54 aus. Wenn Sie eine beliebige Taste drücken, schaltet sich das Gerät wieder ein. Display: Diese LED-Anzeige wird aktualisiert, wenn Sie Einstellungen wie Klangfarbe, Rhythmus, Tempo usw.
- Page 44 14. Rhythm: Drücken Sie diese Taste und verwenden Sie die Zifferntasten oder + / - Tasten, um einen Begleitrhythmus auszuwählen. Weitere Informationen finden Sie unter Betrieb > Hinzufügen von Hintergrundmusik > Begleitrhythmen. 15. Start/Stop: Drücken Sie diese Taste, um einen Begleitrhythmus zu starten oder zu stoppen. Weitere Informationen finden Sie unter Betrieb >...
- Page 45 Rückseite Mic: Schließen Sie hier das inkludierte Mikrofon an, um Ihr Spiel am Keyboard mit Gesang zu begleiten. Kopfhörer (1/8” / 3,5 mm TRS): Schließen Sie Kopfhörer (nicht im Lieferumfang enthalten) an diesen Ausgang an, um PHONES DC 9V DC 12V das Keyboard zu hören.
- Page 46 Dual-Modus Im Dual-Modus können zwei verschiedene Tones zusammengelegt werden. So legen Sie zwei Tones übereinander: Drücken Sie die Dual-Taste. dOU wird vorübergehend auf dem Display angezeigt. Der vor dem Drücken der Dual-Taste ausgewählte Tone wird automatisch als erster Tone in der Ebene verwendet. Um den Tone für die hinzugefügte Ebene zu ändern, wählen Sie mit den Zifferntasten einen bestimmten Tone aus oder verwenden die + / –...
- Page 47 Hinzufügen von Hintergrundmusik Begleitrhythmen Wenn Sie einen Drumloop während des Klavierspiels begleiten möchten, bietet Melody 54 300 einzigartige Rhythmen, aus denen Sie wählen können. So wählen Sie einen Begleitrhythmus aus: Drücken Sie die Rhythm-Taste. Verwenden Sie die Zifferntasten, um einen bestimmten Rhythmus auszuwählen, oder verwenden Sie die Tasten + / –, um die Rhythmen nacheinander zu durchlaufen.
- Page 48 Begleitakkorde Wenn Sie sowohl einen Drumbeat als auch Akkordharmonien beim Begleiten des Keyboards haben möchten, können Sie die Akkordfunktion für die Begleitung verwenden. Wenn diese Funktion aktiviert ist, spielt das Keyboard automatisch Musik, die auf einen bestimmten Piano- Akkord ausgerichtet ist, der arpeggiert und oder von anderen Instrumenten (z. B. einer Bassgitarre) begleitet werden kann.
- Page 49 Um die Lautstärke des Begleitakkords einzustellen, drücken Sie Chord Vol + oder Chord Vol – Taste. Drücken Sie gleichzeitig die Chord Vol + und Chord Vol – Tasten, um den Standardlautstärkepegel zurückzusetzen (am Display als u07 angezeigt). Drücken Sie die Chord Clear-Taste, um die automatische Wiedergabe des Begleitakkords zu stoppen. Hinweis: Wenn die Begleit-Akkordfunktion aktiviert ist, können Sie den Dual-Modus, aber nicht den Split- Modus verwenden.
- Page 50 Rhythmusprogrammierung Sie können die Rhythmus-Programmierfunktion verwenden, um Ihren eigenen benutzerdefinierten Drum- Rhythmus zu erstellen, der Sie beim Spielen der Tasten begleitet. So erstellen Sie einen benutzerdefinierten Begleitrhythmus: Drücken Sie die Program-Taste, um den Programmiermodus aufzurufen. Auf dem Display wird Prg angezeigt, und die Tasten wechseln automatisch zu den Percussion-Sounds.
- Page 51 Aufnahme Sie können die Aufnahmefunktion von Melody 54 verwenden, um sich selbst am Klavier aufzunehmen. So nehmen Sie Ihr eigenes Spiel auf: Drücken Sie erneut die Record-Taste, um in den Aufnahmemodus zu gelangen. REC wird weiterhin auf dem Display angezeigt. Wenn Sie mit dem gewünschten Lied fertig sind, drücken Sie die Play-Taste, um die Aufnahme zu stoppen und die Wiedergabe automatisch zu hören.
-
Page 53: Appendix (English)
Specifications are subject to change without notice. Trademarks & Licenses Alesis is a trademark of inMusic Brands, Inc., registered in the U.S. and other countries. All other product or company names are trademarks or registered trademarks of their respective owners. - Page 56 Manual Version 1.5...