Table des Matières
Publicité
Les langues disponibles
Les langues disponibles
Liens rapides
Publicité
Table des Matières

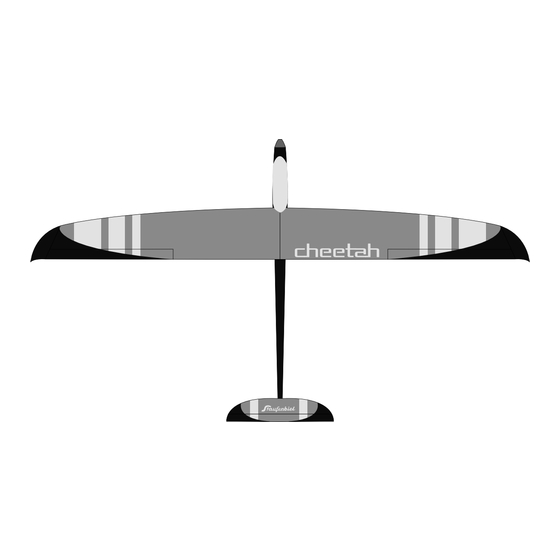
Sommaire des Matières pour Cheetah Staufenbiel
- Page 1 BAUANLEITUNG INSTRUCTION MANUAL INSTRUCTIONS DE MONTAGE HSF0314077/HSF0314077P...
-
Page 2: Warnungen Und Sicherheitshinweise
Betriebsanleitungen im Zusammenhang mit dem Modell sowie die Installation, der Betrieb, die Verwendung und Wartung der mit dem Modell zusammenhängenden Komponenten können von der Firma Staufenbiel nicht überwacht werden. Daher übernimmt die Firma Staufenbiel keinerlei Haftung für Verluste, Schäden oder Kosten, die sich aus dem fehlerhaften Betrieb, aus fehler- haften Verhalten bzw. -
Page 3: Technische Daten
INHALTSÜBERSICHT Vorwort Schwerpunkt Die Tragflächen Konformitätserklärung Der Rumpf Ruderausschläge TECHNISCHE DATEN Tragfflächen-Profil: MH-30 1750 mm (69 in) 26,4 dm² 1030 g (flugfertig) (409.2 in²) (36 oz) EINGEBAUTES ZUBEHÖR (PNP-VERSION) LiPo 2200mAh 3S (separat) Himax C3522 (900KV) LiPo Ladegerät (separat) 60 A (separat erhältlich) min. - Page 4 VORWORT Herzlichen Glückwunsch zum Erwerb des Cheetah. Das Flächenprofil MH-30 in Verbindung mit dem Motor C-3522 mit 900 U/Volt charakterisieren dieses Modell als reinrassigen Hotliner. Die Bauausführung eines solchen Modells und damit verbundene Detaillösungen unterliegen einer gewissen Geschmacksabhängigkeit. Daher sind die Lösungen dieser Bauanleitung als Vorschlag zu verstehen, es gibt sicher hier und da andere Möglichkeiten und Herangehensweisen.
- Page 5 Verknoten Sie die Verlängerungskabel mit der Durchfädelungshilfe. Ziehen Sie die Kabel durch die Fläche und führen Sie diese an der Unterseite heraus. Verschrumpfen Sie die Flächenservos mit Schrumpfschlauch. Schleifen Sie die späteren Klebeflächen mit 80er Schleifpapier leicht an. Bohren sie das äußerste Loch des Servohorns auf 1,8mm auf.
- Page 6 Befestigen Sie, entsprechend der Markierung, die Ruderhörner mit zwei Schrauben. Bringen Sie nun auch die Querruder in Neutralposition und verbinden Sie diese mit zwei Gabelköpfen und einer Gewindestange mit dem Servo. Schneiden Sie die Servoschachtverkleidungen aus. Diese werden mit doppelseitigem Klebe- band befestigt.
- Page 7 Bohren die das innerste Loch des Servohorns auf 1,8mm auf. Bringen Sie das Servo über Ihren Sender auf Neutralposition, verschrauben Sie das Horn und kürzen es entsprechend der Abb. Verwenden Sie auch hier ein 50cm Servover- längerungskabel. Verbinden Sie dieses mit dem Servo und ziehen es durch den Rumpf.
- Page 8 Markieren Sie fluchtend zu den Befestigungs- löchern die Position des Ruderhorns auf dem Höhenruder. Schneiden sie entsprechend der Markierung eine Aussparung in das Ruder. Schleifen Sie das Horn leicht anm und verkleben es entspre- chend der Abb. mit Epoxy. Ermitteln Sie nun die exakte Länge der Steuer- stange bei Neutralstellung von Ruder und Ser- vo.
- Page 9 Verbinden Sie Regler und Motor entsprechend der Regleranleitung. Fixieren Sie den Regler mit Servotape. Sichern Sie den Akku mit zwei Klettschlaufen. Zusätzlich sollte an der Unterseite noch selbst- klebendes Klettband angebracht werden. Im letzten Schritt werden Tragfläche und Rumpf mit zwei Schrauben verbunden. Die Montagearbeiten sind nun abgeschlossen und es kann mit der Senderprogrammierung begonnen werden.
- Page 10 ABSCHLUSS Genießen Sie nun den Erstflug mit Ihrem neuen Cheetah. Mit den Angaben aus dieser Anleitung hält das Modell keine bösen Überraschungen parat. Trotzdem ist eine gute Idee, wenn beim ersten Start z.B. ein Clubkamerad das Modell wirft. Freuen Sie sich auf viele schöne Flugstunden mit Ihrem neuen Cheetah von Staufenbiel.
-
Page 11: Konformitätserklärung
KONFORMITÄTSERKLÄRUNG Horizon Hobby GmbH erklärt hiermit, dass dieses Produkt konform zu den essentiellen Anforderungen der EMC Direktive. Eine Kopie der Konformitätserklärung ist online unter folgender Adresse verfügbar : http://www.horizonhobby.com/content/support-render-compliance HINWEISE ZUM UMWELTSCHUTZ Dieses Produkt darf nicht mit anderem Abfall entsorgt werden. Stattdessen obliegt es dem Benutzer, das Altgerät an einer designierten Receycling-Sammelstelle für elektrische und elektronische Gerä- te abzugeben. -
Page 12: Safety Precautions And Warnings
Do not use with incompatible compo- nents or alter this product in any way outside of the instructions provided by Gustav Staufenbiel GmbH. This manual contains instructions for safety, operation and maintenance. It is essential to read and follow all the instructions and warnings in the manual, prior to assembly, setup or use, in order to operate correctly and avoid damage or serious injury. -
Page 13: Rc-Functions
TABLE OF CONTENTS Preface Center of Gravity The Wings Declaration of comfirmity The Fuselage Control Throws SPECIFICATIONS Airfoil: MH-30 1750 mm (69 in) 26,4 dm² 1030 g (flying weight) (409.2 in²) (36 oz) INCLUDED ACCESSORIES (PNP VERSION) LiPo 2200mAh 3S (separately) Himax C3522 (900KV) LiPo Charger (separately) 60 A (separately) - Page 14 PREFACE Thanks for purchasing the Staufenbiel Cheetah. The construction of the model and the detailed solutions related subject to a certain taste dependen- cy. Therefore, the solutions to these instructions are to be understood as a suggestion. There are certainly other options and approaches. In some alternatives is therefore received during the building specifications, but does not shown on the pictures.
- Page 15 Attach the extension cable to the string and pull the cable through the wing. Cover the aileron servos with heatshrink tube. Sand the parts that will be glued lightly with 80 sandpaper. Enlarge the outermost hole to 1.8 mm. Set the servo to neutral and fasten the servohorn.
- Page 16 Install the rudder horn due to the marking with two screws. Set the Servo and the aileron to neutral and connect the linkage. Trim the servocover with hobby scissors and glue them with double sided tape. For completing the assembly of the wing sec- tion glue the torsion and center pin and the bolt retainer with 5 min Epoxy.
- Page 17 Enlarge the inner hole of the servo horn to 1,8mm. Adjust the servo with the transmitter to neutral. Install the horn and cut it according to the foto. Connect the 50cm servo extension cable und route it to the fuselage. Glue the elevator servo in the fuselage.
- Page 18 Align the position of the rudderhorn and mark it with felt-tipped pen. Cut an opening at the mark in the rudder. Light- ly sand the horn and glue it with epoxy. Estimate the exact length of the pushrod at neutral position of the rudder and servo. Turn the clevis in or out to adjust the lenght of the pushrod.
-
Page 19: Control Throws
Connect the ESC and motor according to the manual. Fasten the ESC with servotape. Use the hook and loop tape to secure the batte- ry in the fuselage. Using the remaining hook and loop tape and attach theloop portion to the bottom of the battery. - Page 20 THE END Now enjoy the first flight with your new CHEETAH. Look forward to many hours with your new CHEETAH.
-
Page 21: Declaration Of Conformity
DECLARATION OF CONFORMITY EU Compliance Statement: Horizon Hobby, LLC hereby declares that this product is in compliance with the essential requirements and other relevant provisions of the EMC Directive. A copy of the EU Declaration of Conformity is available online at: http://www.horizonhobby.com/content/support-render-compliance. -
Page 22: Précautions Et Avertissements Liés À La Sécurité
N’essayez pas de modifi er ou d’utiliser ce produit avec des composants incompatibles hors des instructions fournies par Gustav Staufenbiel GmbH. Ce manuel comporte des instructions relatives à la sécurité, au fonctionnement et à l’entretien. Il est capital de lire et de respecter la totalité... -
Page 23: Caractéristiques
TABLE DES MATIÈRES Préface Centre de gravité Les ailes Déclaration de conformité Le fuselage Débattements des gouvernes CARACTÉRISTIQUES Profil: MH-30 1750 mm (69 in) 26,4 dm² 1030 g (en ordre de vol) (409.2 in²) (36 oz) ACCESSOIRES (VERSION PNP) 3S LiPo 2200mAh (non inclus) Himax C3522 (900KV) Chargeur LiPo (non inclus) 60 A (non inclus) -
Page 24: Les Ailes
PRÉFACE Nous vous remercions pour l‘achat du Cheetah Staufenbiel. L‘assemblage du modèle et les solutions détaillées rapportées sont à adapter suivant vos préféren- ces. Les solutions présentées dans les instructions sont à considérer comme étant des suggestions. Il y a certainement d‘autres solutions et approches possibles. Certaines alternatives sont apparues durant la rédaction du cahier des charges, mais ne sont pas représentées sur les photos. - Page 25 Attachez une ficelle à l‘extrémité de la rallonge, puis tirez la rallonge au travers de l‘aile. Recouvrez les servos des ailerons à l‘aide de gaine thermo-rétractable. Poncez légèrement les surfaces qui seront encollées à l‘aide de papier abrasif grain 80. Portez le diamètre du trou extérieur à...
- Page 26 Installez le guignol en le positionnant par rap- port à la marque précédemment tracée et fixez- le à l‘aide des 2 vis. Positionnez le servo et l‘aileron au neutre, puis connectez la tringlerie. Découpez les carénages de servos à l‘aide de ciseaux et collez les à...
- Page 27 Portez le diamètre du trou intérieur du palon- nier à 1.8mm. Placez le servo au neutre à l‘aide de votre ra- dio. Installez le palonnier et supprimez le sur- plus de matière comme sur la photo. Connectez une rallonge de 50cm, puis glissez- la à...
- Page 28 Repérez la position du guignol de commande de profondeur marquez la position à l‘aide d‘un feutre fin effaçable. Découpez une fente dans la gouverne de pro- fondeur en suivant la marque précédemment tracée. Poncez les surface de collage et collez le guignol en position à...
- Page 29 Connectez le contrôleur au moteur comme indiqué dans leur manuel. Fixez le contrôleur à l‘aide d‘adhésif double-face. Utilisez de la bande auto-agrippante pour fixer la batterie à l‘intérieur du fuselage. Utilisez le morceau restant de bande auto-agrippante pour le coller sous la batterie. Ne pas recouvrir les étiquettes de sécurité...
- Page 30 Vous êtes maintenant prêt à effectuer les premiers vols de votre CHEETAH. Nous vous souhaitons de très nombreuses heures de vol avec votre CHEETAH.
-
Page 31: Déclaration De Conformité
DÉCLARATION DE CONFORMITÉ Ce produit respecte les critères de sécurité essentiels déterminés dans la directive du Conseil de l‘ Union européenne relative à l‘harmonisation des dispositions légales des États membres sur la compatibilité électromagnétique (2004/108/CE). Une déclaration de conformité est dis- ponible. - Page 32 © 2017 Horizon Hobby GmbH GmbH...