Table des Matières
Publicité
Liens rapides
Limited Three Year Warranty
(Commercial Applications)
T&S warrants to the original purchaser (other
than for purposes of resale) that such product is
free from defects in material and workmanship for a
period of three (3) years from the date of purchase.
During this three-year warranty period, if the product
is found to be defective, T&S shall, at its options,
repair and/or replace it. To obtain warranty service,
products must be returned to...
T&S Brass and Bronze Works, Inc.
Attn: Warranty Repair Department
2 Saddleback Cove
Travelers Rest, SC 29690
Shipping, freight, insurance, and other
transportation charges of the product to T&S and
the return of repaired or replaced product to the
purchaser are the responsibility of the purchaser.
Repair and/or replacement shall be made within a
reasonable time after receipt by T&S of the returned
product. This warranty does not cover Items which
have received secondary finishing or have been
altered or modified after purchase, or for defects
caused by physical abuse to or misuse of the
product, or shipment of the products.
Any express warranty not provided herein, and
any remedy for Breach of Contract which might
arise, is hereby excluded and disclaimed. Any
implied warranties of merchantability or fitness for
a particular purpose are limited to three years in
duration. Under no circumstances shall T&S be
liable for loss of use or any special consequential
costs, expenses or damages.
Some states do not allow limitations on how
long and implied warranty lasts or the exclusion or
limitation of incidental or consequential damages,
so the above limitations or exclusions may not apply
to you. Specific rights under this warranty and other
rights vary from state to state.
Attention California Residents:
WARNING This product can expose you to
chemicals including Lead, Chromium (hexavalent
compounds) and Phthalates (DEHP) which are
known to the State of California to cause cancer
and birth defects or other reproductive harm.
For more information go to
www.P65Warnings.ca.gov.
P/N: 098-016361-45 Rev.12
Date: 08-06-21
Drawn: TED
Checked: DMH 08-27-21
Approved: JHB 09-01-21
Installation and
Maintenance
Instructions
EC-3103
EC-3105
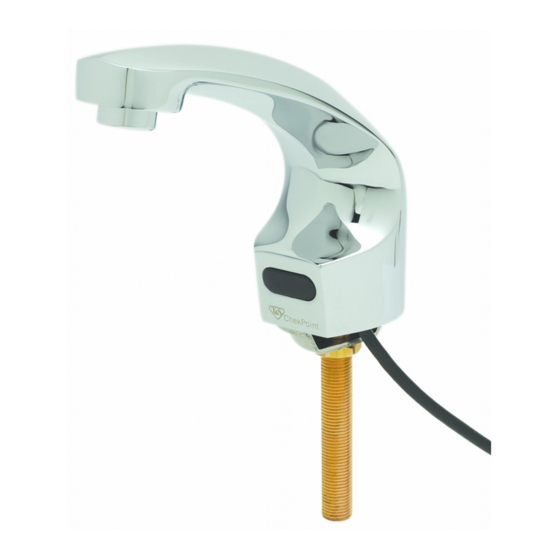
EC-3100 Series
ChekPoint
ELECTRONIC SENSOR OPERATED
FAUCET:
• DECK MOUNT & WALL MOUNT
• GOOSENECK & CAST SPOUT
• SINGLE HOLE, 4" CENTERSET &
4" c/c (DUAL HOLE)
Español:
ES
Instrucciones de instalación y mantenimiento
Français:
FR
Instructions pour l'installation et la maintenance
Deutsch:
DE
Installations- und Wartungsanleitungen
中文:
CN
安装与维护说明
EC-3100
EC-3104
EC-3107
EC-3101
Publicité
Table des Matières
Dépannage

Manuels Connexes pour T&S EC-3100 Serie


Sommaire des Matières pour T&S EC-3100 Serie
- Page 1 Installation and Maintenance Instructions Limited Three Year Warranty (Commercial Applications) T&S warrants to the original purchaser (other than for purposes of resale) that such product is free from defects in material and workmanship for a period of three (3) years from the date of purchase. During this three-year warranty period, if the product is found to be defective, T&S shall, at its options, EC-3100...
-
Page 2: Exploded View
Exploded View EC-3100... - Page 3 Exploded View EC-3101...
- Page 4 Exploded View EC-3102...
- Page 5 Exploded View EC-3103...
- Page 6 Exploded View EC-3104...
- Page 7 Exploded View EC-3105...
- Page 8 Exploded View EC-3107...
- Page 9 Part Number Guide EC-3100, EC-3101 & EC-3105 Electronic Faucets Aerator, Vandal Resistant B-0199-06 Adapter for Non-Splash Aerator 044A O-Ring 006575-45 Angled Sensor w/ Cable 017195-45 Inlet Hose for use with EC-3100 1/2” NPSM-F x 1/4” NPSM-F x 18” Long 016297-45 Inlet Hose for use with EC-3101 &...
-
Page 10: Important
Important: • ALL ELECTRICAL WIRING IS TO BE INSTALLED IN ACCORDANCE WITH NATIONAL/LOCAL CODES AND REGULATIONS. • ALL PLUMBING IS TO BE INSTALLED IN ACCORDANCE WITH APPLICABLE CODES AND REGULATIONS. • USE APPROPRIATE PRECAUTIONS WHILE CONNECTING TRANSFORMER TO 120 VAC POWER SOURCE. -
Page 11: Prior To Installation
Tools Required For Installation of Faucets · 8” (200mm) adjustable wrench · Slotted screwdriver, 3/16” · 1/8” hex key wrench · Phillips head screwdriver, #1 · Basin wrench · Pliers Herramientas requeridas para la instalación de los grifos · Llave ajustable de 8” (200 mm) ·... -
Page 12: Avant L'installation
Avant l’installation : Avant l’installation du robinet de la série ChekPoint de T&S, installez les éléments énumérés ci- dessous. Consultez aussi la Figure 1. • Installez une prise électrique à moins de 6 pi. environ de l’évier pour y brancher le transforma- teur –... -
Page 13: Installez Le Dispositif De Robinet
Installez le dispositif de robinet (Figures 2A, 2B, 2C, 2D et 2E) Insérez le câble du robinet et la tige du bec dans le joint de base puis au travers du trou de fixation de l’évier de chirurgien ou de lavage. Fixer à l’aide de la rondelle frein et de l’écrou fournis. Mischventil Beim Installieren des Wasserhahns mit dem Mischventil müssen die Anweisungen auf S.16 beachtet werden. -
Page 14: Fonctionnalité Anti-Rotation En Option
EC-3101 MOUNTING HOLE DIAGRAM DIAGRAMA DEL ORIFICIO DE MONTAJE EC-3101 DIAGRAMME DU TROU DE FIXATION EC-3101 EC-3101 MONTAGELOCHBILD EC-3101 安装孔径 Ø1-1/8” THRU PASO DE 1-1/8” DE DIÁMETRO Ø1-1/8 po. EN TRAVERS Ø1-1/8” DURCH Ø1-1/8” (28mm) 1 5/32” (29mm) Ø9/32” For Anti-Rotation Ø9/32”... - Page 15 OPTIONALER VERDREHSCHUTZ Modell Wandbefestigung: EC-3101 (Abbildung 2F) Hinweis: Der Verdrehschutz erfolgt über eine Stellschraube, um die Armatur in vertikaler Position zu verankern und ist AUSSCHLIESSLICH für die Verwendung mit Edelstahlspülen vorgesehen. Nutzen Sie das Montagelochbild oder die Fußdichtung der Armatur als Vorlage, durch dessen Platzierung auf dem Armaturen-Montageloch.
- Page 16 Use el diagrama del orificio de montaje o el empaque de la base del grifo como plantilla para colocarlo en su posición sobre el orificio de montaje del grifo. Marque la superficie de montaje de acero inoxidable en la parte central del orificio pequeño en el fondo del empaque de la base. Perfore un orificio de 4 mm (5/32”) de diámetro a través de la superficie de montaje de acero inoxidable.
- Page 17 Installation der Mischventilbaugruppe (Abbildung 3) (falls separat geliefert) Das Mischventil an die Armatur des Regelmoduls montieren, wie in Abbildung 3 dargestellt. Die Armatur fest anziehen NICHT JEDOCH ÜBERDREHEN. Gewindedichtmittel ist nicht erforderlich. Wichtig: Das Mischventil, wie in Abbildung 3 dargestellt, ausrichten. 安装混水阀组件 (图3)(单独提供的情况下)...
- Page 18 Sensor Cable and Supply Line Connections (Figures 4 & 4A) Route the sensor cable from the spout to the top of the control module. Align the (2) white arrows (one on the male side and one on the female side) and plug the mating connectors together.
- Page 19 TRANSFORMER OPTION (Figure 5) Important: DO NOT plug Transformer into receptacle until all wiring has been completed. This type of Transformer is designed to be plugged into a 120 VAC wall receptacle. The Transformer is supplied with a 6 foot Cable. Remove the rubber plug from the transformer connector on the control module.
- Page 20 3. Reemplace las baterías usadas si es necesario. 4. Instale las baterías AA nuevas asegurándose de colocar las terminales + y -en la dirección cor recta. Vuelva a colocar la cubierta de la batería en su sitio y apriete los tornillos de sujeción. 5.
- Page 21 SENSOR RANGE SETUP The sensor range is preset at the faucet during assembly but can be further adjusted by using the steps below. 1. The sensing distance is adjustable from ¾” (2cm) to 6 11/16” (17cm). If there is a disruption in power, the sensor range is saved and will revert to the last setting when power is restored.
-
Page 22: Configuration De La Plage Du Capteur
3. El parpadeo en color rojo en el ojo electrónico indica que la batería está baja. (Reemplace con baterías: tipo AA alcalinas). 4. Una luz roja encendida permanentemente en el ojo electrónico y la ausencia de flujo de agua indica que las baterías se agotaron. 5. - Page 23 2. Der Armaturen-Sensorbereich wird durch ein einfaches Drücken der An-/Aus-Taste auf der Vorderseite des Regelmoduls eingestellt. Versuchen Sie nicht, den Schaltkasten des Regelmoduls zu öffnen. 3. Drücken Sie die An-/Aus-Taste und halten Sie diese gedrückt; Wasser fließt. Nach dem Gedrückthalten der Taste für 5 bis 7 Sekunden, stoppt der Wasserfluss und die rote LED in der Sensorlinse leuchtet durchgängig auf.
- Page 24 5. 与选配的交流电源适配器配套使用时,龙头将自动切换至交流电源适配器并保存其电池 电量。 新的碱性电池可持续使用450,000个开/关循环。 运行时间范围: 15 秒 - 20 分钟 (6 种预设可选) 响应时间: 0.3 秒 感应范围: 距离传感器3/4” 至 6-11/16” (2-17 cm) 电源: 交流和、或直流 低电量提示: LED红灯闪烁 CARE AND CLEANING OF CHROME AND SPECIAL FINISHES DO NOT use abrasive or chemical cleaners (including chlorine bleach) to clean faucets as they may dull the luster and attack the chrome or special decorative finishes.
-
Page 25: Descarga De Agua Automática (Interruptor 4)
The flow control switches are located inside the ChekPoint control module in a black box next to the battery compartment. To access the switches, remove the (4) screws and back cover of the control module. AUTO TIME-OUT ADJUSTMENT (SWITCHES 1-3) The ChekPoint controller provides six periods to select from for shutting off the water when the object is left in front of the electronic eye. -
Page 26: Réglage De La Commande De Débit D'eau
AJUSTE DEL RETRASO DE CORTE Selección de apagado automático DEL AGUA (INTERRUPTORES 5 Y PERÍODO Sw (1) Sw (2) Sw (3) 15 segundos APAGADO APAGADO APAGADO El controlador ChekPoint ofrece cuatro periodos 30 segundos APAGADO APAGADO ENCENDIDO que pueden seleccionarse para cortar el agua 45 segundos APAGADO ENCENDIDO... - Page 27 FUNKTIONEN EINSTELLUNG FÜR AUTO-SCANZEIT Es werden automatisch zwei Scanzeiten von 0,4 Sekunden oder 0,7 Sekunden eingestellt. Die Scanzeit mit 0,4 Sekunden findet Anwendung, wenn die Armatur im Standby-Modus ist. Die Scanzeit ändert sich auf 0,7 Sekunden, sobald die Armatur ein Objekt vor dem Sensor erkennt. EINSTELLUNGEN FÜR WASSERDURCHFLUSSREGELUNG Der ChekPoint-Regler bietet eine Auswahl an vordefinierten Wasserdurchflusseinstellungen.
-
Page 28: Power Saving
自动关水调节(开关1-3) ChekPoint的控制盒提供了六个可选的时间周期,当物体离开电子眼前方,水流就会在一定 时间内关掉。可选的时间周期为:15秒,30秒,45秒,60秒,3分钟和20分钟。默认设置 为15秒。 注意:下表展示了每个自动暂停模式的开关设置位置。 自动冲洗(开关4) ChekPoint控制盒提供开关4位置的自动冲洗选项。如开启自动冲洗功能,在龙头未使用时, 控制盒会在每12个小时自动冲洗龙头25-30秒。工厂默认设置此功能“关闭” 自动关水 关水延迟调整(开关5&6) PERIOD SW(1) SW(2) SW(3) ChekPoint控制盒提供四种自动关水周期 秒 关 关 关 选项,可使物品从电子眼前方移开时, 秒 关 关 开 龙头自动关闭。可选的时间周期包括:1 秒 关 开 关 秒、10秒、15秒、以及30秒。默认设置 秒 为1秒。 关 开 开 开 关 关 分 分 开... - Page 29 SISTEMA CONTRA INTERFERENCIAS • La luz del sol u otras fuentes de iluminación pueden interferir con la distancia del rango de detección. En este caso, el controlador compensará temporalmente la distancia de detección a un rango seguro. El controlador ajustará la distancia al rango normal cuando no se detecte ninguna interferencia.
-
Page 30: Preguntas Y Respuestas
Q&A Q: Can I operate the faucet manually, without using the electronic eye? A: Yes. Press the on/off button and water will start flowing. To turn water off, press on/off button again. If you forget to turn the water off, the faucet will automatically turn it off at the set Auto Time-Out time (see Auto Time-Out Adjustment section). -
Page 31: Troubleshooting Guide
F: Was ist der optimale Erfassungsabstand? A: Zirka 2 Zoll (5 cm) vom Sensor. F: Erfordert das elektronische Auge eine spezielle Pflege? A: Für eine korrekte Funktionsweise des Sensors, muss das elektronische Auge sauber sein. Verwenden Sie ausschließlich milde Reinigungsmittel und Wasser. Mit einem weichen Tuch abwischen. -
Page 32: Guía De Solución De Problemas
GUÍA DE SOLUCIÓN DE PROBLEMAS PROBLEMA POSIBLE CAUSA/SOLUCIÓN No sale agua cuando se activa Si el LED color rojo permanece encendido LED color rojo en el ojo electrónico o parpadea: 1. Reemplace las baterías y/o asegúrese de que se haya enchufado el transformador. 2. - Page 33 Déclenchement intempestif 1. La plage est trop longue ; réduisez la zone (Le dispositif s’active tout seul) de détection. Recherchez au voisinage du robinet des facteurs susceptibles d’influer sur la plage d’activation ; par exemple, des lumières vives, des surfaces très réfléchissantes, la lumière du soleil, etc.
- Page 34 故障检修指南 问题 可能原因/解决方案 打开时没有水流出 如果红色LED持续亮起或者不停闪烁: 电子眼中的红色LED 1. 更换电池并且/或者查明电源适配器是 否插入电源 2. 如果第1种方法没有解决问题: • 感应距离过长/抬起水槽。减小距离。 • 传感器损坏;更换感应模块。 水流非常小或者缓慢滴水 1. 检查供水开关;如果开关处于关闭状 态,请打开开关。 2. 过滤器中有杂质;除去杂质,清洗并重 新安装。 3. 在起泡器或者喷头中有杂质;除去杂 质,清洗并重新安装。 1. 感应距离过长;减小感应器侦测范围。 误触发 检查可能会影响到感应范围的龙头周围事 (龙头自己打开) 物;比如,明亮的灯光、高反射面、阳光 等。 持续流水 1. 电磁阀中有杂质,无法准确关闭。 (即使已经切断连接到龙头的电源) 2. 控制模块损坏;更换控制模块。...
- Page 35 RELATED T&S BRASS PRODUCT LINE EC-3130 ChekPoint Above-Deck Electronic Faucet, Swivel Goosneck w/ 2.2 GPM Aerator EC-3132 ChekPoint Above-Deck Electronic Faucet, Cast Spout w/ 2.2 GPM Aerator T&S BRASS AND BRONZE WORKS, INC. A firm commitment to application-engineered plumbing products 2 Saddleback Cove, P.O.