Table des Matières
Publicité
Liens rapides
For mounting the linear scale and scale tapes, please refer to the separate Mounting Instructions.
Für Montage des Maßstabes und Maßbänder bitte separate Anleitung beachten.
Pour le montage de la règle et des rubans de mesure, veuillez tenir compte des instructions distinctes.
Per il montaggio della riga graduata e dei nastri graduati attenersi alle istruzioni separate.
Para el montaje de la regla y las cintas de medida deben consultarse las instrucciones de montaje
suministradas por separado.
Mounting Instructions
Montageanleitung
Instructions de montage
Istruzioni di montaggio
Instrucciones de montaje
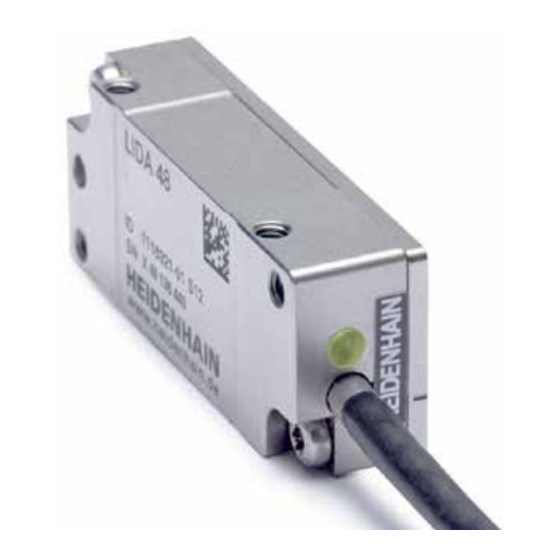
AK LIDA 48
Scanning head
Abtastkopf
Tête captrice
Testina di scansione
Cabezal captador
11/2015
Publicité
Table des Matières

Manuels Connexes pour HEIDENHAIN AK LIDA 48


Sommaire des Matières pour HEIDENHAIN AK LIDA 48
- Page 1 Montageanleitung Instructions de montage Istruzioni di montaggio Instrucciones de montaje AK LIDA 48 Scanning head For mounting the linear scale and scale tapes, please refer to the separate Mounting Instructions. Für Montage des Maßstabes und Maßbänder bitte separate Anleitung beachten.
-
Page 2: Table Des Matières
Contents Page Seite Inhalt Warnings Warnhinweise Sommaire Mounting Options for the Scanning Head Montagemöglichkeiten des Abtastkopfes Indice Items Supplied Lieferumfang Mounting Montage Indice 10 Adjusting the Scanning Head 10 Justage des Abtastkopfes 13 Checking the Status Display 13 Funktionsanzeige überprüfen 14 Tightening Scale Tape (LIDA 405) 14 Maßband spannen (LIDA 405) Page... -
Page 3: Recommandations
Warnings Warnhinweise Recommandations Avvertenze Advertencias Note: Mounting and commissioning is to be conducted by a qualified specialist under compliance with local safety regulations. Do not engage or disengage any connections while under power. The system must be disconnected from power. Achtung: Die Montage und Inbetriebnahme ist von einer qualifizierten Fachkraft unter Beachtung der örtlichen Sicherheitsvorschriften vorzunehmen. -
Page 4: Possibilités De Montage De La Tête Captrice
Mounting Options for the Scanning Head The scanning head must be rotatable for adjustment. Montagemöglichkeiten des Abtastkopfes Für die Justage muss der Abtastkopf drehbar sein. Possibilités de montage de la tête captrice Pour le réglage, il faut que la tête captrice soit pivotable. Varianti di montaggio della testina Per la taratura la testina deve essere libera di ruotare. - Page 5 When you use mounting option , you can use the blind hole in the scanning head for adjusting the scanning head. Für die Justage des Abtastkopfes bei der Anbaumöglichkeit kann das Sackloch im Abtastkopf verwendet werden. Lors du réglage de la tête captrice selon l‘option de montage , il est possible d‘utiliser le trou borgne situé dans la tête captrice. Per la taratura della testina nella versione di montaggio ...
-
Page 6: Items Supplied
Montageanleitung Instructions de montage Istruzioni di montaggio Instrucciones de montaje Measuring equipment required for adjustment must be ordered separately: AK LIDA 48 9/2014 1. PWT (PWM 9 for LIDA 4x3 C) 2. Adapter cable Benötigte Messmittel zur Justage separat bestellen: 1x 0.15 mm... -
Page 7: Montage
Mounting Montage Montage Montaggio Montaje Remove the protective cover! If necessary, clean the graduation and the scanning head with a lint-free cloth and isopropyl alcohol. Do not touch the graduation! Schutzkappe entfernen! Bei Bedarf Teilung und Abtastkopf mit fusselfreiem Tuch und Isopropylalkohol reinigen. - Page 8 Use the spacer foil to set the mounting clearance. LIDA 475/LIDA 485: 0.15 mm LIDA 477/LIDA 487: Fasten the scanning head so that it can still be adjusted. LIDA 473/LIDA 483: Mit Abstandsfolie Montageabstand einstellen. 0.75 mm LIDA 479/LIDA 489: Abtastkopf soweit festschrauben, dass er noch zu justieren ist.
- Page 9 Check the resistance between the connector housing and the machine. Desired value: 1 max. Elektrischen Widerstand zwischen Steckergehäuse und Maschine prüfen. Sollwert: 1 max. Vérifier la résistance électrique entre le boîtier du connecteur et la machine. Valeur nominale: 1 max. Controllare la resistenza elettrica tra l’alloggiamento del connettore e la macchina.
-
Page 10: Ajustement De La Tête Captrice
Adjusting the Scanning Head Justage des Abtastkopfes Ajustement de la tête captrice Taratura della testina Ajuste del cabezal captador Equipment required for adjustment: Adapter cable (see also Mounting Instructions for PWT) Do not engage connectors while unit is under power! Benötigte Messmittel zur Justage: Adapterkabel (siehe auch Montageanleitung PWT) - Page 11 Set the output signals to 1 V by turning the scanning head. Durch Drehen des Abtastkopfes die Ausgangssignale auf 1V einstellen. Régler les signaux de sortie sur 1 V en faisant pivoter la tête captrice. Settare i segnali in uscita su 1 V ruotando la testina di scansione.
- Page 12 To adjust the position of the reference mark, turn the scanning head slightly. The peak of the reference mark signal should be in line with the peak of the composite signal. To fasten the scanning head, tighten the screws (1 Nm). Caution: Make sure that the incremental signals do not decrease.
-
Page 13: Vérifier L'affichage Fonctionnel
Checking the Status Display Status Display Funktionsanzeige überprüfen Funktionsanzeige Vérifier l’affichage fonctionnel Affichage fonctionnel Verifica funzionalità Visualizzazione della funzionalità Comprobar el indicador de función Indicador de función If the LED blinks green after adjustment, check the mounting tolerance and repeat the adjustment. Wenn nach der Justage die LED grün blinkt, Anbautoleranz überprüfen und Justage neu durchführen. -
Page 14: Tensar La Cinta (Lida 405)
Tightening Scale Tape (LIDA 405) Maßband spannen (LIDA 405) Tendre ruban de mesure (LIDA 405) Tensionamento del nastro (LIDA 405) Tensar la cinta (LIDA 405) = 145 µm/m = 14.60m A = V A = 2117 µm SW = 3 Tighten by 50 µm Loosen Tighten... - Page 15 Tap lightly Check Leicht klopfen Überprüfen Frapper légèrement Contrôler Battere delicatamente Controllare Golpear suavemente Verificar ML > 3040 DIN 7984 – M4x14 M d = 2.5 Nm ISO 4762 – M3x6 M d = 1.2 Nm...
- Page 16 DR. JOHANNES HEIDENHAIN GmbH Dr.-Johannes-Heidenhain-Straße 5 83301 Traunreut, Germany { +49 8669 31-0 | +49 8669 32-5061 E-mail: info@heidenhain.de Technical support | +49 8669 32-1000 Measuring systems { +49 8669 31-3104 E-mail: service.ms-support@heidenhain.de TNC support { +49 8669 31-3101 E-mail: service.nc-support@heidenhain.de...