Table des Matières
Publicité
Les langues disponibles
Les langues disponibles
Liens rapides
Met R290 koelmiddel – Avec réfrigérant R290 – With R290 refrigerant
OPGEPAST: Gelieve voor installatie of gebruik van uw toestel, het
serienummer hieronder te noteren. Dit nummer zal u gevraagd worden bij
herstellingsaanvraag.
ATTENTION: Avant toute installation ou utilisation de votre appareil,
veuillez inscrire ci-dessous le numéro de série de votre appareil. Celui-ci
vous sera demandé en cas de dépannage.
NOTICE: Before installing or using your new device, please register, here
below, the serial number of your appliance. This will be required for
troubleshooting.
..................................................................................................
JC16CA20B
GEBRUIKSAANWIJZING
NL
<<
MODE D'EMPLOI
FR
INSTRUCTION MANUAL
GB
Publicité
Chapitres
Table des Matières
Dépannage

Manuels Connexes pour Tecnolux JC16CA20B

Sommaire des Matières pour Tecnolux JC16CA20B
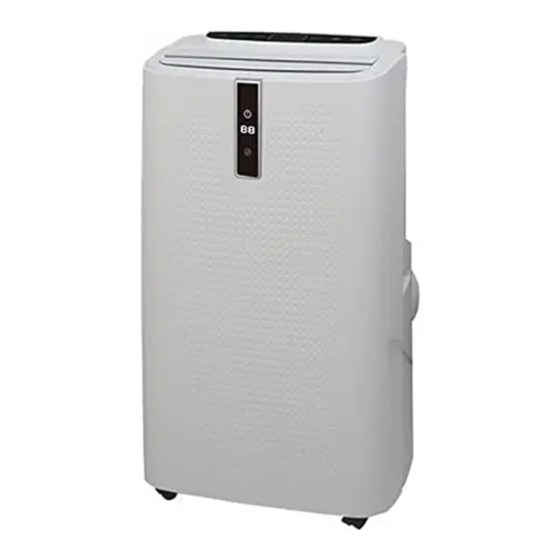
- Page 1 JC16CA20B GEBRUIKSAANWIJZING << MODE D’EMPLOI INSTRUCTION MANUAL Met R290 koelmiddel – Avec réfrigérant R290 – With R290 refrigerant OPGEPAST: Gelieve voor installatie of gebruik van uw toestel, het serienummer hieronder te noteren. Dit nummer zal u gevraagd worden bij herstellingsaanvraag.
- Page 2 FIG.1 FIG.3 FIG.2 FIG.4...
- Page 3 FIG.5 FIG.6 FIG.7 FIG.8 FIG.9...
- Page 4 FIG.10 FIG.11...
- Page 5 FIG.12 FIG.13 FIG.14...
- Page 6 INHOUDSTAFEL 1. Technische kenmerken 2. Veiligheidsvoorschriften 3. Productbeschrijving 4. Montage/Installatie 5. Gebruiksinstructies 6. Onderhoud en reiniging 7. Opslag 8. Probleemoplossing 9. Recyclage van het toestel Technische kenmerken Spanning / Frequentie (V / Hz) 220-240 / 50 Vermogen koeling (kW) 4.70 Vermogen warmte (kW) Koelmiddel / vulling (gr) R290/290...
- Page 7 Veiligheidsvoorschriften Uw veiligheid is het belangrijkste wat ons bezighoudt! 2.1. Symbolen Dit apparaat gebruikt een ontvlambaar koelmiddel. Als koelmiddel lekt en in contact komt met een brand- of verwarmingsonderdeel, veroorzaakt dit schadelijk gas en bestaat er risico op brand. Lees de GEBRUIKSAANWIJZING zorgvuldig door voordat u het apparaat in gebruik neemt.
- Page 8 • Indien propaangas aanwezig is of zelfs vermoed wordt, sta ongetraind personeel dan niet toe om de oorzaak te vinden. • Het propaangas dat in het apparaat wordt gebruikt, heeft geen geur. • Het gebrek aan geur wijst niet op een gebrek aan ontsnapt gas. •...
- Page 9 • Werk niet met natte handen. Voorkom dat water op het apparaat terechtkomt. • Dompel het apparaat niet onder en stel het niet bloot aan regen, vocht of andere vloeistoffen. • Laat het apparaat niet onbeheerd achter. Kantel of draai het apparaat niet om.
- Page 10 Iedereen die betrokken is bij het werken aan of inbreken in een koudemiddelcircuit, moet in het bezit zijn van een geldig certificaat van een door de bedrijfstak geaccrediteerde beoordelingsautoriteit, die toestemming WAARSCHUWING geeft voor de veilige omgang met koelmiddelen in overeenstemming met een erkende branchespecificatie.
- Page 11 worden vermeden. Het gebied rond de werkruimte wordt afgebroken. Zorg ervoor dat de omstandigheden in het gebied veilig zijn gemaakt door de aansturing van ontvlambaar materiaal. 2.4.4. Controleren op aanwezigheid van koelmiddel Het gebied moet vóór en tijdens het werk worden gecontroleerd met een geschikte koelmiddeldetector, om ervoor te zorgen dat de technicus op de hoogte is van potentieel ontvlambare omgevingen.
- Page 12 2.4.8. Controles naar de koelapparatuur Wanneer elektrische componenten worden gewijzigd, moeten ze geschikt zijn voor het doel en de juiste specificatie. Te allen tijde moeten de onderhouds- en servicerichtlijnen van de fabrikant worden gevolgd. Raadpleeg bij twijfel de technische dienst van de fabrikant voor assistentie.
-
Page 13: Productbeschrijving
WAARSCHUWING! Installeer het apparaat in ruimtes van meer dan 13 m². Installeer het apparaat niet op een plaats waar ontvlambaar gas kan lekken. NOTITIE! De vervaardiging kan een ander geschikt voorbeeld verschaffen of kan aanvullende informatie over de geur van koelmiddel verschaffen. - Page 14 4.2. Bevestiging van de afvoerbuis, zie Fig.7 • Verbind het ronde aansluitstuk op de afvoerbuis. • Verbind het nu het aansluitstuk voor de raamkit aan de andere zijde van de afvoerbuis. • Sluit nu het ronde aansluitstuk aan op het toestel. 4.3.
- Page 15 Gebruiksinstructies 5.1. Bedieningspaneel, zie Fig.5 Om de zwaaifunctie in- en uit te FIG5.1: SWING schakelen Stelt een tijd in voor het automatisch FIG5.2: TIMER starten of stoppen van het toestel. Bij elke druk schakelt u tussen de 3 FIG5.3: SPEED mogelijke snelheden FIG5.4: UP Verhoogt de waarde...
- Page 16 5.3. Toestel in- en uitschakelen • Druk op POWER (Fig.5.1) om het toestel in te schakelen. • Druk nogmaals op POWER (Fig.5.1) om het toestel uit te schakelen. 5.4. Juiste modus kiezen 5.4.1. Koelen • Druk herhaaldelijk op MODE (Fig.5.7) tot “COOL” oplicht. •...
- Page 17 5.4.5. Slaapmodus Druk op SLEEP (Fig.5.8) als het toestel aan staat en in koeling of warmte (optie) modus staat. In sleep-modus wordt de blaassnelheid aangepast naar laag en is deze niet aanpasbaar. U kunt de modus uitschakelen door opnieuw op de knop te drukken. 5.4.6.
- Page 18 Voor continu gebruik tijdens de ontvochtiging modus moet u de afvoerslang aansluiten op het waterafvoergaatje. Zo kan het water automatisch worden afgevoerd, zie Fig.13 Onderhoud en reiniging Schakel het toestel uit en trek de stekker uit het stopcontact alvorens het toestel te reinigen! 6.1.
- Page 19 Probleemoplossing Problemen Oorzaken Oplossingen Steek de stekker in een gepast Er is geen elektriciteit. stopcontact en schakel de airconditioner in. Voer het water in het overstromingsindicator waterreservoir af. geeft "FL” weer. Het is aanbevolen om het apparaat bij omgevingstemperatuur een temperatuur is te laag of te hoog.
- Page 20 De luchtinlaat of -uitlaat Verwijder de is verstopt. obstakels. Plaats de De airconditioner is niet airconditioner op een Veel lawaai op een vlakke vlakke en harde ondergrond geplaatst. ondergrond (om het lawaai te beperken). Wacht 3 minuten totdat de Beveiliging tegen temperatuur is compressor oververhitting werd...
- Page 21 Recyclage van het toestel Het vrijkomen van koelmiddel in de atmosfeer is ten strengste verboden! WAARSCHUWING! VERPAKKINGSINFORMATIE De verpakking van dit toestel werden gemaakt van recycleerbare materialen in overeenstemming met onze Nationale Milieuvoorschriften. Voer het verpakkingsmateriaal niet af met huishoudelijk of ander afval. Breng deze naar de inzamelingspunten voor verpakkingsmateriaal zoals aangegeven door de plaatselijke autoriteiten.
-
Page 22: Table Des Matières
TABLES DES MATIERES 1. Caractéristiques techniques 2. Consignes de sécurité 3. Description de l’appareil 4. Montage / Installation 5. Utilisation 6. Entretien et nettoyage 7. Stockage 8. Guide de dépannage 9. Mise à rebus Caractéristiques techniques Tension / Fréquence (V / Hz) 220-240 / 50 Puissance froid (kW) 4.70... -
Page 23: Consignes De Sécurité
Consignes de sécurité Votre sécurité est la chose la plus importante qui nous concerne! 2.1. Symboles Cet appareil utilise un réfrigérant inflammable. Si le réfrigérant fuit et entre en contact avec un feu ou une pièce chauffante, il créera des gaz nocifs et un risque d’incendie. -
Page 24: Précautions Opérationnelles
• Si le propane est présent ou même suspecté, ne laissez pas un personnel non formé essayer de trouver la cause. • Le gaz propane utilisé dans l'appareil n'a pas d'odeur. • Le manque d'odeur n'indique pas un manque de gaz échappé. •... - Page 25 • Ne pas utiliser les mains mouillées. Évitez que l’eau ne se répande sur l’unité. • Ne pas immerger ni exposer l'appareil à la pluie, à l'humidité ou à tout autre liquide. • Ne laissez pas l'appareil en marche sans surveillance. N'inclinez pas et ne retournez pas l'appareil.
-
Page 26: Consignes De Sécurité Relatives À L'entretien
Toute personne impliquée dans des travaux sur ou dans un circuit de réfrigérant doit détenir un certificat en cours de validité délivré par une autorité d'évaluation accréditée par l'industrie, qui autorise sa compétence pour manipuler les réfrigérants en toute sécurité conformément à une spécification d'évaluation reconnue par AVERTISSEMENT l'industrie. - Page 27 doivent être évités. La zone autour de l'espace de travail doit être divisée. Assurez-vous que les conditions dans la zone ont été sécurisées par le contrôle des matériaux inflammables. 2.4.4. Vérification de la présence de réfrigérant La zone doit être vérifiée avec un détecteur de réfrigérant approprié...
-
Page 28: Contrôles De L'équipement De Réfrigération
2.4.8. Contrôles de l'équipement de réfrigération Lorsque les composants électriques sont modifiés, ils doivent être adaptés à l'usage prévu et aux spécifications appropriées. Les directives du fabricant en matière de maintenance et d’entretien doivent être suivies à tout moment. En cas de doute, consultez le service technique du fabricant. -
Page 29: Description De L'appareil
AVERTISSEMENT ! Installez l'appareil dans des pièces dépassant 13m² N'installez pas l'appareil dans un endroit où des gaz inflammables pourraient fuir. REMARQUE ! Le fabricant peut fournir un autre exemple approprié ou peut fournir des informations supplémentaires sur l'odeur de réfrigérant. Description de l’appareil FIG.1.1: Panneau de contrôle FIG.2.1: Couvercle filtre EVA... -
Page 30: Placez Le Kit Fenêtre
4.2. Fixer le tuyau d’évacuation, voir Fig.8 • Branchez le connecteur rond à une extrémité du tuyau. • Branchez l’adapteur pour kit fenêtre à l’autre extrémité. • Connectez le tuyau à l’appareil au niveau de le bouche d’évacuation (Fig.2.3) 4.3. Placez le kit fenêtre •... -
Page 31: Utilisation
Utilisation 5.1. Panneau de contrôle, voire Fig.5 Pour allumer ou éteindre l’oscillation FIG5.1: SWING Définir l'heure à laquelle l'appareil doit FIG5.2: TIMER démarrer ou s'arrêter automatiquement. A chaque pression vous basculer entre FIG5.3: SPEED les 3 vitesses. FIG5.4: UP Augmente la valeur FIG5.5: DISPLAY Affiche la température FIG5.6: DOWN... -
Page 32: Déshumidifiez La Chambre
5.3. Mise en marche et arrêt • Appuyez sur POWER (Fig.5.1) pour allumer l’appareil. • Appuyez de nouveau sur POWER (Fig.5.1) pour éteindre l’appareil. 5.4. Choisir le bon mode 5.4.1. Froid • Appuyez sur MODE (Fig.5.7) jusqu’à ce que « COOL » s’allume. •... -
Page 33: Mode Veille
5.4.5. Mode veille Appuyez sur SLEEP (Fig.5.8) quand l’appareil est en marche et dans le mode froid ou chaud (option). Dans le mode veille la vitesse est réglée sur minimum. Pour éteindre le mode veille vous devez réappuyer sur SLEEP. 5.4.6. -
Page 34: Entretien Et Nettoyage
déshumidification ou à une humidité élevée, voire Fig.12. L’eau s’évapore près du condensateur et s’évacue par le tuyau d’évacuation. Pour un fonctionnement continu ou sans surveillance, veuillez connecter le tuyau de drainage raccordé à l'appareil. L'eau de condensation peut s'écouler automatiquement dans un seau ou s'écouler par gravité, voire Fig.13 Entretien et nettoyage Eteignez l’appareil et retirez la fiche de la prise ! -
Page 35: Guide De Dépannage
• Nettoyez l’appareil et ces filtres. Laissez-le tous sécher complètement. • Couvrez le climatiseur avec un sac en plastique. Rangez le climatiseur dans un endroit sec et gardez-le hors de portée des enfants et de la poussière. L'appareil doit être stocké debout. •... - Page 36 t n’est pas Les portes ou les fenêtres efficace. sont ouvertes ; il y a Fermer les portes beaucoup de monde ; ou et les fenêtres et en mode de ajouter à nouveau refroidissement, d’autres la climatisation. sources de chaleur sont présentes.
- Page 37 Le message Vérifiez le capteur «E1» est Panne du capteur de de température des affiché. température du tuyau. tuyaux et les circuits associés. Le message Vérifiez le capteur «E2» est Panne du capteur de de température affiché. température ambiante. ambiante et les circuits associés.
-
Page 38: Mise À Rebus
Mise à rebus Il est strictement interdit de libérer du réfrigérant dans l’atmosphère ! AVERTISSEMENT! INFORMATIONS SUR L’EMBALLAGE L’emballage de cet appareil est fabriqué à partir de matériaux recyclables, conformément à nos réglementations nationales en matière d’environnement. Ne jetez pas les matériaux d’emballage avec les ordures ménagères habituelles ou autres déchets. - Page 39 CONTENT 1. Technical data 2. Safety instruction/Attention matters 3. Description of the appliance 4. Assembling / Installation 5. Use 6. Maintenance and cleaning 7. Out of season save 8. Troubleshooting 9. Recycling Technical data Voltage / Frequency (V / Hz) 220-240 / 50 Cooling capacity (kW) 4.70...
-
Page 40: Safety Instruction/Attention Matters
Safety instruction/Attention matters Your safety is the most important thing we concerned! 2.1. Symbols This unit uses a flammable refrigerant. If refrigerant leaks and comes in contact with fire or heating part, it will create harmful gas and there is risk of fire. -
Page 41: Operational Precautions
• The lack of smell does not indicate a lack of escaped gas. • If a leak is detected, immediately evacuate all persons from the store, ventilate the room and contact the local fire department to advise them that a propane leak has occurred. •... - Page 42 • Do not use an extension cord or an adapter plug. • Do not put objects on the unit. • Do not climb or sit on the unit. • Do not insert fingers or other objects into the air outlet. •...
-
Page 43: Safety Precautions On Servicing
If you don't understand something or need help, please contact the dealer services. 2.4. Safety precautions on servicing Please follow these warnings when to undertake the following when servicing an appliance with R290. 2.4.1. Checks to the area Prior to beginning work on systems containing flammable refrigerants, safety checks are necessary to ensure that the risk of ignition is minimized. - Page 44 contained flammable refrigerant shall use any sources of ignition in such a manner that it may lead to the risk of fire or explosion. All possible ignition sources, including cigarette smoking, should be kept sufficiently far away from the site of installation, repairing, removing and disposal, during which flammable refrigerant can possibly be released to the surrounding space.
-
Page 45: Description Of The Appliance
2.4.9. Checks to electrical devices Repair and maintenance to electrical components shall include initial safety checks and component inspection procedures. If a fault exists that could compromise safety, then no electrical supply shall be connected to the circuit until it is satisfactorily dealt with. -
Page 46: Assembling / Installation
Assembling / Installation 4.1. Installation Warning : before using the mobile air conditioning, keep it upright for at least 48 hours. The air conditioning can be easily moved in the room. In the moving process, ensure that the air conditioning is in the upright position and the air conditioning should be placed on a flat surface. -
Page 47: Use
5.1. Control panel, see Fig.5 FIG5.1: SWING To turn ON/OFF the swing mode Set a time for the unit to automatically FIG5.2: TIMER start or stop. Each press, you switch between the 3 FIG5.3: SPEED speeds. FIG5.4: UP Increase the value FIG5.5: DISPLAY Shows the temperature FIG5.6: DOWN... -
Page 48: Operation Mode
5.4. Operation mode 5.4.1. Cooling • Press MODE (Fig.5.7) until “COOL” lights up. • Press UP/DONW (Fig.5.4 & 5.6) to adjust the temperature which is displayed on the screen. The temperature can be set between 16°C & 32°C. Afterward the display shows the room temperature. •... - Page 49 5.4.6. Timer setting (1h – 24h) You can use the timer to turn on or to switch off the appliance. • Turn off: when power on, press the TIMER button (Fig.5.2); then press UP/DOWN (Fig.5.4 & 5.6) to select the time. •...
-
Page 50: Maintenance And Cleaning
Maintenance and cleaning Shut down and unplug the appliance before maintenance and cleaning! 6.1. Cleaning the air filter (every two weeks) Dust collects on the filter and restricts the airflow. The restricted airflow reduces the efficiency of the system and if it becomes blocked it can cause damage to the unit. -
Page 51: Troubleshooting
Troubleshooting Problems Reasons Solutions Turn it on after There is no electricity. connecting it to a socket with electricity. The overflow indicator Discharge the water displays "FL". inside. Recommend to use the temperature of 7-35 ℃ The ambient machine in at the (44-95 ℉). - Page 52 The air conditioning is Put the air conditioning Big Noise not placed on a flat on a flat and hard place surface. (to reduce noise). Wait for 3 minutes until compress Overheat protection the temperature is or does starts. lowered, and then restart not work.
-
Page 53: Recycling
Recycling Releasing refrigerant into atmosphere is strictly forbidden! WARNING !!! PACKAGE INFORMATION Packaging materials of the product are manufactured from recyclable materials in accordance with our Nation Environment Regulations. Do not dispose of the packing materials together with the domestic or other wastes.