Geemarc CL100 Notice D'utilisation
Masquer les pouces
Voir aussi pour CL100:
- Manuel d'utilisation (42 pages) ,
- Mode d'emploi (40 pages) ,
- Mode d'emploi (50 pages)
Table des Matières
Les langues disponibles
Les langues disponibles
EASY-DIAL PHONE WITH VOLUME AND TONE ADJUSTMENT
TELEPHONE MULTIFONCTIONS A GRANDES TOUCHES
User guide / Notice d'utilisation
E
CAUTION
:THIS TELEPHONE PRODUCT IS SPECIFI-
CALLY DESIGNED FOR PEOPLE WITH HEARING DIFFI-
CULTIES AND IS PROVIDED WITH A HANDSET EAR-
PIECE VOLUME CONTROL FOR INDIVIDUAL REQUIRE-
MENTS. DUE CARE MUST BE TAKEN BY ALL USERS
THAT THE HANDSET EARPIECE VOLUME CONTROL IS
SET TO THE LOWEST LEVEL ACCEPTABLE BY EACH
RESPECTIVE USER. CARE SHOULD THEREFORE BE
EXERCISED TO ENSURE THAT ANY NAIVE USERS ARE
ARE FAMILIAR WITH THIS REQUIREMENT.
C
F
ATTENTION:
CE TELEPHONE PEUT ETRE DESTINE
AUX PERSONNES AYANT DES PROBLEMES D'AUDITION.
IL POSSEDE UN ECOUTEUR A VOLUME VARIABLE. A
LA PREMIERE UTILISATION, ASSUREZ VOUS QUE LE
BOUTON DE REGLAGE DU VOLUME SOIT POSITIONNE
SUR LA POSITION VOLUME MINIMUM. LES PERSONNES
MALENTENDANTES POURRONT PAR LA SUITE
AUGMENTER LE VOLUME POUR L'ADAPTER A LEUR
AUDITION.
L100
Table des Matières

Manuels Connexes pour Geemarc CL100


Sommaire des Matières pour Geemarc CL100
- Page 1 L100 EASY-DIAL PHONE WITH VOLUME AND TONE ADJUSTMENT TELEPHONE MULTIFONCTIONS A GRANDES TOUCHES User guide / Notice d’utilisation CAUTION ATTENTION: :THIS TELEPHONE PRODUCT IS SPECIFI- CE TELEPHONE PEUT ETRE DESTINE CALLY DESIGNED FOR PEOPLE WITH HEARING DIFFI- AUX PERSONNES AYANT DES PROBLEMES D’AUDITION. CULTIES AND IS PROVIDED WITH A HANDSET EAR- IL POSSEDE UN ECOUTEUR A VOLUME VARIABLE.
-
Page 16: Position Murale
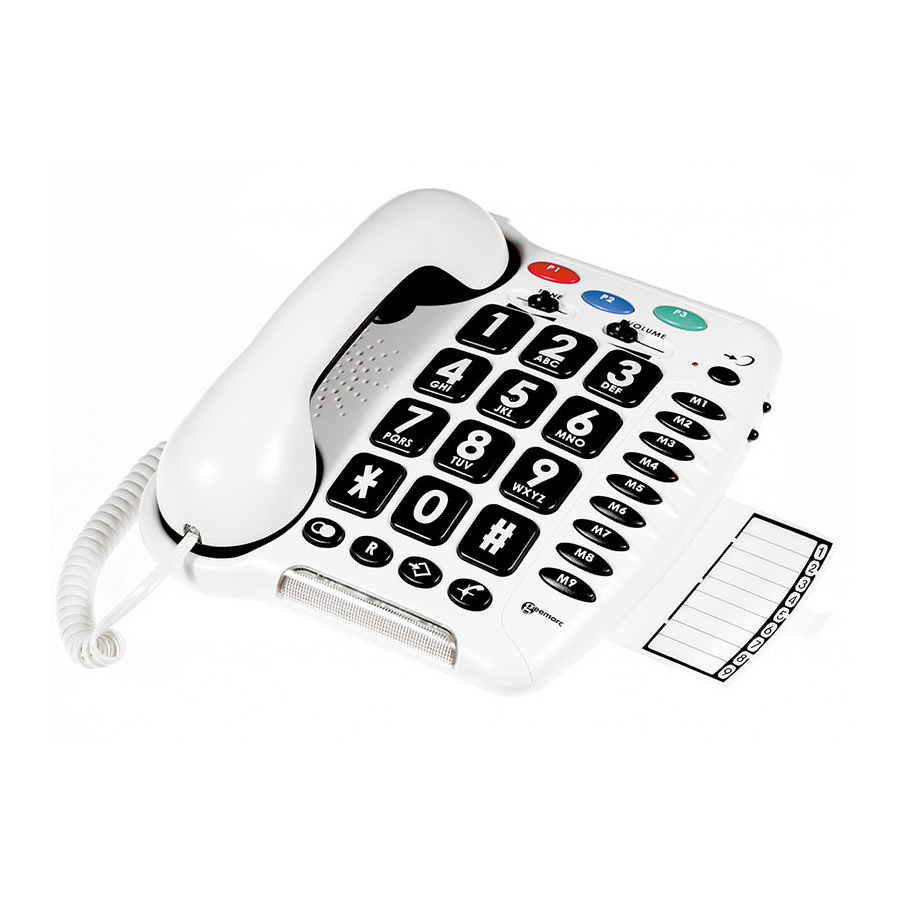
DESCRIPTION Activation automatique de la correction d’écoute au décroché OFF ON 3 mémoires d’urgence Réglage de la tonalité de réception TONE Ergot à retourner pour maintenir le téléphone en position murale Réglage du volume de réception Connecteur du cordon combiné Rappel du dernier numéro composé... -
Page 17: Réglage Du Volume D'émission
Connecteur de ligne Voyant du correcteur de tonalité et volume Activation de la correction de tonalité et de volume de réception VOLUME Réglage du volume d’émission Réglage du niveau de sonnerie Mémoires directes Secret d’appel Flash lumineux de sonnerie... - Page 18 INSTALLATION Ouvertures Prise téléphonique (*) pour vis de position murale Interrupteur Tone / Pulse Interrupteur 300/100ms Cordon de ligne Répertoire Compartiment piles (*) Cordon du (*) Classée TRT-3 selon la norme EN60950 combiné 1 - RACCORDEMENTS 1 - Branchez le cordon du combiné. 2 - Dévissez la vis et ouvrez le compartiment à...
- Page 19 INSTALLATION 6 - Branchez le conjoncteur téléphonique PTT dans votre prise téléphonique murale. 2 - SONNERIE Un commutateur situé sur le côté de l’appareil permet de régler la sonnerie: : désactivée, : faible, : forte Si la mélodie de sonnerie ne vous convient pas, sélectionnez un nouveau réglage parmi les 9 propo- sés ci-dessous: Faible...
-
Page 20: Position Murale
INSTALLATION 3 - FREQUENCE VOCALE OU DECIMALE? (T/ Au moment de sa livraison, votre téléphone est en mode fréquence vocale (T). Si le central télépho- nique dont vous dépendez fonctionne en mode fré- quence décimale (P), vos appels n’aboutiront pas, il vous suffira alors de commuter l’interrupteur T/P situé... -
Page 21: Utilisation
UTILISATION insérer 2 chevilles avec leurs vis. Laissez dépasser les vis de 6-7mm. Placez votre téléphone sur les têtes de vis et faites glisser ensuite votre téléphone dans les têtes de vis. 1 - RECEVOIR UN APPEL - Lorsque le téléphone sonne (flash lumineux de sonnerie de votre téléphone activé), décrochez le combiné... - Page 22 UTILISATION Les touches, TONE et VOLUME, vous permettent de corriger la tonalité et le volume de réception. TONE Graves Aigus +10db max +10db max Normal VOLUME +30db max 15dB 15dB 30dB Note: Des sifflements dans l’écouteur peuvent apparaître dans certaines configurations de réglage (tonalité...
-
Page 23: Reglage Du Volume D'emission
UTILISATION Sur OFF, il faudra activer la fonction en appuyant sur la touche Le réglage de la tonalité et du volume (de 15dB à 30 dB) n’est activé que lorsque la touche sur ON. Lorsque cette touche est sur OFF seul le volume peut être réglé... -
Page 24: Rappel Du Dernier Numéro
UTILISATION Mini Normal Maxi 5 - RAPPEL DU DERNIER NUMERO - Décrochez le combiné. - Appuyez sur la touche le numéro de votre correspondant se recompose automatiquement (ne fonctionne pas pour les numéros en mémoire). 6 - TOUCHES R,* & # Touches d’accès aux Services de France Télécom (Signal d’Appel, Conversation à... -
Page 25: Mémoriser Un Numéro De Téléphone
UTILISATION 8 - MEMORISER UN NUMERO DE TELEPHONE Votre téléphone possède 12 mémoires directes dont 3 d’urgences, (21 chiffres maximum par mé- moire). Les 3 mémoires spéciales permettent de mémori- ser par exemple les 3 numéros suivants: - POMPIER : Pensez à... -
Page 26: Appel D'un Numéro En Mémoire
UTILISATION 9 - APPEL D’UN NUMERO EN MEMOIRE - Décrochez le combiné. - Appuyez sur une des touches M1, M2, ..., ou M9 ou sur une des trois touches spéciales, le numéro en mémoire se recompose automatiquement. Pour repérer vos numéros enregistrés, utilisez le répertoire situé... -
Page 27: Garantie
GARANTIE GARANTIE Cet appareil est garanti 1 an pièces et main-d'oeuvre. La date d'achat figurant sur le ticket de caisse fera foi. Cette garantie s'exerce sous réserve d'une utilisation normale de l'appareil. Les dommages occasionnés par les surtensions électriques, la foudre ou par un choc sur l'appareil ne peuvent en aucun cas être couverts par la garantie. -
Page 28: Extra Receiving Correction Correction De La Reception
EXTRA RECEIVING CORRECTION CORRECTION DE LA RECEPTION Correction Correction treble max. bass max. aïgus max. graves max. Volume max. + 30 dB Volume max. + 15 dB Telephone without correction Téléphone sans correction 3.4K w w w . g e e m a r c . c o m UGCL100 ED04...