LEXIBOOK PA100 Mode D'emploi
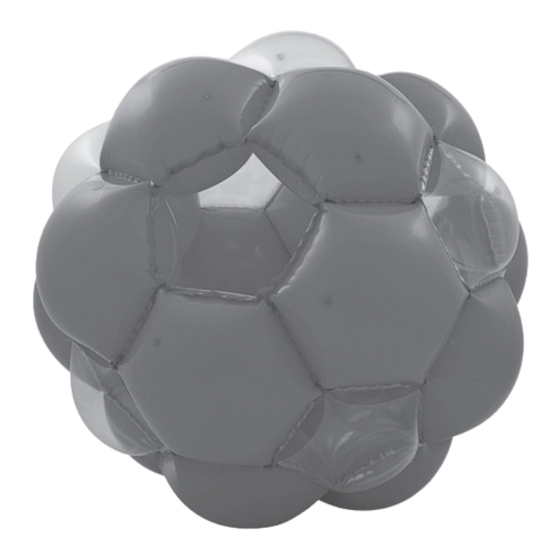
Balle géante gonflable
Les langues disponibles
Les langues disponibles
Giant Inflatable Ball
Balle Géante Gonflable
ENGLISH
UNPACKING
When unpacking, ensure that the following elements are included:
1 x Giant Inflatable Ball
1 x repair kit
1 x instruction manual
WARNING: All packaging materials, such as tape, plastic sheets, wire ties and tags are not part of this product
and should be discarded.
INFLATING THE BALL
Use a manual air pump or an automatic air pump (not included) for inflation.
1. Unpack the product and unfold the ball on a flat surface.
2. Open the valve caps, then insert the large end of the air pump valve (not included). While holding firmly the
valve located inside the product, slowly inflate all the chambers until the ball is firm.
3. Make sure to close each valve tightly and push them inside the ball to avoid leakage or accidental deflation.
Note:
• Inflation by mouth can be difficult and will cause visible moisture to form on the inside of the ball.
• There are 20 valves on the Giant Inflatable Ball.
CAUTION: Inflation using an air pump (sold separately) must be performed by an adult. Do not use a high
pressure pump or a pump for car tire. Do not over-inflate. Do not try to remove all wrinkles; always regular
check the level of inflation and stop inflates while the ball feels firm and supportive. Check before each use
and at regular intervals.
PA100_09IM1025_(4 colors)_V03.indd 1
DEFLATING THE BALL
1. Open and squeeze all the valves to release air from the chambers.
2. Or insert a slim object such as a deflation tube (included in repair kit), to hold the valves open.
CAUTION: Deflation must be performed by adult, be careful not to puncture the Giant Inflatable Ball when
using the deflation tube, when deflating, do not force air out of the Giant Ball, allow air to escape slowly and
naturally. When deflated, fold the ball and store in cool dry place.
REPAIR KIT: INSTRUCTIONS
1. Thoroughly clean the damaged area.
2. Using scissors, cut a piece of patch (included in repair kit) large enough to fully cover the damaged area.
3. Apply adhesive (not included) to the area and place the patch over the adhesive. Press down firmly to
assure good contact. Let the glue dry for 24 hours before inflating the ball again.
Note:
• We recommend using a silicone or rubber based glue when repairing this product.
• Temperature changes will cause your product to expand or contract.
• In cold conditions, added inflation will be needed.
CAUTION: Repair must be performed by an adult. Checking before use is necessary.
• WARNING! Not suitable for children under 3 years. Choking Hazard – Small parts.
• Do not lean head or limbs outside of product during playing as it could cause injuries
• Adult supervision is a must.
• Do not use in water.
www.lexibook.com
• This product must only be used on flat surface, avoiding all sharp rough surfaces and sloping ground
• Sharp parts/ Objects may cause products surface leakage and loss supportive, to avoid any injury on the
children, keep this product away from all sharp parts/ objects during playing.
• It is recommended to use the product in a location free from any obstacle such as a fence, garage,
house, overhanging branches, laundry lines or electrical wires.
PA100_09
• Product will catch fire if exposed to open flame, never allow the product to be exposed to excessive heat,
e.g. prolonged sunlight exposure, cigarettes or high heat, etc....
• Improper or contraindicated use of the product can cause injuries (fractures or sprains), choking caused
by crushing, hyperthermia during sunny days or drowning in the case of aquatic area.
• Very warm temperatures will cause the Giant Ball to expand and may cause over-inflation. If this
happens, deflate until firm but not over-inflated.
• Age range: 4 years and older.
• Maximum weight: 150 lbs.
• Maximum capacity: one child, do not exceed capacity. Do not climb or sit on it.
• The Giant Inflatable Ball should be used with caution since skill is required to avoid falls or collisions
causing injury to the user or third parties.
MAINTENANCE AND WARRANTY
NOTE: Only use a soft, slightly damp cloth to clean the unit, do not use any hard object to clean as it
would damage product. Always check product for any air leakage or surface damage before and after use,
use supplement repair kit to seal off if leakage or damage. Let glue complete dry before storage. Do not
store product under direct sunlight or near any other heat source, store in cool dry place. Please keep this
instruction manual, it contains important information. This product is covered by our 6-month warranty (US
only). To make use of the warranty or the after-sales service, please contact your retailer and supply proof of
purchase. Our warranty covers material or installation-related defects attributable to the manufacturer, with
the exception of wear caused by failure to respect the instructions for use or any unauthorised work on the
equipment (such as dismantling, exposure to heat or damp, etc).
Reference: PA100
Designed and developed in Europe – Made in China, Shanghai
©Lexibook®
www.lexibook.com
WARNINGS
08/01/2015 3:08 PM

Manuels Connexes pour LEXIBOOK PA100


Sommaire des Matières pour LEXIBOOK PA100
- Page 2 1. Ouvrez et pressez toutes les valves pour relâcher l’air contenu dans les chambres. 2. Ou, insérez un tube de dégonflage (fourni avec le kit de réparation) ou un objet fin dans les valves pour les Référence : PA100 maintenir ouvertes.
- Page 4 Conçu et développé en Europe – Fabriqué en Chine, Shanghai Diseñado y desarrollado en Europa - Fabricado en China, Shanghai WARNING LEXIBOOK Calex Logistics Lexibook S.A. Attn to: Brian Wesley/ Jessica Munoz 2, avenue de Scandinavie WARNING 175-177 SOUTH MAIN STREET...