Publicité
Les langues disponibles
Les langues disponibles
Liens rapides
Profi Step
®
Uno / Profi Step
Duo
®
Gebrauchs- und Bedienungsanleitung
Anlegeleitern, Schiebeleitern,
Seilzugleitern
Use and Operating Instructions
Single ladders, Extension ladders,
Rope-pull ladders
Manuel d'utilisation et d'installation
Échelles simples, Échelles coulissantes,
Échelles coulissantes à corde
Instrucciones de uso y manejo
Escaleras de mano, Escaleras telescópicas,
Escaleras de tracción por cable
Istruzioni d'uso
Scale da appoggio, Scale a sfilo,
Scale estensibili con fune
Naudojimo ir priežiūros instrukcija
Pristatomos kopėčios,
Slankiojamos kopėčios, Kopėčios su trosu
Lietošanas un ekspluatācijas instrukcija
Pieslienamās kāpnes, Bīdāmās kāpnes,
Kāpnes ar trosēm
Manual de utilizare
Scări rezemate, Scări culisante,
Scări extensibile cu cablu
Bruks- och användarinstruktioner
Anliggande stegar, Utskjutsstegar,
Reputskjutsstegar
Instrukcja użytkowania i obsługi
Drabiny przystawne, Drabiny rozsuwane,
Drabiny rozsuwane z liną
Návod k použití a obsluze
Opěrné žebříky, Výsuvné žebříky,
Žebříky s tažným lankem
DE
GB
FR
ES
IT
LT
LV
RO
SE
PL
CZ
Publicité
Chapitres

Manuels Connexes pour Hailo ProfiStep Uno


Sommaire des Matières pour Hailo ProfiStep Uno
- Page 1 Profi Step Uno / Profi Step ® ® Gebrauchs- und Bedienungsanleitung Anlegeleitern, Schiebeleitern, Seilzugleitern Use and Operating Instructions Single ladders, Extension ladders, Rope-pull ladders Manuel d‘utilisation et d‘installation Échelles simples, Échelles coulissantes, Échelles coulissantes à corde Instrucciones de uso y manejo Escaleras de mano, Escaleras telescópicas, Escaleras de tracción por cable Istruzioni d‘uso...
- Page 2 Aluminium-Anlegeleiter Art.-Nr. 7106-xxx ( 6 Sprossen ) 7109-xxx ( 9 Sprossen ) 7112-xxx ( 12 Sprossen ) 7115-xxx ( 15 Sprossen ) 7118-xxx ( 18 Sprossen ) Aluminium-Schiebeleiter Art.-Nr. 7209-xxx ( 2x 9 Sprossen ) 7212-xxx ( 2x12 Sprossen ) 7215-xxx ( 2x15 Sprossen ) 7218-xxx...
-
Page 3: Table Des Matières
Gebrauch entstanden sind, wird keine Haftung 35708 Haiger, Germany übernommen. Telefon: +49 (0) 2773 82-0 Veränderungen an der Leiter, die nicht vom Hersteller Telefax: +49 (0) 2773 82-1239 autorisiert sind, führen zum Erlöschen der Garantie und Gewährleistung. E-Mail: info @ hailo.de www.hailo.de... -
Page 4: Technische Informationen
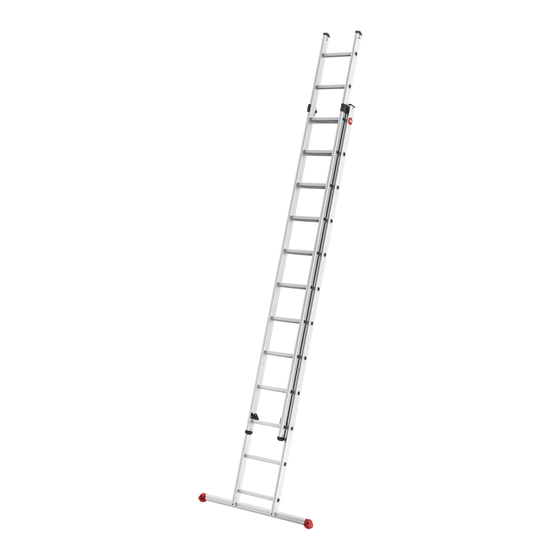
3. Technische Informationen Die maßgeblichen technischen Informationen und produktspezifischen Angaben befinden sich auf der Leiterkennzeichnung [B] direkt an der Leiter. Anlegeleiter [1] [ A ] Anlegeleiter Leiterkennzeichnung [C ] Querbalken (Art.-Nr. 7112-xxx, 7115-xxx, 7118-xxx) Leiterfuß (Art.-Nr. 7106-xxx, 7109-xxx) Schiebeleiter (2-teilig) [2] [ A-1] Hinteres Standteil [ A-2] Vorderes Schiebeteil Leiterkennzeichnung... - Page 5 Übersicht der Leitersprossen, die nicht als Standfläche genutzt werden dürfen. A = 1,71 m 7106-xxx A = 0,34 m A = 1,71 m A = 2,70 m max. B = 0,34 m 2,8 kg B = 0,44 m B = 1,65 m B = 0,71 m 150 kg C = 0,08 m...
- Page 6 A = 2,55 m 7209-xxx A = 0,85 m A = 2,55 m A = 4,23 m A = 5,15 m max. B = 0,41 m 9,4 kg B = 1,09 m B = 2,46 m B = 4,09 m B = 3,14 m 150 kg 2 x 9...
-
Page 7: Lieferumfang
4. Lieferumfang A) Anlegeleiter 1 x Gebrauchs- und Bedienungsanleitung 1 x Anlegeleiter (Art.-Nr. 7106-xxx, 7109-xxx) B) Anlegeleiter 1 x Gebrauchs- und Bedienungsanleitung 1 x Anlegeleiter (Art.-Nr. 7112-xxx, 7115-xxx, 7118-xxx) 1 x Querbalken Montageelemente: 2 x Sechskantmutter M6 2 x Distanzhülse 2 x Schraube M6 C ) Schiebeleiter 1 x Gebrauchs- und Bedienungsanleitung... -
Page 8: Anleitung Für Den Zusammenbau
5. Anleitung für den Zusammenbau Vor dem Gebrauch folgender Leitern muss der dazugehörende Querbalken montiert werden: Anlegeleitern Art.-Nr. 7112-xxx, 7115-xxx, 7118-xxx Schiebeleitern Art.-Nr. 7209-xxx, 7212-xxx, 7215-xxx, 7218-xxx Seilzugleitern Art.-Nr. 7285-xxx, 7288-xxx Die Leiter darf nur mit montiertem Querbalken verwendet werden. 1. -
Page 9: Aufbau / Bedienung
6. Aufbau / Bedienung 6.1 Bedienung der Anlegeleiter Anlegeleiter an eine ebene, feste Fläche anlegen und vor der Benutzung sichern, z.B. Anbinden oder geeignete Einrichtungen zur Sicherstellung der Standsicherheit anbringen. 6.2 Bedienung der Schiebeleiter Die Schiebeleiter kann in der Höhe verstellt werden, indem das Schiebeteil [A-2] ein- oder ausgeschoben wird. - Page 10 6. Aufbau / Bedienung 6.3 Bedienung der Seilzugleiter Die Seilzugleiter kann in der Höhe verstellt werden, indem das Schiebeteil [A-2] ein- oder ausgeschoben wird. Verstellung und Arretierung der Seilzugleiter: Seilzugleiter zunächst provisorisch in Stellung bringen und an eine ebene, feste Fläche anlegen. Die Verstellung der Seilzugleiter kann mit einer Hand ausgeführt werden.
-
Page 11: Sicherheitshinweise
7. Sicherheitshinweise 7.1 Allgemeine Sicherheitshinweise • Bei der Benutzung der Leiter besteht grundsätzlich Verwendung der Leiter im nicht beruflichen Bereich (non professional use): die Gefahr eines Absturzes. Alle Arbeiten mit und auf der Leiter sind deshalb so durchzuführen, dass eine Absturzgefahr so gering wie möglich gehalten wird. - Page 12 7. Sicherheitshinweise 7.2 Sicherheitshinweise zum Gebrauch der Leiter Die Leiter nicht mit abgewendetem Warnung, Sturz von der Leiter. Gesicht auf-oder absteigen. Beim Aufsteigen, Absteigen und Arbeiten auf der Leiter gut festhalten. Anleitungen beachten. Bei Arbeiten auf der Leiter festhalten oder andere Sicherheitsmaßnahmen ergreifen, wenn dies nicht möglich ist.
- Page 13 Beim Transport der Leiter Schäden verhindern, z.B. Für unvermeidbare Arbeiten unter elektrischer durch Festzurren, und sicherstellen, dass sie auf ange- Spannung nicht leitende Leitern benutzen. messene Weise befestigt / angebracht ist. Die Leiter nicht als Überbrückung Sicherstellen, dass die Leiter für den jeweiligen Einsatz benutzen.
-
Page 14: Transport / Lagerung
7. Sicherheitshinweise 8. Transport / Lagerung • Schiebeleiter vor und nach der Benutzung, sowie zur 7.3 Hinweise für Anlegleitern Lagerung und zum Transport, mit den Rasthaken [D] an der jeweils untersten Leitersprosse sicher verriegeln. Anlegeleitern mit Sprossen müssen im Schiebeteil [A-2] der Seilzugleiter nach der richtigen Winkel verwendet werden. -
Page 15: Pflege / Instandhaltung
10. Gebrauchsdauer 12. Produktinformationen Bei bestimmungsgemäßem Gebrauch und regelmäßiger Diese Gebrauchs- und Bedienungsanleitung finden Sie auch im Internet unter www.hailo.de. Wartung ist die Leiter ein langfristig verwendbares Arbeitsmittel. 13. Service / Ersatzteile Weitere Informationen zu Serviceleistungen und Ersatz- teilen erhalten sie direkt vom Hersteller. -
Page 16: Prüfliste
14. Prüfliste • Durch beschädigte, fehlerhafte oder nicht funktionstüchtige Leiterelemente besteht für den Benutzer die Gefahr eines Absturzes; ebenso besteht die Gefahr eines Umsturzes beim Gebrauch der Leiter. • Benutzer der Leiter können sich bei einem Sturz schwere Verletzungen zuziehen. •... - Page 18 Single ladders Item no. 7106-xxx ( 6 rungs ) 7109-xxx ( 9 rungs ) 7112-xxx ( 12 rungs ) 7115-xxx ( 15 rungs ) 7118-xxx ( 18 rungs ) Extension ladders Item no. 7209-xxx ( 2x 9 rungs ) 7212-xxx ( 2x12 rungs ) 7215-xxx ( 2x15 rungs )
-
Page 19: Introduction
Modifications to the ladder that are not authorised by the Daimlerstr. 8 manufacturer shall lead to termination of the guarantee 35708 Haiger, Germany and warranty. Telefon: +49 (0) 2773 82-0 Telefax: +49 (0) 2773 82-1239 E-Mail: info @ hailo.de www.hailo.de... -
Page 20: Technical Information
3. Technical information The relevant technical information and product-specific information are on the ladder label [B] directly on the ladder. Single ladder [1] [ A ] Single ladder Ladder label [C ] Crossbar (Item no. 7112-xxx, 7115-xxx, 7118-xxx) Ladder foot (Item no. - Page 21 Overview of the ladder rungs that must not be used as a support surface. A = 1,71 m 7106-xxx A = 0,34 m A = 1,71 m A = 2,70 m max. B = 0,34 m 2,8 kg B = 0,44 m B = 1,65 m B = 0,71 m 150 kg...
- Page 22 A = 2,55 m 7209-xxx A = 0,85 m A = 2,55 m A = 4,23 m A = 5,15 m max. B = 0,41 m 9,4 kg B = 1,09 m B = 2,46 m B = 4,09 m B = 3,14 m 150 kg 2 x 9...
-
Page 23: Scope Of Delivery
4. Scope of delivery A) Single ladders 1 x Use and Operating Instructions 1 x Single ladder (Item no. 7106-xxx, 7109-xxx) B) Single ladders 1 x Use and Operating Instructions 1 x Single ladder (Item no. 7112-xxx, 7115-xxx, 7118-xxx) 1 x Crossbar Mounting elements: 2 x M6 hex nut 2 x spacer sleeve... -
Page 24: Instructions For Assembly
5. Instructions for assembly Before using the following ladders, the proper crossbar must be installed: Single ladders Item no. 7112-xxx, 7115-xxx, 7118-xxx Extension ladders Item no. 7209-xxx, 7212-xxx, 7215-xxx, 7218-xxx Rope-pull ladders Item no. 7285-xxx, 7288-xxx The ladder must only be used with the crossbar installed. -
Page 25: Assembly / Operation
6. Assembly / operation 6.1 Handling the single ladder Set up single ladder on a flat, solid surface and secure before using, e.g. tie up or attach suitable devices to ensure stability. 6.2 Handling the extension ladder The extension ladder can be adjusted in height by sliding the extension section [A-2] in and out. - Page 26 6. Assembly / operation 6.3 Handling the rope pull ladder The rope pull ladder can be adjusted in height by slid- ing the extension section [A-2] in and out. Adjusting and locking the rope pull ladder: first position the rope pull ladder provisionally and set up on a flat, solid surface.
-
Page 27: Safety Instructions
7. Safety instructions 7.1 General safety information • There is inherently a risk of falling when using the Using the ladder for non-professional use: ladder. All work with and on the ladder should therefore be carried out in such a way that a risk of falling is kept as low as possible. - Page 28 7. Safety instructions 7.2 Safety information for using the ladder Do not ascend or descend unless you Warning, fall from the ladder. are facing the ladder. Keep a secure grip on the ladder when ascending and descending. Maintain a Refer to instruction manual/booklet. handhold whilst working from a ladder or take additional safety precautions if Inspect the ladder after delivery.
- Page 29 Prevent damage of the ladder when transporting e.g. Use non-conductive ladders for unavoidable by fastening and ensure they are suitably placed to live electrical work. prevent damage. Do not use the ladder as a bridge. Ensure the ladder is suitable for the task. Do not use the ladder if contaminated, Do not modify the ladder design.
-
Page 30: Transport / Storage
7. Safety instructions 8. Transport / storage • Before and after using and for storage and 7.3 Use as a single ladder transport, securely latch extension ladder with the latching hook [D] on the lowest ladder rung. After using, position the extension section [A-2] of Leaning ladders with rungs shall be used the rope pull ladder so that it is securely latched in at the correct angle. -
Page 31: Care / Preventive Maintenance
12. Product information When used for its intended purpose and regularly You can find these Use and Operating Instructions on the internet at www.hailo.de. maintained, the ladder is a work tool that can be used for the long term. 13. Service /... -
Page 32: Inspection Plan
14. Inspection plan • There exists the risk of a fall due to damaged, defective or non functional ladder units; there is also a risk of tipping over when using the ladder. • Users of the ladder can sustain serious injuries during a fall. •... -
Page 34: Échelles Coulissantes À Corde
Échelles simples Réf. 7106-xxx ( 6 échelons ) 7109-xxx ( 9 échelons ) 7112-xxx ( 12 échelons ) 7115-xxx ( 15 échelons ) 7118-xxx ( 18 échelonsn ) Échelles coulissantes Réf. 7209-xxx ( 2x 9 échelons ) 7212-xxx ( 2x12 échelons ) 7215-xxx ( 2x15 échelons ) 7218-xxx... -
Page 35: Utilisation Conforme
Daimlerstr. 8 35708 Haiger, Germany Les modifications apportées à l’échelle qui n’ont pas été autorisées par le fabricant annule toute garantie. Telefon: +49 (0) 2773 82-0 Telefax: +49 (0) 2773 82-1239 E-Mail: info @ hailo.de www.hailo.de... -
Page 36: Informations Techniques
3. Informations techniques Les informations techniques déterminantes et les don- nées spécifiques au produit sont indiquées directement sur l’échelle [E]. Échelle simple [1] [ A ] Échelle simple L‘étiquette d‘identification de l‘échelle [C ] Barre transversale (Réf. 7112-xxx, 7115-xxx, 7118-xxx) Pied de l’escabeau (Réf. - Page 37 Vue d‘ensemble des échelons qui ne doivent pas être utilisés comme surface d‘appui. A = 1,71 m 7106-xxx A = 0,34 m A = 1,71 m A = 2,70 m max. B = 0,34 m 2,8 kg B = 0,44 m B = 1,65 m B = 0,71 m 150 kg...
- Page 38 A = 2,55 m 7209-xxx A = 0,85 m A = 2,55 m A = 4,23 m A = 5,15 m max. B = 0,41 m 9,4 kg B = 1,09 m B = 2,46 m B = 4,09 m B = 3,14 m 150 kg 2 x 9...
-
Page 39: Est Livré
4. Est livré A) Échelles simples 1 x Manuel d‘utilisation et d‘installation 1 x Échelle simple (Réf. 7106-xxx, 7109-xxx) B) Échelles simples 1 x Manuel d‘utilisation et d‘installation 1 x Échelle simple (Réf. 7112-xxx, 7115-xxx, 7118-xxx) 1 x Barre transversale Éléments de fixation: 2 x Écrou hexagonal M6 2 x Douille d‘écartement... -
Page 40: Instructions De Montage
5. Instructions de montage Avant d’utiliser les échelles suivantes, installer la barre transversale correspondante : Échelles simples Réf. 7112-xxx, 7115-xxx, 7118-xxx Échelles coulissantes Réf. 7209-xxx, 7212-xxx, 7215-xxx, 7218-xxx Échelles coulissantes à corde Réf. 7285-xxx, 7288-xxx L‘échelle ne doit être utilisée que si la barre transversale est fixée. -
Page 41: Installation / Utilisation
6. Installation / utilisation 6.1 Utilisation de l’échelle simple Positionner l’échelle simple sur une surface plane et dure, et la fixer avant utilisation, par exemple en l’attachant ou en plaçant des dispositifs adaptés permettant de garantir la stabilité. 6.2 Utilisation de l’échelle coulissante L’échelle coulissante peut être réglée en hauteur en insérant ou en retirant l’élément coulissant [A-2]. -
Page 42: Utilisation De L'échelle Coulissante À Corde
6. Installation / utilisation 6.3 Utilisation de l’échelle coulissante à corde L’échelle coulissante à corde peut être réglée en hauteur en insérant ou en retirant l’élément coulissant [A-2]. Réglage et blocage de l’échelle coulissante à corde : Placer d’abord provisoirement l’échelle coulissante et la positionner sur une surface plane et dure. -
Page 43: Consignes De Sécurité
7. Consignes de sécurité 7.1 Consignes de sécurité générales • L’utilisation de l’échelle engendre un risque d’une Utilisation de l’échelle non professionnelle (non professional use) : chute. Pour cette raison, tous les travaux avec et sur l’échelle doivent être effectués en réduisant au maximum le risque de chute. -
Page 44: Consignes De Sécurité Relatives À L'usage De L'échelle
7. Consignes de sécurité 7.2 Consignes de sécurité relatives à l’usage de l’échelle Monter sur l’échelle et en descendre le Attention, chute de l’échelle. visage tourné vers l’échelle. Bien se tenir à l’échelle pour y monter Observer les instructions. et en descendre. Veiller à un maintien sûr lors de l’exécution des travaux et lors de la montée et la descente. - Page 45 Éviter les dommages pendant le transport de l’échelle, Pour les travaux inévitables sous tension ou à proximité par exemple en l’arrimant, et garantir une fixation/ de lignes électriques aériennes, pas utiliser d’échelles installation appropriée. conductrices de courant (p.ex. échelles en aluminium). L’échelle doit être adaptée à...
-
Page 46: Utilisation Comme Échelle Simple
7. Consignes de sécurité 8. Transport / stockage • Bien verrouiller l’échelle coulissante avec les 7.3 Utilisation comme échelle simple crochets [D] sur chaque barreau inférieur avant et après l’utilisation ainsi qu’en cas de stockage et de transport. Utiliser les échelles simples munies de Après utilisation, positionner l’élément coulissant barreaux avec l’angle correct. -
Page 47: Entretien / Maintenance
Lors d’une utilisation conforme et d’un entretien régulier, Le présent mode d’emploi et de manutention est l’échelle est un outil de travail utilisable pendant une disponible sur Internet à l’adresse www.hailo.de. longue période. 13. Service après-vente / pièces de rechange Des informations supplémentaires sur les prestations... -
Page 48: Fiche De Contrôle
14. Fiche de contrôle • Des éléments d’échelle endommagés, défectueux ou non fonctionnels peuvent entraîner la chute de l’utilisateur ; il y a également un risque de renversement pendant l’utilisation de l’échelle. • Les utilisateurs de l’échelle peuvent encourir de graves lésions en cas de chute. •... - Page 50 Escaleras de mano Nº de producto 7106-xxx ( 6 Peldaño ) 7109-xxx ( 9 Peldaño ) 7112-xxx ( 12 Peldaño ) 7115-xxx ( 15 Peldaño ) 7118-xxx ( 18 Peldaño ) Escaleras telescópicas Nº de producto 7209-xxx ( 2x 9 Peldaño ) 7212-xxx ( 2x12 Peldaño ) 7215-xxx...
-
Page 51: Uso Conforme A Lo Previsto
35708 Haiger, Germany indebido. Telefon: +49 (0) 2773 82-0 Las modificaciones en la escalera que no estén autori- Telefax: +49 (0) 2773 82-1239 zadas por el fabricante, conllevan la anulación de la garantía. E-Mail: info @ hailo.de www.hailo.de... -
Page 52: Información Técnica
3. Información técnica Las informaciones técnicas y datos específicos del producto determinantes se encuentran en la identifica- ción de la escalera [B] directamente en el lateral de la escalera. Escalera de mano [1] [ A ] Escalera de mano Identificación de la etiqueta [C ] Barra transversal (Nº... - Page 53 Vista de los peldaños que no deben utilizarse como superficie estable. A = 1,71 m 7106-xxx A = 0,34 m A = 1,71 m A = 2,70 m max. B = 0,34 m 2,8 kg B = 0,44 m B = 1,65 m B = 0,71 m 150 kg C = 0,08 m...
- Page 54 A = 2,55 m 7209-xxx A = 0,85 m A = 2,55 m A = 4,23 m A = 5,15 m max. B = 0,41 m 9,4 kg B = 1,09 m B = 2,46 m B = 4,09 m B = 3,14 m 150 kg 2 x 9...
-
Page 55: Volumen De Suministro
4. Volumen de suministro A) Escaleras de mano 1 x Instrucciones de uso y manejo 1 x Escalera de mano (Nº de producto 7106-xxx, 7109-xxx) B) Escaleras de mano 1 x Instrucciones de uso y manejo 1 x Escalera de mano (Nº... -
Page 56: Instrucciones Para El Montaje
5. Instrucciones para el montaje Antes de usar las siguientes escaleras debe montarse la barra transversal correspondiente: Escaleras de mano Nº de p. 7112-xxx, 7115-xxx, 7118-xxx Escaleras telescópicas Nº de p. 7209-xxx, 7212-xxx, 7215-xxx, 7218-xxx Escaleras de tracción por cable Nº... -
Page 57: Montaje / Manejo
6. Montaje / Manejo 6.1 Manejo de la escalera de mano Apoyar la escalera de mano en una superficie plana, firme y asegurarla antes del uso, p.ej. instalar amarres o dispositivos adecuados para garantizar la estabilidad. 6.2 Manejo de la escalera telescópica La escalera telescópica puede ajustarse en altura, al empujarse hacia dentro o hacia fuera la parte corredera [A-2]. - Page 58 6. Montaje / Manejo 6.3 Manejo de la escalera con tracción de cable La escalera con tracción de cable puede ajustarse en altura al empujarse la parte corredera [A-2] hacia dentro o hacia fuera. Ajuste e inmovilización de las escaleras con tracción de cable: Colocar inicialmente la escalera con tracción de cable en posición y apoyarla en una superficie plana, firme.
-
Page 59: Instrucciones De Seguridad
7. Instrucciones de seguridad 7.1 Instrucciones generales de seguridad • Durante el uso de la escalera existe en principio el Empleo de la escalera en el ámbito no profesional (non professional use): peligro de una caída. Por tanto todos los trabajos con y sobre la escalera deben realizarse de modo que el peligro de caída sea lo más reducido posible. - Page 60 7. Instrucciones de seguridad 7.2 Indicaciones de seguridad para el uso de la escalera Subir y bajar de la escalera con la cara Aviso, caída de la escalera. hacia la misma. Sujetarse firmemente a la escalera al subir y bajar de la misma. Al realizar Seguir las instrucciones.
- Page 61 Impedir daños durante el transporte de la escalera, Para realizar trabajos inevitablemente bajo tensión o p.ej. mediante el amarrado, y garantizar que esté cerca de conductores eléctricos superficiales, no utilizar sujeta/colocada de forma adecuada. escaleras conductoras de corriente. Cerciorarse que la escalera es adecuada para el uso a No utilizar la escalera como puente.
-
Page 62: Transporte / Almacenamiento
7. Instrucciones de 8. Transporte / seguridad Almacenamiento • Bloquear de manera segura la escalera telescópica 7.3 Empleo como escalera de mano con el gancho de retención [D] antes y después del uso, así como para el almacenamiento y para el transporte en el peldaño más inferior en cada caso. -
Page 63: Mantenimiento / Reparación
Si se utiliza conforme a lo previsto y se somete a mante- Este manual de uso y manejo puede encontrarse en nimiento periódico, la escalera es un medio de trabajo Internet en www.hailo.de. que puede utilizarse por mucho tiempo. 13. Servicio técnico / Piezas de repuesto Para obtener más información sobre servicio técnico y... -
Page 64: Plan De Inspección
14. Plan de inspección • Debido a los elementos de escalera dañados, defectuosos o no aptos para el funcionamiento existe para el usuario el peligro de una caída; igualmente existe el peligro de un vuelco durante el uso de la escalera. •... - Page 66 Scale da appoggio N. art. 7106-xxx ( 6 Pioli ) 7109-xxx ( 9 Pioli ) 7112-xxx ( 12 Pioli ) 7115-xxx ( 15 Pioli ) 7118-xxx ( 18 Pioli ) Scale a sfilo N. art. 7209-xxx ( 2x 9 Pioli ) 7212-xxx ( 2x12 Pioli ) 7215-xxx...
-
Page 67: Introduzione
• forme. Daimlerstr. 8 35708 Haiger, Germany Eventuali modifiche alla scala non autorizzate dal costruttore comportano l’invalidamento della garanzia. Telefon: +49 (0) 2773 82-0 Telefax: +49 (0) 2773 82-1239 E-Mail: info @ hailo.de www.hailo.de... -
Page 68: Informazioni Tecniche
3. Informazioni tecniche I dati specifici del prodotto e le informazioni tecniche normative si trovano sul contrassegno [B] applicato direttamente sulla scala. Scala da appoggio [1] [ A ] Scala da appoggio Contrassegno scala [C ] Traversa (N. art. 7112-xxx, 7115-xxx, 7118-xxx) Piede della scala (N. - Page 69 Panoramica dei pioli che non possono essere utilizzati come superficie d‘appoggio. A = 1,71 m 7106-xxx A = 0,34 m A = 1,71 m A = 2,70 m max. B = 0,34 m 2,8 kg B = 0,44 m B = 1,65 m B = 0,71 m 150 kg C = 0,08 m...
- Page 70 A = 2,55 m 7209-xxx A = 0,85 m A = 2,55 m A = 4,23 m A = 5,15 m max. B = 0,41 m 9,4 kg B = 1,09 m B = 2,46 m B = 4,09 m B = 3,14 m 150 kg 2 x 9...
-
Page 71: Kit Di Fornitura
4. Kit di fornitura A) Scale da appoggio 1 x Istruzioni d‘uso 1 x Scala da appoggio (N. art. 7106-xxx, 7109-xxx) B) Scale da appoggio 1 x Istruzioni d‘uso 1 x Scala da appoggio (N. art. 7112-xxx, 7115-xxx, 7118-xxx) 1 x Traversa Elementi di montaggio: 2 x Dado esagonale M6 2 x Bussola distanziale... -
Page 72: Istruzioni Per L'assemblaggio
5. Istruzioni per l’assemblaggio Prima di utilizzare le seguenti scale è necessario montare la traversa corrispondente: Scale da appoggio N. art. 7112-xxx, 7115-xxx, 7118-xxx Scale a sfilo N. art. 7209-xxx, 7212-xxx, 7215-xxx, 7218-xxx Scale estensibili con fune N. art. 7285-xxx, 7288-xxx La scala può... -
Page 73: Struttura / Uso
6. Struttura / Uso 6.1 Utilizzo della scala da appoggio Posare la scala da appoggio su una superficie piana e stabile e assicurarla, ad es. legandola oppure utilizzare idonei dispositivi per garantire la sicurezza dell‘appog- gio. 6.2 Utilizzo della scala a sfilo La scala a sfilo può... - Page 74 6. Struttura / Uso 6.3 Utilizzo della scala estensibile con fune La scala estensibile con fune può essere regolata in altezza inserendo o sfilando il tronco a sfilo [A-2]. Regolazione e bloccaggio della scala estensibile con fune: Portare dapprima in posizione provvisoria la scala estensibile con fune e posarla su una superficie piana e stabile.
-
Page 75: Avvertenze Di Sicurezza
7. Avvertenze di sicurezza 7.1 Avvertenze di sicurezza generali • Durante l’utilizzo della scala sussiste di norma il Utilizzo della scala in ambiente non lavorativo (non professional use): rischio di caduta. Tutti i lavori con e sulla scala devono pertanto essere eseguiti in modo da ridurre il più... - Page 76 7. Avvertenze di sicurezza 7.2 Avvertenze di sicurezza per l’uso della scala Salire e scendere dalla scala sempre Avviso, caduta dalla scala. con il viso rivolto verso la scala. Quando si sale e si scende tenersi bene alla scala. Quando si lavora su una Rispettare le istruzioni.
- Page 77 Evitare di danneggiare la scala durante il trasporto, Non utilizzare scale che conducono la corrente per ad es. tramite legacci troppo stretti, e assicurare che effettuare lavori sotto tensione o nelle vicinanze di linee questa venga fissata / applicata in modo appropriato. aeree elettriche (ad es.
-
Page 78: Trasporto / Immagazzinamento
7. Avvertenze di sicurezza 8. Trasporto / Immagazzinamento 7.3 Utilizzo come scala da appoggio • Prima e dopo l’utilizzo, nonché durante lo stoccaggio e il trasporto, fissare la scala a sfilo in Le scale da appoggio dotate di pioli sicurezza sul piolo più basso utilizzando il gancio devono essere utilizzate nella corretta di arresto [D]. -
Page 79: Manutenzione / Riparazione
In caso di uso conforme e manutenzione regolare, la Il presente manuale di istruzioni è disponibile su Internet scala è un mezzo di lavoro di lunga durata. all‘indirizzo www.hailo.de. 13. Assistenza / Ricambi Maggiori informazioni su servizi di assistenza e ricambi... -
Page 80: Piano Di Controllo
14. Piano di controllo • I tronchi danneggiati, difettosi o non funzionanti possono costituire per l’utente un rischio di caduta, inoltre sussiste il rischio di ribaltamento qualora la scala venga utilizzata. • In caso di caduta, gli utenti della scala possono riportare gravi lesioni. •... - Page 82 Pristatomos kopėčios Prekės-Nr.: 7106-xxx ( 6 Pakopos ) 7109-xxx ( 9 Pakopos ) 7112-xxx ( 12 Pakopos ) 7115-xxx ( 15 Pakopos ) 7118-xxx ( 18 Pakopos ) Slankiojamos kopėčios Prekės-Nr.: 7209-xxx ( 2x 9 Pakopos ) 7212-xxx ( 2x12 Pakopos ) 7215-xxx ( 2x15 Pakopos ) 7218-xxx...
-
Page 83: Įvadas
• patirtą dėl to, kad gaminys buvo naudojamas ne pagal instrukciją. Daimlerstr. 8 35708 Haiger, Germany Pakeitus kopėčių konstrukciją be gamintojo leidimo, garantija joms nebegalioja. Telefon: +49 (0) 2773 82-0 Telefax: +49 (0) 2773 82-1239 E-Mail: info @ hailo.de www.hailo.de... -
Page 84: Techninė Informacija
3. Techninė informacija Konkrečią techninę informaciją ir atskirų modelių duo- menis taip pat rasite tiesiai ant etiketės [B], priklijuotos ant kopėčių. Pristatomos kopėčios [1] [ A ] Pristatomos kopėčios Kopėčių ženklinimo etiketė [C ] Skersiniai (Art.-Nr. 7112-xxx, 7115-xxx, 7118-xxx) Pakopa (Art.-Nr. - Page 85 Pakopų, kurios negali būti naudojamos atraminiam paviršiui, peržiūra. A = 1,71 m 7106-xxx A = 0,34 m A = 1,71 m A = 2,70 m max. B = 0,34 m 2,8 kg B = 0,44 m B = 1,65 m B = 0,71 m 150 kg C = 0,08 m...
- Page 86 A = 2,55 m 7209-xxx A = 0,85 m A = 2,55 m A = 4,23 m A = 5,15 m max. B = 0,41 m 9,4 kg B = 1,09 m B = 2,46 m B = 4,09 m B = 3,14 m 150 kg 2 x 9...
-
Page 87: Tiekiamas Komplektas
4. Tiekiamas komplektas A) Pristatomos kopėčios 1 x Naudojimo ir priežiūros instrukcija 1 x Pristatomos kopėčios (Art.-Nr. 7106-xxx, 7109-xxx) B) Pristatomos kopėčios 1 x Naudojimo ir priežiūros instrukcija 1 x Pristatomos kopėčios (Art.-Nr. 7112-xxx, 7115-xxx, 7118-xxx) 1 x Skersiniai Elementų montavimas: 2 x Šešiakampė... -
Page 88: Pastabos Apie Konstrukciją
5. Pastabos apie konstrukciją Prieš naudojant šias kopėčias reikia sumontuoti joms skirtus skersinius: Pristatomos kopėčios Art.-Nr. 7112-xxx, 7115-xxx, 7118-xxx Slankiojamos kopėčios Art.-Nr. 7209-xxx, 7212-xxx, 7215-xxx, 7218-xxx Kopėčios su trosu Art.-Nr. 7285-xxx, 7288-xxx Kopėčias galima naudoti tik sumontavus skersinį. 1. Paruoškite kopėčias. Paguldykite kopėčias ir nustatykite taip, kad būtų... -
Page 89: Pastatymas / Naudojimas
6. Pastatymas / naudojimas 6.1 Pristatomų kopėčių naudojimas Pristatomas kopėčias paguldykite ant lygaus ir tvirto paviršiaus, prieš naudodami pritvirtinkite, pvz., pririš- kite arba naudokite tinkamus fiksatorius, kurie galėtų užtikrinti ant jų stovinčio asmens saugumą. 6.2 Stumdomų kopėčių naudojimas Stumdomas kopėčias galima nustatyti į norimą aukštį įstumiant arba ištraukiant jų... - Page 90 6. Pastatymas / naudojimas Kopėčių su trosu naudojimas Kopėčias su trosu galima nustatyti į norimą aukštį įstu- miant arba ištraukiant jų stumdomą segmentą [A-2]. Kopėčių su trosu reguliavimas ir nustatymas: Iš pradžių kopėčias su trosu laikinai reikia nustatyti į reikalingą padėtį ir paguldyti ant lygaus ir tvirto paviršiaus.
-
Page 91: Saugos Nuorodos
7. Saugos nuorodos 7.1 Bendroji nuoroda dėl saugos • D irbant ant kopėčių kyla pavojus, kad jos bus pastum- Kopėčių naudojimas tos. neprofesionalioje aplinkoje. Visus darbus su kopėčiomis ir ant jų atlikite taip, kad pavojus jas pastumti ir nuo jų nukristi būtų kuo mažesnis. • D irbant ant kopėčių kyla pavojus nuo jų nukristi. Pastūmus kopėčias gali būti sužalotas ant jų... - Page 92 7. Saugos nuorodos 7.2 Kopėčių naudojimo saugumo nurodymai Įspėjimas, Užlipkite ir nulipkite nuo kopėčių nuo kopėčių galima nukristi. būdami atsisukę į jas veidu. Užlipdami ir nulipdami tvirtai laikykitės už kopėčių. Dirbdami ant kopėčių, Laikykitės instrukcijų. laikykitės už jų viena ranka arba, jei tai neįmanoma, pasirūpinkite papildomo- mis apsaugos priemonėmis.
- Page 93 Jei neišvengiamai reikia atlikti darbus veikiant įtampai ar Perveždami kopėčias pasirūpinkite, kad jos būtų tinka- netoli veikiančių elektros įrenginių, nenaudokite kopėčių, pritvirtintos. per kurias gali tekėti elektros srovė (pvz., aliumininių kopėčių). Įsitikinkite, kad kopėčios tinka numatytam darbui atlikti. Nenaudokite kopėčių kaip jungiamojo Nuvalykite nuo kopėčių...
-
Page 94: Gabenimas Ir Sandėliavimas
7. Saugos nuorodos 8. Gabenimas ir sandėliavimas • S tumdomas kopėčias prieš ir po naudojimo, kai 7.3 Pristatomų kopėčių naudojimas reikia jas pastatyti sandėliuoti arba pervežti, reikia pritvirtinti užfiksuojant atraminius kabliukus [D] ant žemiausios pakopos. Užfiksuojamas kopėčias reikia užfiksuoti Stumdomą kopėčių su trosu segmentą [A-2] baigus teisingu kampu. -
Page 95: Techninė Ir Įprasta Priežiūra
10. Tinkamumo naudoti trukmė 12. Gaminio informacija Tinkamai naudojamos ir prižiūrimos kopėčios yra ilgalai- Šią naudojimo instrukciją rasite interneto svetainėje kė darbo priemonė. www.hailo.de. 13. Aptarnavimas ir atsarginės dalys Daugiau informacijos apie aptarnavimą ir atsargines dalis teiraukitės gamintojo. -
Page 96: Patikros Planas
14. Patikros planas • P ažeisti, neveikiantys ar stingantys kopėčių segmentai kelia pavojų naudotojui, kopėčios gali būti nestabilios ar nuvirsti. • Kopėčių naudotojas gali sunkiai susižaloti krisdamas. • Gali būti sugadinti aplink esantys daiktai. Išbraukite nereikalingą: Kopėčios yra tvarkingos Kopėčios yra netvarkingos Rezultatas Kopėčių elementus Patikros punktai Visos tvirtinimo detalės (kniedės, varžtai, sriegiai ir pan.) turi būti savo vietose ir 1. - Page 98 Pieslienamās kāpnes Preces Nr. 7106-xxx ( 6 pakāpiens ) 7109-xxx ( 9 pakāpiens ) 7112-xxx ( 12 pakāpiens ) 7115-xxx ( 15 pakāpiens ) 7118-xxx ( 18 pakāpiens ) Bīdāmās kāpnes Preces Nr. 7209-xxx ( 2x 9 pakāpiens ) 7212-xxx ( 2x12 pakāpiens ) 7215-xxx ( 2x15 pakāpiens )
-
Page 99: Ievads
• patirtą dėl to, kad gaminys buvo naudojamas ne pagal instrukciją. Daimlerstr. 8 35708 Haiger, Germany Pakeitus kopėčių konstrukciją be gamintojo leidimo, garantija joms nebegalioja. Telefon: +49 (0) 2773 82-0 Telefax: +49 (0) 2773 82-1239 E-Mail: info @ hailo.de www.hailo.de... -
Page 100: Tehniskā Informācija
3. Naudojimas pagal paskirtį Būtiskākā tehniskā informācija un specifiskie dati atrodas kāpņu marķējumā [B] tieši uz kāpnēm. Pieslienamās kāpnes [1] [ A ] Pieslienamās kāpnes Kāpņu marķējums [C ] Šķērsstienis (Preces Nr. 7112-xxx, 7115-xxx, 7118-xxx) Kāpņu pamats (Preces Nr. 7106-xxx, 7109-xxx) Bīdāmās kāpnes (2-daļīgas) [2] [ A-1] Aizmugurējā... - Page 101 Kāpņu pakāpienu pārskats, kurus aizliegts izmantot kā atbalsta virsmu. A = 1,71 m 7106-xxx A = 0,34 m A = 1,71 m A = 2,70 m max. B = 0,34 m 2,8 kg B = 0,44 m B = 1,65 m B = 0,71 m 150 kg C = 0,08 m...
- Page 102 A = 2,55 m 7209-xxx A = 0,85 m A = 2,55 m A = 4,23 m A = 5,15 m max. B = 0,41 m 9,4 kg B = 1,09 m B = 2,46 m B = 4,09 m B = 3,14 m 150 kg 2 x 9...
-
Page 103: Piegādes Komplektācija
4. Piegādes komplektācija A) Pieslienamās kāpnes 1 x Lietošanas un ekspluatācijas instrukcija 1 x Pieslienamās kāpnes (Preces Nr. 7106-xxx, 7109-xxx) B) Pieslienamās kāpnes 1 x Lietošanas un ekspluatācijas instrukcija 1 x Pieslienamās kāpnes (Preces Nr. 7112-xxx, 7115-xxx, 7118-xxx) 1 x Caurules šķērssija Montāža elementi: 2 x Sešmalu uzgrieznis (M6) 2 x Dtarplika... -
Page 104: Salikšanas Instrukcija
5. Salikšanas instrukcija Pirms šo kāpņu lietošanas uzstādiet atbilstošos šķērsstieņus: Pieslienamās kāpnes Preces Nr. 7112-xxx, 7115-xxx, 7118-xxx Bīdāmās kāpnes Preces Nr. 7209-xxx, 7212-xxx, 7215-xxx, 7218-xxx Kāpnes ar trosēm Preces Nr. 7285-xxx, 7288-xxx Lietojiet kāpnes tikai ar uzstādītu šķērssiju. 1. Sagatavojiet kāpnes. Novietojiet kāpnes tā, lai kāpņu šķērsstieņu [C] atvērumi būtu brīvi pieejami. -
Page 105: Montāža/ Lietošana
6. Montāža/ lietošana 6.1 Pieslienamo kāpņu lietošana Novietojiet pieslienamās kāpnes pie līdzenas, cietas virsmas un pirms lietošanas nostipriniet tās, piem., piesienot vai izmantot piemērotus mehānismus stabili- tātes nodrošināšanai. 6.2 Bīdāmo kāpņu lietošana Iebīdot vai izbīdot bīdāmo daļu [A-2], iespējams izmai- nīt bīdāmo kāpņu augstumu. - Page 106 6. Montāža/ lietošana Kāpņu ar trosēm lietošana Iebīdot vai izbīdot bīdāmo daļu [A-2], iespējams izmainīt kāpņu ar trosi augstumu. Kāpņu ar trosēm regulēšana un fiksācija: Vispirms aptuveni pārvietojiet kāpnes ar trosi to pozīcijā un novietojiet uz līdzenas, cietas virsmas. Kāpņu ar trosi regulēšanu iespējams veikt ar vienu roku. 1.
-
Page 107: Drošības Norādījumi
7. Drošības norādījumi 7.1 Vispārīgi drošības norādījumi • L ietojot kāpnes, vienmēr iespējams nogāšanās risks. Lietojot kāpnes neprofesionālām vajadzībām Tādēļ visus darbus ar un uz kāpnēm veiciet tā, lai (non professional use): nogāšanās risks būtu pēc iespējas mazāks. • L ietojot kāpnes, vienmēr iespējams arī apgāšanās risks. Apgāžoties kāpnēm, iespējams traumas un mantiski bojājumi. - Page 108 7. Drošības norādījumi 7.2 Kāpņu lietošanas drošības norādījumi Uzkāpiet un nokāpiet no kāpnēm ar Brīdinājums, kāpņu apgāšanās. skatu uz darbības vietu. Kad strādājat uz kāpnēm, pārliecinieties, lai jūs cieši turētos pie kāpnēm ar Ievērojiet instrukcijas. vienu roku, ja tas nav iespējams, tad nepieciešams veikt papildus drošības pasākumus.
- Page 109 Kāpņu transportēšanas laikā izvairieties no bojāju- Veicot darbus, kas saistīti ar elektroiekārtu daļām vai miem, ko rada, piem., nostiprināšana un pārliecinieties, darbība notiek tuvu elektrolīnijām, neizmantojiet kāpnes, ka tās ir atbilstoši nostiprinātas / uzstādītas. kas vada elektrību (piemēram, alumīnija kāpnes). Pārliecinieties, ka kāpnes ir piemērotas attiecīgā...
-
Page 110: Transportēšana / Uzglabāšana
7. Drošības norādījumi 8. Transportēšana / uzglabāšana 7.3 Pieslienamo kāpņu lietošana • P irms un pēc lietošanas, kā arī glabāšanas nolūkos un transportēšanai, droši nofiksējiet bīdāmās kāpnes ar fiksācijas āķi [D] pie zemākā kāpņu spraišļa. Lietojiet pieslienamās kāpnes ar Pēc lietošanas nostipriniet kāpņu ar trosi bīdāmo spraišļiem pareizajā... -
Page 111: Universālo Kāpņu Pārbaudes Plāns
12. Izstrādājuma informācijas Ja kāpnes tiek lietotas atbilstoši noteikumiem un tiek Šo lietošanas instrukciju internetā varat atrast vietnē veikta regulāra apkope, tad kāpnes ir ilgstoši lietojams www.hailo.de. darba līdzeklis. 13. Serviss / rezerves daļas Turpmāku informāciju par servisa pakalpojumiem un... -
Page 112: Pārbaudes Plāns
Pārbaudes plāns • B ojāti, kļūdaini vai lietošanas kārtībā neesoši kāpņu elementi rada lietotājam nokrišanas risku; tā pat pastāv apgāšanās risks kāpņu lietošanas laikā. • Kāpņu lietotājs apgāšanās laikā var gūt smagas traumas. • Tā pat kāpņu apgāšanās laikā iespējams sabojāt priekšmetus. Ar krustiņu atzīmējiet atbilstošo: Kāpnes ir kārtībā. Kāpnes nav kārtībā. Resultāts Kāpņu elementu: Pārbaudes punkti: Jābūt ir visiem stiprinājumiem (kniedēm, skrūvēm, tapām utt.). 1. Vispārējie pārbaudes Vai stiprinājumi ir vaļīgi vai sarūsējuši? punkti Vai uz kāpnēm ir netīrumi (piem., dubļi, laka, eļļa vai tauki)? - Page 114 Scări rezemate Art.-Nr. 7106-xxx ( 6 Spiţe ) 7109-xxx ( 9 Spiţe ) 7112-xxx ( 12 Spiţe ) 7115-xxx ( 15 Spiţe ) 7118-xxx ( 18 Spiţe ) Scări culisante Art.-Nr. 7209-xxx ( 2x 9 Spiţe ) 7212-xxx ( 2x12 Spiţe ) 7215-xxx ( 2x15 Spiţe ) 7218-xxx...
-
Page 115: Utilizarea Conform Destinaţiei
35708 Haiger, Germany Efectuarea de modificări la scară, care n-au fost autori- Telefon: +49 (0) 2773 82-0 zate de către producător, conduc la anularea garanţiei şi Telefax: +49 (0) 2773 82-1239 la neacordarea garanţiei. E-Mail: info @ hailo.de www.hailo.de... -
Page 116: Informaţii Tehnice
3. Informaţii tehnice Informaţiile tehnice decisive şi datele specifice ale produsului se găsesc pe marcajul scării [B] aplicat direct pe scară. Scară rezemată [1] [ A ] Scară rezemată Marcaj scară [C ] Traversă (Art.-Nr. 7112-xxx, 7115-xxx, 7118-xxx) Picior scară (Art.-Nr. - Page 117 Vedere de ansamblu a spiţelor scării, care nu trebuie utilizate ca suprafaţă de susţinere. A = 1,71 m 7106-xxx A = 0,34 m A = 1,71 m A = 2,70 m max. B = 0,34 m 2,8 kg B = 0,44 m B = 1,65 m B = 0,71 m 150 kg...
- Page 118 A = 2,55 m 7209-xxx A = 0,85 m A = 2,55 m A = 4,23 m A = 5,15 m max. B = 0,41 m 9,4 kg B = 1,09 m B = 2,46 m B = 4,09 m B = 3,14 m 150 kg 2 x 9...
-
Page 119: Conţinutul Livrării
4. Conţinutul livrării A) Scări rezemate 1 x Manual de funcţionare şi utilizare 1 x Scară rezemată (Art.-Nr. 7106-xxx, 7109-xxx) B) Scări rezemate 1 x Manual de funcţionare şi utilizare 1 x Scară rezemată (Art.-Nr. 7112-xxx, 7115-xxx, 7118-xxx) 1 x traversă 2 x piuliţă... -
Page 120: Ghid De Asamblare
5. Ghid de asamblare Înainte de utilizarea următoarelor scări trebuie montate traversele aferente: Scări rezemate Art.-Nr. 7112-xxx, 7115-xxx, 7118-xxx Scări culisante Art.-Nr. 7209-xxx, 7212-xxx, 7215-xxx, 7218-xxx Scări extensibile cu cablu Art.-Nr. 7285-xxx, 7288-xxx Utilizarea scării este permisă numai cu traversa montată. 1. -
Page 121: Structura / Utilizarea
6. Structura / utilizarea 6.1 Manipularea scării rezemate Aşezaţi scara rezemată pe o suprafaţă orizontală nete- dă, rigidă şi o asiguraţi înainte de utilizare, respectiv o ancoraţi sau îi aplicaţi dispozitive adecvate pentru asigurarea stabilităţii pe poziţie. 6.2 Manipularea scării culisante Scara culisantă... - Page 122 6. Structura / utilizarea 6.3 Manipularea scării extensibile cu cablu Scara extensibilă cu cablu poate fi reglată pe înălţime prin retragerea sau extinderea segmentului culisant [A-2]. Reglarea şi blocarea scării extensibile cu cablu: Puneţi mai întâi provizoriu scara extensibilă cu cablu în poziţie, şi o aşezaţi pe o suprafaţă...
-
Page 123: Indicaţii De Siguranţă
7. Indicaţii de siguranţă Indicaţiile generale de siguranţă • L a utilizarea scării există în principiu pericolul unei Utilizarea scării în domeniul non-profesional prăbuşiri. (non professional use): De aceea toate lucrările cu şi pe scară trebuie executate astfel încât să fie redus la minim pericolul unei prăbuşiri. • L a utilizarea scării există de asemenea pericolul unei răsturnări. - Page 124 7. Indicaţii de siguranţă 7.2 Indicaţi de siguranţă pentru utilizarea scării La urcare şi coborâre să vă aflaţi cu faţa Avertizare, prăbuşirea scării. spre scară. La urcare şi coborâre să vă ţineţi ferm Respectaţi instrucţiunile. de scară. Verificarea vizuală a scării, cu privire Evitaţi solicitările laterale excesive, la deteriorare şi utilizarea sigură...
- Page 125 La transportul scării evitaţi deteriorarea, de ex. prin În caz de lucrări de efectuat inevitabil sub tensiune dispozitive de ancorare rigidă şi vă asiguraţi că acestea sauîn apropierea cablurilor electrice libere, nu utilizaţi sunt fixate / ataşate în mod corespunzător. scări conductoare (de ex.
-
Page 126: Transportul / Depozitarea
7. Indicaţii de siguranţă 8. Transportul / depozitarea • Blocaţi scara culisantă înainte şi după utilizare, precum Utilizarea ca scară de reazem şi pentru depozitare şi transport, cu cârligele de înclichetare [D] la treapta corespunzătoare inferioară Scara trebuie să fie amplasată în poziţia extremă. -
Page 127: Întreţinerea / Repararea
În caz de o utilizare corespunzătoare şi întreţinere regulată, Acest manual de utilizare şi manipulare îl găsiţi pe Internet scara este un mijloc de lucru utilizabil de durată. la www.hailo.de. 13. Service / piese de schimb Informaţii suplimentare privind serviciile de service şi... -
Page 128: Planul De Verificare
14. Planul de verificare • D in cauza elementelor de scară deteriorate, defectuoase sau nefuncţionale există pentru utilizator pericolul unei prăbuşiri şi de asemenea există pericolul unei răsturnări la utilizarea scării. • În cazul unei prăbuşiri utilizatorii unei scări pot suferi vătămări grave. • De asemenea în cazul unei răsturnări se pot produce avarii ale bunurilor. Bifaţi răspunsul corect. Scara este în ordine Scara nu este în ordine Rezultatul Elementele de scară: Puncte de verificare: Toate elementele de fixare (nituri, şuruburi, bolţuri etc.) trebuie să... - Page 130 Anliggande stegar Art.nr. 7106-xxx ( 6 Stegpinne ) 7109-xxx ( 9 Stegpinne ) 7112-xxx ( 12 Stegpinne ) 7115-xxx ( 15 Stegpinne ) 7118-xxx ( 18 Stegpinne ) Utskjutsstegar Art.nr. 7209-xxx ( 2x 9 Stegpinne ) 7212-xxx ( 2x12 Stegpinne ) 7215-xxx ( 2x15 Stegpinne ) 7218-xxx...
-
Page 131: Ändamålsenlig Användning
Vid skador, som uppstått genom inte Daimlerstr. 8 ändamålsenlig användning, tas inget ansvar. 35708 Haiger, Germany Modifieringar av stegen, som inte auktoriserats av Telefon: +49 (0) 2773 82-0 tillverkaren, leder till att garantin inte gäller. Telefax: +49 (0) 2773 82-1239 E-Mail: info @ hailo.de www.hailo.de... -
Page 132: Teknisk Information
3. Teknisk information Relevant teknisk information och produktspecifikati- oner finns i angivna i stegens märkning [B] direkt på stegen. Anliggande stege [1] [ A ] Anliggande stege Stegens märkning [C ] Tvärbalk (Art.nr. 7112-xxx, 7115-xxx, 7118-xxx) Glidskydd (Art.nr. 7106-xxx, 7109-xxx) Utskjutsstege (2-delig) [2] [ A-1] Bakre stegdel [ A-2] Främre utskjutsdel... - Page 133 Översikt av stegpinnarna, vilka inte får användas som anliggningsyta. A = 1,71 m 7106-xxx A = 0,34 m A = 1,71 m A = 2,70 m max. B = 0,34 m 2,8 kg B = 0,44 m B = 1,65 m B = 0,71 m 150 kg C = 0,08 m...
- Page 134 A = 2,55 m 7209-xxx A = 0,85 m A = 2,55 m A = 4,23 m A = 5,15 m max. B = 0,41 m 9,4 kg B = 1,09 m B = 2,46 m B = 4,09 m B = 3,14 m 150 kg 2 x 9...
-
Page 135: Leveransomfattning
4. Leveransomfattning A) Anliggande stegar 1 x Bruks- och användarinstruktioner 1 x Anliggande stegen (Art.nr. 7106-xxx, 7109-xxx) B) Anliggande stegar 1 x Bruks- och användarinstruktioner 1 x Anliggande stege (Art.nr. 7112-xxx, 7115-xxx, 7118-xxx) 1 x Tvärbalk Monteringselement 2 x Mutter M6 2 x Distanshylsa 2 x Skruv M6 C ) Utskjutsstegar... -
Page 136: Monteringsanvisning
5. Monteringsanvisning Före användning av nedanstående stegar måste tillhörande tvärbalken monteras: Anliggande stegar Art.nr. 7112-xxx, 7115-xxx, 7118-xxx Utskjutsstegar Art.nr. 7209-xxx, 7212-xxx, 7215-xxx, 7218-xxx Reputskjutsstegar Art.nr. 7285-xxx, 7288-xxx Den stegen får endast användas om tvärbalkarna är monterade. 1. Förbered stegen. Placera stegen liggande så att öppningen för tvärbalken [C] är tillgänglig. -
Page 137: Montering/Användning
6. Montering/Användning 6.1 Användning av den anliggande stegen Placera den anliggande stegen på ett jämnt, fast underlag och säkra den före användning, t.ex. genom att binda fast den eller genom att använda lämpliga anordningar för att säkerställa att den står stabilt. 6.2 Användning av utskjutsstegen Utskjutsstegen kan regleras i höjd genom att utskjutsde- len [A-2] skjuts in eller ut. - Page 138 6. Montering/Användning 6.3 Användning av reputskjutsstegen Reputskjutsstegen kan regleras i höjd genom att utskjutsdelen [A-2] skjuts in eller ut. Justering och fastlåsning av reputskjutsstegen: Placera först reputskjutsstegen provisoriskt på plats och placera den på ett jämnt, fast underlag. Justeringen av reputskjutsstegen kan utföras med en hand.
-
Page 139: Säkerhetsanvisningar
7. Säkerhetsanvisningar 7.1 Allmänna säkerhetsanvisningnar • Vid användning av stegen finns i princip fara för att Vid icke-professionell användning av stegen (non professional use): falla. Alla arbeten med och på stegen ska därför genomför- as så att risken för att falla är så låg som möjligt. •... - Page 140 7. Säkerhetsanvisningar 7.2 Säkerhetsanvisningar för användning av stegen Gå upp på, och ner från, vänd mot Varning, fall från stegen. stegen. Vid arbeten på en stege, håll fast dig Observera anvisningarna. med ena handen. Om detta inte är möj- ligt, vidta ytterligare säkerhetsåtgärder. Inspektera den stege som ska använ- Undvik överdriven sidobelastning, t.ex.
- Page 141 Vid transport av stegen, förhindra skador genom att Vid oundvikliga arbeten under spänning, eller i närheten t.ex. surra fast den och säkerställ att den sitter fast av elektriska luftledningar, använd inte stegar som kan ordentligt. leda ström (t.ex. aluminiumstegar). Före varje användning, säkerställ att stegen är lämplig. Använd inte stegen som en bro eller övergång.
-
Page 142: Transport/Förvaring
7. Säkerhetsanvisningar 8. Transport / Förvaring • Före och efter användningen av utskjutsstegen, samt 7.3 Användning som anliggande stege vid förvaring eller transport, lås fast utskjutsstegen med hjälp av spärrhaken [D] mot den nedersta stegpinnen. Anliggande stegar med stegpinnar Efter användningen av reputskjutsstegen, placera måste användas i rätt vinkel. -
Page 143: Service/Underhåll
10. Livslängd 12. Produktinformation Vid ändamålsenlig användning och regelbunden service Denna bruksanvisning finner du på Internetadressen är stegen ett arbetsredskap som har lång livslängd. www.hailo.de. 13. Service / Reservdelar Ytterligare information om servicetjänster och reservde- lar kan fås direkt från tillverkaren. -
Page 144: Kontrollschema
14. Kontrollschema • Vid skadade, felaktiga eller ej fungerande stegsektioner finns det fara för att användaren kan falla ned från stegen; det finns också fara för att stegen välts omkull under användning. • Användaren kan råka ut för allvarliga skador vid ett fall från stegen. •... - Page 146 Drabiny przystawne Nr katal. 7106-xxx ( 6 szczebli ) 7109-xxx ( 9 szczebli ) 7112-xxx ( 12 szczebli ) 7115-xxx ( 15 szczebli ) 7118-xxx ( 18 szczebli ) Drabiny rozsuwane Nr katal. 7209-xxx ( 2x 9 szczebli ) 7212-xxx ( 2x12 szczebli ) 7215-xxx ( 2x15 szczebli )
-
Page 147: Stosowanie Zgodnie Z Przeznaczeniem
(patrz rozporządzenie w sprawie bezpieczeństwa środ- ków roboczych). Producent: Drabinę wolno stosować tylko zgodnie z opisem zawar- Hailo-Werk • Rudolf Loh Gmbh & Co. KG tym w niniejszej instrukcji użytkowania i obsługi. Każde inne zastosowanie jest traktowane jako niezgodne Daimlerstr. 8 z przeznaczeniem. -
Page 148: Informacje Techniczne
3. Informacje techniczne Istotne informacje techniczne i dane konkretnego produktu znajdują się na oznakowaniu drabiny [B] bezpośrednio na drabinie. Drabina przystawna: [1] Drabina przystawna Oznakowanie drabiny Belka suportowa (Nr katal. 7112-xxx, 7115-xxx, 7118-xxx) Stopka drabiny (Nr katal. 7106-xxx, 7109-xxx) Drabina rozsuwana (2-częściowa): [2] [A-1] Tylna część... - Page 149 Przegląd szczebli drabiny, na których nie wolno stawać. A = 1,71 m 7106-xxx A = 0,34 m A = 1,71 m A = 2,70 m max. B = 0,34 m 2,8 kg B = 0,44 m B = 1,65 m B = 0,71 m 150 kg C = 0,08 m...
- Page 150 A = 2,55 m 7209-xxx A = 0,85 m A = 2,55 m A = 4,23 m A = 5,15 m max. B = 0,41 m 9,4 kg B = 1,09 m B = 2,46 m B = 4,09 m B = 3,14 m 150 kg 2 x 9...
-
Page 151: Zakres Dostawy
4. Zakres dostawy A) Drabina przystawna 1 x instrukcja użytkowania i obsługi 1 x drabina przystawna (Nr katal. 7106-xxx, 7109-xxx) B) Drabina przystawna 1 x instrukcja użytkowania i obsługi 1 x drabina przystawna (Nr katal. 7112-xxx, 7115-xxx, 7118-xxx) 1 x belka suportowa Elementy montażowe: 2 x nakrętka sześciokątna M6 2 x tuleja dystansowa... -
Page 152: Instrukcja Składania
5. Ghid de asamblare Przed użyciem poniższych drabin należy zamontować przynależną do nich belkę suportową: Drabina przystawna Nr katal.: 7112-xxx, 7115-xxx, 7118-xxx Drabina rozsuwana Nr katal.: 7209-xxx, 7212-xxx, 7215-xxx, 7218-xxx Drabina rozsuwana z liną Nr katal.: 7285-xxx, 7288-xxx Tych drabin można używać tylko z zamontowaną... -
Page 153: Montaż/Obsługa
6. Montaż / obsługa 6.1 Obsługa drabiny przystawnej Drabiny przystawne należy opierać o równe, stałe powierzchnie i przed użyciem zabezpieczyć, np. przez przywiązanie lub zamontowanie właściwych elementów zapewniających stabilność ustawienia. 6.2 Obsługa drabiny rozsuwanej Drabinę rozsuwaną można regulować na wysokość przez wsunięcie lub wysunięcie części przesuwnej [A-2]. - Page 154 6. Montaż / obsługa 6.3 Obsługa drabiny rozsuwanej z liną Drabinę rozsuwaną z liną można regulować na wysokość przez wsunięcie lub wysunięcie części przesuwnej [A-2]. Regulacja i blokada drabiny rozsuwanej z liną: Drabinę rozsuwaną z liną ustawić najpierw prowizo- rycznie i przystawić do równej, stałej powierzchni. Regulację...
-
Page 155: Wskazówki Dot. Bezpieczeństwa
7. Wskazówki dot. bezpieczeństwa 7.1 Ogólne wskazówki dotyczące bezpieczeństwa • P odczas korzystania z drabiny istnieje zawsze niebez- Korzystanie z drabiny w celach pieczeństwo upadku. niezawodowych (non professional use): Dlatego wszelkie prace z drabiną i prowadzone na drabinie należy wykonywać w taki sposób, aby ryzyko upadku było jak najmniejsze. - Page 156 7. Wskazówki dot. bezpieczeństwa 7.2 Instrukcje bezpieczeństwa dotyczące użytkowania drabiny Nie wchodzić ani nie schodzić z drabiny z Ostrzeżenie, ryzyko upadku z drabiny. odwróconą twarzą. Podczas wchodzenia i schodzenia oraz w trakcie prac na drabinie trzymać Przestrzegać instrukcji. się dobrze elementów drabiny. W trakcie prowadzenia prac na drabinie należy się...
- Page 157 W trakcie transportu drabiny uniemożliwić jej uszkod- Do wykonania nieuniknionych prac pod napięciem zenie, np. przez uwiązanie, i zapewnić jej stosowne elektrycznym używać drabin nieprzewodzących. zamocowanie / umieszczenie. Upewnić się, czy drabina dostosowana jest do danego Nie stosować drabiny jako mostka. rodzaju zastosowania.
-
Page 158: Transport/Przechowywanie
7. Wskazówki dot. 8. Transport / przechowywanie bezpieczeństwa • P rzed i po użyciu oraz w celu przechowania i transpor- tu drabinę rozsuwaną bezpiecznie zablokować hakami 7.3 Użycie jako drabiny przystawnej zatrzaskowymi [D] na każdorazowo najniższym szczeblu drabiny. Po użyciu część przesuwną [A-2] drabiny rozsuwanej Drabin przystawnych ze szczeblami z liną... -
Page 159: Konserwacja / Utrzymywanie
Drabina wykorzystywana zgodnie z przeznaczeniem Ta instrukcja użytkowania i obsługi dostępna jest także w oraz regularnie konserwowana jest narzędziem pracy internecie na stronie www.hailo.de. nadającym się do długoterminowej eksploatacji. 13. Serwis / części zamienne Szczegółowe informacje na temat usług serwisowych i części zamiennych można uzyskać... -
Page 160: Lista Kontrolna
14. Lista kontrolna • U szkodzone, wadliwe lub niesprawne elementy drabiny stwarzają niebezpieczeństwo upadku dla użytkownika; podczas korzystania z drabiny występuje także niebezpieczeństwo jej przewrócenia się. • U padek z drabiny grozi poważnymi obrażeniami ciała. • P rzewrócenie się drabiny może uszkodzić także inne przedmioty. Właściwe zakreślić: Drabina jest OK Drabina nie jest OK Wynik Elementy drabiny: Punkty kontrolne: Wszystkie mocowania (nity, śruby, sworznie itd.) muszą być kompletne. 1. - Page 162 Opěrné žebříky Č. výr. 7106-xxx ( 6 Příčky žebříku ) 7109-xxx ( 9 Příčky žebříku ) 7112-xxx ( 12 Příčky žebříku ) 7115-xxx ( 15 Příčky žebříku ) 7118-xxx ( 18 Příčky žebříku ) Výsuvné žebříky Č. výr. 7209-xxx ( 2x 9 Příčky žebříku ) 7212-xxx ( 2x12 Příčky žebříku ) 7215-xxx...
-
Page 163: Použití K Určenému Účelu
Jakékoliv jiné použití Výrobce: je pokládáno za použití v rozporu s určeným účelem. Za Hailo-Werk • Rudolf Loh Gmbh & Co. KG škody, které vzniknou při použití v rozporu s určeným Daimlerstr. 8 účelem, nepřebíráme žádnou odpovědnost. -
Page 164: Technické Informace
3. Technické informace Příslušné technické informace a informace o výrobku naleznete na označení žebříku [B] přímo na žebříku. Opěrný žebřík [1] [ A ] Opěrný žebřík Označení žebříku [C ] Stabilizační příčná pata (Č. výr. 7112-xxx, 7115-xxx, 7118-xxx) Pata žebříku (Č. - Page 165 Přehled příček, na něž je zakázáno stoupat. A = 1,71 m 7106-xxx A = 0,34 m A = 1,71 m A = 2,70 m max. B = 0,34 m 2,8 kg B = 0,44 m B = 1,65 m B = 0,71 m 150 kg C = 0,08 m A = 2,55 m...
- Page 166 A = 2,55 m 7209-xxx A = 0,85 m A = 2,55 m A = 4,23 m A = 5,15 m max. B = 0,41 m 9,4 kg B = 1,09 m B = 2,46 m B = 4,09 m B = 3,14 m 150 kg 2 x 9...
-
Page 167: Rozsah Dodávky
4. Rozsah dodávky A) Opěrné žebříky 1 x Návod k použití a obsluze 1 x Opěrný žebřík (Č. výr. 7106-xxx, 7109-xxx) B) Opěrné žebříky 1 x Návod k použití a obsluze 1 x Opěrný žebřík (Č. výr. 7112-xxx, 7115-xxx, 7118-xxx) 1 x Stabilizační... -
Page 168: Návod Pro Sestavení
5. Návod pro sestavení Před použitím následujících žebříků musí být namontovány příslušné příčníky: Opěrné žebříky Č. výr. 7112-xxx, 7115-xxx, 7118-xxx Výsuvné žebříky Č. výr. 7209-xxx, 7212-xxx, 7215-xxx, 7218-xxx Žebříky s tažným lankem Č. výr. 7285-xxx, 7288-xxx Žebřík se smí používat jen s namontova- nou stabilizační... -
Page 169: Postavení / Obsluha
6. Postavení / obsluha 6.1 Používání opěrného žebříku Opěrný žebřík postavte na rovný, pevný povrch a před použitím ho zajistěte, např. ho přivažte nebo použijte nějaké vhodné zařízení pro zajištění stability. 6.2 Používání výsuvného žebříku Výsuvný žebřík lze výškově nastavit zasunutím nebo vysunutím výsuvného dílu [A-2]. - Page 170 6. Postavení / obsluha 6.3 Používání žebříku s tažným lankem Žebřík s tažným lankem lze výškově nastavit zasunutím nebo vysunutím výsuvného dílu [A-2]. Nastavení a aretace žebříku s tažným lankem: Žebřík s tažným lankem dejte nejprve provizorně do polohy a umístěte na rovný a pevný povrch. Nastavení...
-
Page 171: Bezpečnostní Pokyny
7. Bezpečnostní pokyny 7.1 Všeobecné bezpečnostní pokyny • P ři použití žebříku hrozí v zásadě nebezpečí pádu. Použití žebříku v neprofesionálním sektoru Všechny práce se žebříkem nebo na žebříku musí být (non professional use): proto prováděny tak, aby bylo nebezpečí pádu co možné nejmenší. • P ři použití žebříku hrozí rovněž nebezpečí převrácení. Převrácením žebříku může dojít ke zranění... - Page 172 7. Bezpečnostní pokyny 7.2 Bezpečnostní pokyny pro používání žebříku Na žebřík vystupovat a sestupovat z Pozor, nebezpečí pádu z žebříku. něho vždy s obličejem k žebříku. Při práci na žebříku se jednou rukou pevně držte, nebo pokud to není možné, Postupujte podle pokynů.
- Page 173 Je třeba zamezit poškození žebříku při přepravě, a to Při nevyhnutelné práci pod napětím nebo v blízkosti např. svázáním a zajištěním správného upevnění a volného elektrického vedení nepoužívat žebříky, které uložení. vedou proud (např. z hliníku). Zajistěte, aby byl žebřík vhodný pro příslušné použití. Žebřík nepoužívat jako přemostění.
-
Page 174: Přeprava / Skladování
7. Bezpečnostní pokyny 8. Přeprava / skladování • V ýsuvný žebřík před použitím a po použití, jakož i pro 7.3 Použití jako opěrný žebřík skladování a přepravu, bezpečně zajistěte pomocí pojistných háčků [D] na příslušné nejnižší příčli žebříku. Opřené žebříky s příčkami musí být Výsuvný díl [A-2] žebříku s tažným lankem po použití použity ve správném úhlu. -
Page 175: Ošetřování / Údržba
Při používání k určenému účelu a pravidelné údržbě je Tento návod k použití a obsluze naleznete na žebřík dlouhodobě použitelný pracovní prostředek. internetových stránkách www.hailo.de. 13. Servis / náhradní díly Další informace k servisním výkonům a náhradním dílům obdržíte přímo od výrobce. -
Page 176: Plán Revizí
14. Plán revizí • P oškozené, vadné nebo nefunkční části žebříku představují pro uživatele nebezpečí pádu; při použití žebříku hrozí také nebezpečí převrácení. • Uživatel žebříku si může v případě pádu přivodit vážná zranění. • Stejně tak může při převrácení žebříku dojít ke vzniku věcných škod. Hodící se zatrhněte: Žebřík je v pořádku Žebřík není v pořádku Výsledek Stojacího žebříku: Kontrolní body: Všechna upevnění (nýty, šrouby, čepy atd.) musí být úplně k dispozici. 1. - Page 180 Hailo-Werk Rudolf Loh GmbH & Co. KG Daimlerstraße 8 35708 Haiger, Germany • • • Telefon: +49 (0) 2773 82-0 Telefax: +49 (0) 2773 82-1239 E-Mail: info@hailo.de www.hailo.de • • •...