AEG Ultraone Mini Mode D'emploi
Table des Matières
Table des Matières

Manuels Connexes pour AEG Ultraone Mini


Sommaire des Matières pour AEG Ultraone Mini
- Page 1 EN INSTRUCTION BOOK DE BEDIENUNGSANLEITUNG FR MODE D’EMPLOI IT ISTRUZIONI...
-
Page 3: Table Des Matières
Vorbereitungen Enjoy your AEG UltraOneMini! Wir wünschen Ihnen viel Freude mit Ihrem AEG UltraOneMini! Inhaltsverzeichnis: Sicherheitshinweise . . . . . . . . . . . . . . . . . . . . . . . . . . . . . . . . . . . . . . 5 Table of contents: Safety advice . -
Page 4: Safety Advice
Safety precautions Safety requirement and warning • If the cord is damaged, it must be replaced only by This appliance can be used by children aged from 8 an authorized Electrolux service centre in order to years and above and persons with reduced physical, avoid a hazard. Damage to the vacuum cleaner’s sensory or mental capabilities or lack of experience cord is not covered by the warranty. -
Page 5: Sicherheitshinweise
• Den Staubsauger niemals am Netzkabel ziehen Trennen Sie das Gerät vor Reinigungs- oder oder hochheben. Wartungsarbeiten immer vom Stromnetz. Alle Wartungs- und Reparaturarbeiten müssen vom Benutzen Sie den Staubsauger niemals ohne Filter. autorisierten AEG-Kundendienst durchgeführt werden . Staubsauger an einem trockenen Ort aufbewahren . Vorsicht Dieses Gerät besitzt elektrische Verbindungen: Verbraucherinformationen und • Keine Flüssigkeiten aufsaugen Nachhaltigkeitsgrundsätze... -
Page 6: Précautions De Sécurité Et Avertissement
Précautions de sécurité et avertissement Précautions d’emploi du cordon d’alimentation Cet appareil n’est pas destiné à être utilisé par des • Vérifier régulièrement que la prise et le cordon personnes (y compris des enfants) dont les capacités ne sont pas endommagés. Ne jamais utiliser physiques, sensorielles ou mentales sont diminuées, l’aspirateur si le cordon est endommagé. ou qui ne disposent pas des connaissances ou de • Si le cordon d’alimentation est endommagé, il l’expérience nécessaires, à moins qu’elles n’aient été peut uniquement être remplacé dans un Centre formées ou encadrées pour l’utilisation de cet appareil Service Agréé Electrolux, afin d’éviter tout danger. par une personne responsable de leur sécurité. Les dommages portés au cordon de l’aspirateur ne sont pas couverts par la garantie. Les enfants doivent être surveillés, pour éviter qu’ils • Ne jamais tirer ni soulever l’aspirateur par le cordon. ne jouent avec cet appareil. Toutes les révisions et réparations doivent être Toujours débrancher la fiche de la prise avant toute effectuées dans un Centre Service Agréé... -
Page 7: Norme Di Sicurezza
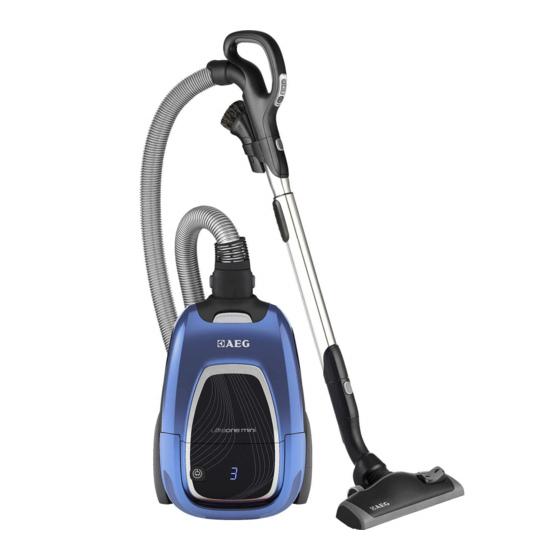
Requisiti e avvertenze per la sicurezza assistenza Electrolux autorizzato per evitare L’apparecchio non è destinato ad essere utilizzato eventuali pericoli. Gli eventuali danni al cavo da persone, compresi i bambini, con ridotte capacità dell’aspirapolvere non sono coperti dalla garanzia. fisiche, mentali o sensoriali o con esperienza e/o • Non utilizzare mai il cavo per tirare o sollevare competenze insufficienti, a meno che non siano l’aspirapolvere. sotto la supervisione di una persona responsabile Qualsiasi intervento di manutenzione e riparazione della loro sicurezza o non vengano da essa istruite deve essere eseguito presso un centro di assistenza... - Page 9 Content Description of your UltraOneMini: Beschreibung Ihres UltraOneMini: L ED Display L ED-Display H EPA-Filter HEPA filter HEPA filter cover HEPA-Filterabdeckung Parking clip D üsen-Parkclip Power cord Netzkabel M otor filter M otorfilter M otor filter holder M otorfilterhalterung D ust bag Staubbeutel D ust bag holder Staubbeutelhalter 10.
-
Page 10: How To Use The Vacuum Cleaner
10 10 How to use the vacuum cleaner Click! Click! 1. Open the cover by pushing the release button. 2. Insert the hose (to remove it, press the lock buttons 3. Attach the telescopic tube to the fl oor nozzle Check that the dust bag is in place. and pull the hose out). - Page 11 11 11 Click! 4. Attach the telescopic tube to the hose handle 5. Adjust the telescopic tube by holding the lock with 6. Pull out the power cord and plug it into the mains. (to remove it, press the lock button and pull one hand and pulling the handle with the other hand.
- Page 12 12 12 8. Adjust suction power. The cleaner starts in auto- 7. The model can be operated by the ON/OFF button 9. After vacuuming rewind the cable by pushing the function (automatic suction power regulation). To on the handle. Battery indicator blinks red when rewind button.
-
Page 13: Tips On How To Get The Best Results
Tips on how to get the best results 13 13 Insert the nozzle parking clip into one of the two parking slots on the back or on the bottom of the machine. Düsen-Parkclip in eine der seitlichen oder hinteren Parkschienen einsetzen. Insérer le clip de rangement du suceur dans l’une des deux fentes de rangement “Pargking” sur le côté ou à l’arrière de l’aspirateur. Inserire il fermo di blocco della bocchetta in uno dei due alloggiamenti presenti su un lato o sul retro. - Page 14 14 14 Tips on how to get the best results For optimum performance check the fi ve power levels during use. (1=Normal mode, 5= Maximum mode) Auto mode: The selected power level is shown on the LED display. When in auto mode, the vacuum cleaner automatically selects the vacuum level best suited to the fl oor type. Um die optimale Saugleistung einzustellen, regeln Sie die Leistung beim Staubsaugen über die 5 Leistungsstufen. (1 = Normalbetrieb, 5 = Maximale Leistung) Automatikmodus: Die ausgewählte Leistungsstufe wird im LED-Display angezeigt. Im Automatikmodus wird die für den jeweiligen Bodentyp am besten geeignete Saugleistung vom Staubsauger automatisch eingestellt.
- Page 15 15 15...
-
Page 16: Replacing The Dust Bag
3. Pour fermer la grille du fi ltre, insérer les crochets 2. Appuyez sur les boutons de déverrouillage et est allumé. avant dans leurs rails, repousser la grille vers l’avant et remplacez le fi ltre.Veuillez utiliser un fi ltre AEG appuyer dessus. d’origine AEF 94. 1. Sostituire il fi ltro Hepa quando si accende 2. - Page 17 17 17 4. Insert a new dust bag by pushing the cardboard NB: Always change the dust bag when the indicator signal is illuminated straight down in its tracks. Close the lid. If the dustbag is even if the dust bag is not full (it may be blocked) and after using carpet not properly placed or is missing, the lid will not close.
-
Page 18: Remote Handle
18 18 Cleaning Aeropro nozzles and changing battery in handle 1. Disconnect the nozzle from the tube. Use the hose 2. If the wheels are stuck, clean them by removing the 3. Unscrew the wheel axis and clean all parts. Refi t in handle to clean the nozzle. wheel cap with a small screwdriver. reverse order. 1. -
Page 19: Troubleshooting
Garantie abgedeckt. For any further problems, contact an authorized AEG service centre. Falls weitere Probleme auftreten, wenden Sie sich an die AEG Kundenbetreuung. L’aspirapolvere non si accende L’aspirateur ne se met pas en marche : • Controllare che il cavo sia collegato all’alimentazione di rete. - Page 20 English Deutsch The symbol on the product or on its packaging Das Symbol auf dem Produkt oder seiner indicates that this product may not be treated as household Verpackung weist darauf hin, dass dieses Produkt waste. Instead it shall be handed over to the applicable nicht als normaler Haushaltsabfall zu behandeln ist, collection point for the recycling of electrical and sondern an einem Sammelpunkt für das Recycling von electronic equipment. By ensuring this product is disposed elektrischen und elektronischen Geräten abgegeben...
- Page 24 Share more of our thinking at www.electrolux.com ANC: 2198055-06...