Table des Matières
Publicité
Les langues disponibles
Les langues disponibles
Liens rapides
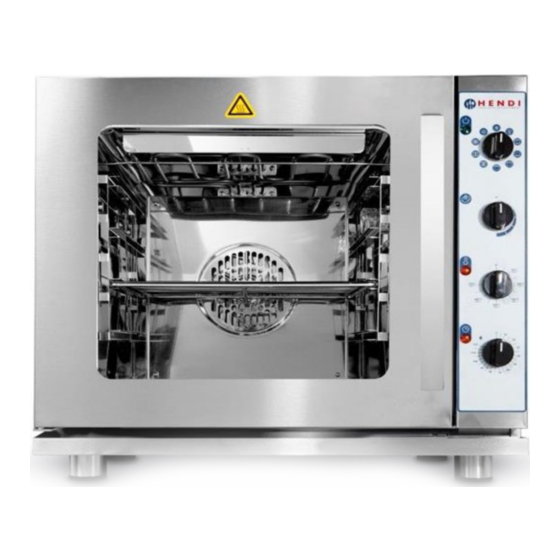
Electric convection steam oven
Piec konwekcyjno-parowy 4x GN 2/3 -
User manual | Gebrauchsanweisung | Instrukcja obsługi | Mode d'emploi | Istruzioni per l'utente
You should read this user manual carefully before
using the appliance
Bevor Sie das Gerät in Betrieb nehmen, sollten
Sie diese Gebrauchsanweisung aufmerksam lesen
Przed uruchomieniem urządzenia należy koniecznie
dokładnie przeczytać niniejszą instrukcję obsługi.
4x GN 2/3
elektryczny
227954
Lisez attentivement ce mode d'emploi avant d'utiliser
l'appareil .
Prima di utilizzare l'apparecchio in funzione leggere
attentamente le istruzioni per l'uso.
Publicité
Chapitres
Table des Matières

Sommaire des Matières pour Hendi 4x GN 2/3
- Page 1 Electric convection steam oven 4x GN 2/3 Piec konwekcyjno-parowy 4x GN 2/3 - elektryczny 227954 User manual | Gebrauchsanweisung | Instrukcja obsługi | Mode d’emploi | Istruzioni per l’utente You should read this user manual carefully before Lisez attentivement ce mode d’emploi avant d’utiliser using the appliance l’appareil .
- Page 29 TABLE DES MATIÈRES 1. RÈGLES DE SÉCURITÉ ..........30 2. CONSIGNES GÉNÉRALES ........31 3. CARACTÉRISTIQUES TECHNIQUES ..... 31 4. INSTRUCTIONS POUR L’INSTALLATEUR ..... 32 5. INSTRUCTIONS POUR L’UTILISATEUR ....34 6. MAINTENANCE ET NETTOYAGE ......35 7. ÉLIMINATION ET PROTECTION DE L’ENVIRONNEMENT..........36 8.
-
Page 30: Règles De Sécurité
Cher client, Merci d’avoir acheté cet appareil de Hendi. Veuillez lire attentivement ce mode d’emploi avant de brancher l’appareil afin d’éviter tout endommagement pour cause d’usage abusif. Veuillez notamment lire les consignes de sécurité avec la plus grande attention. 1. RÈGLES DE SÉCURITÉ... -
Page 31: Consignes Générales
• L’appareil doit être branché à la prise murale avec une tension et la fréquence indiquées sur la plaque signalétique. • Insérez la fiche à la prise murale située dans un endroit facilement accessible de sorte qu’en cas de panne l’appareil puisse être immédiatement déconnecté. Pour éteindre complètement l’appareil, débranchez-le de la source d’alimentation. -
Page 32: Instructions Pour L'installateur
4. INSTRUCTIONS POUR L’INSTALLATEUR Les instructions qui suivent s’adressent à l’installa- aux normes en vigueur. Avant d’utiliser cet appar- teur qualifié, afin qu’il exécute les opérations d’in- eil, retirez le film de protection spécial qui a été ap- stallation, de régulation et de maintenance de la pliqué... -
Page 33: Raccordement Hydraulique - Arrivée D'eau
flexible de type H05VV-F. Les conducteurs doivent d’y accéder afi n de pouvoir éventuellement la avoir une section d’au moins 3x1,5 mm², et n’uti- déconnecter de la ligne. lisez le câble jaune et vert que pour la connexion • Si vous utilisez une installation fi xe, comme de terre. -
Page 34: Instructions Pour L'utilisateur
5. INSTRUCTIONS POUR L’UTILISATEUR 1 Changer 1a Lampe de four 1b Chauffage supérieur et inférieur 1c Chauffage inférieur 1d Chauffage supérieur 1e Gril 1f Chauffage supérieur + air chaud 1g Chauffage supérieur et inférieur + air chaud 1h Véritable cuisson par ventilateur 1i Fonction de dégivrage / refroidissement 2 Lampe de fonctionnement 3 Régulateur de vapeur... -
Page 35: Programmateur De Fin De Cuisson - Minuterie
PROGRAMMATEUR DE FIN DE CUISSON - MINUTERIE Ce dispositif permet de mettre l’appareil en service. La fi n de la cuisson est signalée par la coupure au- Le temps maximum programmable est de 120 min- tomatique de l’appareil et une sonnerie. Vous pouvez utes. -
Page 36: Remplacement De La Lampe Du Four
REMPLACEMENT DE LA LAMPE DU FOUR Débranchez l’appareil du réseau électrique. Retirez pe puis remplacez-la par une autre ayant les car- le support latéral des plats à rôtis en le soulevant, actéristiques suivantes: attendez que le pendentif et la lampe se refroidis- Tension: 230/240 V, puissance: 15 W, culot: E14 sent, puis sans outils pour éviter tout bris, dévissez Remontez la calotte en verre, le support latéral des... -
Page 37: Garantie
8. GARANTIE Tout vice ou toute défaillance entraînant un dysfonc- la réparation ou doit être remplacé dans le cadre de tionnement de l’appareil qui se déclare dans les 12 la garantie, il y a lieu de spécifier le lieu et la date de mois suivant la date de l’achat sera éliminé...