Télécharger Imprimer la page

Publicité

Les langues disponibles
  • FR

Les langues disponibles

  • FRANÇAIS, page 15

Liens rapides

• HOZ3150
• HOZ6901
USER INSTRUCTIONS
OVENS
NOTICE D'EMPLOI ET D'INSTALLATION
DES FOURS ENCASTRABLES
MANUALE D'ISTRUZIONI
FORNO
INSTRUCCIONES DE USO
HORNOS EMPOTRABLES
BEDIENUNGSANLEITUNG
BACKOFEN
KULLANIM KILAVUZU
FIRINLAR
POKYNY PRO UŽIVATELE
TROUBY
CANDY HOOVER GROUP S.R.L. • Via Comolli 16 • 20861 Brugherio (MB) - Italy
02
EN
15
FR
29
IT
42
ES
55
DE
68
TR
83
CZ

Publicité

loading

Sommaire des Matières pour Hoover HOZ3150

  • Page 1 USER INSTRUCTIONS OVENS NOTICE D'EMPLOI ET D'INSTALLATION DES FOURS ENCASTRABLES MANUALE D’ISTRUZIONI FORNO INSTRUCCIONES DE USO HORNOS EMPOTRABLES BEDIENUNGSANLEITUNG BACKOFEN KULLANIM KILAVUZU FIRINLAR POKYNY PRO UŽIVATELE TROUBY CANDY HOOVER GROUP S.R.L. • Via Comolli 16 • 20861 Brugherio (MB) - Italy...
  • Page 2 Safety Indications • During cooking, moisture may condense inside the oven cavity or on the glass of the door. This is a normal condition. To reduce this effect, wait 10-15 minutes after turning on the power before putting food inside the oven. In any case, the condensation disappears when the oven reaches the cooking temperature.
  • Page 3 •Do not use a steam cleaner for cleaning operations. • Connect a plug to the supply cable that is able to bear the voltage, current and load indicated on the tag and having the earth contact. The socket must be suitable for the load indicated on the tag and must be having the earth contact connected and in operation.
  • Page 4 Summary General Instructions 1.1 Safety indications 1.2 Electrical safety 1.3 Recommendations 1.4 Installation 1.5 Waste management 1.6 Conformity declaration Product Description 2.1 Overview 2.2 Accessories 2.3 First use Use of the Oven 3.1 Display description 3.2 Cooking modes Oven Cleaning and Maintenance 4.1 General notes on cleaning 4.2 Steam cleaning 4.3 Maintenance...
  • Page 5 1. General Instructions We thank you for choosing one of our products. For the best results with your oven, you should read this manual carefully and retain it for future reference. Before installing the oven, take note of the serial number so that you can give it to customer service staff if any repairs are required.
  • Page 6 NOTE: as the oven could require maintenance work, it is advisable to keep another wall socket available so that the oven can be connected to this if it is removed from the space in which it is installed. The power cable must only be substituted by technical service staff or by technicians with equivalent qualifications.
  • Page 7 Candy Hoover Group in this sector. The Chef Panel is an air conveyor that increases air circulation inside the oven. This...
  • Page 8 2.3 First Use PRELIMINARY CLEANING Clean the oven before using for the first time. Wipe over external surfaces with a damp soft cloth. Wash all accessories and wipe inside the oven with a solution of hot water and washing up liquid. Set the empty oven to the maximum temperature and leave on for about 1 hour, this will remove any lingering smells of newness.
  • Page 9 FUNCTION HOW TO USE HOW TO DEACTIVATE WHAT IT DOES WHY IT IS NEEDED •Child Lock function is •Child Lock function is activated by touching Set deactivated by touching (+) for a minimum of 5 touchpad Set (+) again KEY LOCK s e c o n d s .
  • Page 10 3.2 Cooking Modes Function T °C T °C Function (Depends on the oven model) Dial default range LAMP: Turns on the oven light. DEFROST: When the dial is set to this position. The fan circulates air at room 40 ÷ 40 temperature around the frozen food so that it defrosts in a few minutes without the protein content of the food being changed or altered.
  • Page 11 4. Oven cleaning and maintenance 4.1 General notes on cleaning The lifecycle of the appliance can be extended through regular cleaning. Wait for the oven to cool before carrying out manual cleaning operations. Never use abrasive detergents, steel wool or sharp objects for cleaning, so as to not irreparably damage the enamelled parts.
  • Page 12 4.3 Maintenance REMOVAL AND CLEANING OF THE SIDE RACKS 1. Unscrew the bolt in an anti-clockwise direction. 2. Remove the side racks by pulling them towards you. 3. Clean the side racks in a dishwasher or with a wet sponge and then dry them immediately. 4.
  • Page 13 REMOVAL AND CLEANING OF THE GLASS DOOR 1. Open the oven door. 2.3.4. Lock the hinges, remove the screws and remove the upper metal cover by pulling it upwards. 5.6. Remove the glass, carefully extracting it from the oven door (NB: in pyrolytic ovens, also remove the second and third glass (if present)).
  • Page 14 CHANGING THE BULB 1. Disconnect the oven from the mains supply. 2. Undo the glass cover, unscrew the bulb and replace it with a new bulb of the same type. 3. Once the defective bulb is replaced, replace the glass cover. Troubleshooting 5.1 FAQ PROBLEM...
  • Page 15 Conseils De Securite • Pendant la cuisson de l’humidité peut se créer dans la cavité ou sur la surface de la porte. Le cas décrit est normal. Si on veut reduire cet effet, il faut laisser réchauffer le four 10-15 minutes avant d’introduire les aliments.
  • Page 16 de fonctionnement. Le conducteur de mise à la terre est jaune et vert. Cette opération doit être exécutée par du personnel qualifié. En cas d’incompatibilité entre la prise d’alimentation et la fiche du câble de l’appareil, demander à un électricien professionnel de remplacer la prise d’alimentation par un dispositif compatible.
  • Page 17 SOMMAIRE Instructions Générales 1.1 Indications de sécurité 1.2 Sécurité électrique 1.3 Recommandations 1.4 Installation 1.5 La gestion des déchets et la protection de l'environnement 1.6 Déclaration de conformité Description du produit 2.1 Vue d'ensemble 2.2 Accessoires 2.3 Première utilisation Utilisation du Four 3.1 Description de l'affichage 3.2 Mode de cuisson Nettoyage du four et...
  • Page 18 1. Instructions générales Nous vous remercions d'avoir choisi un de nos produits. Pour obtenir les meilleurs résultats avec votre four, vous devez lire attentivement ce manuel et le conserver pour toute consultation ultérieure. Avant d'installer le four, notez le numéro de série, il vous sera demandé par le support technique si des réparations sont nécessaires.
  • Page 19 ATTENTION Faire vérifier la continuité de la terre de l’installation avant de procéder au raccordement. Le fabricant décline toute responsabilité en cas d'accidents ou d'autres problèmes qui pourraient survenir à l'usage d'un appareil non relié à la terre, ou relié à une terre dont la continuité serait défectueuse. REMARQUE: Le four peut nécessiter une opération de S.A.V.
  • Page 20 ÉCONOMIE ET RESPECT DE L'ENVIRONNEMENT Lorsque cela est possible, éviter le préchauffage du four et éviter de le faire tourner à vide. N'ouvrez la porte du four que lorsque cela est nécessaire, car il y a des déperditions de chaleur à chaque fois qu'il est ouvert.
  • Page 21 2.2. Accessories Parois Chef Léchefrite Recueille le jus des grillades. Le lèche frite ne doit Les fours Rosières dotés de ces parois offrent un pas être utilisé pour les cuissons autres que Grill résultat de cuisson de type professionnel. Ces et grill pulsé...
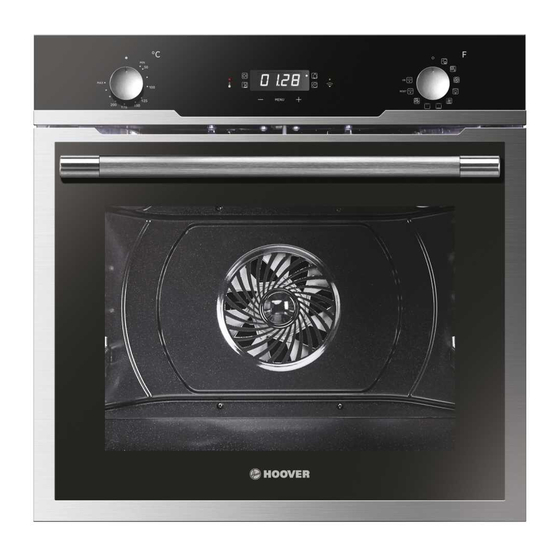
  • Page 22 3. Utilisation du Four 3.1 Description de l'affichage 1- Minuteur ATTENTION: la première opération à exécuter 2- Reglage de l'heure après l'installation ou après une coupure de 3- Durèe de cuisson courant (de telles situations se reconnaissent parce 4- Fin de cuisson que le atticheur est sur et clignote)est réglage 12:00...
  • Page 23 FONCTION Á QUOI SERT-IL ? COMMENT L’UTILISER COMMENT L’ARRETER • V o u s a c t i v e z l a • Vous désactivez la sécurité enfants en sécurité enfants en pressant la touche pressant la touche pendant au moins 5 pendant au moins 5 s e c o n d e s , l ' é...
  • Page 24 3.2 Mode de cuisson Bouton de T °C T °C Fonction (selon modèle) sélection par défaut range L'ampoule: Allumage de l’éclairage du four Décongélation: fonctionnement de la turbine de cuisson qui brasse l'air dans 40 ÷ 40 l'enceinte du four. Idéale pour réaliser une décongélation avant une cuisson. Chaleur brassée: fonction recommandée pour les volailles, les pâtisseries, les poissons, les légumes...
  • Page 25 4. Nettoyage du four et maintenance 4.1 Remarques générales sur le nettoyage Le cycle de vie de l'appareil peut être étendu grâce à un nettoyage régulier. Attendez le refroidissement du four avant de procéder à des opérations de nettoyage manuel. Ne jamais utiliser de détergents abrasifs, de laine d'acier ou d'objets pointus pour le nettoyage, l'émail serait irrémédiablement abîmé.
  • Page 26 4.3 Entretien RETRAIT ET NETTOYAGE DES GRADINS FILS 1. Dévissez les écrous moletés dans le sens inverse des aiguilles d'une montre. 2. Retirez les gradins fils en les tirant vers vous. 3. Nettoyez les gradins fils dans le lave-vaisselle ou avec une éponge humide, puis séchez-les immédiatement.
  • Page 27 RETRAIT ET NETTOYAGE DES VITRES 1. Ouvrez la porte du four. 2.3.4. Bloquer les charnières, enlever les vis et retirez le couvercle métallique supérieur en le tirant vers le haut. 5.6. Retirez le verre, l'extraire soigneusement de la porte du four (NB: dans les fours de pyrolyse, retirez également les deuxième et troisième verre (le cas échéant)).
  • Page 28 REMPLACEMENT DE L'AMPOULE 1. Débranchez le four de la prise. 2. Défaire le couvercle en verre, dévisser l'ampoule et la remplacer par une ampoule du même modèle. 3. Une fois l'ampoule remplacée, remettre le couvercle en verre. 5. Dépannage 5.1 FAQ PROBLEMES CAUSE POSSIBLE SOLUTION...
  • Page 29 Indicazioni di Sicurezza • Durante la cottura l'umidità può condensarsi all'interno della cavità o sul vetro della porta. È normale. Per ridurre questo effetto, attendere 10-15 minuti dopo l'accensione prima di mettere il cibo all'interno del forno. In ogni caso, la condensa scompare quando il forno raggiunge la temperatura di cottura.
  • Page 30 dell'elettrodomestico, richiedere ad un tecnico specializzato di sostituire la presa con un'altra di tipo compatibile. La spina e la presa devono essere conformi alle normative attuali del paese di installazione. Il collegamento alla rete di alimentazione può essere effettuato anche collocando un interruttore automatico onnipolare tra l'elettrodomestico e la rete di alimentazione, in grado di supportare il carico massimo collegato, in linea con la legislazione corrente.
  • Page 31 Sommario Avvertenze Generali 1.1 Suggerimenti sulla sicurezza 1.2 Sicurezza elettrica 1.3 Raccomandazioni 1.4 Installazione 1.5 Gestione dei rifiuti 1.6 Dichiarazione di conformità Descrizione del Prodotto 2.1 Panoramica 2.2 Accessori 2.3 Primo utilizzo Utilizzo del Forno 3.1 Descrizione del display 3.2 Modalità di cottura Pulizia e Manutenzione del Forno 4.1.Note generiche di pulizia 4.2 Pulizia con Vapore...
  • Page 32 1. Avvertenze Generali Vi ringraziamo per aver scelto uno dei nostri prodotti. Per utilizzare il forno in modo ottimale è consigliabile leggere con attenzione questo manuale e conservarlo con cura per ogni ulteriore consultazione. Prima di installare il forno, prendere nota del numero di serie in modo da poterlo comunicare al personale del servizio di assistenza in caso di richiesta di intervento.
  • Page 33 messa a terra con una continuità difettosa. NOTA: poiché il forno potrebbe richiedere interventi di assistenza, è consigliabile prevedere la disponibilità di un’ulteriore presa a muro a cui collegare il forno dopo che è stato rimosso dallo spazio in cui è stato installato. Il cavo di alimentazione deve essere sostituito solo dal personale dell’assistenza tecnica o da tecnici con qualifiche analoghe.
  • Page 34 Candy Hoover Group in questo settore. Lo Chef Panel è un convogliatore d’aria che Griglia metallica incrementa la circolazione della stessa all’interno della cavità.
  • Page 35 Griglie a filo laterale Griglia laterale se inclusa. 2.3 Primo utilizzo PULIZIA PRELIMINARE Pulire sempre il forno prima di utilizzarlo per la prima volta. Pulire le superfici esterne con un panno morbido leggermente inumidito. Lavare tutti gli accessori e pulire l’interno del forno con del detergente per piatti ed acqua calda. Verificare che il forno sia vuoto, impostare la temperatura massima e lasciarlo acceso per almeno 1 ora, così...
  • Page 36 FUNZIONE COME SI ATTIVA COME SI SPEGNE COSA FA A COSA SERVE •Tenere premuto per 5 •Tenere premuto per 5 secondi il tasto (+), Da secondi il tasto (+). Da questo momento lo questo momento tutle BLOCCO s c h e r m o v i s u a l i z za l e f u n z i o n i s o n o BAMBINO a l t e r n a t i v a m e n t e...
  • Page 37 3.2 Modalità di cottura Manopola T° preim- Intervallo Funzione (a seconda del modello) commuta- postata di T° tore LAMPADA: accende la luce interna. SCONGELAMENTO: questa posizione permette di far circolare l’aria a 40 ÷ 40 temperatura ambiente intorno al cibo surgelato facendolo così scongelare in pochi minuti senza modificare od alterare il contenuto proteico.
  • Page 38 4. Pulizia e manutenzione del forno 4.1 Note generiche di pulizia La vita di servizio dell’apparecchio si allunga se questo viene pulito ad intervalli regolari. Attendere che il forno si raffreddi prima di effettuare le operazioni di pulizia manuali. Non utilizzare mai detergenti abrasivi, pagliette di ferro o oggetti appuntiti per lapulizia, per non danneggiare in modo irreparabile le parti smaltate.Utilizzare solo acqua, sapone o detergenti a base di candeggina (ammoniaca).
  • Page 39 4.3 Manutenzione RIMOZIONE E PULIZIA DELLE GRIGLIE 1. Svitare in senso antiorario i dadi zigrinati. 2. Rimuovere le griglie tirandole verso se stessi. 3. Pulire le griglie lavandole in lavastoviglie o con una spugna bagnata e asciugandole subito dopo. 4. Dopo aver pulito le griglie, installarle nuovamente, fissando i dadi zigrinati. RIMOZIONE DELLO SPORTELLO DEL FORNO 1.
  • Page 40 RIMOZIONE E PULIZIA DELLA PORTA IN VETRO 1. Aprile la porta del forno. 2.3.4. Bloccare le cerniere, rimuovere le viti e rimuovere la copertura metallica superiore tirandola verso l’alto. 5.6. Rimuovere il vetro, estraendolo con molta cura, dalla controporta del forno (NB: nei forni pirolitici, rimuovere anche il secondo e terzo vetro (se presente)).
  • Page 41 SOSTITUZIONE DELLA LAMPADINA 1. Scollegare il forno alla rete. 2. Allentare la copertura in vetro, svitare la lampadina e sostituirla con una nuova dello stesso modello. 3. Una volta sostituita la lampadina difettosa, riavvitare la copertura in vetro. 5. Risoluzione dei Problemi 5.1 FAQ PROBLEMA POSSIBILE CAUSA...
  • Page 42 Indicaciones de seguridad • Durante la cocción, podría condensarse humedad dentro de la cavidad del horno o en el cristal de la puerta. Esto es normal. Para reducir este efecto, espere de 10 a 15 minutos antes de introducir alimentos en el horno una vez que lo encienda.
  • Page 43 contacto de masa conectado y operativo. El conductor de tierra es de color amarillo verdoso. Esta operación debe realizarla un profesional debidamente cualificado. Si la toma de corriente es incompatible con el enchufe del electrodoméstico, pida a un electricista profesional que sustituya la toma por otra adecuada.
  • Page 44 Resumen Advertencias generales 1.1 Recomendaciones de seguridad 1.2 Seguridad eléctrica 1.3 Recomendaciones 1.4 Instalación 1.5 Gestión de residuos 1.6 Declaración de conformidad 2.1 Descripción general Descripción del producto 2.2 Accesorios 2.3 Primer uso 3.1 Descripción de la pantalla Utilización del horno 3.2 Modalidades de cocción Limpieza y mantenimiento 4.1 Notas genéricas de limpieza...
  • Page 45 1. Advertencias Generales Le agradecemos que haya elegido uno de nuestros productos. Para utilizar el horno de forma óptima es aconsejable leer con atención este manual y conservarlo para poder consultarlo en el futuro. Antes de instalar el horno, anote el número de serie para poder facilitárselo al personal del servicio de asistencia técnica en caso de solicitar su intervención.
  • Page 46 NOTA: puesto que el horno podría requerir la intervención del servicio de asistencia, es aconsejable prever la disponibilidad de otro enchufe de pared al que conectar el horno después de extraerlo del espacio donde se ha instalado. El cable de alimentación debe sustituirse únicamente por personal de asistencia técnica o por técnicos con una cualificación análoga.
  • Page 47 1.6 Consejos De Cumplimiento En este equipo, las piezas que se prevé que puedan estar en contacto con los alimentos, cumplen las regulaciones de la CEE indicadas en la directiva 89/109. Al mostrar el logo marcado en este producto, declaramos, bajo nuestra propia responsabilidad, el cumplimiento de todos los requisitos europeos en términos de seguridad, salud y medio ambiente, establecidos en la legislación de este producto.
  • Page 48 Grupo Candy Hoover en este sector. El Panel Chef es un transportador de aire, que aumenta la circulación del aire en el interior del horno.
  • Page 49 MODO DE MODO DE FUNCIONAMIENTO FINALIDAD FUNCIÓN ACTIVACIÓN DESCONEXIÓN Para activar la función del Pa r a d e s a c t i v a r l a “Bloqueo para niños”, se función del “Bloqueo debe pulsar “Set (+)” para niños”, se debe BLOQUEO durante un mínimo de 5...
  • Page 50 3.2 Modalidades de cocción Mando Rango T°C FUNCIÓN ( dependiendo del modelo selector de T°C establecida LAMPARA: Conecta la luz interior DESCONGELACIÓN: Funcionamiento de la turbina de cocción que hace 40 ÷ 40 circular el aire dentro del espacio del horno. Ideal para realizar una descongelación previa a una cocción.
  • Page 51 4. Limpieza y mantenimiento del horno 4.1 Notas genéricas de limpieza La vida útil del aparato se prolonga si se limpia a intervalos regulares. Espere a que el horno se enfríe antes de llevar a cabo las operaciones de limpieza manuales. No utilice nunca detergentes abrasivos, estropajos metálicos ni objetos puntiagudos para la limpieza con el fin de no dañar de forma irreparable las piezas esmaltadas.
  • Page 52 4.3 Mantenimiento EXTRACCIÓN Y LIMPIEZA DE LAS REJILLAS 1. Desenrosque en sentido antihorario las tuercas estriadas. 2. Extraiga las rejillas tirando de ellas hacia fuera. 3. Límpielas lavándolas en el lavavajillas o con una esponja húmeda y séquelas inmediatamente después. 4.
  • Page 53 EXTRACCIÓN Y LIMPIEZA DE LA PUERTA DE VIDRIO 1. Abra la puerta del horno. 2.3.4. Bloquee las bisagras, desenrosque los tornillos y extraiga la cubierta metálica superior tirando hacia arriba. 5.6. Extraiga el vidrio con mucho cuidado de la contrapuerta del horno (N. B.: si se trata de un horno pirolítico, extraiga también el segundo y el tercer vidrio si los hubiera).
  • Page 54 SUSTITUCIÓN DE LA BOMBILLA 1. Desenchufe el horno de la red eléctrica. 2. Suelte la cubierta de vidrio, desenrosque la bombilla y sustitúyala por una nueva del mismo modelo. 3. Una vez sustituida la bombilla defectuosa, vuelva a atornillar la cubierta de vidrio. 5.
  • Page 55 S cherhe tsh nwe se • Während des Garvorgangs kann Feuchtigkeit im Ofenraum oder auf dem Glas der Tür kondensieren. Dies ist ein normaler Zustand. Um diesen Effekt zu verringern, warten Sie 10-15 Minuten nach dem Einschalten des Geräts, bevor Sie die Speisen in den Ofen stellen. In jedem Fall verschwindet das Kondensat, wenn der Ofen die Gartemperatur erreicht hat.
  • Page 56 und in Betrieb sein. Der Schutzleiter ist gelb-grün gefärbt. Dieser Vorgang darf nur von entsprechend qualifiziertem Fachpersonal durchgeführt werden. Im Falle einer Inkompatibilität zwischen Steckdose und Gerätestecker müssen Sie einen qualifizierten Elektriker bitten, die Steckdose durch eine geeigneten Typ zu ersetzen. Stecker und Buchse müssen zu den im Installationsland geltenden aktuellen Normen konform sein.
  • Page 57 Zusammenfassung Allgemeine Anweisungen Sicherheitshinweise Elektrische Sicherheit Empfehlungen Installation Abfallentsorgung Konformitätserklärung Übersicht Produktbeschreibung Zubehör Inbetriebnahme Betrieb des Backofens Beschreibung der Anzeige Funktionen zum Garen Reinigung und Wartung des Allgemeine Reinigungshinweise Dampfreinigung Backofens Wartung • Entfernen und Reinigen der Führungsschienen • Entfernen des Backofenfensters •...
  • Page 58 1. Allgemeine Anweisungen Vielen Dank, dass Sie sich für eins unserer Produkte entschieden haben. Damit Sie lange Freude mit Ihrem Backofen haben, sollten Sie diese Bedienungsanleitung sorgfältig durchlesen und zum Nachschlagen in der Zukunft aufbewahren. Notieren Sie sich vor dem Anschließen des Backofens die Seriennummer, sodass Sie diese im Reparaturfall an den Kundendienst weitergeben können.
  • Page 59 HINWEIS: Für eine eventuelle Wartung des Ofens ist die Zugänglichkeit einer zweiten Wandsteckdose von Vorteil, sodass er an diese angeschlossen werden kann, wenn er ausgebaut werden muss. Das Stromkabel darf nur von qualifizierten Kundendiensttechnikern oder Elektrikern ausgetauscht werden. 1.3 Empfehlungen Es empfiehlt sich, den Backofen nach jeder Verwendung grob zu reinigen.
  • Page 60 Fängt die beim Backen aus den Lebensmitteln über eine typische Funktion, die das Ergebnis austretende Flüssigkeit auf. innovativer Technologien ist, und der großen Erfahrung der Candy Hoover Group auf diesem Sektor zu verdanken ist. Der Heißluftventilator fördert die Zirkulation der Backrost Luft im Ofen.
  • Page 61 2.3 Erste Inbetriebnahme ERSTE REINIGUNG Den Backofen vor der ersten Inbetriebnahme reinigen. Die Außenflächen mit einem feuchten, weichen Tuch abwischen. Alle Zubehörteile spülen und den Backofen innen mit warmem Spülwasser auswischen. Den leeren Backofen auf die Höchsttemperatur einstellen und etwa eine Stunde lang anlassen, damit der neue Geruch verfliegt.
  • Page 62 3.2 Touch timer FUNKTION EINSCHALTEN AUSSCHALTEN FUNKTION NÜTZLICH FÜR Die Kindersicherung wird Die Kindersicherung wird deaktiviert wenn Sie a k t i v i e r t w e n n S i e mindestens 5 Sekunden mindestens 5 Sekunden lang die Taste Set (+) lang die Taste Set (+) der KINDER-...
  • Page 63 T °C T °C Funktion Funktion (je nach Backofenmodell) Bereich standard LAMPE: Schaltet das Licht im Backofen an. AUFTAUEN: Wenn die Auswahl auf diese Funktion eingestellt wird. Der Ventilator 40 ÷ 40 wälzt die Luft bei Raumtemperatur um, sodass das Tiefkühlprodukt innerhalb weniger Minuten aufgetaut wird, ohne dass sein Eiweißgehalt sich ändert.
  • Page 64 4. Reinigung und Wartung des Backofens 4.1 Allgemeine Reinigungshinweise Die Lebensdauer des Geräts lässt sich durch eine regelmäßige Reinigung verlängern. Den Ofen vor der Reinigung abkühlen lassen. Keine Scheuermittel, Stahlwolle oder scharfkantige Gegenstände für die Reinigung verwenden, um die Emaillebeschichtung nicht zu beschädigen. Nur Wasser, Spülmittel oder Reinigungsmittel mit Bleiche (Ammoniak) verwenden.
  • Page 65 4.3 Wartung ENTFERNEN UND REINIGEN DER SEITLICHEN FÜHRUNGSSCHIENEN 1. Schraube entgegen dem Uhrzeigersinn abschrauben. 2. Die seitlichen Führungsschienen herausziehen und aus dem Ofen nehmen. 3. In der Spülmaschine oder mit einem feuchten Schwamm säubern und sofort abtrocknen. 4. Die gereinigten Führungsschienen wieder einsetzen und mit den Schrauben sichern. ENTFERNEN DES BACKOFENFENSTERS 1.
  • Page 66 ENTFERNEN UND REINIGEN DER GLASTÜR 1. Die Backofentür öffnen. 2.3.4. Scharniere sperren, Schrauben entfernen und die obere Metallkappe nach oben abziehen. 5.6. Die Glasscheibe vorsichtig aus der Ofentür ziehen (Hinweis: Bei Backöfen mit Pyrolyse- Reinigungsfunktion auch die zweite (falls vorhanden) und dritte Scheibe herausnehmen). 7.
  • Page 67 WECHSELN DER GLÜHBIRNE 1. Den Backofen von der Stromversorgung trennen. 2. Glasabdeckung abnehmen, Glühbirne herausschrauben und durch eine neue vom selben Typ ersetzen. 3. Nach dem Austausch der kaputten Glühbirne die Glasabdeckung wieder aufsetzen. 5. Fehlerbehebung 5.1 HÄUFIG GESTELLTE FRAGEN STÖRUNG MÖGLICHE URSACHE LÖSUNG...
  • Page 68 Güvenlik uyarıları • Pişirme sırasında nem, fırın içinde veya kapı camının içinde yoğunlaşabilir. Bu normal. Bu etkiyi azaltmak için, fırını 10-15 dakika çalıştırınız sonra yiyeceklerinizi fırının içine koyunuz. Fırın pişirme sıcaklığına ulaştığında yoğunlaşma ortadan kalkar. • Sebzeleri açık bir tepsi yerine kapaklı bir kapta pişiriniz. •...
  • Page 69 sahip personel tarafından gerçekleştirilmelidir. Prizle cihazın fişi arasında uyumsuzluk olması durumunda, yetkin bir elektrik ustasından prizi uygun tipte bir prizle değiştirmesini isteyin. Fiş ve priz kurulumun yapıldığı ülkede geçerli olan normlara uygun olmalıdır. Güç kaynağı bağlantısı, cihazla güç kaynağı arasına maksimum bağlı yükü kaldırabilecek ve geçerli mevzuata uygun olan omnipolar bir devre kesici yerleştirilerek de yapılabilir.
  • Page 70 Özet Genel Açıklamalar 1.1 Güvenlik ipuçları 1.2 Elektriksel güvenlik 1.3 Tavsiyeler 1.4 Kurulum 1.5 Atık yönetimi 1.6 Uygunluk beyanı Ürün Açıklaması 2.1 Genel bakış 2.2 Aksesuarlar 2.3 İlk kullanım Fırının Temizlenmesi ve Bakımı 3.1 Gösterge açıklamaları 3.2 Pişirme modları Fırının Temizlenmesi ve Bakımı 4.1 Temizleme hakkında genel notlar 4.2 Buharla Temizleme 4.3 Bakım...
  • Page 71 1. Genel Açıklamalar Ürünlerimizden birini tercih ettiğiniz için teşekkür ederiz. Fırınınızdan en iyi sonuçları almak için bu kılavuzu dikkatle okuyun ve daha sonra başvurmak için saklayın. Fırının montajından önce, herhangi bir onarım gerekmesi halinde müşteri hizmetleri personeline vermek üzere seri numarasını not edin. Fırını ambalajından çıkardıktan sonra nakliye sırasında hasar almamış...
  • Page 72 çıkabilecek her türlü kaza veya zararda imalatçı herhangi bir sorumluluk kabul etmemektedir. NOT: fırında bazı bakım işlemleri yapılması gerektiğinden, montajın yapılmış olduğu alandan çıkarılması halinde fırının bağlanabileceği başka bir prizin yakınlarda bulunması tavsiye edilir. Elektrik kablosunun sadece teknik servis personeli ya da eşdeğer niteliklere sahip teknisyenler tarafından değiştirilmesi gereklidir.
  • Page 73 Birçok ülkede, büyük WEEE'ler için şehir içinde toplama noktaları bulunmaktadır. Yeni bir cihaz satın aldığınızda, eski cihazın satın alınan cihazla aynı tipte olması ve aynı işlevlere sahip olması durumunda eski cihazı ücretsiz olarak bire bir kabul etmesi gereken satıcıya iade edebilirsiniz. ENERJİ...
  • Page 74 Şef Panel Yanal tel Izgaralar Bu teknolojiye sahip tüm fırınlar, bu sektörde Eğer dahil yanal tel ızgara. Candy Hoover Grup olarak kazandığımız engin deneyimler ve geniş bir yelpazede yenilikçi teknolojiler sonucunda profesyonel modellerin tipik bir işlevine sahiptirler. Şef Panel, fırının içinde hava dolaşımını...
  • Page 75 DEVREDEN PROGRAM DEVREYE SOKULMASI İŞLEVİ NE İÇİN KULLANILDIĞI ÇIKARILMASI • Çocuk kilidi fonksiyonu • Ç o c u k k i l i d i dokunmatik ekrandaki f o n k s i y o n u t e k r a r (+) sembolüne en az 5 dokunmatik ekrandaki saniye dokunarak aktif...
  • Page 76 3.2 Pişirme Modları Fonksiyon Sıcaklık Varsayılan Fonksiyon (Fırın modeline bağlıdır) ikonu sıcaklık °C aralığı °C LAMBA: Fırın lambasını yakar. BUZ ÇÖZME: Düğme bu konuma alındığı zaman fan oda sıcaklığında havayı donmuş gıdanın etrafında dolaştırır, böylece gıdanın protein içeriği 40 ÷ 40 değişmeden birkaç...
  • Page 77 4. Fırının Temizlenmesi ve Bakımı 4.1 Temizleme hakkında genel notlar Düzenli temizlik ile cihazın kullanım ömrü uzatılabilir. Elle temizlik işlemlerini yapmadan önce fırının soğumasını bekleyin. Temizlik için asla aşındırıcı deterjanlar, çelik tel veya keskin nesneler kullanmayın, aksi takdirde emaye parçalarda onarılamaz hasarlar oluşabilir. Sadece su, sabun veya ağartıcı bazlı deterjanlar (amonyak) kullanın.
  • Page 78 4.3 Bakım YAN RAFLARIN ÇIKARILMASI VE TEMİZLENMESİ 1. Saat yönünün tersine çevirerek vidayı sökün. 2. Kendinize doğru çekerek yan rafları çıkarın. 3. Yan rafları bir bulaşık makinesinde veya ıslak bir sünger kullanarak temizleyin ve hemen kurutun. 4. Yan rafları temizledikten sonra yerlerine takın ve vidalarını sonuna kadar sıkın. FIRIN KAPAĞININ SÖKÜLMESİ...
  • Page 79 CAMIN SÖKÜLMESİ VE TEMİZLENMESİ 1. Fırının kapağını açın. 2.3.4. Menteşeleri kilitleyin, vidaları çıkarın ve yukarı doğru çekerek üst metal kapağı çıkarın. 5.6. Camı dikkatli bir şekilde fırın kapağından çekerek çıkarın (Not: pirolitik fırınlarda ikinci ve üçüncü camı (eğer varsa) da çıkarın). 7.
  • Page 80 AMPULÜN DEĞİŞTİRİLMESİ 1. Fırını elektrik beslemesinden ayırın. 2. Cam kapağı sökün, ampulü sökün ve aynı türde yeni bir ampul ile değiştirin. 3. Arızalı ampul değiştirildikten sonra cam kapağı yerine takın. 5. Sorun Giderme 5.1 Sorun giderme SORUN ÇÖZÜMÜ OLASI NEDENİ Fırın ısınmıyor Saati ayarlayın Saat ayarlanmamış...
  • Page 81 Candy Hoover Euroasia tarafından sağlanan garanti şartları aşağıdaki koşullarda geçersiz olacaktır. • Ürüne, yetkili servis dışındaki kişiler tarafından müdahale edilmesi, elektrik-su kesintisi ve üründen kaynaklanmayan kaçaklar garanti kapsamı...
  • Page 82 şahıslar tarafından bakımı, onarımı veya başka bir nedenle müdahale edilmemiş olması şartıyla bütün parçaları dahil olmak üzere tamamı malzeme, işçilik ve üretim hatalarına karşı ürünün teslim tarihinden itibaren 3 ( ÜÇ ) YIL SÜRE İLE CANDY HOOVER EUROASIA A.Ş. TARAFINDAN GARANTİ EDİLMİŞTİR. Malın bütün parçaları dahil olmak üzere tamamı garanti kapsamındadır.
  • Page 83 Bezpečnostní pokyny • Během vaření může ve vnitřním prostoru trouby nebo na skle dveří docházet ke kondenzaci vlhkosti. Jedná se o normální stav. Chcete-li tento efekt omezit, počkejte po zapnutí napájení 10-15 minut, než vložíte jídlo do trouby. Kondenzace v každém případě zmizí, jakmile trouba dosáhne teploty vaření.
  • Page 84 kvalifikací. V případě neslučitelnosti mezi zásuvkou a zástrčkou spotřebičů požádejte kvalifikovaného elektrikáře, aby zásuvku nahradil jiný m vhodný m typem. Zástrčka i zásuvka musejí odpovídat platný m normám země instalace. Připojení k napájecímu zdroji lze provést také tak, že mezi spotřebičem a zdrojem energie, který zvládne maximální připojenou zátěž...
  • Page 85 Shrnutí Obecné pokyny 1.1 Bezpečnostní pokyny 1.2 Elektrická bezpečnost 1.3 Doporučení 1.4 Instalace 1.5 Odpadové hospodářství 1.6 Prohlášení o shodě Popis vý r obku 2.1 Přehled 2.2 Příslušenství 2.3 První použití Použití trouby 3.1 Popis displeje 3.2 Režimy vaření 4.1 Obecné poznámky k čištění Čištění...
  • Page 86 1. Obecné pokyny Děkujeme Vám, že jste si zvolili jeden z našich vý r obků. Pro dosažení nejlepších výsledků s troubou byste si měli pečlivě přečíst tento návod a uschovat jej pro budoucí použití. Před instalací trouby si poznamenejte vý r obní číslo, abyste jej mohli poskytnout pracovníkům zákaznických služeb v případě...
  • Page 87 POZNÁMKA: protože trouba může vyžadovat údržbu, je vhodné mít k dispozici další elektrickou zásuvku, ke které lze troubu připojit po vyjmutí z prostoru, ve kterém je nainstalována. Napájecí kabel smí být nahrazen pouze servisním technikem nebo technikem s rovnocennou kvalifikací. 1.3 Doporučení...
  • Page 88 Shromažďuje zbytky, které odkapávají během pochlubit funkcí typických profesionálních pečení potravin na roštech. modelů, plody inovačních technologií a bohatých zkušenosti získaných skupinou Candy Hoover Group v tomto odvětví. Panel šéfkuchaře je vzduchový dopravník, který zvyšuje cirkulaci vzduchu uvnitř trouby. To umožňuje zvýšení...
  • Page 89 2.3 První použ tí PŘEDBĚŽNÉ ČIŠTĚNÍ Před prvním použitím troubu vyčistěte. Otřete vnější povrchy vlhký m měkký m hadříkem. Umyjte všechna příslušenství a vytřete vnitřek trouby roztokem horké vody a promývací kapaliny. Nastavte prázdnou troubu na maximální teplotu a ponechte ji zapnutou zhruba po dobu 1 hodiny. To odstraní veškeré...
  • Page 90 FUNKCE JAK AKTIVOVAT JAK VYPNOUT CO TO DĚLÁ VÝHODY • Dětský zámek Funkce • Dětský zámek Funkce se aktivuje dotykem Set j e d e a k t i v o v á n a (+) po dobu minimálně dotykem tlačítka Set DĚTSKÁ...
  • Page 91 3.2 Režimy vaření Volič T °C T °C Funkce (Závisí na modelu trouby) funkc ozmezí výchozí SVĚTLO: Zapne světlo v troubě. ROZMRAZOVÁNÍ: Je-li volič nastaven do této polohy. Ventilátor dmýchá vzduch o pokojové teplotě kolem zmrzlého pokrmu a tak jej za několik minut 40 ÷...
  • Page 92 4. Čištění a údržba trouby 4.1 Obecné poznámky k čištění Životnost spotřebiče můžete prodloužit prostřednictvím pravidelného čištění. Před prováděním ručního čištění počkejte, až trouba vychladne. Nikdy nepoužívejte při čištění brusné mycí prostředky, drátěnku nebo ostré předměty. Předejdete tak neopravitelnému poškození smaltovaných dílů. Používejte pouze mycí...
  • Page 93 4.3 Údržba DEMONTÁŽ A ČIŠTĚNÍ BOČNIC 1. Odšroubujte šroub proti směru hodin. 2. Vyjměte bočnice vytažením směrem k sobě. 3. Vyčistěte bočnice v myčce na nádobí nebo mokrou houbičkou a poté je ihned vysušte. 4. Po vyčištění dejte bočnice zpět, nasaďte zpět šrouby a pevně je utáhněte. DEMONTÁŽ...
  • Page 94 DEMONTÁŽ A ČIŠTĚNÍ SKLENĚNÝCH DVÍŘEK 1. Otevřete dvířka trouby. 2.3.4. Zajistěte závěsy, vyšroubujte šrouby a demontujte horní kovový kryt vytažením směrem nahoru. 5.6. Vyjměte opatrně sklo ze dvířek trouby (Pozn: u pyrolytických trub vyjměte také druhé a třetí sklo (jsou-li osazena)). 7.
  • Page 95 VÝ M ĚNA ŽÁROVKY 1. Odpojte troubu od síťového přívodu. 2. Sejměte skleněný kryt, vyšroubujte žárovku a vyměňte ji za novou žárovku stejného typu. 3. Jakmile je vadná žárovka vyměněna, vraťte zpět skleněný kryt. 5. Řešení potíží 5.1 Často Kladené Otázky PROBLÉM MOŽNÁ...
  • Page 96 INSTALLATION INSTALLATION INSTALLATION KURULUM INSTALLAZIONE INSTALACE INSTALACIÓN 560 mm Opening / Açıklık / Ouverture / Apertura / 595 mm 580 mm Apertura/Otwarcie 460mm x 15 mm 546 mm 595 mm 22 mm If the furniture is equpped with a bottom at the back part, provide an opening for the power supply cable.
  • Page 97 The manufacturer will not be responsible for any inaccuracy resulting from printing or transcript errors contained in this brochure. We reserve the right to carry out modifications to products as required, including the interests of consumption, without prejudice to the characteristics relating to safety or function.

Ce manuel est également adapté pour:

Hoz6901