Table des Matières

Publicité

Les langues disponibles
  • FR

Les langues disponibles

  • FRANÇAIS, page 84

Liens rapides

• HOE3061IN
• HOT3061BI
• HOT3061WI
USER INSTRUCTIONS
OVENS
MANUALE D'ISTRUZIONI
FORNO
KULLANIM KILAVUZU
FIRINLAR
POKYNY PRO UŽIVATELE
TROUBY
INSTRUCCIONES DE USO
HORNOS
BEDIENUNGSANLEITUNG
ÖFEN
INSTRUCTIONS D'UTILISATION
FOURS
CANDY HOOVER GROUP S.R.L. • Via Privata Eden Fumagalli • 20047 Brugherio Milano Italy
EN
02
IT
15
TR
28
43
CZ
ES
56
69
DE
84
FR

Publicité

Table des Matières
loading

Sommaire des Matières pour Hoover HOE3061IN

  • Page 1 • HOT3061BI • HOT3061WI USER INSTRUCTIONS OVENS MANUALE D’ISTRUZIONI FORNO KULLANIM KILAVUZU FIRINLAR POKYNY PRO UŽIVATELE TROUBY INSTRUCCIONES DE USO HORNOS BEDIENUNGSANLEITUNG ÖFEN INSTRUCTIONS D’UTILISATION FOURS CANDY HOOVER GROUP S.R.L. • Via Privata Eden Fumagalli • 20047 Brugherio Milano Italy...
  • Page 2: Safety Indications

    Safety Indications • WARNING: the appliance and accessible parts become hot during use. Be careful not to touch any hot parts. •WARNING: the accessible parts can become hot when the oven is in use. Children must be kept at a safe distance. •WARNING: ensure that the appliance is switched off before replacing the bulb, to avoid the possibility of electric shocks.
  • Page 3 having the earth contact connected and in operation. The earth conductor is yellow-green in colour. This operation should be carried out by a suitably qualified professional. In case of incompatibility between the socket and the appliance plug, ask a qualified electrician to substitute the socket with another suitable type.
  • Page 4: Table Des Matières

    Summary General Instructions 1.1 Safety indications 1.2 Electrical safety 1.3 Recommendations 1.4 Installation 1.5 Waste management 1.6 Declaration of compliance 2.1 Overview Product Description 2.2 Accessories 2.3 First use Use of the Oven 3.1 Display description 3.2 Cooking modes Oven Cleaning and Maintenance 4.1 General notes on cleaning 4.2 Hydro easy clean function 4.3 Maintenance...
  • Page 5: General Instructions

    1. General Instructions We thank you for choosing one of our products. For the best results with your oven, you should read this manual carefully and retain it for future reference. Before installing the oven, take note of the serial number so that you can give it to customer service staff if any repairs are required.
  • Page 6: Recommendations

    NOTE: as the oven could require maintenance work, it is advisable to keep another wall socket available so that the oven can be connected to this if it is removed from the space in which it is installed. The power cable must only be substituted by technical service staff or by technicians with equivalent qualifications.
  • Page 7: Product Description

    2. Product Description 2.1 Overview 1. Control panel 2. Shelf positions (lateral wire grid if included) 3. Metal grill 4. Drip pan 5. Fan (behind the steel plate) 6. Oven door 2.2 Accessories Metal grill Drip pan Holds baking trays and plates. Collects the residues that drip during the cooking of foods on the grills.
  • Page 8: First Use

    2.3 First Use PRELIMINARY CLEANING Clean the oven before using for the first time. Wipe over external surfaces with a damp soft cloth. Wash all accessories and wipe inside the oven with a solution of hot water and washing up liquid. Set the empty oven to the maximum temperature and leave on for about 1 hour, this will remove any lingering smells of newness.
  • Page 9 FUNCTION HOW TO USE HOW TO DEACTIVATE WHAT IT DOES WHY IT IS NEEDED •Child Lock function is •Child Lock function is activated by touching Set deactivated by touching (+) for a minimum of 5 touchpad Set (+) again for s e c o n d s .
  • Page 10: Cooking Modes

    3.2 Cooking Modes Function T °C T °C Function (Depends on the oven model) Dial default range LAMP: Turns on the oven light. DEFROST: When the dial is set to this position. The fan circulates air at room 40 ÷ 40 temperature around the frozen food so that it defrosts in a few minutes without the protein content of the food being changed or altered.
  • Page 11: Oven Cleaning And Maintenance

    4. Oven cleaning and maintenance 4.1 General notes on cleaning The lifecycle of the appliance can be extended through regular cleaning. Wait for the oven to cool before carrying out manual cleaning operations. Never use abrasive detergents, steel wool or sharp objects for cleaning, so as to not irreparably damage the enamelled parts.
  • Page 12: Hydro Easy Clean Function

    4.2 Hydro Easy Clean Function The HYDRO EASY CLEAN procedure uses steam to help remove remaining fat and food particles from the oven. 1. Pour 300 ml of water into the HYDRO EASY CLEAN container at the bottom of the oven. 2.
  • Page 13: Removal And Cleaning Of The Glass Door

    REMOVAL AND CLEANING OF THE GLASS DOOR 1. Open the oven door. 2.3.4. Lock the hinges, remove the screws and remove the upper metal cover by pulling it upwards. 5.6. Remove the glass, carefully extracting it from the oven door (NB: in pyrolytic ovens, also remove the second and third glass (if present)).
  • Page 14: Changing The Bulb

    CHANGING THE BULB 1. Disconnect the oven from the mains supply. 2. Undo the glass cover, unscrew the bulb and replace it with a new bulb of the same type. 3. Once the defective bulb is replaced, replace the glass cover. 5.
  • Page 15: Indicazioni Di Sicurezza

    Indicazioni di Sicurezza • ATTENZIONE: l'apparecchio e le parti accessibili diventano calde durante l'uso. Prestare attenzione a non toccare le parti calde. • ATTENZIONE: le parti accessibili possono diventare molto calde quando si utilizza il forno. I bambini devono essere tenuti a distanza di sicurezza.
  • Page 16 automatico onnipolare tra l'elettrodomestico e la rete di alimentazione, in grado di supportare il carico massimo collegato, in linea con la legislazione corrente. Il cavo di terra giallo-verde non deve essere interrotto dall'interruttore automatico. La presa o l'interruttore automatico onnipolare utilizzati per il collegamento devono essere facilmente accessibili al momento del montaggio dell'elettrodomestico.
  • Page 17 Sommario Avvertenze Generali 1.1 Suggerimenti sulla sicurezza 1.2 Sicurezza elettrica 1.3 Raccomandazioni 1.4 Installazione 1.5 Gestione dei rifiuti 1.6 Dichiarazione di conformità Descrizione del Prodotto 2.1 Panoramica 2.2 Accessori 2.3 Primo utilizzo 3.1 Descrizione del display Utilizzo del Forno 3.2 Modalità di cottura Pulizia e Manutenzione del Forno 4.1.Note generiche di pulizia 4.2 La funzione hydro easy clean...
  • Page 18: Avvertenze Generali

    1. Avvertenze Generali Vi ringraziamo per aver scelto uno dei nostri prodotti. Per utilizzare il forno in modo ottimale è consigliabile leggere con attenzione questo manuale e conservarlo con cura per ogni ulteriore consultazione. Prima di installare il forno, prendere nota del numero di serie in modo da poterlo comunicare al personale del servizio di assistenza in caso di richiesta di intervento.
  • Page 19: Raccomandazioni

    elettrica ad un elettricista qualificato. Il produttore declina ogni responsabilità per eventuali incidenti o altri problemi derivanti dal mancato collegamento a terra del forno o dal suo collegamento ad una messa a terra con una continuità difettosa. NOTA: poiché il forno potrebbe richiedere interventi di assistenza, è consigliabile prevedere la disponibilità...
  • Page 20: Dichiarazione Di Conformità

    1.6 Dichiarazione di conformità Tutti i componenti di questo elettrodomestico destinati a venire a contatto con gli alimenti sono conformi con le disposizioni della Direttiva CEE 89/109. Apponendo la marcatura su questo prodotto, dichiariamo, sotto la nostra responsabilità, di ottemperare a tutti i requisiti relativi alla tutela di sicurezza, salute e ambiente previsti dalla legislazione europea in essere per questo prodotto.
  • Page 21: Primo Utilizzo

    2.3 Primo utilizzo PULIZIA PRELIMINARE Pulire sempre il forno prima di utilizzarlo per la prima volta. Pulire le superfici esterne con un panno morbido leggermente inumidito. Lavare tutti gli accessori e pulire l’interno del forno con del detergente per piatti ed acqua calda. Verificare che il forno sia vuoto, impostare la temperatura massima e lasciarlo acceso per almeno 1 ora, così...
  • Page 22 FUNZIONE COME SI ATTIVA COME SI SPEGNE COSA FA A COSA SERVE •Tenere premuto per 5 •Tenere premuto per 5 secondi il tasto (+), Da secondi il tasto (+). Da questo momento lo questo momento tutle BLOCCO s c h e r m o v i s u a l i z za l e f u n z i o n i s o n o BAMBINO a l t e r n a t i v a m e n t e...
  • Page 23: Modalità Di Cottura

    3.2 Modalità di cottura Manopola T° preim- Intervallo Funzione (a seconda del modello) commuta- postata di T° tore LAMPADA: accende la luce interna. SCONGELAMENTO: questa posizione permette di far circolare l’aria a 40 ÷ 40 temperatura ambiente intorno al cibo surgelato facendolo così scongelare in pochi minuti senza modificare od alterare il contenuto proteico.
  • Page 24: Pulizia E Manutenzione Del Forno

    4. Pulizia e manutenzione del forno 4.1 Note generiche di pulizia La vita di servizio dell’apparecchio si allunga se questo viene pulito ad intervalli regolari. Attendere che il forno si raffreddi prima di effettuare le operazioni di pulizia manuali. Non utilizzare mai detergenti abrasivi, pagliette di ferro o oggetti appuntiti per lapulizia, per non danneggiare in modo irreparabile le parti smaltate.Utilizzare solo acqua, sapone o detergenti a base di candeggina (ammoniaca).
  • Page 25: La Funzione Hydro Easy Clean

    4.2 La Funzione Hydro Easy Clean La procedura “HYDRO EASY CLEAN” utilizza il vapore per facilitare la rimozione dal forno del grasso e dei pezzi di cibo rimasti. 1. Inserire 300 ml di acqua distillata o potabile nel contenitore dell'HYDRO EASY CLEAN sul fondo del forno 2.
  • Page 26: Rimozione E Pulizia Della Porta In Vetro

    RIMOZIONE E PULIZIA DELLA PORTA IN VETRO 1. Aprile la porta del forno. 2.3.4. Bloccare le cerniere, rimuovere le viti e rimuovere la copertura metallica superiore tirandola verso l’alto. 5.6. Rimuovere il vetro, estraendolo con molta cura, dalla controporta del forno (NB: nei forni pirolitici, rimuovere anche il secondo e terzo vetro (se presente)).
  • Page 27: Sostituzione Della Lampadina

    SOSTITUZIONE DELLA LAMPADINA 1. Scollegare il forno alla rete. 2. Allentare la copertura in vetro, svitare la lampadina e sostituirla con una nuova dello stesso modello. 3. Una volta sostituita la lampadina difettosa, riavvitare la copertura in vetro. 5. Risoluzione dei Problemi 5.1 FAQ PROBLEMA POSSIBILE CAUSA...
  • Page 28: Güvenlik Uyarıları

    Güvenlik uyarıları • UYARI: Cihaz ve aparatları kullanım sırasında ısınır. Isınmış parçalara dokunmaktan kaçınınız. •UYARI: Fırın kullanımdayken erişilebilir parçalar çok sıcak olabilir. Çocuklar güvenli bir mesafede tutulmalıdır. • Bu cihaz, 8 yaş ve üzeri çocuklar ve fiziksel, duyusal veya zihinsel yetenekleri veya bilgi ve tecrübe açısından yetersiz kişiler tarafından ancak yetişkin bir bireyin denetiminde ve cihazın nasıl kullanılacağına dair verilen talimatların uygulanması...
  • Page 29 erişilebilir durumda olmalıdır. •Bağlantı, fişin erişilebilir durumda tutulması veya kablolama kurallarına uygun şekilde sabit kablo tesisatına bir anahtarın eklenmesi yoluyla kesilebilir. •Güç kablosu hasarlıysa üreticiden temin edilen bir kablo veya özel bir demet ile ya da müşteri hizmetleri departmanıyla iletişim kurularak değiştirilmelidir.
  • Page 30 Özet Genel Açıklamalar 1.1 Güvenlik ipuçları 1.2 Elektriksel güvenlik 1.3 Tavsiyeler 1.4 Kurulum 1.5 Atık yönetimi 1.6 Uygunluk beyanı Ürün Açıklaması 2.1 Genel bakış 2.2 Aksesuarlar 2.3 İlk kullanım Fırının Kullanımı 3.1 Gösterge açıklamaları 3.2 Pişirme modları Fırının Temizlenmesi ve Bakımı 4.1 Temizleme hakkında genel notlar 4.2 Kolay Temizlenme Fonksiyonu 4.3 Bakım...
  • Page 31: Genel Açıklamalar

    1. Genel Açıklamalar Ürünlerimizden birini tercih ettiğiniz için teşekkür ederiz. Fırınınızdan en iyi sonuçları almak için bu kılavuzu dikkatle okuyun ve daha sonra başvurmak için saklayın. Fırının montajından önce, herhangi bir onarım gerekmesi halinde müşteri hizmetleri personeline vermek üzere seri numarasını...
  • Page 32 çıkabilecek her türlü kaza veya zararda imalatçı herhangi bir sorumluluk kabul etmemektedir. NOT: fırında bazı bakım işlemleri yapılması gerektiğinden, montajın yapılmış olduğu alandan çıkarılması halinde fırının bağlanabileceği başka bir prizin yakınlarda bulunması tavsiye edilir. Elektrik kablosunun sadece teknik servis personeli ya da eşdeğer niteliklere sahip teknisyenler tarafından değiştirilmesi gereklidir.
  • Page 33: Uygunluk Beyanı

    Birçok ülkede, büyük WEEE'ler için şehir içinde toplama noktaları bulunmaktadır. Yeni bir cihaz satın aldığınızda, eski cihazın satın alınan cihazla aynı tipte olması ve aynı işlevlere sahip olması durumunda eski cihazı ücretsiz olarak bire bir kabul etmesi gereken satıcıya iade edebilirsiniz. ENERJİ...
  • Page 34: İlk Kullanım

    2.3 İlk Kullanım İLK TEMİZLEME İlk kez kullanmadan önce fırını temizleyin. Dış yüzeyleri yumuşak bir ıslak bezle silin. Tüm aksesuarları yıkayın ve fırının içini sabunlu su ve sıvı bulaşık deterjanı karışımına batırılmış bir bezle silin. Boş fırını maksimum sıcaklık değerine ayarlayın ve yaklaşık 1 saat çalıştırın, bu şekilde fırının yeni olmasından kaynaklı...
  • Page 35 DEVREDEN PROGRAM DEVREYE SOKULMASI İŞLEVİ NE İÇİN KULLANILDIĞI ÇIKARILMASI • Çocuk kilidi fonksiyonu • Ç o c u k k i l i d i dokunmatik ekrandaki f o n k s i y o n u t e k r a r (+) sembolüne en az 5 dokunmatik ekrandaki saniye dokunarak aktif...
  • Page 36 3.2 Pişirme Modları Fonksiyon Varsayılan Sıcaklık Fonksiyon (Fırın modeline bağlıdır) ikonu aralığı °C sıcaklık °C LAMBA: Fırın lambasını yakar. BUZ ÇÖZME: Düğme bu konuma alındığı zaman fan oda sıcaklığında havayı 40 ÷ 40 donmuş gıdanın etrafında dolaştırır, böylece gıdanın protein içeriği değişmeden birkaç...
  • Page 37 4. Fırının Temizlenmesi ve Bakımı 4.1 Temizleme hakkında genel notlar Düzenli temizlik ile cihazın kullanım ömrü uzatılabilir. Elle temizlik işlemlerini yapmadan önce fırının soğumasını bekleyin. Temizlik için asla aşındırıcı deterjanlar, çelik tel veya keskin nesneler kullanmayın, aksi takdirde emaye parçalarda onarılamaz hasarlar oluşabilir. Sadece su, sabun veya ağartıcı bazlı deterjanlar (amonyak) kullanın.
  • Page 38 4.2 Kolay Temizlenme Fonksiyonu (Hydro Easy Clean - ) Hydro easy clean buhar yardımı ile fırınınızdaki yağ ve yemek artıklarını temizler. 1. Fırınınızın Hydro Easy Clean – Kolay Temizlenme bölümüne 300 ml su ilave edin. 2. Fırınınızı sabit ( ) ya da taban ( ) sıcaklığına ayarlayın.
  • Page 39 CAMIN SÖKÜLMESİ VE TEMİZLENMESİ 1. Fırının kapağını açın. 2.3.4. Menteşeleri kilitleyin, vidaları çıkarın ve yukarı doğru çekerek üst metal kapağı çıkarın. 5.6. Camı dikkatli bir şekilde fırın kapağından çekerek çıkarın (Not: pirolitik fırınlarda ikinci ve üçüncü camı (eğer varsa) da çıkarın). 7.
  • Page 40: Ampulün Deği̇şti̇ri̇lmesi̇

    AMPULÜN DEĞİŞTİRİLMESİ 1. Fırını elektrik beslemesinden ayırın. 2. Cam kapağı sökün, ampulü sökün ve aynı türde yeni bir ampul ile değiştirin. 3. Arızalı ampul değiştirildikten sonra cam kapağı yerine takın. 5. Sorun Giderme 5.1 Sorun giderme SORUN ÇÖZÜMÜ OLASI NEDENİ Fırın ısınmıyor Saati ayarlayın Saat ayarlanmamış...
  • Page 41: Tüketi̇ci̇ Hi̇zmetleri̇

    Candy Hoover Euroasia tarafından sağlanan garanti şartları aşağıdaki koşullarda geçersiz olacaktır. • Ürüne, yetkili servis dışındaki kişiler tarafından müdahale edilmesi, elektrik-su kesintisi ve üründen kaynaklanmayan kaçaklar garanti kapsamı...
  • Page 42: Garanti̇ Belgesi̇

    şahıslar tarafından bakımı, onarımı veya başka bir nedenle müdahale edilmemiş olması şartıyla bütün parçaları dahil olmak üzere tamamı malzeme, işçilik ve üretim hatalarına karşı ürünün teslim tarihinden itibaren 3 ( ÜÇ ) YIL SÜRE İLE CANDY HOOVER EUROASIA A.Ş. TARAFINDAN GARANTİ EDİLMİŞTİR. Malın bütün parçaları dahil olmak üzere tamamı garanti kapsamındadır.
  • Page 43: Bezpečnostní Pokyny

    Bezpečnostní pokyny • UPOZORNĚNÍ: Spotřebič a jeho přístupné části se během použití zahřívají. Nedotý k ejte se topných prvků. • UPOZORNĚNÍ: přístupné části se mohou při používání trouby zahřát. Děti musejí být udržovány v bezpečné vzdálenosti. • Tento spotřebič smí používat děti starší 8 let a osoby se snížený mi fyzickými, senzorickými nebo mentálními schopnostmi nebo bez dostatečných zkušeností, pokud jsou pod dohledem a byly poučeny o použití...
  • Page 44 být přerušen vypínačem. Zásuvka nebo omnipolární vypínač používaný pro připojení by měl být při instalaci spotřebiče snadno přístupný. • Odpojení lze zajistit přístupnou zástrčkou nebo začleněním spínače v pevném zapojení v souladu s pravidly elektroinstalace. • Pokud je napájecí kabel poškozen, musí být nahrazen kabelem nebo speciálním svazkem, který...
  • Page 45 Shrnutí Obecné pokyny 1.1 Bezpečnostní pokyny 1.2 Elektrická bezpečnost 1.3 Doporučení 1.4 Instalace 1.5 Odpadové hospodářství 1.6 Prohlášení o shodě 2.1 Přehled Popis vý r obku 2.2 Příslušenství 2.3 První použití Použití trouby 3.1 Popis displeje 3.2 Režimy vaření 4.1 Obecné poznámky k čištění Čištění...
  • Page 46: Obecné Pokyny

    1. Obecné pokyny Děkujeme Vám, že jste si zvolili jeden z našich vý r obků. Pro dosažení nejlepších výsledků s troubou byste si měli pečlivě přečíst tento návod a uschovat jej pro budoucí použití. Před instalací trouby si poznamenejte vý r obní číslo, abyste jej mohli poskytnout pracovníkům zákaznických služeb v případě...
  • Page 47: Odpadové Hospodářství A Ochrana Životního Prostředí

    POZNÁMKA: protože trouba může vyžadovat údržbu, je vhodné mít k dispozici další elektrickou zásuvku, ke které lze troubu připojit po vyjmutí z prostoru, ve kterém je nainstalována. Napájecí kabel smí být nahrazen pouze servisním technikem nebo technikem s rovnocennou kvalifikací. 1.3 Doporučení...
  • Page 48: Popis Výrobku

    2. Popis vý robku 2.1 Přehled 1. Ovládací panel 2. Polohy polic (podélný dr átěný r ošt, je-li součástí dodávky) 3. Kovový r ošt 4. Odkapávací plech 5. Ventilátor (za ocelovou deskou) 6. Dvířka trouby 2.2 Příslušenství Odkapávací plech Kovový ro št Drží...
  • Page 49: Použití Trouby

    3. Použití trouby 3.1 Popis displeje MENU VAROVÁNÍ: první operace lze provádět když trouba 1- Doba pečení byla nainstalována nebo po přerušení napájení 2- Nastavení hodin 12:00 (když je displej pulzující – bliká a ukazuje ) je 3- Časovač 4- Konec pečení nastavení...
  • Page 50: Dětská Pojistka

    FUNKCE JAK AKTIVOVAT JAK VYPNOUT CO TO DĚLÁ VÝHODY • Dětský zámek Funkce • Dětský zámek Funkce se aktivuje dotykem Set j e d e a k t i v o v á n a (+) po dobu minimálně dotykem tlačítka Set 5 sekund.
  • Page 51: Režimy Vaření

    3.2 Režimy vaření Volič T °C T °C Funkce (Závisí na modelu trouby) funkc ozmezí výchozí SVĚTLO: Zapne světlo v troubě. ROZMRAZOVÁNÍ: Je-li volič nastaven do této polohy. Ventilátor dmýchá 40 ÷ 40 vzduch o pokojové teplotě kolem zmrzlého pokrmu a tak jej za několik minut rozmrazí...
  • Page 52: Čištění A Údržba Trouby

    4. Čištění a údržba trouby 4.1 Obecné poznámky k čištění Životnost spotřebiče můžete prodloužit prostřednictvím pravidelného čištění. Před prováděním ručního čištění počkejte, až trouba vychladne. Nikdy nepoužívejte při čištění brusné mycí prostředky, drátěnku nebo ostré předměty. Předejdete tak neopravitelnému poškození smaltovaných dílů. Používejte pouze mycí...
  • Page 53 4.2 Funkce Hydro Easy Clean HYDRO EASY CLEAN vytváří páru pro snadné odstraňování tuku a zbytků jídla z trouby. 1. Nalijte 300 ml vody do zásobníku HYDRO EASY CLEAN na dně trouby. 2. Nastavte funkci trouby na Statický ( ) nebo Spodní ( ) oh řev.
  • Page 54 DEMONTÁŽ A ČIŠTĚNÍ SKLENĚNÝCH DVÍŘEK 1. Otevřete dvířka trouby. 2.3.4. Zajistěte závěsy, vyšroubujte šrouby a demontujte horní kovový kryt vytažením směrem nahoru. 5.6. Vyjměte opatrně sklo ze dvířek trouby (Pozn: u pyrolytických trub vyjměte také druhé a třetí sklo (jsou-li osazena)). 7.
  • Page 55: Řešení Potíží

    VÝ M ĚNA ŽÁROVKY 1. Odpojte troubu od síťového přívodu. 2. Sejměte skleněný kryt, vyšroubujte žárovku a vyměňte ji za novou žárovku stejného typu. 3. Jakmile je vadná žárovka vyměněna, vraťte zpět skleněný kryt. 5. Řešení potíží 5.1 Často Kladené Otázky PROBLÉM MOŽNÁ...
  • Page 56: Indicaciones De Seguridad

    Indicaciones de seguridad • ADVERTENCIA: el electrodoméstico y las partes accesibles de este se calientan durante el funcionamiento. Tenga cuidado de no tocar ninguna parte caliente. • ADVERTENCIA: las partes accesibles pueden estar calientes durante el uso del horno. Los niños deben mantenerse a una distancia de seguridad. •...
  • Page 57 de color amarillo verdoso. Esta operación debe realizarla un profesional debidamente cualificado. Si la toma de corriente es incompatible con el enchufe del electrodoméstico, pida a un electricista profesional que sustituya la toma por otra adecuada. El enchufe y la toma deben cumplir las normas actuales del país donde se instala el electrodoméstico.
  • Page 58 Resumen 1.1 Indicaciones de seguridad Instrucciones generales 1.2 Seguridad eléctrica 1.3 Recomendaciones 1.4 Instalación 1.5 Gestión de residuos 1.6 Declaración de conformidad 2.1 Descripción general Descripción del producto 2.2 Accesorios 2.3 Primer uso 3.1 Descripción de la pantalla Uso del horno Funciones de cocción 4.1 Indicaciones generales para la Limpieza y mantenimiento del...
  • Page 59: Instrucciones Generales

    Instrucciones generales Gracias por haber elegido nuestro producto. Para obtener los mejores resultados con su horno, lea atentamente este manual y guárdelo para futuras consultas. Antes de instalar el horno, tome nota del número de serie para que pueda dárselo al personal de servicio al cliente si necesita alguna reparación.
  • Page 60: Declaración De Conformidad

    NOTA: dado que el horno puede requerir trabajos de mantenimiento, es aconsejable tener a mano otra toma de corriente para poder conectarlo si se retira del espacio en el que está instalado. El cable de alimentación sólo debe ser sustituido por personal del servicio técnico o por técnicos con cualificaciones equivalentes.
  • Page 61: Descripción Del Producto

    Descripción del producto Descripción general 1. Panel de mandos 2. Posiciones de la bandeja (rejilla de alambre lateral si se incluye) 3. Parrilla de metal 4. Bandeja de goteo 5. Ventilador (detrás de la placa de acero) 6. Puerta del horno 2.2 Accesorios Bandeja de goteo Parrilla de metal...
  • Page 62: Primer Uso

    2.3 Primer uso LIMPIEZA PRELIMINAR Limpie el horno antes de usarlo por primera vez. Limpie las superficies exteriores del horno con un trapo suave que esté húmedo. Lave todos los accesorios y utilice una solución de agua caliente con jabón líquido en el interior del horno. Programe el horno vacío en la temperatura máxima y déjelo encendido durante cerca de 1 hora para que desaparezca el olor a nuevo.
  • Page 63 FUNCIÓN CÓMO SE USA CÓMO SE DESACTIVA QUÉ HACE POR QUÉ SE NECESITA • La función de bloqueo • La función de bloqueo para niños se desactiva para niños se desactiva tocando de nuevo el tocando de nuevo el botón Set (+) del panel botón Set (+) del panel BLOQUEO táctil durante un...
  • Page 64: Modos De Cocción

    3.2 Modos de cocción Selector de T °C T °C Función (depende del modelo de horno) funciones rango defecto LUZ: Encendido de la luz del horno. DESCONGELACIÓN: Cuando el selector está en esta posición. El ventilador hace circular el aire a temperatura ambiente alrededor de los alimentos 40 ÷...
  • Page 65: Limpieza Y Mantenimiento Del Horno

    Limpieza y mantenimiento del horno 4.1 Indicaciones generales para la limpieza El ciclo de vida del electrodoméstico se puede prolongar mediante una limpieza regular. Esperar a que el horno se enfríe antes de efectuar las operaciones de limpieza manual. Nunca utilice detergentes abrasivos, lana de acero u objetos punzantes para la limpieza, para no dañar irreparablemente las piezas esmaltadas.
  • Page 66 4.2 Función de limpieza fácil hidrostática El procedimiento HYDRO EASY CLEAN utiliza vapor para ayudar a eliminar la grasa restante y las partículas de comida del horno. 1. Vierta 300 ml de agua en el recipiente HYDRO EASY CLEAN en el fondo del horno. 2.
  • Page 67 DESMONTAJE Y LIMPIEZA DE LA PUERTA DE VIDRIO 1. Abra la puerta del horno. 2.3.4. Bloquee las bisagras, retire los tornillos y retire la cubierta metálica superior tirando de ella hacia arriba. 5.6. Retire el vidrio, extrayéndolo cuidadosamente de la puerta del horno (Nota: en los hornos pirolíticos, retire también el segundo y tercer vidrio (si está...
  • Page 68: Cambio De La Bombilla

    CAMBIO DE LA BOMBILLA 1. Desconecte la alimentación eléctrica del electrodoméstico. 2. Desenrosque la tapa de vidrio, desenrosque la bombilla y sustitúyala por una bombilla nueva del mismo tipo. 3. Una vez sustituida la bombilla defectuosa, vuelva a colocar la tapa de vidrio. 5.
  • Page 69: Sicherheitshinweise

    Sicherheitshinweise • WARNUNG: Während des Gebrauchs werden das Gerät und dessen zugänglichen Teile heiß. Achten Sie darauf, dass Sie keine heißen Teile berühren. • WARNUNG: Die zugänglichen Teile können während des Betriebs des Ofens heiß werden. Kinder müssen einen sicheren Abstand wahren. •...
  • Page 70 und zwar auf sichere Weise und im Bewusstsein der möglichen Risiken. • Die Reinigung und Wartung darf nicht von unbeaufsichtigten Kindern durchgeführt werden. • Verwenden Sie keine rauen oder abrasiven Materialien oder scharfen Metallabstreifer zur Reinigung der Ofentürscheiben, da diese die Oberfläche zerkratzen und das Glas zerbrechen können.
  • Page 71 Steckdose bzw. der allpolige Trennschalter muss leicht erreichbar sein, wenn das Gerät installiert ist. • Die Trennung kann durch einen zugänglichen Stecker oder einen vorschriftsmäßig in die Festverdrahtung eingebundenen Schalter erfolgen. • Wenn das Netzkabel beschädigt ist, muss es durch ein Kabel oder ein spezielles Bündel ersetzt werden, das beim Hersteller oder beim Kundendienst erhältlich ist.
  • Page 72 Übersicht 1.1 Sicherheitshinweise Allgemeine Hinweise 1.2 Elektrische Sicherheit 1.3 Empfehlungen 1.4 Montage 1.5 Abfallwirtschaft 1.6 Konformitätserklärung 2.1 Übersicht Produktbeschreibung 2.2 Zubehör 2.3 Erstmalige Verwendung Nutzung des Ofens Beschreibung der Anzeige Gararten 4.1 Allgemeine Hinweise zur Ofenreinigung und Pflege Reinigung 4.2 Hydro Easy Clean-Funktion 4.3 Instandhaltung •...
  • Page 73: Allgemeine Hinweise

    Allgemeine Hinweise Wir danken Ihnen, dass Sie sich für eines unserer Produkte entschieden haben. Um die besten Ergebnisse mit Ihrem Ofen zu erzielen, sollten Sie diese Anleitung sorgfältig lesen und für spätere Verwendung aufbewahren. Notieren Sie sich vor der Installation des Ofens die Seriennummer, damit Sie sie im Reparaturfall dem Kundendienst geben können.
  • Page 74 VERBINDUNG Der Ofen wird mit einem Netzkabel geliefert, das nur an ein Stromnetz mit 220- 240 Vac 50 Hz Leistung zwischen den Phasen oder zwischen Phase und Neutralleiter angeschlossen werden sollte. Bevor der Ofen an die Stromversorgung angeschlossen wird, ist es wichtig, Folgendes zu überprüfen: - die auf dem Messgerät angezeigte Netzspannung;...
  • Page 75 1.5 Abfallwirtschaft und Umweltschutz Dieses Gerät ist entsprechend der EU-Richtlinie 2012/19/EU für Elektro- und Elektronik-Altgeräte (WEEE) gekennzeichnet. Unter die WEEE fallende Elektro- und Elektronik-Altgeräte enthalten sowohl umweltschädliche Stoffe (die negativen Folgen für die Umwelt verursachen) als auch wiederverwendbare Grundstoffe. Es ist wichtig, dass die Elektro- und Elektronik-Altgeräte einer spezifischen Behandlung unterzogen werden, um die Schadstoffe korrekt zu entfernen und zu entsorgen und alle Materialien zurückzugewinnen.
  • Page 76 Produktbeschreibung 2.1 Überblick 1. Bedienfeld 2. Position der Einlegeböden (seitliches Drahtgitter, sofern beiliegend) 3. Metallgrill 4. Auffangschale 5. Lüfter (hinter Stahlblech) 6. Ofentür 2.2 Zubehör Auffangschale Metallgrill Sammelt die Rückstände, die beim Für Backbleche und -platten. Kochen von Lebensmitteln auf die Grills tropfen.
  • Page 77: Erstmalige Verwendung

    2.3 Erstmalige Verwendung VORREINIGUNG Reinigen Sie den Ofen vor der ersten Benutzung. Wischen Sie die Außenflächen mit einem feuchten Tuch ab. Waschen Sie alle Zubehörteile ab, und wischen Sie das Ofeninnere mit einer Lösung aus warmem Wasser und Spülmittel ab. Stellen Sie den Ofen auf die maximale Temperatur ein und lassen Sie ihn etwa 1 Stunde eingeschaltet, um verbleibende Produktionsgerüche zu beseitigen.
  • Page 78: Funktionsbeschreibung

    FUNKTIONSBESCH FUNKTION ANWENDUNG DEAKTIVIERUNG NOTWENDIGKEIT REIBUNG •Die Kindersicherung •Die Kindersicherung wird aktiviert, indem Sie wird deaktiviert, indem Set (+) mindestens 5 Sie Set das Touchpad Sekunden lang berühren. (+) erneut für mindestens TASTEN- Von diesem Zeitpunkt an Sekunden lang sind alle anderen berühren.
  • Page 79 3.2 Gararten Einstellra T °C T °C Funktion (In Abhängigkeit des Ofenmodells) Standard- bereich LAMPE: Schaltet die Ofenbeleuchtung ein. ABTAUEN: Wenn das Einstellrad auf diese Position eingestellt ist. Zirkuliert der Ventilator bei Raumtemperatur Luft um das Gefriergut herum, so dass es in 40 ÷...
  • Page 80: Allgemeine Hinweise Zur Reinigung

    Ofenreinigung und Pflege 4.1 Allgemeine Hinweise zur Reinigung Der Lebenszyklus des Gerätes kann durch regelmäßige Reinigung verlängert werden. Warten Sie, bis der Ofen abgekühlt ist, bevor Sie eine manuelle Reinigung durchführen. Verwenden Sie zur Reinigung niemals scheuernde Reinigungsmittel, Stahlwolle oder scharfe Gegenstände, damit die lackierten Teile nicht irreparabel beschädigt werden.
  • Page 81 4.2 Hydro Easy Clean-Funktion Das HYDRO EASY CLEAN-Verfahren verwendet Dampf, um verbleibende Fett- und Lebensmittelpartikel aus dem Ofen zu entfernen. 1. 300 ml Wasser in den HYDRO EASY CLEAN-Behälter am Boden des Ofens geben. 2. Stellen Sie die Ofenfunktion auf Statisch ( ) oder untere ( ) Heizung 3.
  • Page 82 AUSBAU UND REINIGUNG DER GLASTÜR 1. Öffnen Sie die Ofentür. 2.3.4. Verriegeln Sie die Scharniere, entfernen Sie die Schrauben und entfernen Sie die obere Metallabdeckung, indem Sie sie nach oben ziehen. 5.6. Entfernen Sie das Glas und ziehen Sie es vorsichtig aus der Ofentür (Achtung: bei pyrolytischen Öfen entfernen Sie auch das zweite und dritte Glas (falls vorhanden)).
  • Page 83 AUSWECHSELN DER BIRNE 1. Trennen Sie den Ofen vom Stromnetz. 2. Lösen Sie die Glasabdeckung, schrauben Sie die Birne heraus und ersetzen Sie sie durch eine neue Birne des gleichen Typs. 3. Sobald die defekte Glühbirne ausgetauscht ist, setzen Sie die Glasabdeckung wieder ein.
  • Page 84: Consignes De Sécurité

    Consignes de sécurité • AVERTISSEMENT : l’appareil et ses parties accessibles chauffent pendant l’utilisation. Faites attention à ne pas toucher les parties chaudes. • ATTENTION : les parties accessibles peuvent devenir très chaudes quand le four est en marche. Les enfants doivent être tenus à...
  • Page 85 produit, uniquement s'ils sont surveillés ou s’ils ont été informés de la manière d'utiliser l'appareil, en toute sécurité et qu'ils comprennent les risques possibles. • Le nettoyage et l’entretien ne doivent pas être effectués par des enfants sans surveillance. • N’utilisez pas de matériaux rugueux ou abrasifs ou de racloirs métalliques acérés pour nettoyer les vitres des portes des fours, car cela pourrait rayer la surface et provoquer la rupture de la vitre.
  • Page 86 d’alimentation ou le disjoncteur multipolaire utilisé pour le branchement doit rester à tout moment accessible lors de l’installation de l’appareil. • Le débranchement doit se faire en accédant à la prise d’alimentation ou en prévoyant un interrupteur sur le circuit électrique fixe, conforme aux normes électriques.
  • Page 87 Sommaire 1.1 Consignes de sécurité Instructions générales 1.2 Sécurité électrique 1.3 Recommandations 1.4 Installation 1.5 Gestion des déchets 1.6 Déclaration de conformité 2.1 Vue générale Description du produit 2.2 Accessoires 2.3 Première utilisation Description de l’affichage Utilisation du four Modes de cuisson 4.1 Notes générales en matière Nettoyage et entretien du four de nettoyage...
  • Page 88: Instructions Générales

    Instructions générales Nous vous remercions d'avoir choisi un de nos produits. Pour obtenir les meilleurs résultats avec votre four, il convient de lire le présent manuel avec soin et de le conserver pour référence ultérieure. Avant d'installer le four, notez le numéro de série afin que vous puissiez le donner au personnel du service client en cas de réparations.
  • Page 89: Installation

    BRANCHEMENT Le four est fourni avec un câble électrique qui doit être branché uniquement à une alimentation électrique de 220- 240 Vac 50 Hz entre les phases ou entre la phase et le neutre. Avant de brancher le four à l’alimentation électrique, il est important de vérifier : - La tension électrique indiquée sur la jauge ;...
  • Page 90: Gestion Des Déchets Et Protection De L'environnement

    1.5 Gestion des déchets et protection de l’environnement Cet appareil est étiqueté conformément à la directive européenne 2012/19/EU relative aux appareils électriques et électroniques (DEEE). La catégorie DEEE recouvre à la fois les substances polluantes (pouvant avoir des retombées négatives sur l'environnement) et les composants de base (pouvant être réutilisés).
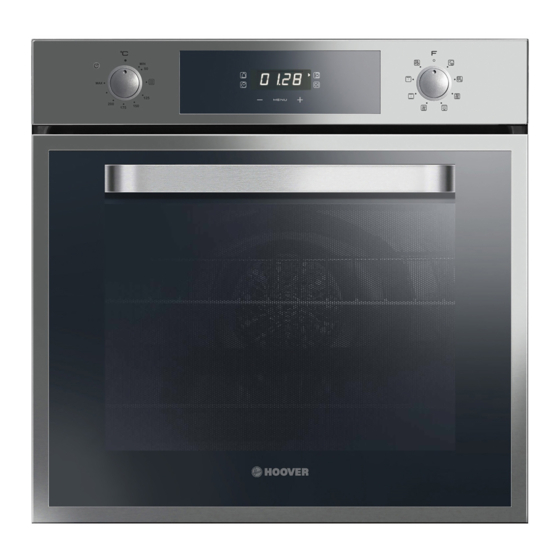
  • Page 91: Description Du Produit

    Description du produit 2.1 Vue d’ensemble 1. Panneau de commande 2. Positions des grilles (grille latérale, le cas échéant) 3. Grille métallique 4. Lèchefrite 5. Ventilateur (derrière la plaque d'acier) 6. Porte du four 2.2 Accessoires Lèchefrite Grille métallique Collecte les résidus qui s'écoulent Permet de ranger les plaques de cuisson pendant la cuisson des aliments sur les et plats.
  • Page 92: Première Utilisation

    2.3 Première utilisation NETTOYAGE PRÉLIMINAIRE Nettoyez le four avant la première utilisation. Essuyez les surfaces extérieures avec un chiffon doux humide. Lavez tous les accessoires et essuyez l'intérieur du four avec de l'eau chaude additionnée de liquide vaisselle. Réglez le four vide sur la température maximum et laissez-le allumé...
  • Page 93 COMMENT COMMENT LA FONCTION FONCTION POURQUOI L’UTILISER DÉSENCLENCHER •Pour enclencher la •Pour désenclencher la fonction verrouillage fonction verrouillage enfant, appuyez sur la enfant, appuyez touche (+) pendant au nouvelle fois sur la touche TOUCHE moins 5 secondes. À (+) pendant au moins 5 DE VER- partir de ce moment, secondes.
  • Page 94: Modes De Cuisson

    3.2 Modes de cuisson Cadran T °C Fonction (selon le modèle du four) T °C Mode par Gamme fonction défaut AMPOULE : Allume la lumière du four. DÉGIVRAGE Quand le bouton est réglé sur cette position, l’air du ventilateur circule tout autour de l’aliment surgelé à température ambiante, ce qui permet 40 ÷...
  • Page 95: Nettoyage Et Entretien Du Four

    Nettoyage et entretien du four 4.1 Remarques générales sur le nettoyage du four Le cycle de vie de l’appareil peut être prolongé par un nettoyage régulier. Attendez que le four refroidisse avant d’effectuer des opérations de nettoyage manuelles. N'utilisez jamais de détergents abrasifs, de laine d'acier ou d'objets tranchants pour le nettoyage, afin de ne pas endommager irrémédiablement les parties émaillées.
  • Page 96: Fonction De Nettoyage Facile À L'eau

    4.2 Fonction de nettoyage facile à l’eau La méthode du NETTOYAGE FACILE À L’EAU utilise de la vapeur d’eau pour aider à l’élimination des résidus de graisse et d’aliments du four. 1. Versez 300 ml d’eau dans le conteneur du NETTOYAGE FACILE À L’EAU en bas du four.
  • Page 97: Enlèvement Et Nettoyage De La Porte Vitrée

    ENLÈVEMENT ET NETTOYAGE DE LA PORTE VITRÉE 1. Ouvrez la porte du four. 2.3.4. Bloquez les charnières, enlevez les vis et enlevez le capot métallique supérieur en le tirant vers le haut. 5,6. Enlevez la vitre, en l’extrayant avec précaution de la porte du four (NB dans les fours à pyrolyse, enlevez également la seconde et la troisième vitre (si elles existent)).
  • Page 98: Remplacement De L'ampoule

    REMPLACEMENT DE L’AMPOULE 1. Débranchez le four de l’alimentation secteur. 2. Démontez le capot en verre, dévissez l'ampoule et remplacez-la par une nouvelle du même type. 3. Une fois que l'ampoule défectueuse est remplacée, remettez le capot en verre en place.
  • Page 99 INSTALLATION KURULUM INSTALLAZIONE INSTALACE Opening/Apertura/ 550 mm Açıklık / Otvor 460 mm x 15 mm 560 mm 580 mm 595 mm 545 mm 595 mm 22 mm If the furniture is equpped with a covarage at the back part, provide an opening for the power supply cable. Se il mobile ha un fondo posteriore, praticare un foro per il passaggio del cavo di alimentazione.
  • Page 100: Montage

    INSTALACIÓN MONTAGE INSTALLATION Apertura/ Öffnung / 550 mm Ouverture 460 mm x 15 mm 560 mm 580 mm 595 mm 545 mm 595 mm 22 mm Si el mueble tiene fondo en la parte trasera hacer una apertura para el cable electrico. Wenn das Möbel mit einer Abdeckung im hinteren Teil ausgestattet ist, sehen Sie eine Öffnung für das Netzkabel vor.

Ce manuel est également adapté pour:

Hot3061biHot3061wi

Table des Matières