Bosch BGC05AAA1 Mode D'emploi
Manuel de l'utilisateur - Produit 1:
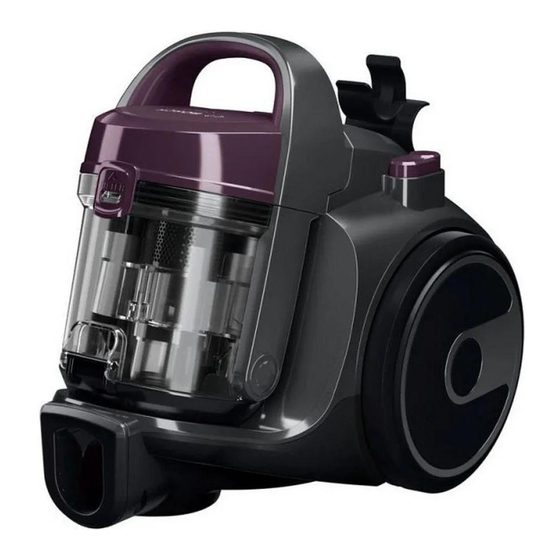
Bosch Série 2 Aspirateur sans sac BGC05AAA1 – Aspirateur
au format ultra compact et poids léger, avec filtre hygiénique
lavable et haute performance d'aspiration – Couleur : Violet
Manuel de l'utilisateur - Produit 2:
Machine à Café Nespresso Krups Inissia Rouge Cafetière
Espresso à Dosettes YY1531FD
Chapitres

Manuels Connexes pour Bosch BGC05AAA1


Sommaire des Matières pour Bosch BGC05AAA1
- Page 1 Manuel de l’utilisateur - Produit 1: Bosch Série 2 Aspirateur sans sac BGC05AAA1 – Aspirateur au format ultra compact et poids léger, avec filtre hygiénique lavable et haute performance d’aspiration – Couleur : Violet Manuel de l’utilisateur - Produit 2: Machine à...
- Page 2 BGS05.../BGC05... [de] Gebrauchsanleitung [en] Instruction manual [fr] Mode d’emploi [it] Istruzioni per l’uso [nl] Gebruiksaanwijzing Instrucciones de uso [es] Instruções de serviço [pt] [pl] Instrukcja uzytkowania [ru] Оuписание прибора [ro] Descrierea aparatului [kk] [ar]...
- Page 3 13 14...
- Page 4 Click! Click!
- Page 5 Click!
- Page 6 Click! Click!
- Page 7 Drying Click!
- Page 8 Click! Drying Click!
-
Page 9: Table Des Matières
Sicherheit ....................... 9 Gebrauchsanleitung ..................27 Safety information ..................10 Instructions for use ..................29 Consignes de sécurité ................12 Mode d`emploi ..................32 Norme di securezza ..................13 Istruizioni per l`uso ................... 34 Veiligheidsvoorschriften................15 Gebruiksaanwijzing ..................37 Consejos y advertencias de seguridad ............16 Instrucciones de uso .................. -
Page 10: Bestimmungsgemäße Verwendung
Das Gerät kann von Kindern „ ab 8 Jahren und darüber und von Personen mit verringer- Die Gebrauchsanweisung bitte aufbewahren. Bei Weitergabe des Staubsaugers an Dritte bitte Ge- ten physischen, sensorischen brauchsanweisung mitgeben. oder mentalen Fähigkeiten Bestimmungsgemäße Verwendung oder Mangel an Erfahrung Dieses Gerät ist nur für den privaten Haushalt und das und / oder Wissen benutzt häusliche Umfeld bestimmt. -
Page 11: Intended Use
„ Achten Sie darauf, dass der Netzstecker beim automa- tischen Kabeleinzug nicht gegen Personen, Körpertei- le, Tiere oder Gegenstände geschleudert wird. „ Netzanschlusskabel mit Hilfe des Netzsteckers führen. Please keep this instruction manual. When passing the „ Vor allen Arbeiten am Staubsauger Netzstecker zie- vacuum cleaner on to a third party, please also pass on hen. -
Page 12: Proper Use
„ The vacuum cleaner is not suitable for use on con- ructed on the safe use of the struction sites. appliance and the have un- = Vacuuming up building rubble could damage the > appliance. derstood the potential dan- „ When not in use, switch off the appliance and pull out gers of using the appliance. -
Page 13: Consignes De Sécurité
sensorielles ou mentales re- streintes ou ayant un man- que d'expérience et / ou de Conservez cette notice d'utilisation. Si vous remettez l'aspirateur à une tierce personne, veuillez-y joindre sa connaissances s'ils sont sous notice d'utilisation. surveillance ou ont été infor- Utilisation conforme aux prescriptions més de la manipulation sûre et à... -
Page 14: Norme Di Securezza
„ Pour éviter tout risque de danger, seul le service après-vente agréé est autorisé à effectuer des répara- tions et à remplacer des pièces sur l’aspirateur. „ Ne pas exposer l'aspirateur aux influences atmos- Conservare le istruzioni per l'uso. In caso di cessione phériques, à... -
Page 15: Uso Conforme
„ Per evitare eventuali lesioni, le riparazioni e le sostitu- o istruite in merito all'utilizzo zioni dei componenti dell’aspirapolvere devono esse- sicuro dell'apparecchio re effettuate esclusivamente dal servizio di assistenza tecnica autorizzato. consapevoli degli eventuali „ Proteggere l'aspirapolvere dalle intemperie, rischi derivanti da un utilizzo dall'umidità... -
Page 16: Veiligheidsvoorschriften
of met het oog op een veilig gebruik volledig over de be- diening van het apparaat zijn De gebruiksaanwijzing goed bewaren. Wanneer u de stofzuiger doorgeeft aan derden de gebruiksaanwijzing geïnformeerd en op de hoog- erbij voegen. te zijn van de gevaren die hie- Gebruik volgens de voorschriften ruit kunnen voorvloeien. -
Page 17: Instructies Voor Recycling
„ Om risico's te voorkomen mogen reparaties aan de stofzuiger en de vervanging van onderdelen alleen wor- den uitgevoerd door onze klantenservice. „ De stofzuiger beschermen tegen weersinvloeden, vocht Conservar las instrucciones de uso. En caso de ent- en hittebronnen. regar el aspirador a una tercera persona, adjuntar las „... -
Page 18: Peligro De Asfixia
„ Para evitar riesgos, las reparaciones y el cambio de o psíquicas o que carezcan piezas del aspirador sólo deben ser llevados a cabo de la experiencia y el conoci- por el servicio de asistencia técnica autorizado. „ Proteger el aspirador de las inclemencias del tiempo, miento necesarios, siempre la humedad y fuentes de calor. -
Page 19: Uso A Que Se Destina
Este aparelho não pode ser „ utilizado por crianças a partir dos 8 anos e pessoas com ca- Por favor, guarde o manual de instruções e junte-o ao aspirador sempre que o entregar a terceiros. pacidades físicas, sensoriais Uso a que se destina ou mentais reduzidas ou que não disponham de experiên- Este aparelho destina-se exclusivamente a uso privado e... -
Page 20: Użytkowanie Zgodne Z Przeznaczeniem
„ Certifique-se de que, durante o enrolamento au- tomático do cabo, a ficha não é projetada contra pes- soas, partes do corpo, animais ou objetos. = Conduza o cabo de alimentação com o auxílio da > Instrukcję użytkowania należy zachować. W przypadku ficha. -
Page 21: Wskazówki Dotyczące Utylizacji
„ Przed przystąpieniem do prac związanych z naprawą także osoby lub konserwacją odkurzacza należy wyciągnąć wtyczkę posiadające wystarczającego z gniazda sieciowego. „ Nie włączać uszkodzonego odkurzacza. W przypad- doświadczenia i/lub wiedzy, ku zakłócenia w pracy urządzenia należy wyciągnąć jeśli pozostają nad- wtyczkę... -
Page 22: Правила Техники Безопасности
физическими или умственными способностями, а также Сохраните инструкцию по эксплуатации. При передаче пылесоса новому владельцу не забудьте лицами, не имеющими передать также инструкцию по эксплуатации. опыта обращения с Указания по использованию подобным оборудованием, Этот прибор предназначен только для домашнего допускается только использования... -
Page 23: Piese De Schimb, Accesorii
„ Следите за тем, чтобы сетевой кабель не был зажат и не попадал на острые края предметов. „ Перед автоматическим сматыванием сетевого кабеля убедитесь в том, что его штекер не цепляется Vă rugăm să păstraţi instrucţiunile de utilizare. за людей, части тела, животных или другие объекты. În cazul predării aspiratorului unei terţe persoane, vă... -
Page 24: Utilizarea Corectă
„ Aspiratorul nu este adecvat pentru utilizare pe şantier. înţeles pericolele care pot re- = Aspirarea de moloz poate defecta aparatul. > zulta. „ Opriţi aspiratorul şi scoateţi ştecărul din priză atunci când nu aspiraţi. Copiii nu au voie să se joace „... - Page 25 „ „ „ „ − − − − − „ > „ „ > „ > „ „ „ „ „ „ „ >...
- Page 26 „ „ „ „ „ „ „ „ „ „ „ „ „ > „ „ <= „ „ „ „ „ „ „ „ „...
- Page 27 „ „ „ „ „ − − − − − „ <= „ „ <= „ <= „ „ „ „ „...
-
Page 28: Gerätebeschreibung
Inbetriebnahme Bild ‡ Saugschlauchstutzen in die Saugöffnung des Gerä- Es freut uns, dass Sie sich für einen Bosch Staubsauger tes schieben und hörbar verrasten. der Baureihe Cleann`n entschieden haben. ‡ Zum Entfernen des Schlauches Knopf an der Ober- In dieser Gebrauchsanweisung werden verschiedene seite drücken und Schlauch aus dem Gerät ziehen. -
Page 29: Reinigung & Pflege
Saugen Bild Zum Abstellen des Gerätes den Handgriff aus dem Achtung Teleskoprohr ziehen Bild ‡ Bodendüsen unterliegen, abhängig von der Beschaf- Den Adapter in die Parkhilfe an der Geräterückseite fenheit ihres Hartbodens (z.B. raue, rustikale Flie- stecken. sen) einem gewissen Verschleiß. Deshalb sollten Sie ‡... -
Page 30: Your Vacuum Cleaner
Niemals ohne die eingesetzten Filter saugen. =>Gerät kann beschädigt werden! Congratulations on your purchase of a Bosch vacuum Ausblasfilter-Pflege cleaner from the Cleann`n series. This instruction manual describes various Cleann`n Bild models, which means that some of the equipment fea- ‡... -
Page 31: Starting The Appliance
Starting the appliance Vacuum-cleaning Fig. Please note ‡ Push the suction-hose adapter into the air intake Floor nozzles are subject to a certain amount of opening on the appliance and lock it in place. You wear, depending on the type of hard floors you have will hear an audible 'click'. -
Page 32: Cleaning And Care
Exhaust filter care Fig. To pack the appliance away, pull the handle out of the Fig. telescopic tube ( Fig. ‡ Press the catch on the left-hand side to open the ‡ Slot the adapter into the stand on the rear of the exhaust grille. -
Page 33: Avant La Première Utilisation
Fig. pas toutes votre aspirateur. Utilisez exclusivement les ‡ Insérer l’embout du flexible d’aspiration dans le accessoires d'origine Bosch. Ils sont spécialement trou d’aspiration de l’appareil et l'encliqueter de conçus pour votre aspirateur, pour vous permettre façon audible. d'obtenir un résultat de nettoyage optimal. -
Page 34: Après L'aspiration
Après l'aspiration Fig. La puissance d'aspiration peut également être réglée Fig. en poussant le régulateur d'air secondaire dans le ‡ Mettre l’appareil hors tension. sens de la flèche. ‡ Retirer la fiche de la prise de courant. „ Régulateur d'air secondaire ouvert =>puissance... -
Page 35: Nettoyer Les Filtres Du Collecteur De Poussières
Nettoyer les filtres du collecteur de pous- sières ‡ Veuillez éteindre l'appareil. Siamo lieti che Lei abbia scelto un aspirapolvere Bosch della serie Cleann`n. Fig. Nelle presenti istruzioni per l'uso verranno illustrati di- ‡ Ouvrir le couvercle du collecteur de poussières en versi modelli Cleann`n. -
Page 36: Messa In Funzione
Messa in funzione Aspirazione Figura Attenzione ‡ Inserire il tronchetto di aspirazione nell'apposita Le spazzole per pavimenti sono soggette a una certa apertura e richiudere fino allo scatto. usura in base alle caratteristiche del pavimento duro ‡ Per rimuovere il tubo flessibile, premere il nodo sul (ad es. -
Page 37: Cura E Pulizia
Attenzione Figura Non inserire i componenti nell'apparecchio prima Per riporre l'apparecchio, staccare l'impugnatura dal che siano completamente asciutti. tubo telescopico Figura ‡ Inserire l'adattatore nel supporto di fissaggio sul Non aspirare mai senza aver inserito il filtro. lato posteriore dell'apparecchio. ‡... -
Page 38: Voor Het Eerste Gebruik
Voor het eerste gebruik Afb. ‡ De adapter in de parkeerhulp aan de achterkant van Het verheugt ons dat u voor een Bosch stofzuiger uit de het toestel steken. serie Cleann`n heeft gekozen. In deze gebruiksaanwijzing worden verschillende De stofzuiger in gebruik nemen Cleann`n –... -
Page 39: Zuigkracht Regelen
Zuigkracht regelen Stofzuigen met extra toebehoren Afb. Afb. Mondstukken naar behoefte op de zuigbuis of de hand- Is uw toestel met een vermogensregelaar uitgerust, greep steken: dan kan het vermogen door het schuiven van de ver- a) Kierenmondstuk voor het schoonzuigen van kieren, mogensregelaar traploos worden ingesteld. - Page 40 Schoonmaakinstructies Afb. ‡ Ontgrendelingsknop indrukken om het stofreser- Voor het schoonmaken dient de stofzuiger altijd te voir te ontgrendelen en met de handgreep uit het worden uitgeschakeld en de stekker uit het stopcon- toestel te nemen. ‡ tact te worden gehaald. De stofzuiger en accessoires Stofreservoir boven vuilnisbak houden en bodem- van kunststof kunnen met een in de handel gebruike- plaat door het indrukken van de ontgrendelings-...
-
Page 41: Puesta En Marcha
Puesta en marcha Fig. ‡ Introducir el racor del tubo flexible de aspiración Nos alegra que haya elegido una aspiradora Bosch de en la abertura de aspiración del aparato y encajarlo la serie Cleann`n. de forma audible. En estas instrucciones de uso se presentan diferentes ‡... -
Page 42: Después De Aspirar
Aspirar Fig. Para almacenar el aparato, extraer la empuñadura del Atención tubo telescópico Fig. ‡ Las boquillas para suelos están sometidas a un gran Insertar el adaptador en el soporte para el tubo desgaste en función de la calidad del suelo duro (p. situado en la parte posterior del aparato. -
Page 43: Consejos De Limpieza
Deverá uti- chorro de agua. ‡ lizar exclusivamente os acessórios originais da Bosch Después de que se haya secado por completo el especialmente desenvolvidos para o seu aspirador, filtro de salida, colocarlo en el aparato y cerrar la para obter o melhor resultado de aspiração possível. -
Page 44: Colocação Em Funcionamento
Colocação em funcionamento Aspiração Fig. Atenção ‡ Insira o bocal da mangueira de aspiração na As escovas são sujeitas a um certo desgaste, inde- abertura de sucção do aparelho e encaixe de forma pendentemente das características do seu pavimen- audível. to (p. -
Page 45: Limpeza E Manutenção
Manutenção do filtro de saída do ar Fig. Para desligar o aparelho, puxe a pega para fora do Fig. tubo telescópico Fig. ‡ Abra a grelha de saída do ar, pressionando a patilha ‡ Encaixe o adaptador na posição de parque na parte do lado esquerdo. -
Page 46: Opis Urządzenia
Uruchamianie Rysunek ‡ Króciec węża ssącego wsunąć w otwór ssący Dziękujemy za zakup odkurzacza Cleann`n firmy Bosch. urządzenia i zatrzasnąć z charakterystycznym W niniejszej instrukcji obsługi przedstawione zostały kliknięciem. różne modele odkurzacza Cleann`n. Dlatego może ‡ W celu zdjęcia węża nacisnąć przycisk na górze i się... -
Page 47: Czyszczenie I Konserwacja
Odkurzanie Rysunek W celu odstawienia urządzenia wyciągnąć uchwyt z Uwaga rury teleskopowej Rysunek ‡ W zależności od właściwości podłogi (np. szorst- Umieścić adapter w zaczepie z tyłu urządzenia. kie, rustykalne podłogi) szczotki podłóg ‡ Wąż ssący owinąć wokół urządzenia i zamocować w ulegają... -
Page 48: Wskazówki Dotyczące Czyszczenia
Pielęgnacja filtra wylotowego Rysunek ‡ Otworzyć kratkę wylotu powietrza poprzez Мы рады, что вы остановили свой выбор на naciśnięcie zaczepu po lewej stronie. ‡ пылесосе Bosch серии Cleann`n. Odblokować filtr wylotowy poprzez naciśnięcie В настоящей инструкции по эксплуатации zaczepu na górze filtra i wyjąć filtr z urządzenia. -
Page 49: Подготовка К Работе
Подготовка к работе Рис. Мощность всасывания также может быть Рис. установлена путём сдвигания регулятора ‡ Вставьте патрубок шланга во всасывающее дополнительного воздуха в направлении стрелки. отверстие пылесоса так, чтобы он „ Регулятор дополнительного воздуха открыт => зафиксировался со слышимым щелчком. ‡... -
Page 50: Чистка И Уход
После уборки Рис. ‡ Откройте крышку контейнера для сбора пыли, Рис. потянув за защёлку. ‡ ‡ Выключите прибор. Выньте рамку с фильтром из крышки. ‡ Выньте вилку из розетки. ‡ Выньте поролоновый фильтр из рамки фильтра. ‡ Чтобы свернуть кабель, нажмите кнопку ‡... -
Page 51: Descrierea Aparatului
Glisaţi mânerul în tubul telescopic. mai bune rezultate la aspirare, este recomandabil să ‡ Pentru desfacerea îmbinării, rotiţi puţin mânerul şi utilizaţi numai accesoriile originale Bosch, care au fost scoateţi-l din tubul telescopic. proiectate special pentru aspiratorul dvs. Figura Vă rugăm să păstraţi instrucţiunile de utilizare. În cazul ‡... -
Page 52: Curăţarea Şi Întreţinerea
Aspirarea Figura Pentru a depozita aparatul, trageţi de mânerul din Atenţie tubul telescopic Figura ‡ În funcţie de structura podelei (de ex. gresie aspră, Introduceţi adaptorul în dispozitivul auxiliar de rustică), periile pentru podele sunt supuse unei anu- fixare, pe partea din spate a aparatului. mite uzuri. - Page 53 Îngrijirea filtrului pentru aerul evacuat Figura ‡ Deschideţi filtrul pentru aerul evacuat prin apăsarea eclisei de pe partea stângă. ‡ Deblocaţi filtrul pentru aerul evacuat prin apăsarea eclisei de pe partea superioară a filtrului şi scoateţi-l din aparat. ‡ Bateţi filtrul pentru aerul evacuat şi spălaţi-l sub jet de apă.
- Page 54 ‡ ‡ ‡ ‡ „ ‡ „ ‡ ‡ ‡ ‡ ‡ ‡ „ „ ‡ „ ‡ ‡ ‡ „ „...
- Page 55 ‡ ‡ ‡ ‡ ‡ ‡ ‡ ‡ ‡ ‡ ‡ ‡ ‡ ‡ ‡ ‡ ‡ ‡ ‡...
- Page 56 ‡ ‡ ‡ ‡...
- Page 57 ‡ ‡ ‡ ‡ „ „ ‡ ‡ ‡ ‡ ‡ ‡ ‡ ‡ ‡ ‡ ‡ ‡ ‡ ‡ ‡ ‡ ‡...
- Page 58 ‡ ‡ ‡ ‡ ‡ ‡ ‡ ‡ ‡ „ „ „ „ ‡ „...
- Page 59 @bshg com S vic o somm G P GL 8 ichb L I P t S ]i þ t S GPt \ m i o:so -bosch-co so@bshg com å i ]i 6+ + P SS L \ / G 6 YL Yê...
- Page 60 T i Ko Ts i, Kow oo 0 S J Ho g Ko g m i o:s viss@ m i o:bosch h s vic @bshg com SH Hom App i c s LL 6 5 / ³5L 6 GL ´...
- Page 61 L 1= L GL J 6P 6+ + P SS L m i o:bsh z -s vic @bshg com J 0 .L www bosch-hom com w T chp c 6L J S m i o: f s z@bshg com 72 ³...
- Page 62 Dit apparaat is gekenmerkt in overeenstemming met de Europese richtlijn 2012/19/EU betreffende afgedankte elektrische en elektronische apparatuur (waste electrical and electronic equipment - WEEE). De richtlijn geeft het kader aan voor de in de EU geldi- ge terugneming en verwerking van oude apparaten. Este aparelho está...
- Page 63 T LSP :(((...
- Page 64 ES Condiciones de garantia DE Garantie A este aparato son aplicables las condiciones de Bundesrepublik Deutschland garantia acordadas por la representación de siehe letzte Seite. nuestra firma en el pais de compra. Para más Ausland: Für dieses Gerät gelten die von der detalles sirvanse dirgir al correspondiente Vertretung unseres Hauses in dem Kaufland establecimiento del ramo en que se ha comprado...
- Page 66 : \ 6 : \ 6 ‡ ‡ ƒ ± ‡ ‡ ‡ S ZZZ E...
- Page 67 VXAS VXAS VXAS VXAS VXAS V AS HMOVE N VXAS HMOVE N VXAS HMOVE N VXAS V AS V AS H ATH V AS H ATH V AS V AS H ZOOO V AS VR S 95 6 S ORT 52 ,5 / 6,/ 9, 6...
- Page 68 Рекомендуем Вам пользоваться услугами только авторизованных сервисных центров. Оригинальные аксессуары и средства по уходу для бытовой техники Bosch Вы можете приобрести в нашем фирменном интернет- магазине: www.bosch-home.ru/store. C условиями заказа, оплаты и доставки Вы можете ознакомиться на сайте. Также оригинальные...
- Page 73 Register your new device on MyBosch now and profit directly from: Free and easy registration – also on mobile phones: Expert advice for your Bosch home appliances, need help with problems or a repair from Bosch experts. Find out everything about the many ways Bosch can support you: Robert Bosch Hausgeräte GmbH...
- Page 75 InIssIA Nespresso, an exclusive system creating the perfect espresso, time after time. All machines are equipped with a unique extraction system that guarantees up to 19 Bar pressure. each parameter has been calculated with great precision to ensure that all the aromas from each Grand Cru can be extracted, to give the coffee body and create an exceptionally thick and smooth crema.
-
Page 76: Consignes De Securite
CONSIGNES DE SECURITE • L’appareil est conçu pour préparer à condition qu’ils bénéficient • Les enfants ne doivent pas utiliser des boissons conformément à ces d’une surveillance ou qu’ils aient l’appareil comme un jouet. AvERTiSSEmENT: les instructions. reçu des instructions quant à •... - Page 77 CONSIGNES DE SECURITE l’appareil doit être l’appareil sur ou à côté de surfaces • L’ é lectricité et l’ e au ensemble sont complètement le levier et ne connecté uniquement après chaudes telles que les radiateurs, les dangereux et peuvent conduire à le soulevez jamais pendant le l’installation�...
- Page 78 CONSIGNES DE SECURITE • Videz le réservoir d’ e au si l’appareil CONSERvEZ lES iNSTRuCTiONS • Tous les appareils Nespresso sont n’ e st pas utilisé pendant une durée soumis à des contrôles sévères. SuivANTES Transmettez-les aux prolongée (vacances etc…). Des tests de fiabilité, dans des •...
-
Page 79: Overview/ Presentation
OVERVIEW/ speCIfICATIons/ pResenTATIon speCIfICATIons Lever XN1001 Levier Coffee buttons (espresso and Lungo) Boutons café (espresso et Lungo) Water tank lid 12 cm 23 cm 32. 1 cm Couvercle du Coffee outlet réservoir d’eau sortie café 220–240 V, 50/60 Hz, 1150-1260 W Capsule container for 9 - 11 capsules Max/max. -
Page 80: Energy Saving Mode/ Mode D'economie D'energie
ENERGY SAVING MODE/ MODE D’ECONOMIE D’ENERGIE This machine is equipped with an energy saving feature. The machine will automatically enter power off mode after 9 minutes. Cette machine est équipée d’une fonction d’économie d’énergie. La machine se met automatiquement en mode économie d’énergie au bout de 9 minutes. To turn the machine on either press the To turn the machine off before automatic espresso or Lungo button. -
Page 81: First Use Or After Long Period Of Non-Use
FIRST USE OR AFTER A LONG PERIOD OF NON-USE/ pReMIeRe uTILIsATIon ou ApRes une LonGue PERIODE DE NON-UTILISATION CAuTiON: first read the safety precautions to avoid risks of fatal electrical shocks and fire� REmARquE: veuillez lire les consignes de sécurité pour éviter les risques de décharges électriques mortelles et d’incendie�... -
Page 82: Coffee Preparation/Preparation Du Cafe
Coffee pRepARATIon/ PREPARATION DU CAFE 1. Rinse then fill the 2. press the espresso or Lungo button Blinking Lights: heating water tank with fresh to activate the machine. up (25 sec.) drinking water. 2. Appuyez sur le bouton espresso ou Voyants clignotants: 1. -
Page 83: Programming The Water Volume
PROGRAMMING THE WATER VOLUME/ PROGRAMMATION DU VOLUME D’EAU 1. Turn the machine on and 2. fill the water tank with 3. place a cup under wait for it to be in ready fresh drinking water and the coffee outlet. mode (steady lights). insert a Nespresso capsule. -
Page 84: Emptying The System Before A Period Of Non-Use And For Frost
EMPTYING THE SYSTEM BEFORE A PERIOD OF NON-USE AND foR fRosT pRoTeCTIon, oR BefoRe A RepAIR/ VIDANGE DU SYSTEME AVANT UNE PERIODE D’INUTILISATION, POUR LA PROTECTION CONTRE LE GEL OU AVANT UNE REPARATION 1. To enter the emptying mode, 2. Remove the water tank 3. -
Page 85: Reset To Factory Settings
ReseT To fACToRy seTTInGs/ RESTAURER LES REGLAGES D’USINE 1. With machine being 2. LEDS will blink fast 3 times to turned off, press and hold confirm machine has been reset down the Lungo button for to factory settings. 5 seconds. 2. -
Page 86: Descaling/ Detartrage
DESCALING/ DETARTRAGE NOTE: duration approximately 15 minutes� REmARquE: la durée approximative est de 15 minutes� 1. Remove the capsule and 2. empty the drip tray and used 3. fill the water tank with close the lever. capsule container. 0.5 L of fresh drinking water and add 1 Nespresso 1. - Page 87 DESCALING/ DETARTRAGE 9. When ready, repeat step 4 10. To exit the descaling mode, Blinking Lights: heating 11. The machine is and 6 to now rinse the machine. press both the epresso and Lungo up (25 sec.) now ready for use. Repeat twice.
-
Page 88: Cleaning/ Nettoyage
CLeAnInG/ neTToyAGe Clean the coffee outlet regularly wARNiNG with a soft damp cloth. Risk of fatal elec trical shock and fire� nettoyez la sortie du café never immerse the appliance or part of it in water. régulièrement avec un chiffon Be sure to unplug the machine before cleaning. -
Page 89: Troubleshooting/ Pannes
TROUBLESHOOTING/ pAnnes no light indicator. ➔ Check the mains, plug, voltage, and fuse. In case of problems, call the Nespresso Club. ➔ first use: fill water tank with warm water (max. 55° C) and run through machine according to instructions on page 10. -
Page 90: Contact The Nespresso Club/C Contacter Le Club Nespresso
CONTACT THE Nespresso CLuB/ ConTACTeR Le CLuB Nespresso As we may not have forseen all uses of your appliance, should you need any additional information, in case of problems or simply to seek advice, call the Nespresso Club or your Nespresso authorized representative. Contact details for your nearest Nespresso Club or your Nespresso authorized representative can be found in the «Welcome to Nespresso»... -
Page 91: Ecolaboration: Ecolaboration.com/ Ecolaboration: Ecolaboration.com
eCoLABoRATIon: eCoLABoRATIon.CoM/ eCoLABoRATIon: eCoLABoRATIon.CoM We have committed to buy coffee of the very highest quality grown in a way that is respectful of the environment and farming communities. since 2003 we have been working together with the Rainforest Alliance developing our Nespresso AAA sustainable Quality Coffee program. -
Page 92: Limited Guarantee/ Garantie Limitee
LIMITED GUARANTEE/ GARAnTIe LIMITee Krups guarantees this product against defects in materials and workmanship for a period of two years from the date of purchase. During this period, Krups will either repair or replace, at its discretion, any defective product at no charge to the owner. Replacement products or repaired parts will be guaranteed for only the unexpired portion of the original guarantee or six months, whichever is greater. This limited guarantee does not apply to any defect resulting from accident, misuse, improper maintenance, or normal wear and tear. - Page 93 1800 623 033 06 80 2582 80 800 260 260 0800 216251 800 39 20 29 8000888 80001999 962 79 9 835 835 0800 222 000 0800 162 64 965 249 22 600 8800 200 00 0 80002223 961 5 953 700 590 590 871570 800263333 8002 26 33...
- Page 94 X N 1 0 0 1 B Y N e s p r e s s o NES-432001-2002E-2...