Table des Matières
Publicité
Les langues disponibles
Les langues disponibles
Liens rapides
GB
Blender
Operation Manual
(Original Instructions)
Visit https://hamiltonbeach.global for our complete
line of products and Use and Care Guides – as well as
delicious recipes, tips, and to register your product online.
(20)
ZH
多功能高速破壁攪拌機
操作手冊
請訪問
https://hamiltonbeach.global
整產品系列以及使用和保養指南、美味食譜和
小貼士,並在線註冊購買的產品!
MS
Pengisar
Manual Pengendalian
Lawati https://hamiltonbeach.global untuk barisan
produk kami yang lengkap dan Panduan Penggunaan
dan Penjagaan – begitu juga dengan resipi yang sedap,
tip dan untuk daftar barang anda secara dalam talian.
FR
Mélangeur
Manuel d'utilisation
Rendez-vous sur le site Internet https://hamiltonbeach.global
pour consulter notre gamme complète de produits ainsi que nos
guides d'utilisation et d'entretien - vous pourrez aussi consulter
de délicieuses recettes, des astuces et enregistrer votre produit
en ligne !
Hamilton Beach Brands, Inc.
Glen Allen, VA 23060
840316700 | 05/19
(2)
AR
(36)
,查看我們的完
.
(52)
(68)
Type: B79
Publicité
Table des Matières
Dépannage

Manuels Connexes pour Hamilton Beach Professional 58928-SAU


Sommaire des Matières pour Hamilton Beach Professional 58928-SAU
- Page 1 Blender Operation Manual (Original Instructions) Visit https://hamiltonbeach.global for our complete line of products and Use and Care Guides – as well as delicious recipes, tips, and to register your product online. (20) 多功能高速破壁攪拌機 (36) 操作手冊 請訪問 ,查看我們的完 https://hamiltonbeach.global 整產品系列以及使用和保養指南、美味食譜和 小貼士,並在線註冊購買的產品! Pengisar Manual Pengendalian (52)
-
Page 2: Important Safeguards
IMPORTANT SAFEGUARDS When using electrical appliances, basic safety precautions should always be followed to reduce the risk of fire, electric shock, and/or injury to persons, including the following: cord, plug, base, or motor in ead all instructions. water or other liquid. his appliance is not intended urn the appliance OFF( ), for use by persons with... - Page 3 he use of attachments, o not use a broken, including canning jars, not chipped, or cracked blender recommended or sold by jar. the appliance manufacturer e careful if hot liquid is may cause a risk of injury to poured into the blender as persons.
- Page 4 top of the lid, keep exposed inadvertent resetting of the skin away from the lid, and thermal cut-off, this appliance start blending at lowest speed. must not be supplied through an external switching device, nsure cutter assembly is such as a timer, or connected tight and secure to jar.
-
Page 5: Other Consumer Safety Information
Other Consumer Safety Information This product is intended for household use only. The len gth of the cord used on this where it can be pulled on by children or appliance was selected to reduce the accidentally tripped over. hazards of becoming tangled in or tripping If the Cutting Blade Assembly locks and over a longer cord. -
Page 6: Parts And Features
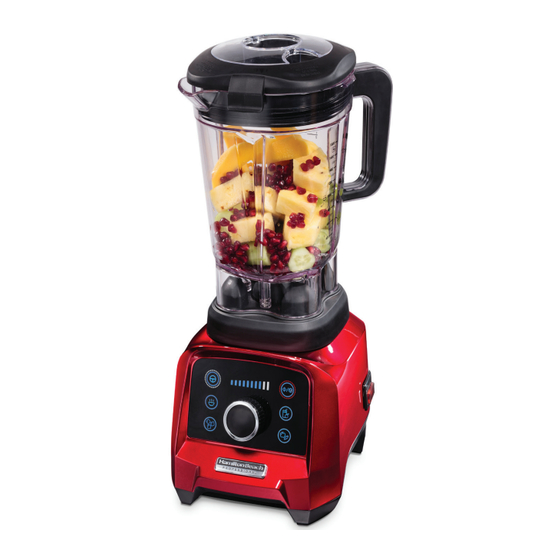
Jar Pad RESET/OFF (Power) (I/ ) Switch/ Circuit Breaker (on side of Base) Base START/STOP PULSE ) Button ( ) Button Program Speed Indicator Buttons (4) Lights Variable Speed Dial Model: 58928-SAU Type: B79 Ratings: 220–240 V~ 50–60 Hz 1400 W... - Page 7 Emulsion Cup: The Emulsion Cup helps create dressings and sauces that require slowly adding liquid ingredients into the Blender Jar while the Blender is in operation. Lid: The Lid is easy to put on, take off, and clean. Always use the Lid and the Emulsion Cup when the machine is in operation.
-
Page 8: Using Your Blender
Using Your Blender Before first use: After unpacking the Blender, follow the instructions in “Care and Cleaning.” IMPORTANT: The Blender Jar and Cutting Blade Assembly are subject to wear during normal use. Always inspect Jar for nicks, chips, or cracks. Always inspect Cutting Blade Assembly for broken, cracked, or loose blades. - Page 9 How to Open Blender Lid IMPORTANT: To remove the Lid, use your finger to pull up on the front tab. Do not twist the Lid to take it off the Jar — this might harm the Lid material and prevent it from sealing the Blender Jar.
- Page 10 Using Program Settings Programs are optimized for recipe categories and vary in blending speed and duration. Pressing a Program Button illuminates only the program selected. The Blender automatically starts when the Program Button is pressed and automatically stops at the end of the program. To stop Blender before program cycle ends, press START/STOP ( ) Button or the Program Button.
-
Page 11: Using Manual Mode
Using Manual Mode 1. Rotate the VARIABLE SPEED DIAL to 2. Press START/STOP ( ) and slowly leftmost. rotate the VARIABLE SPEED DIAL to the right or left during blending to increase or decrease blending speed. When pressing PULSE ( ), the Blender will run at selected speed until the PULSE ( ) Button is released. - Page 12 Using Manual Mode (cont.) 4. At the end of the blending cycle, 5. Remove Blender Jar. rotate the VARIABLE SPEED DIAL back to the leftmost position and w WARNING Burn Hazard. press the START/STOPw( ) Button to stop blending. Turn off the Blender Metal parts under with the RESET/OFF (I/ ) Switch.
-
Page 13: Blender Tips
Blender and Accessory Tips Blender Tips • Cutting large whole fruits and • To add foods when Blender is operating, remove Emulsion Cup and add vegetables may allow them to blend ingredients through the opening. more quickly. • For best performance, the minimum •... -
Page 14: Care And Cleaning
Care and Cleaning 1. Unplug Blender. 2. Remove Jar, Lid, and Emulsion Cup. Electrical Shock Hazard. w WARNING Disconnect power before cleaning. Do not immerse cord, plug, base, or motor in water or other liquid. Burn Hazard. w WARNING Metal parts under blending Jar get hot after extended use. -
Page 15: Error Messages
Troubleshooting Error Messages All Program Buttons are flashing. • The motor has overheated during use. Turn RESET/OFF (I/ ) (Power) Switch to OFF ( ) and allow to cool for 15 minutes. Flip RESET/OFF (I/ ) (Power) Switch to RESET (I), and resume normal operation. - Page 16 Troubleshooting (cont.) Blender fails to start and Program Lights are not illuminated. • Make sure that the main power RESET/OFF (I/ ) Switch is in the RESET (I) position. • Check to see if unit is securely plugged into an electrical socket of the proper voltage and frequency.
- Page 17 Notes...
- Page 52 PERLINDUNGAN PENTING Apabila menggunakan perkakas elektrik, langkah keselamatan asas harus sentiasa diikuti untuk mengurangkan risiko kebakaran, kejutan elektrik, dan/atau kecederaan kepada individu, termasuk yang berikut: kord, plag, asas atau motor aca semua arahan. dalam air atau cecair lain. erkakas ini tidak bertujuan usingkan perkakas ke untuk penggunaan oleh OFF( ), kemudian cabut...
- Page 53 atau pelarasan. pembersihan balang pengisar. enggunaan sambungan, angan gunakan balang termasuk pengetinan balang, pengisar yang pecah, tidak disyorkan atau dijual sumbing atau retak. oleh pengilang perkakas erhati-hati jika cecair boleh menyebabkan risiko panas dituangkan ke dalam kecederaan kepada individu. pengisar kerana ia boleh angan guna di luar rumah.
- Page 54 AWAS! U tuala tebal, letakkan satu ntuk tangan di atas penutup, mengelakkan bahaya jauhkan kulit yang terdedah akibat penetapan semula daripada penutup, dan mula pemotongan haba yang mengisar pada kelajuan tidak disengajakan, perkakas terendah. ini tidak boleh dikuasakan astikan pemasangan melalui peranti pensuisan pemotong ketat dan dipasang luar, seperti pemasa, atau...
- Page 55 Maklumat Keselamatan Pengguna Lain Produk ini bertujuan untuk kegunaan di rumah sahaja. Panjang kord yang digunakan pada ia boleh ditarik oleh kanak-kanak atau perkakas ini telah dipilih untuk secara tidak sengaja tersadung. mengurangkan bahaya menjadi kusut atau Jika Pemasangan Bilah Pemotongan tersadung pada kord yang lebih panjang.
- Page 56 Bahagian dan Ciri-Ciri Sebelum penggunaan pertama: Selepas mengeluarkan Pengisar, ikuti arahan dalam "Membersihkan Pengisar Anda." Cawan Emulsi Penutup Penghentak Balang Pengisar Pemasangan Bilah Pemotongan Suis/Pemutus Litar RESET/OFF Pad Balang (Kuasa) (I/ ) (pada bahagian tepi Tapak) Tapak Butang START/STOP Butang PULSE ( ) Butang Lampu Penunjuk...
- Page 57 Cawan Emulsi: Cawan Emulsi membantu menghasilkan peraga dan sos yang memerlukan secara perlahan menambahkan bahan cecair ke dalam Balang Pengisar sementara Pengisar sedang beroperasi. Penutup: Penutup mudah dipakai, dikeluarkan, dan dibersihkan. Sentiasa gunakan Penutup dan Cawan Emulsi apabila mesin sedang beroperasi. Balang Pengisar: Ukuran isipadu ditanda dengan jelas.
- Page 58 Menggunakan Pengisar Anda Sebelum penggunaan pertama: Selepas mengeluarkan Pengisar, ikuti arahan dalam "Penjagaan dan Pembersihan". PENTING: Balang Pengisar dan Pemasangan Bilah Pemotongan boleh haus semasa penggunaan biasa. Sentiasa perhatikan Balang untuk torehan, sumbing, atau retakan. Sentiasa perhatikan Pemasangan Bilah Pemotongan untuk bilah yang pecah, retak, atau longgar. Jika Balang atau Pemasangan Bilah Pemotongan rosak, jangan gunakannya.
- Page 59 Cara Membuka Penutup Pengisar PENTING: Untuk mengeluarkan Penutup, gunakan jari anda untuk menarik ke atas pada tab depan. Jangan putar Penutup untuk mengeluarkannya dari Balang — ini boleh merosakkan bahan Penutup dan menghalangnya daripada menutup Balang Pengisar. Pegang pemegang Balang dengan kuat. Untuk membuka Penutup, letakkan jari di tab depan.
- Page 60 Menggunakan Tetapan Program Program dioptimumkan untuk kategori resipi dan berbeza mengikut kelajuan dan tempoh pengisaran. Menekan Butang Program hanya menyalakan program yang dipilih. Pengisar bermula secara automatik apabila Butang Program ditekan dan berhenti secara automatik di penghujung program. Untuk menghentikan Pengisar sebelum kitaran program berakhir, tekan Butang START/STOP ( ) atau Butang Program.
- Page 61 Menggunakan Mod Manual 1. Putar DAIL LAJU PEMBOLEHUBAH ke 2. Tekan START/STOP ( ) dan paling kiri. dengan perlahan putarkan DAIL LAJU PEMBOLEHUBAH ke kanan atau kiri semasa pengisaran untuk meningkatkan atau mengurangkan kelajuan pengisaran.Apabila menekan PULSE ( ), Pengisar akan beroperasi pada kelajuan yang dipilih sehingga Butang PULSE ( ) dilepaskan.
- Page 62 Menggunakan Mod Manual (samb.) 4. Pada akhir kitaran pengisaran, putar 5. Keluarkan Balang Pengisar. DAIL LAJU PEMBOLEHUBAH kembali ke kedudukan paling kiri dan tekan Bahaya Lecur. w AMARAN Butang START/STOP( ) untuk menghentikan pengisaran. Matikan Bahagian logam Pengisar dengan Suis RESET/OFF di bawah Balang (I/ ).
- Page 63 Tips Pengisar dan Aksesori Tip Pengisar • Memotong buah dan sayur yang besar • Untuk menambah makanan semasa Pengisar sedang beroperasi, keluarkan akan membolehkan mereka dikisar Cawan Emulsi dan tambah bahan lebih cepat. melalui bukaan. • Jangan isi Balang Pengisar melepasi •...
- Page 64 Penjagaan dan Pembersihan 1. Cabut plag Pengisar. 2. Keluarkan Balang, Penutup, dan Cawan Emulsi. Bahaya Kejutan Elektrik. w AMARAN Cabut plag kuasa sebelum pembersihan. Jangan rendam kord, plag, tapak, atau enjin dalam air atau cecair lain. Bahaya Lecur. w AMARAN Bahagian logam di bawah Balang pengisaran menjadi panas selepas digunakan untuk masa yang lama.
-
Page 65: Penyelesaian Masalah
Penyelesaian Masalah Mesej Ralat Semua Butang Program berkelip. • Enjin telah menjadi terlalu panas semasa penggunaan. Pusingkan SuisRESET/OFF (I/ ) (Kuasa) ke OFF ( ) dan biarkan sejuk selama 15 minit. Tekan SuisRESET/OFF (I/ ) (Kuasa) ke RESET (I), dan sambung operasi biasa. - Page 66 Penyelesaian Masalah (samb.) Pengisar gagal untuk hidup dan Lampu Program tidak bercahaya. • Pastikan bahawa kuasa utama Suis RESET/OFF (I/ ) berada dalam kedudukan RESET (I). • Periksa sama ada unit dipasangkan dengan selamat ke dalam soket elektrik dengan voltan dan kekerapan yang betul.
- Page 67 Nota...
-
Page 68: Mises En Garde Importantes
MISES EN GARDE IMPORTANTES Observez toujours les consignes essentielles de sécurité lors de l’utilisation d’appareils électriques, afin de réduire le risque d’incendie, d’électrocution ou de blessure corporelle, notamment ce qui suit : aucun autre liquide. ire toutes les instructions. ébranchez la fiche de la our des raisons de sécurité, prise secteur ( ), lorsque cet appareil ne doit pas être... - Page 69 y compris de bocaux à e pas utiliser un pot cassé, conserves, qui ne sont ni ébréché, ou craqué. recommandés ni vendus renez toutes les précautions par le fabricant de l'appareil nécessaires lorsque vous peut entraîner des risques de versez du liquide chaud dans blessures.
- Page 70 MISE EN GARDE ! maintenez la peau exposée à distance du couvercle et fin d’éviter tout risque dû commencez à mélanger à la à une reprise accidentelle vitesse la plus basse. du système de coupure ssurez-vous que la partie thermique, cet appareil ne contenant la lame, soit doit pas être alimenté...
-
Page 71: Autres Consignes De Sécurité Destinées Au Consommateur
Autres consignes de sécurité destinées au consommateur Ce produit est destiné à un usage ménager uniquement. La lon gueur du cordon d’alimentation sur le plan de travail ni sur la table, afin installé sur cet appareil a été d’éviter que des enfants ne tirent dessus et sélectionnée afin de réduire les risques de minimiser tout risque de trébuchement. -
Page 72: Pièces Et Fonctionnalités
Pièces et fonctionnalités Avant la première utilisation : Après avoir déballé le mélangeur, suivez les instructions de la section « Nettoyage de votre mélangeur ». Coupe d'émulsion Couvercle Pilon Pot du mélangeur Lame Bouton RESET / OFF (remettre à Support du pot zéro / arrêt) (I / ) Interrupteur / Disjoncteur (sur le côté... - Page 73 Coupe d'émulsion : La coupe d'émulsion permet de créer des vinaigrettes et des sauces qui nécessitent d’ajouter lentement des ingrédients liquides dans le pot pendant le fonctionnement du mélangeur. Couvercle : Le couvercle est facile à poser, à enlever et à nettoyer. Utilisez toujours le couvercle et la coupe d'émulsion lorsque l’appareil fonctionne.
-
Page 74: Utilisation Du Mélangeur
Utilisation du mélangeur Avant la première utilisation : Après avoir déballé le mélangeur, suivez les instructions de la section « Entretien et nettoyage ». IMPORTANT : L'assemblage du pot et du système des lames est sujet à l'usure lors d'une utilisation normale. -
Page 75: Comment Ouvrir Le Couvercle Du Mélangeur
Comment ouvrir le couvercle du mélangeur IMPORTANT : Pour retirer le couvercle, utilisez votre doigt pour tirer sur la languette avant. Ne tordez pas le couvercle pour le retirer du pot - cela pourrait endommager le matériau du couvercle et l'empêcher de sceller le bocal du mélangeur. Tenez fermement la poignée du pot. -
Page 76: Utilisation Des Paramètres Des Programmes
Utilisation des paramètres des programmes Les programmes sont optimisés pour des catégories de recettes et varient en vitesse et en durée de mélange. Appuyez sur l’une des touches des différents programmes et le voyant du programme sélectionné s’allumera. Le mélangeur se met en marche automatiquement lorsque vous appuyez sur le bouton d’un programme et s’arrête automatiquement à... -
Page 77: Utilisation Du Mode Manuel
Utilisation du mode manuel 1. Placez le SÉLECTEUR DE VITESSE à fond 2. Appuyez sur START / STOP (marche sur la gauche. / arrêt) ( ) et tournez lentement le sélecteur de vitesse vers la droite ou vers la gauche pendant le mélange pour augmenter ou diminuer la vitesse du mélange. - Page 78 Utilisation du mode manuel (suite) 4. À la fin du cycle de mélange, ramenez 5. Enlevez le pot du mélangeur. le SÉLECTEUR DE VITESSE sur la position à fond à gauche et appuyez sur le bouton START / STOP (marche / arrêt) ( ) pour arrêter le mélangeur.
-
Page 79: Conseils Pour Utiliser Le Mélangeur Et Les Accessoires
Conseils pour utiliser le mélangeur et les accessoires Conseils pour utiliser le mélangeur • Pour ajouter des aliments lorsque • Coupez les gros fruits et les gros le mélangeur est en marche, retirez légumes afin qu’ils se mélangent plus la coupe d’émulsion et ajoutez les rapidement. -
Page 80: Entretien Et Nettoyage
Entretien et nettoyage 1. Débranchez le mélangeur. 2. Enlevez le pot, le couvercle et la coupe d'émulsion. Risque d’électrocution. AVERTISSEMENT Débranchez l’alimentation électrique avant de nettoyer l’appareil. N’immergez ni le cordon d’alimentation, ni la prise, ni la base, ni le moteur dans du liquide. Risque de brûlure. -
Page 81: Dépannage
Dépannage Messages d'erreur Tous les boutons des programmes clignotent. • Le moteur a surchauffé pendant l'utilisation du mélangeur. Tournez le bouton RESET / OFF (remettre à zéro / arrêt) (I / ) Interrupteur (alimentation) sur OFF - arrêt ( ) et laissez-le refroidir pendant 15 minutes. -
Page 82: Dépannage (Suite)
Dépannage (suite) Le mélangeur ne démarre pas et les voyants des programmes ne sont pas allumés. • Assurez-vous que le bouton d’alimentation RESET / OFF (remettre à zéro / arrêt) (I/ ) soit sur la position (I) RESET (remettre à zéro). •... -
Page 83: Remarques
Remarques... - Page 84 © 2019 Hamilton Beach Brands, Inc. 4421 Waterfront Drive Glen Allen, VA 23060 840316700 | 05/19...