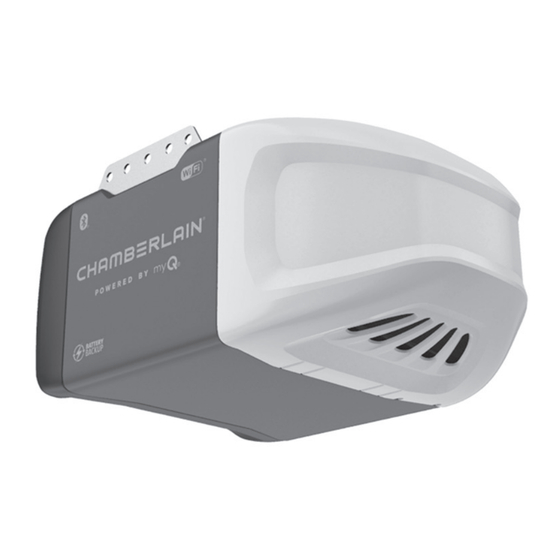
Chamberlain B4505TC Manuel D'installation
Ouvre-porte de garage entraîné par courroie
Masquer les pouces
Voir aussi pour B4505TC:
- Manuel d'installation (96 pages) ,
- Manuel d'installation (104 pages)
Table des Matières
Les langues disponibles
Les langues disponibles
Installation Manual
Belt Drive Garage Door Opener
Models B2202C • B2405C • B4505TC
FOR RESIDENTIAL USE ONLY
PRE PROGRAMMED REMOTE
CONTROL INCLUDED
To register your garage door opener to receive updates and offers
from Chamberlain, visit chamberlain.registria.com or use the icon
below:
1. Take a photo of the camera icon including
the points (
).
2. Send it in by texting the photo to 71403 (US).
• Please read this manual and the enclosed safety materials carefully!
• Fasten the manual near the garage door after installation.
• The door WILL NOT CLOSE unless the Protector System® is connected and properly aligned.
• Periodic checks of the garage door opener are required to ensure safe operation.
• The model number label is located on the left side panel of your garage door opener.
• This garage door opener is compatible with myQ® and Security+ 2.0® accessories.
• DO NOT install on a one-piece door if using devices or features providing unattended close. Unattended devices
and features are to be used ONLY with sectional doors.
Download the myQ®
App
www.chamberlain.com
Available on most iOS and Android Devices
Chapitres
Table des Matières
Dépannage

Manuels Connexes pour Chamberlain B4505TC


Sommaire des Matières pour Chamberlain B4505TC
-
Page 49: Télécommande Pré-Programmée Incluse
TÉLÉCOMMANDE PRÉ-PROGRAMMÉE INCLUSE Pour enregistrer votre ouvre-porte de garage afin de recevoir des mises à jour et des offres de Chamberlain, visitez Chamberlain.registria.com ou utilisez l’icône ci-dessous : • Veuillez lire attentivement ce manuel et les documents relatifs à la sécurité ci-joints! •... - Page 50 Modèle B4505TC ........
-
Page 51: Préparation
Préparation Préparation Vérifiez la porte Avant de vous connecter avec votre téléphone intelligent Surveillez et contrôlez votre porte de garage de n’importe où à l’aide de l’application myQ ® Vous aurez besoin d’un routeur avec Wi-Fi ® et d’un téléphone intelligent ou d’un autre appareil mobile. -
Page 52: Outils Nécessaires
Préparation Outils nécessaires Articles supplémentaires dont vous pourriez avoir besoin : Examinez votre garage pour voir si vous aurez besoin de l’un des éléments suivants : (2) morceaux de bois 2X4 : Peuvent être utilisés pour fixer le support de linteau aux supports structurels. -
Page 53: Inventaire Du Carton
15. Contrôle de la porte à bouton-poussoir - Modèle B2202C Panneau de commande à plusieurs fonctions - Modèle B2405C Panneau de commande de détection de mouvement - Modèle B4505TC 16. Fil blanc et rouge/blanc Manuel d’installation et toutes les étiquettes d’avertissement Voir Matériel, page 6. - Page 54 Préparation Matériel COMMANDE DE ASSEMBLAGE INSTALLATION PORTE Boulon Vis autotaraudeuse Modèles B2405 et B4505T Boulon 1/4 po - Tirefond 5/16 po - 9 x 1 - 5/8 po (4) 1/4 po - 14 x 5/8 po (2) 20 x 1 - 3/4 po Chevilles pour cloisons sèches (2) Vis 6 - 32 x 1 po (2) Arbre fileté...
-
Page 55: Assemblage
Assemblage ÉTAPE 1 Assembler le rail et installer le chariot ATTENTION Faites glisser jusqu’aux butées Pour éviter les BLESSURES par pincement, gardez les mains et les doigts éloignés des du dessus et des joints lorsque vous assemblez le rail. côtés du support en « U »... -
Page 56: Étape 2 Fixer Le Rail Au Bloc Moteur
Assemblage ÉTAPE 2 Fixer le rail au bloc moteur MATÉRIEL ATTENTION Boulon Écrou d’arrêt 1/4 po - 20 x 1/4 po - 20 1-3/4 po Pour éviter de GRAVES dommages à l’ouvre-porte de garage, utilisez UNIQUEMENT les boulons/attaches montés sur le dessus de l’ouvre-porte. Boulons (montés dans Insérez un boulon 1/4 po - 20 x 1 3/4 po dans le trou du boulon de protection du couver- l’ouvre-porte de garage) -
Page 57: Étape 3 Installer La Poulie De Tension
Assemblage ÉTAPE 3 Installer la poulie de tension MATÉRIEL Boulon Écrou 3/8 po Rondelle d’arrêt 3/8 po 1. Posez la courroie à côté du rail, tel qu’illustré. Saisissez l’extrémité avec le connecteur de chariot à crochet et passez environ 30 cm (12 po) de courroie à travers la fenêtre. Gardez le côté... -
Page 58: Étape 4 Installer La Courroie
Assemblage ÉTAPE 4 Installer la courroie MATÉRIEL Arbre fileté avec écrou de chariot à ressort 1. Tirez la courroie pour entourer la poulie de tension, en allant vers le chariot. Le côté nervuré doit entrer en contact avec la poulie. 2. -
Page 59: Étape 5 Serrer La Courroie
Assemblage ÉTAPE 5 Serrer la courroie ÉTAPE 6 Installer le couvercle du pignon Vissez à la main l’écrou du chariot à ressort sur l’arbre fileté jusqu’à ce qu’il soit bien serré (à la main) contre le chariot N’utilisez aucun outil. Retirez le tournevis. Insérez la pointe d’un tournevis à... -
Page 60: Installation
Installation INSTRUCTIONS D’INSTALLATION IMPORTANTES AVERTISSEMENT Pour réduire le risque de BLESSURES GRAVES voire MORTELLES : 1. LISEZ ET SUIVEZ TOUS LES AVERTISSEMENTS ET TOUTES LES 9. Installez la commande de porte de garage murale : INSTRUCTIONS D’INSTALLATION. en vue de la porte de garage. ... -
Page 61: Étape 1 Déterminer L'emplacement Du Support De Linteau
Installation ÉTAPE 1 Déterminer l’emplacement du support de linteau Mur du linteau Ligne médiane verticale de la porte FIXATION AU PLAFOND EN OPTION de garage POUR SUPPORT DE LINTEAU Supports structurels Plafond non fini Pour éviter d’éventuelles BLESSURES GRAVES voire MORTELLES : Le support de linteau DOIT être fixé... -
Page 62: Étape 2 Installer Le Support De Linteau
Installation ÉTAPE 2 Installer le support de linteau INSTALLATION MURALE Mur du linteau Ligne médiane Vous pouvez fixer le support de linteau soit au mur au-dessus de la porte de garage, soit au Support plafond. Suivez les instructions qui conviendront le mieux à vos besoins particuliers. N’installez verticale de structurel 2x4 pas le support de linteau sur une cloison sèche. -
Page 63: Étape 3 Fixer Le Rail Au Support De Linteau
Installation ÉTAPE 4 Positionner l’ouvre-porte de garage ÉTAPE 3 Fixer le rail au support de linteau Placez l’ouvre-porte sur le sol du garage, sous le support de linteau. Utilisez des matériaux ATTENTION d’emballage comme base de protection. REMARQUE : Si le ressort de la porte gêne, vous aurez besoin d’aide. Demandez à quelqu’un de tenir fermement l’ouvre-porte sur un support temporaire pour permettre au rail de dégager le ressort. -
Page 64: Étape 5 Accrocher L'ouvre-Porte De Garage
Installation ÉTAPE 5 Accrocher l’ouvre-porte de garage MATÉRIEL Écrou Tirefond 5/16 po - 18 5/16 po - 9 x 5/8 po Pour éviter d’éventuelles BLESSURES GRAVES causées par la chute d’un ouvre-porte de garage, fix- ez-le SOLIDEMENT aux supports de la structure du garage. Des ancrages à béton DOIVENT être utilisés Rondelle d’arrêt si vous installez TOUT support dans la maçonnerie. -
Page 65: Étape 6 Installer Les Ampoules
N’utilisez JAMAIS la poignée pour ouvrir ou fermer la porte. Si le nœud de la corde se défait, Utiliser UNIQUEMENT les ampoules à DEL recommandées ici : chamberlain.com/bulb. vous risquez de tomber. 1. Insérez une extrémité de la corde de déclenchement d’urgence à travers la poignée. -
Page 66: Étape 8 Installer Le Support De Porte
Installation ÉTAPE 8 Installer le support de porte MATÉRIEL ATTENTION Vis autotaraudeuse 1/4 po - 14 x 5/8 po Les portes de garage en fibre de verre, en aluminium ou en acier léger DEVRONT être renforcées AVANT l’installation du support de porte. Contactez le fabricant de la porte de garage ou le revendeur qui s’est chargé... -
Page 67: Étape 8 Installer Le Support De Porte (Suite)
Installation Mur du linteau ÉTAPE 8 Installer le support de porte (suite) Support 2x4 (Plafond fini) OPTION B - PORTES MONOBLOC 1. Centrez le support de porte sur le dessus de la porte, en ligne avec le support de linteau Support de linteau tel qu’illustré. -
Page 68: Étape 9 Connecter Le Bras De Porte Au Chariot
Installation MATÉRIEL ÉTAPE 9 Connecter le bras de porte au chariot L’installation variera selon le type de porte de garage. Suivez les instructions qui s’appliquent à votre porte. OPTION A - PORTES SECTIONNELLES Axe à épaulement Axe à épaulement Boulon à six pans IMPORTANT : La rainure du bras de porte droit DOIT faire face à... -
Page 69: Étape 9 Connecter Le Bras De Porte Au Chariot (Suite)
Installation ÉTAPE 9 Connecter le bras de porte au chariot (suite) OPTION B - PORTES MONOBLOC Bras de porte droit IMPORTANT : La rainure du bras de porte droit DOIT faire face à l’opposé du bras de porte incurvé. (rainure tournée Fermez la porte. -
Page 70: Installer De La Commande De La Porte
Installation ÉTAPE 10 Installer la commande de porte Dénudez 6 mm (1/4 po) d’isolant à une extrémité du fil et séparez les fils. Connectez un fil à chacune des deux vis à l’arrière de la commande de porte. Les fils peuvent BOUTON POUSSOIR DE LA COMMANDE DE PORTE être connectés à... -
Page 71: Panneau De Commande À Plusieurs Fonctions
Ancrage pour 6-32 x 1 po cloisons sèches Les anciennes commandes de porte Chamberlain et les produits de tiers ne sont pas compatibles. Installez la commande de porte à portée de vue de la porte de garage, hors de portée des jeunes 6 AB x 1 po enfants, à... -
Page 72: Étape 12 Fixer Les Étiquettes D'avertissement
Installation ÉTAPE 11 Câbler la commande de porte à l’ouvre-porte de garage ÉTAPE 12 Fixer les étiquettes d’avertissement Faites passer le fil blanc et rouge/blanc de la commande de porte à l’ouvre-porte de garage. Fixez l’étiquette d’avertissement de piégeage sur le mur, près de la commande de porte, avec Fixez le fil au mur et au plafond avec l’agrafe (ne s’applique pas aux boîtes de commande ou des punaises ou des agrafes. -
Page 73: Installer Le Protector System
Installation ÉTAPE 13 Installer le Protector System MATÉRIEL ® Vis à six pans 10-24 (2) Écrou à oreilles (2) Vérifiez que l’alimentation n’est PAS connectée à l’ouvre-porte de garage AVANT d’installer le capteur d’inversion de sécurité. Pour éviter des BLESSURES GRAVES voire MORTELLES en Les capteurs d’inversion de sécurité... -
Page 74: Étape 13 Installer Le Protector System (Suite)
Installation ÉTAPE 13 Installer le Protector System (suite) OPTION AU SOL Mesurez la position des deux supports de capteur afin qu’ils soient à la même distance du OPTION MURALE mur et sans obstruction. Assurez-vous que les supports de chaque côté sont éloignés du rail de la porte et ont le même 2. -
Page 75: Étape 14 Câbler Les Capteurs D'inversion De Sécurité
Installation ÉTAPE 14 Câbler les capteurs d’inversion de sécurité MATÉRIEL Agrafe isolée (non illustré) Si votre garage a un câblage pré-installé pour les capteurs d’inversion de sécurité, voir l’OPTION B – INSTALLATION PRÉ-CÂBLÉE, page 28. OPTION A : INSTALLATION SANS PRÉ-CÂBLAGE Faites passer le fil des deux capteurs à l’ouvre-porte de garage. Fixez avec des agrafes, mais NE percez PAS le fil. -
Page 76: Étape 14 Câbler Les Capteurs D'inversion De Sécurité (Suite)
Installation ÉTAPE 14 Câbler les capteurs d’inversion de sécurité Fils pré- (suite) installés 11 mm (7/16 po) OPTION B : INSTALLATION PRÉCÂBLÉE Coupez les fils du capteur, en vous assurant qu’il y a une longueur suffisante de fil pour atteindre les fils préinstallés du mur. 2. -
Page 77: Connecter L'alimentation
Installation ÉTAPE 15 Connecter l’alimentation IL EXISTE DEUX OPTIONS POUR CONNECTER L’ALIMENTATION : AVERTISSEMENT OPTION A - CÂBLAGE TYPIQUE Branchez l’ouvre-porte de garage dans une prise de courant mise à la terre. 2. NE PAS faire fonctionner l’ouvre-porte de garage à ce moment-là. Pour éviter les risques de BLESSURES GRAVES voire MORTELLES par électrocution ou OPTION B - CÂBLAGE PERMANENT incendie :... -
Page 78: Étape 16 Aligner Les Capteurs D'inversion De Sécurité
Installation ÉTAPE 16 Aligner les capteurs d’inversion de sécurité DÉPANNAGE DU CAPTEUR DE SÉCURITÉ Si l’un des deux voyants des capteurs est éteint, le capteur n’est pas alimenté : IMPORTANT : Les capteurs d’inversion de sécurité DOIVENT être connectés et alignés Vérifiez que l’ouvre-porte de garage est alimenté... -
Page 79: Ajustements
Ajustements Introduction PORTES D’UNE SEULE PIÈCE UNIQUEMENT Lors du réglage du déplacement vers le haut d’une porte d’une seule pièce, assurez-vous que la porte n’est pas inclinée vers l’arrière lorsqu’elle est complètement ouverte (HAUTE). Si la porte est inclinée vers l’arrière, cela provoquera des secousses inutiles lors de l’ouverture ou de la fermeture de la porte. Si le capteur d’inversion de sécurité... -
Page 80: Programmez Le Déplacement
Ajustements - Programmez le déplacement AVERTISSEMENT - Réglez la force automatique Lorsque les positions de montée et de descente ont été réglées manuellement, les capteurs d’inversion Si le capteur d’inversion de sécurité n’est pas correctement installé, les personnes (en particulier les de sécurité... -
Page 81: Tester Le Système D'inversion De Sécurité
Ajustements - Tester le système d’inversion de sécurité - Testez le Protector System AVERTISSEMENT AVERTISSEMENT Si le capteur d’inversion de sécurité n’est pas installé correctement, Sans un système d’inversion de sécurité qui n’est pas installé les personnes (en particulier les jeunes enfants) peuvent SUBIR correctement, des personnes (en particulier les jeunes enfants) DES BLESSURES GRAVES voire MORTELLES causées pas une pourraient subir des BLESSURES GRAVES voire MORTELLE par... -
Page 82: Commande De L'application Myq
Commande de l’application myQ ® Connectez-vous avec votre téléphone intelligent VOUS AUREZ BESOIN : Un téléphone intelligent, une tablette ou un ordinateur portable compatible Wi-Fi ® Une connexion Internet à large bande Signal Wi-Fi dans le garage (2,4 GHz, 802,11b/g/n requis), voir la page 5 ®... -
Page 83: Fonctionnement
Fonctionnement CONSIGNES DE SÉCURITÉ IMPORTANTES AVERTISSEMENT Pour réduire le risque de BLESSURES GRAVES voire MORTELLES : 9. Après TOUT réglage, le système d’inversion de sécurité DOIT être testé. LISEZ ET SUIVEZ TOUS LES AVERTISSEMENTS ET TOUTES LES INSTRUCTIONS. 10. Le système d’inversion de sécurité DOIT être testé tous les mois. La porte DOIT s’inverser au Gardez TOUJOURS les télécommandes hors de portée des enfants. -
Page 84: Utilisation De La Commande De Votre Porte
Fonctionnement Utilisation de la commande de votre porte BOUTON DE VERROUILLAGE : Empêche les télécommandes de fonctionner, tout en permettant l’activation à partir de la commande de l’ouvre-porte ou système d’accès sans clé. (Le réglage PANNEAU DE CONTRÔLE DE DÉTECTION DE MOUVEMENT d’usine est Désactivé.) Pour activer : Appuyez et maintenez le bouton de verrouillage pendant 2 secondes. -
Page 85: Bouton Poussoir De La Commande De Porte
Fonctionnement PANNEAU DE COMMANDE À PLUSIEURS FONCTIONS BOUTON POUSSOIR DE LA COMMANDE BOUTON DE VERROUILLAGE : Empêche les télécommandes de fonctionner, tout en permettant l’activation DE PORTE à partir de la commande de l’ouvre-porte ou système d’accès Barre de poussée sans clé. (Le réglage d’usine est Désactivé.) Mise en marche : Appuyez et maintenez le bouton LOCK pendant deux Bouton poussoir... -
Page 86: Télécommande Et Entrée Sans Clé
® , vous aurez peut-être besoin d’un Compatibility Bridge™ (non compris). Visitez bridge.chamberlain.com pour savoir si vous avez besoin d’un Bridge (pont). Les lumières de l’ouvre-porte de garage clignoteront (ou vous entendrez deux clics) lorsque le code est programmé. Refaites les étapes pour programmer des télécommandes ou des dispositifs d’entrée sans clé... -
Page 87: Effacer La Mémoire
Fonctionnement Pour ouvrir la porte manuellement Effacer la mémoire EFFACER TOUTES LES TÉLÉCOMMANDES ET LES ENTRÉES SANS CLÉS Appuyez et maintenez le bouton LEARN (apprentissage) sur l’ouvre-porte jusqu’à ce que le voyant à DEL LEARN s’éteigne (environ 6 secondes). Tous les codes de télécommandes et des entrées sans clé... -
Page 88: Entretien
Entretien Planification de l’entretien AVIS : Cet appareil est conforme à la partie 15 du règlement de la FCC ainsi qu’avec le CNR exempt de licence d’Innovation, Science et Développement économique Canada. Son utilisation est sujette aux deux TOUS LES MOIS conditions suivantes : (1) cet appareil ne doit pas causer d’interférences nuisibles, et (2) cet appareil doit Activez manuellement la porte. -
Page 89: Dépannage
Dépannage Tableau des diagnostics Votre ouvre-porte de garage est programmé pour s’autodiagnostiquer. Les flèches vers le HAUT et le BAS de l’ouvre-porte de garage clignotent pour indiquer les codes de diagnostic. DIAGNOSTIC CODE SYMPTÔME SOLUTION Clignotements Clignotements Les capteurs d’inversion de sécurité ne sont pas installés, connectés ou les fils sont peut-être coupés. Inspectez les fils des capteurs L’ouvre-porte de garage ne ferme pas la porte. -
Page 90: Dépannage Supplémentaire
Pour certains véhicules, il pourrait être nécessaire d’installer un pont de compatibilité (non compris). pour vous assurer que l’ouvre-porte de garage fonctionne correctement. Visitez bridge.chamberlain.com pour savoir si vous avez besoin d’un Bridge (pont). Ma porte ne se ferme pas : Le capteur d’inversion de sécurité... -
Page 91: Garantie
Garantie Coordonnées de contact GARANTIE LIMITÉE CHAMBERLAIN ® The Chamberlain Group, Inc. (le « Vendeur ») garantit au premier acheteur au détail de ce produit, pour la résidence ® ARRÊTEZ! dans laquelle ce produit est installé à l’origine, qu’il est exempt de défauts de matériaux et/ou de fabrication pendant une période spécifique définie ci-dessous (la « Période de garantie »). -
Page 92: Guide De Sécurité Et D'entretien De L'ouvre-Porte De Garage Automatique
Guide de sécurité et d’entretien de l’ouvre-porte de garage automatique Sécurité de l’ouvre-porte de garage – Une décision automatique La porte de garage est le plus grand objet mobile d’une maison. Le réglage inapproprié de la porte de garage et de l’ouvre-porte peut entraîner une force mortelle lorsque la porte ferme, ce qui pourrait faire en sorte qu’un enfant ou un adulte soit coincé... -
Page 93: L'entretien De Routine Peut Éviter Des Tragédies
L’entretien de routine peut éviter des tragédies Faites des inspections et des tests de votre porte de garage et votre système d’ouvre-porte tous les mois en tant que partie de votre routine. Relisez le guide de l’utilisateur de la porte ainsi que de l’ouvre-porte. -
Page 94: Pièces Détachés
Pièces détachées Pièces d’assemblage de rail Pièces d’installation Description Numéro de pièce Description Numéro de pièce Courroie 041A5250 Bras de porte incurvé 041B0035B Poulie 144C0054M Support de porte, axe à épaulement et attache 041A5047-1 Lien maître 004A1008 Corde et poignée de déclenchement d’urgence 041A2828 Rail 041A5665... -
Page 95: Modèles B2202C Et B2405C
Pièces détachées Pièces de l’ouvre-porte de garage - Modèles B2202C et B2405C Description Numéro de pièce Couvercle de pignon 041A4371 Engrenage 041A4885-4 Couvercle du panneau d’extrémité avec éclairage 041D0207 Douille d’éclairage 041C0279 Lentille de lampe 041-0144 Condensateur K030B0532-1 Support de condensateur K012A0373 Module de déplacement 041D7742-7... -
Page 96: Modèle B4505Tc
Pièces détachées Pièces de l’ouvre-porte de garage - Modèle B4505TC Description Numéro de pièce Couverclede pignon 041C1751 Panneau d’extrémité du devant 041D0207 Lentille d’éclairage 041-0144 Douille d’éclairage 041C0279 Couvercle 041-0229-000 Moteur avec module de déplacement 041D8006-1 Module de déplacement 041D8071-4 Panneau d’extrémité...