Table des Matières
Publicité
Les langues disponibles
Les langues disponibles
Liens rapides
All manuals and user guides at all-guides.com
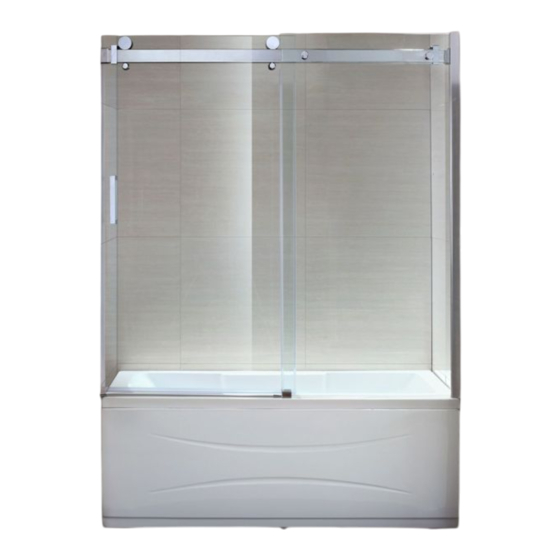
SIERRA 60 TUB DOOR
Purchase date: _________________________
Product Tracking Reference: ________________________
Questions, problems, missing parts?
Before returning to your retailer, call our customer service department at
1-866-839-2888, 9 a.m. - 5 p.m., EST, Monday - Friday
2800 Etienne Lenoir, Laval
OVE 2015-05-27
1
Québec H7R 0A3 Canada
Publicité
Table des Matières

Manuels Connexes pour OVE SIERRA 60 TUB DOOR


Sommaire des Matières pour OVE SIERRA 60 TUB DOOR
- Page 1 All manuals and user guides at all-guides.com SIERRA 60 TUB DOOR Purchase date: _________________________ Product Tracking Reference: ________________________ Questions, problems, missing parts? Before returning to your retailer, call our customer service department at 1-866-839-2888, 9 a.m. - 5 p.m., EST, Monday - Friday...
-
Page 2: Table Des Matières
TABLE OF CONTENT All manuals and user guides at all-guides.com PACKAGE CONTENT............................4 HARDWARE CONTENT............................5 TOOLS REQUIRED............................. 5 SAFETY INFORMATION............................. 6 PREPARATION..............................6 SHOWER REVERSIBILITY..........................7 WALL TO WALL MEASURES..........................7 WALL TRACK INSTALLATION........................... 8 FIXED PANEL INSTALLATION.......................... 9 SUPPORT BAR INSTALLATION........................ -
Page 3: Package Content
PACKAGE CONTENT All manuals and user guides at all-guides.com... - Page 4 PACKAGE CONTENT All manuals and user guides at all-guides.com PART# DESCRIPTION CODE Aluminum track 99STR3612-WM Fixed glass panel 99SGC10053-WM Support bar’s anchors 99SGC1011-WM Roller stoppers 99SDS0002-WM Support bar 99SGS1027-WM Fixed panel’s brackets 99SGC0041-WM Top door rollers 99SWE0024-WM Anti-jump pegs 99SWE0025-WM Door panel 99SGD0038-WM Glass panels vertical seal strips (short)
-
Page 5: Hardware Content
HARDWARE CONTENT All manuals and user guides at all-guides.com Wall Anchor Screw Screw Screw ø8x30mm ST4x12mm ST5x30mm ST4x20mm Screw Fitting ST5x35mm ABS Cap TOOLS REQUIRED Drill with ceramic tile bits Pencil Screwdriver Level ø3mm (1/8”) & ø4mm (3/16”) & ø8mm (5/16”) Measuring Tape Silicone Rubber mallet... -
Page 6: Safety Information
SAFETY INFORMATION All manuals and user guides at all-guides.com Please read and understand this entire manual before attempting to assemble, operate or install the product. Handle the tempered glass with caution! Improperly handling the glass can cause it to break suddenly in small pieces (never in pointed fragments). Dot NOT put glass panels on hard surfaces, always work on clean and soft surface (e.g. -
Page 7: Shower Reversibility
SHOWER REVERSIBILITY All manuals and user guides at all-guides.com • This instruction is drawn up for an opening from right to left (see illustration B). • For an installation from left to right (see illustration A), use the same instructions, but switch around the panels: mirror effect. -
Page 8: Wall Track Installation
WALL TRACK INSTALLATION All manuals and user guides at all-guides.com 1. Place the track (B) at approximately 3/4 in. (20 mm) from the edge of the tub to the track center. 2. Mark the position of the track (B). 3. Drill the holes according to the illustration. 4. -
Page 9: Fixed Panel Installation
FIXED PANEL INSTALLATION All manuals and user guides at all-guides.com 1-2. Cut the fixed panel’s bottom seal strip (N) to size and attach the strip (N) on the fixed glass panel (C). 3-4. Mark the position of sliding door guide (Q) and drill the hole. 5. -
Page 10: Support Bar Installation
SUPPORT BAR INSTALLATION All manuals and user guides at all-guides.com 1-2. Slide the two stoppers (E) on the bar (F), then mount the bar anchors (D) without tightening. 3. Mount the bar (F) on the panel (C). Don’t over tighten the brackets (G) in order to adjust the bar level. Make sure the glass protection gaskets are in place on either side of the glass panel. - Page 11 SUPPORT BAR INSTALLATION All manuals and user guides at all-guides.com 1. Mark the location of the two anchors holes (D) on the wall. 2. Drill pilot holes at the marked place. 3. Install the bar anchors (D) using wall anchors (AA) and screws (GG). Note: Before continuing, place the door panel (J) inside the shower enclosure to facilitate future steps! 4-5.
-
Page 12: Door Panel Installation
DOOR PANEL INSTALLATION All manuals and user guides at all-guides.com 1. Mount the two door rollers (H) onto the door panel (J) using Allen key. Use a ratchet to strongly tighten the bolts. 2. Place the door (J) on the bar (F) while smoothly inserting it into the guide (Q). 3-5. - Page 13 DOOR PANEL INSTALLATION All manuals and user guides at all-guides.com 1-2. Place the seal strips (O & R) on the door (J). 3. Place the decorative end caps (T) on the decorative metal strip (U). 4-5. Secure the door stopper (E) using Allen key. 2.5mm 2.5mm...
-
Page 14: Handle Installation & Sealing
HANDLE INSTALLATION & SEALING All manuals and user guides at all-guides.com 1. Install the door handle (M) on both sides using Allen keys. 2. Ensure that the door closes tightly and opens smoothly, and that there is a tight connection between the side glass panels and the frame as well as the support bar. -
Page 15: Care And Maintenance
CARE AND MAINTENANCE All manuals and user guides at all-guides.com For the daily maintenance, use a wet cloth and a soft liquid cleaner. Never use abrasive cleaners containing some acetone, chlorine or strong bleach, scrapers, metallic brushes, nor other objects or the products which can graze or tarnish surfaces. Use a ratchet to strongly tighten any bolts used to support the fixed glass panels or doors panel (support bolts can withstand up to 250 lbf*in of torque). - Page 16 All manuals and user guides at all-guides.com SIERRA 60 TUB DOOR Date de l’achat: _______________________ Numéro de référence du produit: ______________________ Questions, problèmes ou pièces manquantes? Avant de retourner le produit à votre détaillant, contactez notre service à la clientèle au 1-866-839-2888, du lundi au vendredi de 9h00 à...
- Page 17 TABLE DES MATIÈRES All manuals and user guides at all-guides.com CONTENU DE L’EMBALLAGE........................... 4 QUINCAILLERIE..............................5 OUTILS REQUIS..............................5 INFORMATIONS DE SÉCURITÉ......................... 6 PRÉPARATION..............................6 RÉVERSIBILITÉ DE LA DOUCHE........................7 MESURES MUR À MUR............................7 INSTALLATION DES RAILS MURAUX....................... 8 INSTALLATION DU PANNEAU FIXE........................
-
Page 18: Contenu De L'emballage
CONTENU DE L’EMBALLAGE All manuals and user guides at all-guides.com... - Page 19 CONTENU DE L’EMBALLAGE All manuals and user guides at all-guides.com PART# DESCRIPTION CODE Rails muraux 99STR3612-WM Panneau fixe 99SGC10053-WM Ancrages pour barre de support 99SGC1011-WM Butées pour roues 99SDS0002-WM Barre de support 99SGS1027-WM Raccords pour panneau fixe 99SGC0041-WM Roues de la porte 99SWE0024-WM Butées anti-sauts 99SWE0025-WM...
-
Page 20: Quincaillerie
QUINCAILLERIE All manuals and user guides at all-guides.com Ancrage mural ø8x30mm ST4x12mm ST5x30mm ST4x20mm Raccord Capuchon ST5x35mm Capuchom en ABS OUTILS REQUIS Perceuse avec forets à céramique Crayon Tournevis Niveau ø3mm (1/8”) & ø4mm (3/16”) & ø8mm (5/16”) Ruban à mesurer Silicone Maillet Exacto... -
Page 21: Information Sur La Sécurité
INFORMATION SUR LA SÉCURITÉ All manuals and user guides at all-guides.com S.v.p. lire et comprendre complètement le manuel avant de tenter d’assembler, d’installer et d’utiliser le produit. Manipulez le verre trempé avec précaution sinon il pourrait se briser en petits morceaux (jamais en fragments pointus). -
Page 22: Réversibilité De La Douche
RÉVERSIBILITÉ DE LA DOUCHE All manuals and user guides at all-guides.com • Utilisez ces instructions pour une ouverture de la porte de droite à gauche (illustration B). • Pour une installation de gauche à droite (illustration A), suivez ces mêmes instructions mais permutez l’emplacement des panneaux: effet miroir. -
Page 23: Installation Du Rail Mural
INSTALLATION DU RAIL MURAL All manuals and user guides at all-guides.com 1. Placez le rail mural (B) approximativement à 3/4 in (20 mm) du bord du bain. 2. Marquez la position du rail (B) et des trous. 3. Percez 3 trous guides. 4. -
Page 24: Installation Du Panneau Fixe
INSTALLATION DU PANNEAU FIXE All manuals and user guides at all-guides.com 1-2. Coupez le joint d’étanchéité (N) à la longueur adéquate et l’installer sur le panneau fixe (C). 3-4. Marquez la position du guide de porte (Q) et percez un trou guide. 5. -
Page 25: Installation De La Barre De Support
INSTALLATION DE LA BARRE DE SUPPORT All manuals and user guides at all-guides.com 1-2. Glissez les deux butées (E) et les ancrages (D) sur la barre (F). 3. Montez la barre (F) sur le panneau (C). Ne pas trop serrez les raccords (G) afin d’ajuster le niveau de la barre. - Page 26 INSTALLATION DE LA BARRE DE SUPPORT All manuals and user guides at all-guides.com 1. Marquez l’emplacement des 2 trous des ancrages (D) sur le mur. 2. Percez des trous pilotes. 3. Installez les encrages (D) en utilisant les ancrages muraux (AA) et les vis (GG). Note: Avant de continuer, placez la porte de douche à...
-
Page 27: Installation De La Porte
INSTALLATION DE LA PORTE All manuals and user guides at all-guides.com 1. Montez les deux roues (H) sur le panneau de la porte (J). Utilisez une clé à rochet afin de fortement serrez les boulons. 2. Placez la porte (J) sur la barre (F) et l’insérer dans le guide (Q). 3-5. - Page 28 INSTALLATION DE LA PORTE All manuals and user guides at all-guides.com 1-2. Placez le joint d’étanchéité (O & R) sur la porte (J). 3. Utilisez du silicone afin d’installer le rail décoratif (U) au pied de la porte. Y glissez les embouts décoratifs (T).
-
Page 29: Installation De La Poignée Et Scellage
INSTALLATION DE LA POIGNÉE ET SCELLAGE All manuals and user guides at all-guides.com 1. Installez la poignée (M) avec une clé Allen. 2. Assurez-vous que la porte se ferme hermétiquement et s’ouvre doucement, et que le châssis et la barre de support sont étroitement fixés aux panneaux de verre. Appliquez un scellant étanche à... -
Page 30: Traitement Et Entretien
TRAITEMENT ET ENTRETIEN All manuals and user guides at all-guides.com Utilisez un chiffon mouillé et un nettoyant liquide doux pour l’entretien quotidien. N’utilisez jamais de nettoyants abrasifs contenant de l’acétone, du chlore ou du javellisant puissant, et évitez les grattoirs, les brosses métalliques et tout autre objet ou produit pouvant érafler ou ternir les surfaces. Utilisez la clé... - Page 31 All manuals and user guides at all-guides.com SIERRA 60 TUB DOOR Fecha de compra: ___________________ Seguimiento y referencia del producto:___________________ Preguntas, problemas, piezas faltantes? Antes de volver a la tienda, llame a nuestro departamento de servicio al cliente al 1-866-839-2888, 9 am. – 5 pm., HDE, Lunes a Viernes..
- Page 32 TABLA DE CONTENIDO All manuals and user guides at all-guides.com CONTENIDO DEL PAQUETE..........................19 CONTENIDO DE HARDWARE...........................20 HERRAMIENTAS NECESARIAS........................20 INFORMACIÓN DE SEGURIDAD........................21 PREPARACIÓN..............................21 REVERSIBILIDAD DE LA DUCHA........................22 MEDIDAS DE PARED A PARED........................22 INSTALACIÓN DEL RIEL DE LA PARED......................23 INSTALACIÓN DEL PANEL FIJO........................24 INSTALACIÓN DE LA BARRA DE SOPORTE....................
-
Page 33: Contenido Del Paquete
CONTENIDO DEL PAQUETE All manuals and user guides at all-guides.com... - Page 34 CONTENIDO DEL PAQUETE All manuals and user guides at all-guides.com DESCRIPCIÓN CANTIDAD CÓDIO PARTE# Riel de aluminio 99STR3612-WM Panel de vidrio fijo 99SGC10053-WM Soporte de pared de la barra 99SGC1011-WM Retenedor de la puerta de la ducha 99SDS0002-WM Barra de soporte de la puerta de la ducha 99SGS1027-WM Tornillos de fijación de la barra de soporte 99SGC0041-WM...
-
Page 35: Contenido De Hardware
CONTENIDO DE HARDWARE All manuals and user guides at all-guides.com Tarugo Tornillo Tornillo Tornillo ø8x30mm ST5x30mm ST4x20mm ST4x12mm Tornillo Adecuado Tapa ST5x35mm ABS Tapa HERRAMIENTAS NECESARIAS Taladro con brocas para cerámica Lápiz Destornillador Nivel ø3mm (1/8”) & ø4mm (3/16”) & ø8mm (5/16”) Cinta medidora Silicona Mazo de goma... -
Page 36: Información De Seguridad
INFORMACIÓN DE SEGURIDAD All manuals and user guides at all-guides.com Lea y comprenda completamente este manual antes de intentar ensamblar, usar o instalar el producto. ¡Manipule el vidrio templado con precaución! Una manipulación inadecuada del vidrio puede ocasionar que se rompa. NO coloque los paneles sobre superficies duras;... -
Page 37: Reversibilidad De La Ducha
REVERSIBILIDAD DE LA DUCHA All manuals and user guides at all-guides.com • Utilisez ces instructions pour une ouverture de la porte de droite à gauche (illustration B). • Pour une installation de gauche à droite (illustration A), suivez ces mêmes instructions mais permutez l’emplacement des panneaux: effet miroir. -
Page 38: Instalación Del Riel De La Pared
INSTALACIÓN DEL RIEL DE LA PARED All manuals and user guides at all-guides.com 1. Coloque el riel (B) a aproximadamente 3/4 pulgada (20 mm) del borde de la BAÑERA hasta el centro del riel. 2. Marque la posición del riel (B). 3. -
Page 39: Instalación Del Panel Fijo
INSTALACIÓN DEL PANEL FIJO All manuals and user guides at all-guides.com 1-2. Corte la tira de caucho (N) al tamaño adecuado y fije la tira (N) en el panel de vidrio (C). 3-4. Marque la posición de la guía (Q) de la puerta corrediza y perfore el agujero. 5. -
Page 40: Instalación De La Barra De Soporte
INSTALACIÓN DE LA BARRA DE SOPORTE All manuals and user guides at all-guides.com 1-2. Deslice los dos retenedores (E) en la barra (F), luego monte los soportes (D) de la barra sin apretar. 3. Monte la barra (F) en el panel (C). No apriete excesivamente el tornillo (G) para poder ajustar el nivel de la barra. - Page 41 INSTALACIÓN DE LA BARRA DE SOPORTE All manuals and user guides at all-guides.com 1. Marque la ubicación de los dos agujeros del soporte (D) en la pared. 2. Perfore los agujeros pilotos en el sitio marcado. 3. Instale los soportes (D) de la barra usando los tacos (AA) y los tornillos (GG). 4-5.
-
Page 42: Instalación De La Puerta
INSTALACIÓN DE LA PUERTA All manuals and user guides at all-guides.com 1. Monte los dos rodillos (H) de la puerta en el panel de la puerta (J) usando la llave Allen. 2. Coloque la puerta (J) en la barra (F) mientras la inserta suavemente en la guía (Q). 3-5. - Page 43 INSTALACIÓN DE LA PUERTA All manuals and user guides at all-guides.com 1-2. Coloque la tira de caucho (O & R) en la puerta (J). 3. Coloque las presillas (T) en la tira metálica de estanqueidad (U). 4-5. Fije el retenedor (E) de la puerta usando la llave Allen. 2.5mm 2.5mm...
-
Page 44: Instalación De La Manija Y Sellado
INSTALACIÓN DE LA MANIJA Y SELLADO All manuals and user guides at all-guides.com 1. Instalar la empuñadura (M) como se muestra. 2. Asegúrese de que la puerta cierre firmemente y abra suavemente y que haya una conexión apretada entre el panel de vidrio y el riel al igual que con la barra se soporte. Aplique silicona transparente resistente al agua alrededor del perámetro interno y externo de todos los componentes de la ducha (horizontalmente entre la parte inferior del panel de vidrio y la base, al igual que verticalmente (entre la pared, el riel y el panel de vidrio). -
Page 45: Garantía Limitada De 5 Años
MANTENIMIENTO All manuals and user guides at all-guides.com Para mantenimiento diario, utilice un paño húmedo y un limpiador líquido suave. Nunca utilice abrasivos olimpiadores que contenga acetona, cloro o blanqueadores fuertes, espátulas o cepillos de cerdas metálicas, ni objetos o productos que puedan raspar o deslucir las superficies. Utilice un trinquete para apretar firmemente a cualquier pernos utilizados para soportar los paneles de vidrio fijos o panel de puertas (pernos de soporte pueden soportar hasta 250 lbf * in de torque).