Télécharger Imprimer la page

Lotus F10T-63EM Instructions Pour L'installation Et L'emploi

Friteuses electriques

Publicité

Les langues disponibles
  • FR

Les langues disponibles

Liens rapides

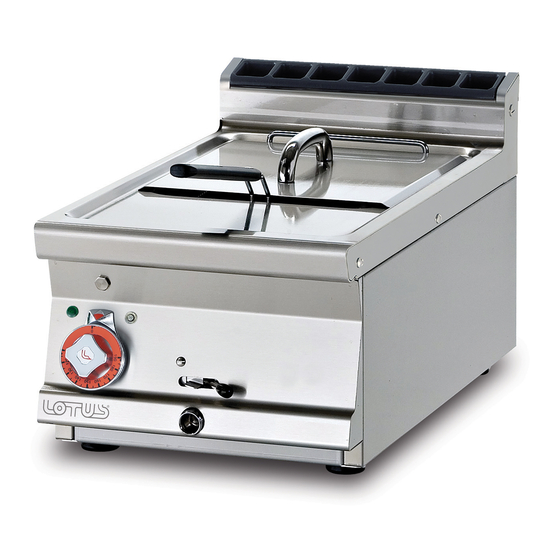
FRIGGITRICI ELETTRICHE
Istruzioni
IT
CH
per l'installazione e l'uso
ELEKTRISCH BETRIEBENE
Aufstellung
DE
AT
CH
FRITEUSE
und Bedienungsanleitung
Instructions
FRITEUSES ELECTRIQUES
FR
BE
Pour l'installation et l'emploi
ELECTRICAL FRYER
Instructions
GB
IE
for installation and use
FREIDORAS ELÉCTRICAS
Instrucciones para la instalación
ES
y el uso
Mod.
F10T-63EM
F10T-63ET
F2/10T-66EM
F2/10T-66ET
F13-64ET
563012501.doc
LIBR.ISTR.F60ENEW POT
1

Publicité

loading

Sommaire des Matières pour Lotus F10T-63EM

  • Page 1 ELEKTRISCH BETRIEBENE Aufstellung FRITEUSE und Bedienungsanleitung Instructions FRITEUSES ELECTRIQUES Pour l’installation et l’emploi ELECTRICAL FRYER Instructions for installation and use FREIDORAS ELÉCTRICAS Instrucciones para la instalación y el uso Mod. F10T-63EM F10T-63ET F2/10T-66EM F2/10T-66ET F13-64ET 563012501.doc LIBR.ISTR.F60ENEW POT...
  • Page 2 FIG.A. F...T 562017600M00C00 ..63=300 ..64=400 ..66=600 ..68=800 F... Targhetta caratteristiche Allacciamento elettrico Typenschild Elektroanschluß Plaque des caractéristiques Raccordement electrique Data Plate Electrical connection Chapa de características Conexión eléctrica...
  • Page 3 SCHEMA ELETTRICO – SCHALTPLAN – SCHEMA ELECTRIQUE WIRING DIAGRAM – ESQUEMA ELECTRICO FIG.B 549005700 M00_02 230V~3 50/60Hz 400V~3N 50/60Hz Commutatore Umschalter Commutateur Commutator Commutador Microinterruttore Mikroschalter Micro-interrupteur Microswitch Microinterruptor Morsettiera arrivo linea Klemmleiste linie Plaque à borne arr. Ligne Electrical connection Conexión eléctrica Morsettiera di Plaque à...
  • Page 4 SCHEMA ELETTRICO – SCHALTPLAN – SCHEMA ELECTRIQUE WIRING DIAGRAM – ESQUEMA ELECTRICO FIG. C 549002800 MODELLI Morsettiera MODELLE Klemm-Leiste MODELES Bornier Junction-box MODELS MODELOS Tablero de bornes F10T-63EM FIG.B F2/10T-66EM FIG.B + FIG.B Commutatore Umschalter Commutateur Commutator Commutador Microinterruttore Mikroschalter Micro-interrupteur Microswitch Microinterruptor...
  • Page 5 Pag. Seite Page Page Pàg.
  • Page 6 INDICE TABELLA DATI TECNICI ............................7 TRASFORMAZIONE ..............................7 ISTRUZIONI PER L'INSTALLAZIONE ........................7 INSTALLAZIONE ................................7 DISPOSIZIONI DI LEGGE, REGOLE TECNICHE E DIRETTIVE ................ 7 ALLACCIAMENTO ELETTRICO ..........................7 EQUIPOTENZIALE ................................ 8 MESSA IN FUNZIONE ..............................8 ISTRUZIONI PER L'USO .............................. 8 ACCENSIONE ..................................
  • Page 7 MASSIMO MASSIMA ALIMENTAZIONE (Al silicone) 30 x 60 x 29h 230Vac1 50/60 Hz 17,39 3 x 2,5 mm² F10T-63EM F10T-63ET 30 x 60 x 29h 400Vac/3N 50/60 Hz 10,36 7,15 5 x 1,5 mm² F2/10T-66EM 60 x 60 x 29h...
  • Page 8 • Bloccare il cavo con il pressacavo e rimontare il pannello posteriore. Il conduttore di terra deve essere più lungo degli altri, in modo che in caso di rottura del pressacavo, questo si stacchi dopo i cavi della tensione. N.B. il cavo di allacciamento deve avere le seguenti caratteristiche: deve essere almeno del tipo H05 RN-F (resistenza a temperature di almeno 150°C) ed avere una sezione adeguata alla potenza dell'apparecchio (vedi tabella dati tecnici).
  • Page 9 PULIZIA E MANUTENZIONE Attenzione: durante la pulizia non lavare esternamente l'apparecchio con getti d'acqua diretti o ad alta pressione. Ogni sera a fine lavoro pulire accuratamente l'apparecchio. La pulizia quotidiana dell'apparecchio garantisce un funzionamento perfetto e una lunga durata dello stesso. Prima di iniziare la pulizia togliere la tensione dall'apparecchio.
  • Page 10 INHALTSANGABE TABELLE DER TECHNISCHEN DATEN ......................... 11 ABÄNDERUNG ................................11 AUFSTELLUNGSANLEITUNGEN..........................11 AUFSTELLUNG ................................11 GESETZLICHE BESTIMMUNGEN, TECHNISCHE VORGABEN UND VORSCHRIFTEN ......11 ELEKTROANSCHLUSS..............................11 ÄQUIPOTENZIAL ................................12 INBETRIEBNAHME ..............................12 BEDIENUNGSANLEITUNGEN ............................. 12 EINSCHALTEN ................................12 ENTLEEREN DES BECKENS ............................. 12 REINIGUNG UND WARTUNG ...........................
  • Page 11 STROMAUFNAHME LEISTUNG LEITUNG (Al aus Silikon) 30 x 60 x 29h 230V~ 50/60 Hz 17,39 3 x 2,5 mm² F10T-63EM F10T-63ET 30 x 60 x 29h 400V~3N 50/60 Hz 10,36 7,15 5 x 1,5 mm² F2/10T-66EM 60 x 60 x 29h...
  • Page 12 • Das Anschlusskabel durch den Kabeldurchgang ziehen, die Leiter mit den entsprechenden Klemmen der Klemmleiste verbinden und daran befestigen. • Das Kabel mit der Kabelklemme blockieren und das Paneel wieder befestigen. Die Erdungsleitung muss länger als die anderen sein, damit es sich bei einer eventuellen Beschädigung der Kabelklemme erst nach den Spannungskabeln löst. ZUR BEACHTUNG: Das Anschlusskabel muss die folgenden Merkmale aufweisen: es muss mindestens dem Typ H05 RN-F entsprechen (um Temperaturen von mindestens 150°C standzuhalten) und einen der Gerätespannung entsprechenden Querschnitt haben (siehe Tabelle Technische Daten).
  • Page 13 gebaut sein, daß das Öl während des Entleerens nicht ausfließen und somit keine Gefahr bilden kann. Es wirde empfohlen, das Öl bzw. Fritierfett täglich nach Betriebsende zu filtrieren und - falls erforderlich - zu erneuern. Den Abflußschlauch laut Abbildung einführen und den Behälter positionieren. Die Sicherheitsvorrichtung (A) gegen unerwünschte Öffnung nach oben drücken und den Knebel (B) in ichtung Symbol schieben.
  • Page 14 TABLE DES MATIÈRES TABLEAU DES DONNÉES TECHNIQUES ......................15 TRANSFORMATION ..............................15 INSTRUCTIONS D'INSTALLATION ........................15 INSTALLATION ................................15 DISPOSITIONS LÉGALES, RÈGLES TECHNIQUES ET DIRECTIVES ............. 15 BRANCHEMENT ÉLECTRIQUE ..........................15 CIRCUIT ÉQUIPOTENTIEL ............................16 MISE EN SERVICE ............................... 16 INSTRUCTIONS D'UTILISATION ..........................
  • Page 15 MAXIMUM MAXIMUM D'ALIMENTATION (au silicone) 30 x 60 x 29h 230V~ 50/60 Hz 17,39 3 x 2,5 mm² F10T-63EM F10T-63ET 30 x 60 x 29h 400V~3N 50/60 Hz 10,36 7,15 5 x 1,5 mm² F2/10T-66EM 60 x 60 x 29h...
  • Page 16 • Faire passer le câble d'alimentation à travers le passe-fil, raccorder les conducteurs aux bornes correspondantes du bornier et les fixer. • Bloquer le câble à l'aide du serre-fil et remettre en place le panneau. La longueur du conducteur de terre doit être supérieure à...
  • Page 17 VIDANGE DE LA CUVE L’usager doit se munir d’un récipient permettant d’évacuer l’huile. Ce récipient doit pouvoir résister à la chaleur et doit être fait de manière à ce que l’huile ne déborde pas pendant la vidange, ce qui provoquerait une situation dangereuse.
  • Page 18 INDEX TECHNICAL DATA TABLE ............................19 TRANSFORMATION ..............................19 INSTRUCTIONS FOR INSTALLATION ........................19 INSTALLATION ................................19 LAWS, TECHNICAL RULES AND NORMS ......................19 ELECTRIC CONNECTION ............................19 EQUIPOTENTIAL................................. 20 STARTING UP ................................20 INSTRUCTIONS FOR USE ............................20 TURNING ON ................................20 EMPTYNG THE TANK ..............................
  • Page 19 ABSORBTION POWER SUPPLY CABLE (Silicone) 30 x 60 x 29h 230V~ 50/60 Hz 17,39 3 x 2,5 mm² F10T-63EM F10T-63ET 30 x 60 x 29h 400V~3N 50/60 Hz 10,36 7,15 5 x 1,5 mm² F2/10T-66EM 60 x 60 x 29h...
  • Page 20 N.B. The connection cable must have the following characteristics: it must be at least type H05 RN-F (resistant to a temperature of at least 150°), and must have an adequate section for the power of the appliance (see technical data table).
  • Page 21 After every use, clean the appliance thoroughly. Daily cleaning after switching off the appliance ensures the perfect functioning and long life of the appliance. Before starting to clean the appliance, disconnect the power supply. The parts in steel must be washed with hot water and neutral detergent, then rinsed thoroughly in order to eliminate all traces of detergent;...
  • Page 22 ÍNDICE TABLA DATOS TÉCNICOS ............................23 TRASFORMACIÓN ..............................23 INSTRUCCIONES PARA LA INSTALACIÓN ......................23 INSTALACIÓN ................................23 DISPOSICIONES DE LEY, REGLAS TÉCNICAS Y DIRECTIVAS ..............23 CONEXIÓN ELÉCTRICA ............................23 EQUIPOTENCIAL ................................ 24 PUESTA EN FUNCIONAMIENTO ..........................24 INSTRUCCIONES PARA EL USO..........................24 ENCENDIDO ..................................
  • Page 23 ABSORCIÓN POTENCIA CABLE DIMENSIONES MODELOS ALIMENTACIÓN MÁXIMA MÁXIMA ALIMENTACIÓN (A la silicona) F10T-63EM 30 x 60 x 29h 230V~ 50/60 Hz 17,39 3 x 2,5 mm² F10T-63ET 30 x 60 x 29h 400V~3N 50/60 Hz 10,36 7,15 5 x 1,5 mm²...
  • Page 24 Nota importante. El cable de conexión debe tener las siguientes características: debe ser al menos del tipo H05 RN-F (para resistir a una temperatura de 150°C), y debe tener un tamaño adecuado a la potencia del aparato (ver tabla datos técnicos) EQUIPOTENCIAL El aparato debe conectarse a un sistema equipotencial.
  • Page 25 LIMPIEZA Y MANTENIMIENTO ¡Atención!: durante la limpieza, no lavar por fuera el aparato con chorros de agua directos o a alta presión. Cada noche al acabar el trabajo limpiar cuidadosamente al aparato. La limpieza diaria después del apagado del aparato garantiza un perfecto funcionamiento y una larga duración en el tiempo.

Ce manuel est également adapté pour:

F10t-63etF2t-66emF2t-66etF10t-66emF10t-66etF13-64et