JVC LT-24EM71 Guide D'utilisation
Table des Matières
Les langues disponibles
Les langues disponibles
Liens rapides
24" WIDE TFT LCD TELEVISION WITH DIGITAL TUNER
TÉLÉVISEUR GRAND ÉCRAN ACL TFT DE 24 po AVEC
SYNTONISEUR NUMÉRIQUE
LT-24EM71
If you purchase a universal remote control from your local retailer, please contact the remote manufacturer for the
required programming code.
Si vous utilisez avec cet appareil une télécommande universelle (autre que celle vendue avec ce téléviseur),
consultez la documentation accompagnant la télécommande universelle afin de connaître le code numérique cor-
respondant au téléviseur.
When shipped from the factory, the Signal Type option is set to the "Cable" (Cable Television) mode.
If not using Cable TV, set this menu option to the "Air" position.
Lorsque l'appareil sort de l'usine, l'option Signal Type est en mode « Cable » (câblodistribution). Si vous
n'utilisez pas la câblodistribution, sélectionnez l'option « Air ».
PLEASE HAVE THE MODEL NUMBER READY PRIOR TO THE CALL.
S'IL FAUT CONTACTER LE SERVICE CLIENTÈLE, PRENEZ SOIN D'ÊTRE MUNI
FOR RECYCLING INFORMATION, PLEASE VISIT ORION'S WEBSITE AT
POUR OBTENIR DES INFORMATIONS SUR RECYCLAGE,
Before operating the unit, please read this manual thoroughly.
Avant de faire fonctionner l'appareil, veuillez lire le présent guide attentivement.
(24" class/23.6 diagonal)
(24" classe/23,6 diagonale)
ATTENTION
ATTENTION
AIR/CABLE MODE SELECTION
SÉLECTION DU MODE AIR/CABLE
IF CONTACT WITH CUSTOMER SERVICE IS REQUIRED
DU NUMÉRO DE MODÈLE AVANT D'APPELER.
CUSTOMER SERVICE – 1-800-289-0984
SERVICE/SERVICE CLIENTÈLE: 1-800-289-0984
ORION WEBSITE
SITE WEB ORION
VEUILLEZ VISITER ORION'S SITE WEB:
www.orionsalesinc.com
OWNER'S MANUAL
GUIDE D'UTILISATION
Chapitres
Table des Matières
Dépannage

Manuels Connexes pour JVC LT-24EM71


Sommaire des Matières pour JVC LT-24EM71
- Page 1 OWNER’S MANUAL GUIDE D’UTILISATION 24” WIDE TFT LCD TELEVISION WITH DIGITAL TUNER TÉLÉVISEUR GRAND ÉCRAN ACL TFT DE 24 po AVEC SYNTONISEUR NUMÉRIQUE LT-24EM71 (24” class/23.6 diagonal) (24” classe/23,6 diagonale) ATTENTION ATTENTION If you purchase a universal remote control from your local retailer, please contact the remote manufacturer for the required programming code.
- Page 27 Memo ............................................................................................................................................................................................................................................................................................................................................................................................................................................................................................................................................................................................................................................................................................
-
Page 28: De Choc Electrique, Ne Retirez Pas Le Couvercle
FRANÇAIS Le symbole représentant un éclair dans un triamgle équilatéral a pour but d’avertir l’utilisateur du danger présenté ATTENTION par des pièces non isolées à l’intérieur RISQUE DE CHOC ELECTRIQUE de l’appareil et dont la tenstion est suf- NE PAS OUVRIR fisante pour provoquer des décharges électriques dangeruses. -
Page 29: Consignes De Sécurité Importantes
CONSIGNES DE SÉCURITÉ IMPORTANTES 1) Lisez ces consignes. 2) Gardez ces consignes. 3) Conformez-vous à tous les avertissements. 4) Suivez toutes les consignes applicables. 5) N’utilisez pas cet appareil près de l’eau. 6) Nettoyez uniquement à I’aide d’un chiffon sec. 7) N’obstruez jamais les orifices d’aération de l’appareil et installez-le en conformité... -
Page 30: Sécurité Des Enfants
CONSIGNES DE SÉCURITÉ IMPORTANTES 20) Quand il est nécessaire de remplacer certaines pièces de l’appareil, assurez-vous que le réparateur utilise des pièces recommandées par le fabricant ou ayant les mêmes caractéristiques que les pièces originales. Le remplacement par des pièces non autorisées peut causer un incendie, des chocs électriques ou être la source d’autres dangers. -
Page 31: Précautions De Sécurité
CONSIGNES DE SÉCURITÉ IMPORTANTES CONDENSATION De la condensation se forme sur les composantes internes de l’appareil si ce dernier est déplacé rapidement d’un environnement froid à un endroit tempéré ou si la température de la pièce augmente subitement. La performance de l’appareil peut alors en être altérée. -
Page 32: Comment Fixer Le Socle
Comment fixer le socle REMARQUE: • Débranchez le cordon d’alimentation de la prise d’alimentation CA. • Avant de commencer cette procédure, veillez à poser le TV sur une surface propre, sécurisée et matelas- sée pour éviter toute détérioration de l’écran. •... -
Page 33: Caractéristiques
Caractéristiques • Système de rétroéclairage LED - Il produit un profil fin, une faible consommation d’énergie, un design avec moins de mercure et une image très contrastée. • Syntonisateur numérique intégré - Vous pouvez regarder une émission numérique sans utiliser de décodeur de télévision numérique. - Page 34 Table des matières Avant d’utiliser l’appareil CONSIGNES DE SÉCURITÉ IMPORTANTES .3 PRÉCAUTIONS DE SÉCURITÉ .......5 Comment fixer le socle ........6 Comment enlever le socle .........6 Caractéristiques ..........7 Source d’alimentation ........7 Table des matières ..........8 Emplacement des commandes ......9 Télécommande ..........10 Raccordement à...
-
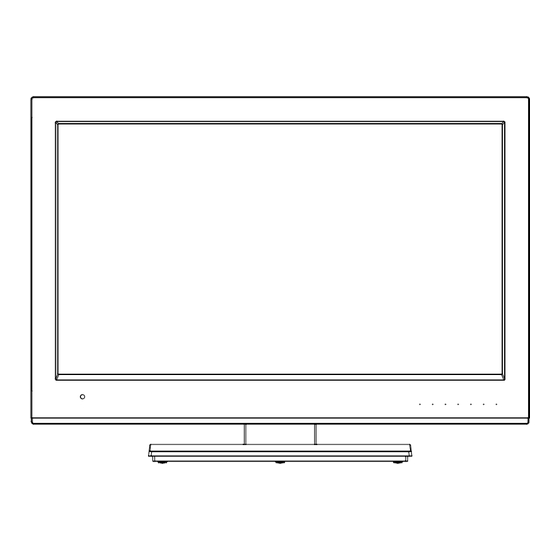
Page 35: Vue Latérale Gauche
Emplacement des commandes Vue latérale gauche Vue avant Prise HDMI2 IN Prise HDMI1/DVI IN Prises VIDEO IN (VIDEO/AUDIO Coté gauche (L(MONO)/R)) Prise DIGITAL AUDIO COAXIAL Prises COMPONENT IN (Y/Pb/Pr/AUDIO (L(MONO)/R)) Prise AC INPUT Prise RF (ANT.) IN Capteur de la télécommande Prise HEADPHONE Voyant d’alimentation Power... -
Page 36: Télécommande
Télécommande ▲/▼/◀/▶ 6. Touches CURSEUR - Pour commander les fonctions de menu du téléviseur LCD. 7. Touche ENTER - Appuyez sur cette touche pour choisir ou valider des informations affichées à le téléviseur. 8. Touche MUTING - Appuyez une fois sur cette touche pour couper le volume. -
Page 37: Raccordement À L'antenne
Raccordement à l’antenne Si vous utilisez une antenne intérieure ou extérieure, suivez les directives ci-dessous, selon le type d’antenne que vous employez. Si vous êtes abonné à un service de câblodistribution, voyez les consignes de raccordement à la « Raccordement au réseau de câblodistribution ». Antenne VHF/UHF combinée (câble unique de 75 ohms) Raccordez le câble de 75 ohms de l’antenne Borne de... -
Page 38: Raccordement À Un Autre Appareil
Raccordement à un autre appareil La configuration exacte des liaisons entre les divers appareils audio et vidéo et le présent produit dépend du modèle et des particularités de chacun. Pour connaître l’emplacement des entrées et des sorties audio et vidéo, reportez-vous au mode d’emploi accompagnant chaque appareil. -
Page 39: Utilisation D'un Amplificateur Av À Son Ambiophonique Numérique Intégré
Raccordement à un autre appareil (suite) Utilisation d’un amplificateur AV à son ambiophonique numérique intégré Si vous utilisez un amplificateur à son ambiophonique numérique intégré, vous pouvez profiter de divers formats audio, notamment le Dolby numérique ambiophonique (Dolby Digital Surround), qui vous donne exactement le même son qu’au cinéma. -
Page 40: Raccordement Du Téléviseur À Un Pc (Ordinateur Personnel)
Raccordement à un autre appareil (suite) Raccordement du téléviseur à un PC (ordinateur personnel) Avant de connecter le présent téléviseur à votre PC, ajustez la résolution et le taux de rafraîchissement de votre PC (60 Hz). Raccordez un bout de câble VGA (mâle-mâle) à la carte vidéo de l’ordinateur et l’autre bout au connecteur VGA PC MONITOR IN situé... -
Page 41: Fonctionnement Du Téléviseur
Starting Setup (Configuration Appuyez sur les touches d’accès direct (0-9, –) pour sélectionner le canal. au démarrage) (Si vous n’appuyez que sur le numéro de canal, la sélection du canal est retardée de quelques secondes.) Le menu Auto Setup s’affiche la première POUR SÉLECTIONNER DES CANAUX fois que le téléviseur est mis sous tension de ANALOGIQUES... -
Page 42: Affichage
RAPPEL DE CANAL Pour sélectionner la source d’entrée vidéo Pour afficher un signal provenant d’un autre La touche RECALL vous permet de retourner au appareil raccordé à votre téléviseur LCD, comme dernier canal sélectionné. Appuyez de nouveau sur un magnétoscope, appuyez sur INPUT SELECT, RECALL pour retourner au canal que vous regardiez puis sur ▲... -
Page 43: Fonctions Personnelles
Fonctions personnelles Vous pouvez modifier les paramètres par défaut en appuyant sur le bouton MENU de la télécommande. Sélectionnez ensuite une icône dans la partie gauche du menu. Suivez les invites à l’écran pour définir vos préférences. Icon Rubriques sélectionnées Conseil de réglage Picture Picture... -
Page 44: Mise En Mémoire Des Canaux
Mise en mémoire des canaux Le téléviseur commencera à mémoriser tous les canaux offerts dans votre région. Ce téléviseur est muni d’une mémoire de canaux, • La mémorisation des canaux câblodistribués qui permet de passer au canal mémorisé suivant numériques peut prendre de 15 à 30 minutes. ou précédent et de sauter les canaux non Selon la qualité... -
Page 45: Vérification De La Force Du Signal Numérique
Appuyez sur ◀ ou ▶ pour sélectionner « Add » Appuyez sur ▲ ou ▼ pour sélectionner « Ch ou « Delete », selon la fonction à appliquer. Label », puis sur ▶ ou ENTER. Le menu Ch Label apparaît. Répétez les procédures décrites aux étapes 4 à... -
Page 46: Utilisation De La Puce V
TV Rating (Classification des émissions Video Label télévisées) Video Component TV Rating HDMI1 HDMI2 ALL D TV-Y TV-Y7 TV-G : Select : Adjust TV-PG TV-14 – : Utilise le nom d’étiquette par défaut TV-MA : Magnétoscope : Select ENTER:Set Vous pouvez régler la classification en fonction : Lecteur DVD du niveau d'âge et du genre. -
Page 47: Sous-Titrage
Appuyez sur ▲ ou ▼ pour sélectionner « Change Utilisez les touches numériques (0-9) pour Password », puis sur ▶ ou ENTER. entrer votre mot de passe, puis appuyez sur L'écran Change Password apparaît. ENTER. Le menu Lock apparaît. Entrez un nouveau mot de passe à l’aide des Appuyez sur ▲... -
Page 48: Sous-Titrage Avancé
• Si le texte n’est pas disponible dans votre zone Taille Sous- Auto, Petit (Small), Standard, de réception, un rectangle noir peut apparaître à Titres Grand (Large) l’écran. Si cela se produit, mettez le réglage des (Text Size): sous-titres sur « Off ». Type Sous- Auto, Style1, Style2, Style3, •... - Page 49 Natural REMARQUE: • Il se peut que certaines émissions numériques, Dans certains cas, cette image s’affiche au format haute définition ou les deux ne vous permettent pas standard 4:3 avec des bandes latérales noir. de modifier le format d’image. • En mode HDMI ou COMPONENT avec taux de balayage de 720p, 1080i ou 1080p (HDMI seulement) seuls le format d’image Cinema Wide2...
-
Page 50: Problèmes De Réception
Problèmes de réception Il est possible de remédier à la plupart des interférences subies par le téléviseur en réglant la hauteur et en changeant la position de l’antenne VHF/UHF. Pour obtenir les meilleurs résultats, il est recommandé d’utiliser une antenne extérieure. Les types les plus courants de brouillage en télévision sont expliqués ci-dessous. Si l’un de ces symptômes apparaît lorsque le téléviseur est raccordé... -
Page 51: Guide De Dépannage
JVC a attribué le service d’assistance technique et de responsabilité de garante à Orion Sales Inc. (ORION). POUR CONTACTER LE SERVICE CLIENTÈLE ET OBTENIR DE L’AIDE AVEC LA CONFIGURATION OU L’UTILISATION,... -
Page 52: Fiche Technique
Fiche technique DONNÉES GÉNÉRALES Source d’alimentation : 120 V CA 60 Hz Consommation de courant : En marche: 29 W En veille: 0,3 W Poids : 4,6 kg (10,2 lbs) Dimensions : Largeur: 586,6 mm (23-1/8 po) Hauteur: 431,9 mm (17 po) Profondeur: 174,9 mm (6-7/8 po) Température de fonctionnement : 5 ˚C à...