Télécharger Imprimer la page

Publicité

Les langues disponibles

Les langues disponibles

Liens rapides

man_S20xx.qxd
12-03-2009
3
4
1
TR
12:32
Pagina 1
S2035 - S2041 - S2053
MANUEL D'UTILISATION
OPERATING MANUAL
GEBRUIKSAANWIJZING
KULLANIM KILAVUZU
2
22
42
62

Publicité

loading

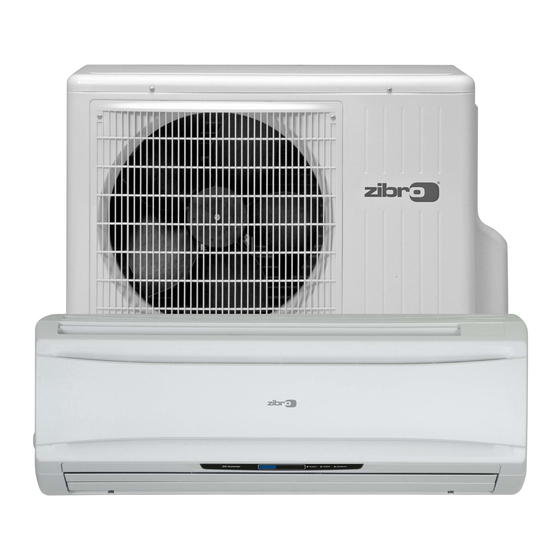
Sommaire des Matières pour Zibro S2035

  • Page 1 12-03-2009 12:32 Pagina 1 S2035 - S2041 - S2053 MANUEL D’UTILISATION OPERATING MANUAL GEBRUIKSAANWIJZING KULLANIM KILAVUZU...
  • Page 2 12:32 Pagina 2 Madame, Monsieur, Toutes nos félicitations pour l’achat de votre climatiseur Zibro. Vous venez d’acquérir un produit de qualité dont vous pourrez profiter pendant de longues années, à condition de l’utiliser de façon adéquate. Pour assurer une durée de vie optimale à votre climatiseur, nous vous invitons à lire d’abord ce manuel d’installation.
  • Page 3 man_S20xx.qxd 12-03-2009 12:32 Pagina 3 SOMMAIRE CONSIGNES DE SÉCURITÉ ELEMENTS ET FONCTIONS AVANT LA MISE EN SERVICE MODE D’EMPLOI FILTRE A AIR ENTRETIEN PETIT DEPANNAGE CONDITIONS DE GARANTIE SPECIFICATIONS TECHNIQUES LISEZ CE MANUEL Ce manuel vous propose de nombreux conseils pour utiliser et entretenir correctement votre climatiseur.
  • Page 4 • Toute réparation et/ou maintenance doit être exclusivement effectuée par un technicien agréé ou votre distributeur Zibro. Pour l’utilisation et l’entretien de l’appareil, prière de suivre les instructions indi- quées dans le manuel. • Débranchez toujours l’appareil lorsque vous ne l’utilisez pas.
  • Page 5 man_S20xx.qxd 12-03-2009 12:32 Pagina 5 • Si vous avez les mains mouillées, n’appuyez pas sur les boutons de l’appareil et ne le manipulez pas. • Notez que l’unité extérieure émet un bruit de fonctionnement. L’utilisateur a la responsabilité de véri- fier si l’appareil est en parfaite conformité...
  • Page 6 man_S20xx.qxd 12-03-2009 12:32 Pagina 6 Tableau de commande Tableau de commande Le bouton de commande de test est utilisé comme bouton de commande de secours. BOUTON DE COMMANDE DE SECOURS (MANUEL). En cas de non-disponibilité de la télécommande (si elle a été égarée ou si les piles sont vides), le système de climatisation peut continuer à fonctionner tem- porairement.
  • Page 7 man_S20xx.qxd 12-03-2009 12:32 Pagina 7 Télécommande BOUTON DE VOLET EMETTEUR HORIZONTAL Envoie des signaux au récepteur de l’unité Permet de modifier le flux d’air à l’horizonta- intérieure. le avec oscillation (droite et gauche) à cha- INDICATION DE VITESSE que pression. DU VENTILATEUR BOUTON DE VITESSE Indique la vitesse réglée au moyen du bou-...
  • Page 8 2. Mise en place des filtres REMARQUE • N’utiliser en aucun cas le climatiseur sans le filtre à air. • Utiliser uniquement des filtres Zibro adéquats. Cela évite d’endommager le climatiseur. • Les filtres adéquats sont disponibles chez votre revendeur.
  • Page 9 man_S20xx.qxd 12-03-2009 12:32 Pagina 9 Comment fixer les filtres d’épuration d’air a. Ouvrir le panneau avant en tirant vers le haut. b. Enlever les filtres à air extérieurs. Pousser l’onglet au milieu de chaque filtre vers le haut jusqu’au déblocage et dégager le filtre vers le bas. Fixer les filtres d’épuration d’air en place.
  • Page 10 man_S20xx.qxd 12-03-2009 12:32 Pagina 10 Refroidissement / déshumidification Appuyer sur le bouton Marche/Arrêt. Mettre le mode de fonctionnement sur Refroidissement , Chauffage Déshumidification , en appuyant sur le bouton de réglage du mode de fonctionnement. Régler la température en appuyant sur les boutons de réglage de la tempé- rature.
  • Page 11 man_S20xx.qxd 12-03-2009 12:32 Pagina 11 N.B. • Aucun air ne sort avant que l’échangeur de chaleur soit assez chaud pour prévenir la sortie d’air froid. • Le climatiseur ne commence à fonctionner qu’après environ 3 min pour protéger le compresseur, même si l’on appuie sur le bouton ON juste après l’arrêt du fonctionnement. Le fonctionnement démarre automatiquement après 3 min.
  • Page 12 man_S20xx.qxd 12-03-2009 12:32 Pagina 12 Réglage du flux d’air Réglage vertical Position standard Le volet vertical se met automatiquement dans la position correcte après une Env. 10 degrés (refroidissement / Niveau pression sur le bouton ON /OFF. Déshumidification) Env. 70 degrés (Chauffage) Oscillation du flux d’air Oscillation du flux d’air...
  • Page 13 man_S20xx.qxd 12-03-2009 12:32 Pagina 13 Fonctionnement du minuteur Avant le régler le minuteur, valider l’heure actuelle réglée. Au réglage du minuteur, la télécommande met ce réglage en mémoire. A partir de la fois suivante, il est possible de remettre en marche le même mode de fonctionnement minuteur en appuyant sur le bouton Marche/Arrêt et sur le bouton “ON/OFF”...
  • Page 14 man_S20xx.qxd 12-03-2009 12:32 Pagina 14 Arrêt par minuteur Exemple : Régler l’heure d’arrêt (OFF) sur 10 h du soir Le fonctionnement commence à cette heure-là Programmation de l’heure de d’arrêt Appuyer 3 fois sur le bouton “TIME ADJ”. Régler l’heure avec le bouton .
  • Page 15 man_S20xx.qxd 12-03-2009 12:32 Pagina 15 Mise en veilleuse du minuteur Une pression sur ce bouton fait démarrer le minuteur qui fera cesser le fonctionnement à l’heure réglée. Appuyer sur le bouton de mise en veilleuse pendant le fonctionnement. Après une pression sur le bouton, à l’heure réglée, le mode suivant est activé : Fonctionnement continu (Mode veilleuse : OFF (désactivé).
  • Page 16 man_S20xx.qxd 12-03-2009 12:32 Pagina 16 N.B. Le fonctionnement de secours à une température supérieure à 23 °C et inférieure à 26 °C signifie uniquement que l’appareil est en marche en mode de refroidissement mais sans vraiment refroidir. La déshumidification n’est alors pas possible. Test •...
  • Page 17 man_S20xx.qxd 12-03-2009 12:32 Pagina 17 N.B. • Les vieux filtres peuvent être jetés dans le conteneur à déchets non biologiques. • Les filtres adéquats sont disponibles chez le revendeur. • Le fait de faire fonctionner le climatiseur sans filtre anti-moisissures, sans filtre photocatalytique anti-odeurs ou sans filtre statique Catechin ne l’endommage pas.
  • Page 18 man_S20xx.qxd 12-03-2009 12:32 Pagina 18 Remplacement et entretien de filtres de purification de l’air Filtres de remplacement Filtres photocatalytiques : 2 unités Filtres photocatalytiques modèle CAC-5 Filtres statiques Catechin : 2 unités Filtre statique Catechin modèle CAC-6 Ouvrir l’arrivée d’air en tirant vers le haut. Enlever les filtres à...
  • Page 19 man_S20xx.qxd 12-03-2009 12:32 Pagina 19 PETIT DEPANNAGE ATTENTION! En cas de dysfonctionnement (odeur de brûlé etc.), mettre l’appareil à l’arrêt immédiatement, déconnecter l’alimentation et consulter le revendeur. Avant de demander un dépannage, effectuer les contrôles suivants : Problème Cause / Solution Cela est destiné...
  • Page 20 Les frais d’expédition et les risques liés à l’envoi du climatiseur ou de ses pièces sont toujours à la char- ge de l’acheteur. La garantie ne couvre pas les dégâts causés par l’utilisation de filtres d’une autre marque que Zibro. La garantie ne couvre pas les pertes et/ou fuites de gaz réfrigérant causées par une installation effec- tuée par un personnel non qualifié.
  • Page 21 man_S20xx.qxd 12-03-2009 12:32 Pagina 21 SPECIFICATIONS TECHNIQUES Modèle S 2035 S 2041 S 2053 Inverseur CC 2 parties murales Type de climatiseur Capacité de refroidissement, min-max (nom)* 850-3500 (2930) 800-4100 (3660) 500-5300 (5190) Capacité de refroidissement, min-max (nom)* BTU/h 2900-11950 (10000) 2730-13990 (12490) 1710-11950 (17710 Classe d'efficacité...
  • Page 22 Pagina 22 Dear Sir, Madam, Congratulations on the purchase of your Zibro airconditioner. You have acquired a high quality product that, if used responsibly, will give you many years of pleasure. Please read these instructions for use first in order to ensure the maximum life span of your airconditioner.
  • Page 23 man_S20xx.qxd 12-03-2009 12:32 Pagina 23 CONTENTS Safety instructions Parts and functions Before operation Instructions for use Air filter Maintenance Trouble shooting Guarantee conditions Technical data...
  • Page 24 • Have any repairs and/or maintenance only carried out by a recognised service engineer or your recognised Zibro supplier. Follow the instructions for use and maintenance as indicated in the user manual of this device. • Always remove the plug of the unit from the wall socket when it is not in use.
  • Page 25 man_S20xx.qxd 12-03-2009 12:32 Pagina 25 Do not install in the following places: • Heat or steam is generated in the vicinity. • Under influence by the atmosphere containing in excess salt (in coastal area), sulphide gas (in spa), ammonia, steam of high temperature and vapor. •...
  • Page 26 man_S20xx.qxd 12-03-2009 12:32 Pagina 26 Operating panel / POWER Operating panel The test operation switch is used as an emergency operation switch. EMERGENCY OPERATION (MANUAL) SWITCH. If the wireless remote controlling system is not available (when the wireless remote controller is lost or is out of battery), the air conditioning system is able to continue its operation temporarily.
  • Page 27 man_S20xx.qxd 12-03-2009 12:32 Pagina 27 Remote Control TRANSMITTER HORIZONTAL LOUVER BUTTON (ONLY ON S2053) Sends signals to the receiver of the indoor unit. Air flow direction can be changed horizon- tally with swing movement (right and left) FAN SPEED by each press. INDICATION FAN SPEED BUTTON Indicates the fan speed selected by the fan...
  • Page 28 7 meters. 2. Attaching filters COMMENT • Never use the airconditioner without the air filter. • Only use suitable Zibro filters. This will prevent damage to your airconditioner. • Suitable filter packages are available at your dealer.
  • Page 29 man_S20xx.qxd 12-03-2009 12:32 Pagina 29 How to attach the air clean filters a. Open the front panel by pulling upward b. Remove the outer air filters. Push up the center tab of each filter slightly until it is released from the stopper, and remove the filter downward. Air filters Attach the air clean filters.
  • Page 30 man_S20xx.qxd 12-03-2009 12:32 Pagina 30 Cooling/dry operation Press the ON/OFF button Set the operation mode to Cooling , Heating or Dry , by pressing the operation mode button Adjust the setting temperature by pressing the temperature setting buttons. Adjust the fan speed by pressing the fan speed button. When the mode is set at “AUTO”...
  • Page 31 man_S20xx.qxd 12-03-2009 12:32 Pagina 31 NOTE! • The air will not flow out unless the heat exchanger gets warm enough in order to prevent cold air. • The air conditioner will not start operation for approx. 3 min. in order to protect the compressor even if you press the ON button right after the operation stops.
  • Page 32 man_S20xx.qxd 12-03-2009 12:32 Pagina 32 Air flow adjustment Standard Position Vertical adjustment The vertical louver will move automatically to the suitable position when ON/OFF Approx. 10 degrees Level button is pressed. (Cooling/Dry) Approx. 70 degrees (Heating) Swing of air flow Swing of Air Flow The vertical louver will keep moving within the range illustrated on the right, if Level...
  • Page 33 man_S20xx.qxd 12-03-2009 12:32 Pagina 33 “ON Timer” Example: set the “ON Timer” to 7 a.m. Operation starts at the set time. Programming the “ON Time” Press the “TIME ADJ” 2 times. Adjust the time with the button. The time setting changes in 10-minu- te intervals.
  • Page 34 man_S20xx.qxd 12-03-2009 12:32 Pagina 34 Press the “TIME ADJ” button once. The setting of “OFF Time” is complete and the present time appears. Press the “ON/OFF” button. Proceed from Step 5 (below) if the unit has been operated or the ON Timer has been set.
  • Page 35 man_S20xx.qxd 12-03-2009 12:32 Pagina 35 Emergency and test operation Emergency Operation • The emergency operation is needed only when the remote control can not be used. • When you press the Emergency Operation Switch, you will hear a beep and the emergency operation starts.
  • Page 36 man_S20xx.qxd 12-03-2009 12:32 Pagina 36 The filter frame on the backside of the unit can be opened. The Mold-Proof screen filter, the Photo-cataly- tic Anti-odor Filter and the Static Catechin Filter can be installed or removed. The Mold-Proof screen filter has to be cleaned regularly with a vacuum cleaner to avoid blocking of the air flow.
  • Page 37 man_S20xx.qxd 12-03-2009 12:32 Pagina 37 Screen Filter Cleaning. (once every two weeks) Open the inlet by pulling upward. Remove the screen filter. Push up the filter’s center tab slightly until it is rele- ased from the stopper, and remove the filter downward. Clean the screen filter.
  • Page 38 man_S20xx.qxd 12-03-2009 12:32 Pagina 38 TROUBLE SHOOTING CAUTION! In the event of a malfunction (burning smell, etc.) immediately stop operation, disconnect the Power Supply plug and consult sales shop. Before requesting service, perform the following checks: Problem Cause / Solution The system does not start re-operation This is for protection of the system.
  • Page 39 Damage caused by not using suitable Zibro filters is not covered by the guarantee. Refrigerant loss and/or leakage because of incompetent (dis)connecting the units is not covered by the guarantee conditions applicable to this product.
  • Page 40 man_S20xx.qxd 12-03-2009 12:32 Pagina 40 TECHNICAL DATA Model S 2035 S 2041 S 2053 DC inverter Wall mounted split Type air-conditioner Cooling capacity, min-max (nom)* 850-3500 (2930) 800-4100 (3660) 500-5300 (5190) Cooling capacity, min-max (nom)* BTU/h 2900-11950 (10000) 2730-13990 (12490) 1710-11950 (17710 EE Class* EER*...
  • Page 41 man_S20xx.qxd 12-03-2009 12:32 Pagina 41...
  • Page 42 Pagina 42 Geachte mevrouw, mijnheer, Van harte gefeliciteerd met de aankoop van uw Zibro airconditioner. U heeft een kwaliteitsproduct aangeschaft waar u nog vele jaren plezier van zult hebben, mits u het apparaat verantwoord gebruikt. Lees daarom eerst deze gebruiksaanwijzing voor een optimale levensduur van uw airconditioner.
  • Page 43 man_S20xx.qxd 12-03-2009 12:32 Pagina 43 INHOUD VEILIGHEIDSVOORSCHRIFTEN ONDERDELEN EN FUNCTIES VOOR INGEBRUIKNEMING INSTRUCTIES VOOR GEBRUIK LUCHTFILTER ONDERHOUD STORINGEN VERHELPEN GARANTIEBEPALINGEN TECHNISCHE GEGEVENS LEES DEZE HANDLEIDING In de handleiding vindt u vele nuttige tips over hoe u de airconditioner op de juiste manier gebruikt en onderhoudt.
  • Page 44 • Laat eventuele reparaties en/of onderhoud alleen uitvoeren door een erkend servicemonteur of door uw erkende Zibro leverancier. Volg de gebruiks- en onderhoudsinstructies in het gebruikershandboek dat bij dit apparaat hoort. • Haal altijd de stekker van het apparaat uit het stopcontact als het niet wordt gebruikt.
  • Page 45 man_S20xx.qxd 12-03-2009 12:32 Pagina 45 • Plaats nooit gasbranders, ovens of kooktoestellen in de luchtstroom. • Bedien nooit de knoppen en raak de airconditioner nooit aan met natte handen. • De buitenunit produceert geluid wanneer het apparaat aanstaat. Dit kan in strijd zijn met plaatselijke wettelijke regelingen.
  • Page 46 man_S20xx.qxd 12-03-2009 12:32 Pagina 46 Bedieningspaneel Bedieningspaneel De testbedieningsschakelaar wordt gebruikt als noodbedieningsschakelaar. SCHAKELAAR VOOR (HANDMATIGE) NOODBEDIENING. Wanneer het draadloze afstandsbedienings- ysteem niet beschikbaar is (als de draadloze afstandbediening is zoekgeraakt of de batterij ervan leeg is), kan de airconditioner tijdelijk blijven werken. SCHAKELAAR VOOR (HANDMATIGE) TESTBEDIENING.
  • Page 47 man_S20xx.qxd 12-03-2009 12:32 Pagina 47 Afstandsbediening KNOP VOOR HORIZONTA- TRANSMITTER LE VENTILATIEJALOEZIE Stuurt signalen naar de ontvanger van de De richting van de luchtstroom kan horizon- thuisunit. taal met een zwenkende beweging (rechts VENTILATORSNEL- en links) worden aangepast door elke druk op de knop.
  • Page 48 7 meter worden bediend. 2. Filters aanbrengen OPMERKING • Gebruik de airconditioner nooit zonder het luchtfilter. • Gebruik alleen geschikte Zibro filters. Dit voorkomt schade aan uw airconditioner. • Geschikte filterpakketten zijn verkrijgbaar bij uw verkooppunt.
  • Page 49 man_S20xx.qxd 12-03-2009 12:32 Pagina 49 Hoe de luchtreinigingsfilters aan te brengen a. Open het frontpaneel door het omhoog te trekken. b. Verwijder de buitenste luchtfilters. Druk het flapje van elk filter een klein stuk- je omhoog totdat deze los komt van de stopper en verwijder het filter naar beneden.
  • Page 50 man_S20xx.qxd 12-03-2009 12:32 Pagina 50 Werking koelen/drogen Druk op de ON/OFF (AAN/UIT) knop. Stel de werkingsmodus in op Koelen , Verwarmen of Drogen , door op de knop voor de werkingsmodus te drukken. Pas de ingestelde temperatuur aan door op de instelknoppen voor de tem- peratuur te drukken.
  • Page 51 man_S20xx.qxd 12-03-2009 12:32 Pagina 51 LET OP! • De lucht zal niet uitstromen tenzij de warmtewisselaar warm genoeg wordt om een koude luchtstroom te voorkomen. • De airconditioner zal gedurende ongeveer 3 minuten niet beginnen te werken om de compressor te beschermen ook al drukt u op de ON (AAN) knop direct nadat de werking is gestopt.
  • Page 52 man_S20xx.qxd 12-03-2009 12:32 Pagina 52 Regelen van de luchtstroom Verticale regeling Standaardpositie De verticale ventilatiejaloezie zal automatisch naar de juiste positie bewegen Ongeveer 10 graden Vlak (Koelen/Drogen) wanneer de ON/OF (AAN/UIT) knop wordt ingedrukt. Ongeveer 70 graden (Verwarmen) Zwenken van luchtstroom Zwenken van de luchtstroom Als de knop voor de verticale ventilatiejaloezie één keer wordt ingedrukt, zal de Vlak...
  • Page 53 man_S20xx.qxd 12-03-2009 12:32 Pagina 53 Timerwerking Controleer alvorens de timer in te stellen of de huidige tijd correct is ingesteld. Zodra u de timer heeft inge- steld, onthoudt de afstandsbediening de instelling. Vanaf de volgende keer kunt u dezelfde timermodus gebruiken door slechts op de ON/OFF (AAN/UIT) en de Timerbevestiging ("ON/OFF timer") knop te drukken.
  • Page 54 man_S20xx.qxd 12-03-2009 12:32 Pagina 54 “OFF Timer” Voorbeeld: stel de “Off Timer” in op 22:00 uur. Werking start op de ingestelde tijd. Programmeren van de “OFF Time” Druk 3 keer op de “TIME ADJ” knop. Pas de tijd aan met de knop.
  • Page 55 man_S20xx.qxd 12-03-2009 12:32 Pagina 55 “SLAAP Timer” Indrukken van deze knop start de timermodus die de werking na het ingestelde tijdstip stopzet. Druk op de “SLAAP” knop tijdens de werking. Door op de knop te drukken volgt de ingestelde tijd de volgende modus: Continue werking (Slaapwerking: OFF).
  • Page 56 man_S20xx.qxd 12-03-2009 12:32 Pagina 56 Testwerking • Dezelfde schakelaar die gebruikt wordt bij de noodbediening. • In speciale gevallen, wanneer u de "koelwerking" moet testen ook al is de kamertemperatuur lager dan 16 °C, heeft u de testbediening nodig. Deze gebruikt u dus niet tijdens normale werking van het apparaat.
  • Page 57 man_S20xx.qxd 12-03-2009 12:32 Pagina 57 LET OP • De oude filters kunnen worden afgedankt in de 'niet-biologische afvalcontainer' (grijze container). • Pakketten met vervangende filters zijn verkrijgbaar bij uw verkooppunt. • De unit raakt niet beschadigd als deze werkt zonder het schimmelbestendige schermfilter, het fotokatalytische anti-geurfilter en het elektrostatische Catechinfilter.
  • Page 58 man_S20xx.qxd 12-03-2009 12:32 Pagina 58 Vervangen en onderhoud van luchtreinigingsfilters Vervangende filters Fotokatalytische filters: 2 stuks Fotokatalytische filters Model CAC-5 Elektrostatische, Elektrostatische, 2 stuks Catechinfilters: Catechinfilters Model CAC-6 Open de inlaat door deze omhoog te trekken. Verwijder de buitenste luchtfilters. Druk het flapje van elk filter een klein stukje omhoog totdat deze los komt van de stopper en verwijder het filter naar beneden.
  • Page 59 man_S20xx.qxd 12-03-2009 12:32 Pagina 59 STORINGEN VERHELPEN VOORZICHTIG! Stop bij een eventuele storing (brandlucht,etc.) onmiddellijk de werking, trek de stekker uit het stopcontact en raadpleeg uw verkooppunt. Voer voordat u om service verzoekt de volgende controles uit: Probleem Oorzaak/oplossing Het systeem begint niet onmiddellijk weer met Dit is ter bescherming van het systeem.
  • Page 60 De verzendkosten en het risico van het opsturen van de airconditioner of onderdelen daarvan, komen altijd voor rekening van de koper. Schade, veroorzaakt door het niet gebruiken van de geschikte Zibro filters, valt buiten de garantie. Het verlies van koelmiddel en/of lekkage ten gevolge van ondeskundig aansluiten / losmaken van de units valt niet onder de garantiebepalingen die op dit product van toepassing zijn.
  • Page 61 man_S20xx.qxd 12-03-2009 12:32 Pagina 61 TECHNISCHE GEGEVENS Model S 2035 S 2041 S 2053 DC inverter splittype voor wandmontage Type airconditioner Koelcapaciteit, min-max (nom)* 850-3500 (2930) 800-4100 (3660) 500-5300 (5190) Koelcapaciteit, min-max (nom)* BTU/h 2900-11950 (10000) 2730-13990 (12490) 1710-11950 (17710 EE klasse* EER* 4,44...
  • Page 62 12:32 Pagina 62 Say›n Bay/Bayan, Zibro klimas›n› sat›n ald›¤›n›z için tebrikler. Sorumlu biçimde kullan›ld›¤›nda size y›llarca memnuniyet verecek bir yüksek kaliteli ürün sahibi oldunuz. Kliman›za maksimum yaflam süresi garanti etmek için önce bu kullanma talimatlar›n› okuyun. ‹malatç› ad›na tüm malzeme ve üretim hatalar› üzerinde size 24-ayl›k bir garanti sa¤l›yoruz.
  • Page 63 man_S20xx.qxd 12-03-2009 12:32 Pagina 63 ‹Ç‹NDEK‹LER GÜVENL‹K TAL‹MATLARI PARÇALAR VE FONKS‹YONLARI KULLANIMDAN ÖNCE KULLANIM TAL‹MATLARI HAVA F‹L‹TRES‹ BAKIM SORUN G‹DERME GARANT‹ fiARTLARI TEKN‹K VER‹LER...
  • Page 64 man_S20xx.qxd 12-03-2009 12:32 Pagina 64 GÜVENL‹K TAL‹MATLARI Cihaz› sadece yerel tüzükler, genelgeler ve standartlara göre monte edin. Ünite sadece kuru yerlerde, içeride kullanmaya uygundur. Ana voltaj ve frekans› kontrol edin. Bu ünite asadece ba¤lant› voltaj› 230 V. / 50 Hz. olan toprakl›...
  • Page 65 man_S20xx.qxd 12-03-2009 12:32 Pagina 65 • G›da, sanat ifli veya hassas ekipman saklama veya ›slah amaçl› olarak kullanmay›n›z. • Yan›k-koku gibi anormallikler oldu¤unda, derhal çal›flma dü¤mesini durdurun ve sat›fl ma¤azas› ile temasa geçi- niz. • Boflalt›m›n güvenli do¤ru monte edildi¤ini kontrol ediniz. Afla¤›daki yerlere monte etmeyiniz: •...
  • Page 66 man_S20xx.qxd 12-03-2009 12:32 Pagina 66 ‹flletim Paneli / POWER ‹flletim Paneli Test çal›flt›rma flalteri acil çal›flt›rma flalteri olarak kullan›l›r. AC‹L ÇALIfiTIRMA (MANUEL) fiALTER‹: Kablosuz uzaktan kumanda sistemi mevcut de¤ilse (kablosuz uzaktan kumada kay›p oldu¤unda veya pili bitti¤inde), klima sistemi geçici olarak ifllemini sürdürebilir. TEST ÇALIfiTIRMA (MANUEL) fiALTER‹.
  • Page 67 man_S20xx.qxd 12-03-2009 12:32 Pagina 67 Uzaktan kumanda YATAY BÖLME Verici DÜ⁄MES‹ (Sadece S2053 üzerinde) ‹ç ünite al›c›s›na sinyal gönderir. Yatay Hava ak›fl› yatay flaplar›n manual olarak Fan H›z› Göstergesi yönlendirilmesi sonucu de¤ifltirilebilir. Fan h›z› tuflu ile seçilen fan h›z›n› gösterir. Fan H›z›...
  • Page 68 Uzaktan kumanday› kliman›n iç ünitesi üzerindeki al›c›ya do¤rultunuz. Klima bu flekilde yaklafl›k 7 metre uzakl›ktan çal›flt›r›labilir. 2. Ekran filtrelerinin tak›lmas› D‹KKAT! • Klimay› hiçbir zaman eleme filtresi olmadan kullanmay›n›z. • Sadece uygun Zibro filtrelerini kullan›n. Bu kliman›za gelebilecek hasar› önler • Uygun filtre paketleri sat›c›n›zda mevcuttur...
  • Page 69 man_S20xx.qxd 12-03-2009 12:32 Pagina 69 a. Ön paneli öne çekerek aç›n›z b. D›fl hava filtrelerini sökünüz. Durdurucudan ayr›l›ncaya kadar her filtrenin orta t›rna¤›n› yukar› itiniz, ve filtreyi afla¤› do¤ru ç›kar›n›z. Hava filtreleri c. Hava temizleme filtrelerini tak›n›z. Her iki tarafa hem “Statik, catechin filtrelerini” hem de “Foto-Katalitik Koku Giderici filtreleri”...
  • Page 70 man_S20xx.qxd 12-03-2009 12:32 Pagina 70 So¤utma/kuru çal›flma ON/OFF (Açma / Kapama)tufluna bas›n›z. Çal›flma biçimi tufluna basarak çal›flma biçimini Cooling (So¤utma), , Heating (Is›tma) veya Dry (Kuru) , olarak ayarlay›n›z. S›cakl›k ayar tufllar›na basarak s›cakl›¤› ayarlay›n›z. Fan h›z›n› fan h›z› tufluna basarak ayarlay›n›z. “AUTO” olarak ayarland›¤›nda, fan h›z›...
  • Page 71 man_S20xx.qxd 12-03-2009 12:32 Pagina 71 NOT! • So¤uk havay› korumak için ›s› dönüfltürücü yeteri kadar ›s›nmazsa havan›n d›flar› ak›fl› gerçekleflmez. • Çal›flma durduktan hemen sonra AÇMA dü¤mesine bassan›z bile kompresörü korumak için klima yaklafl›k olarak 3 dak. Çal›flmaya bafllamayacakt›r. Çal›flma 3 dak. içinde otomatik olarak bafllayacakt›r.
  • Page 72 man_S20xx.qxd 12-03-2009 12:32 Pagina 72 Hava ç›k›fl ayar› Dikey Ayarlama Standart Pozisyon AÇMA/KAPAMA dü¤mesine bas›ld›¤›nda dikey bölme (louver) uygun pozisyona kendi- Yaklafl›k 10 derece Seviye li¤inden hareket edecektir. (So¤utma/Kuru) Yaklafl›k 70 derece (Is›tma) Hava ak›fl›n›n sal›nmas› (swing) Hava Ak›fl›n›n Sal›nmas› (Swing) Dikey bölme dü¤mesine bir kez bas›l›rsa, dikey bölme sa¤daki flekilde gösterilen düzey- Seviye...
  • Page 73 man_S20xx.qxd 12-03-2009 12:32 Pagina 73 “ON Timer” Örnek: “ON Timer” ibaresini 7 a.m. olarak ayarlay›n Klima belirlenen saatte çal›flmaya bafllar. (7 a.m. = 07:00) “ON Timer” programlamas›: “TIME ADJ” tufluna 2 defa bas›n›z. Tuflu kullanarak zaman› ayarlay›n›z. Zaman ayar› 10 dakikal›k aral›klarla de¤iflir.
  • Page 74 man_S20xx.qxd 12-03-2009 12:32 Pagina 74 3.“TIME ADJ” tufluna bir defa bas›n›z. “OFF Time” ayar› bitmifltir. Ve güncel zaman görüntülenir. AÇMA/KAPAMA” dü¤mesine bas›n›z. E¤er ünite çal›flt›r›ld›ysa ve AÇMA zamanlay›c›s› ayarland›ysa, 5. Ad›mdan (afla¤›da) ilerleyiniz. Press the timer fixing button “ON”. The “ON Time” is displayed for 2 seconds and then the present time appe- ars.
  • Page 75 man_S20xx.qxd 12-03-2009 12:32 Pagina 75 Acil durum ve test operasyonu Acil Durum Operasyonu • Acil durum operasyonuna sadece uzaktan kumandan›n kullan›lamad›¤› durumlarda gerek duyulur. • Acil Durum Operasyonu Anahtar›na bast›¤›n›z zaman, bir bip sesi duyars›n›z ve acil durum operasyonu bafllar. •...
  • Page 76 man_S20xx.qxd 12-03-2009 12:32 Pagina 76 HAVA F‹L‹TRES‹ Cihaz sirküle olan havay› temizlemek için 3 çeflit filitre ile donanm›flt›r. Tozlanmaz hava filitresi; ekran havadaki tozlar› yok eder. Ekran› tozlanmaz oldu¤u için tozun bar›nmas›na izin vermez, onun yerine temiz, taze hava verir. Fotokatalitik koku giderici filitre: kokular›...
  • Page 77 man_S20xx.qxd 12-03-2009 12:32 Pagina 77 Izgara Filtresinin Temizli¤i (her iki haftada bir defa) Yukar› do¤ru çekerek hava giriflini aç›n›z. Izgara filtresini sökünüz. T›kaçtan ayr›l›ncaya kadar filtrenin orta t›rna¤›n› hafifçe yukar› itiniz, ve filtreyi afla¤› do¤ru ç›kar›n›z. Izgara filtresini temizleyiniz. Tozlar› ç›karmak için bir vakumlu temizleyici kullan›n›z, veya filtreyi su ile y›kay›n›z.
  • Page 78 man_S20xx.qxd 12-03-2009 12:32 Pagina 78 SORUN G‹DERME DIKKAT! Ar›za durumunda (yan›k kokusu, vb.) ifllemi hemen durdurunuz, Güç Kayna¤› fiflini ç›kar›n›z ve sat›fl ma¤azas›na baflvurunuz. Bak›m yapt›rmadan önce, afla¤›daki kontrolleri yap›n›z: P P r r o o b b l l e e m m S S e e b b e e p p / / S S o o n n u u ç...
  • Page 79 Posta masraflar› ve klima veya klima parçalar›n›n yollama riski her zaman sat›n alan tarafa aittir. Uygun Zibro filtrelerinden baflka filtre kullan›lmas›ndan ötürü olan hasarda garanti geçersizdir. Gereksiz masraflar› önlemek için, her zaman ilk baflta kullanma k›lavuzunu özenle okuman›z› tavsiye ediyoruz.
  • Page 80 man_S20xx.qxd 12-03-2009 12:32 Pagina 80 TEKN‹K VER‹LER M M o o d d e e l l S S 2 2 0 0 3 3 5 5 S S 2 2 0 0 4 4 1 1 S S 2 2 0 0 5 5 3 3 Klimanın Çeflidi Duvar Tipi DC Inverter Klima So¤utma Kapasitesi (min-max) *...
  • Page 81 man_S20xx.qxd 12-03-2009 12:32 Pagina 81...
  • Page 82 Cranage, Middlewich, CW10 9LT UK tel: +43 7434 44867 tel.: +44 1606 837787 fax: +43 7434 44868 fax: +44 1606 837757 email: pvgaustria@zibro.com email: sales@scottmail.co.uk > ITALIA e BELGIË PVG Italy SRL PVG Belgium NV/SA Via Niccolò Copernico 5 Industrielaan 55 50051 CASTELFIORENTINO (FI)

Ce manuel est également adapté pour:

S2041S2053