Thermor Riva 3 Notice D'installation Et D'utilisation
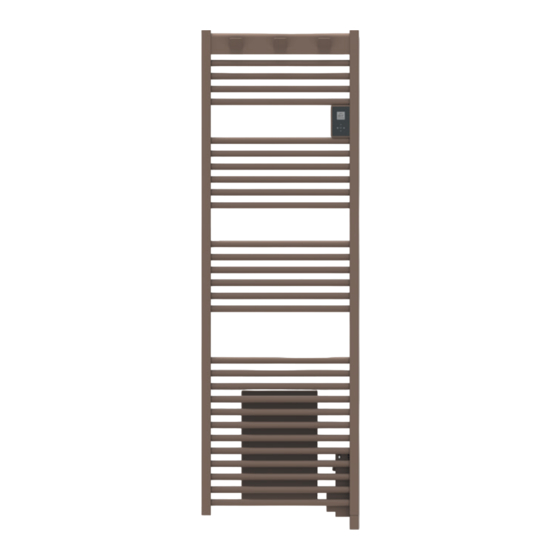
Radiateur sèche-serviettes de 500 à 1000 w avec ou sans soufflerie (1000 w)
Les langues disponibles
Les langues disponibles
Radiateur
sèche-serviettes
de 500 à 1000 W
avec ou sans soufflerie
(1000 W)
Electric towel radiator
Elektrische radiator handdoekdroger
25%
(1) Par rapport à un convecteur de 1
www.thermor.fr
NOTICE D'INSTALLATION
ET D'UTILISATION
INSTALLATION AND OPERATING MANUAL
GEBRUIKS- EN INSTALLATIEHANDLEIDING
Riva 3
(1)
génération.
ère

Manuels Connexes pour Thermor Riva 3


Sommaire des Matières pour Thermor Riva 3
- Page 1 NOTICE D’INSTALLATION ET D’UTILISATION INSTALLATION AND OPERATING MANUAL GEBRUIKS- EN INSTALLATIEHANDLEIDING Riva 3 Radiateur sèche-serviettes de 500 à 1000 W avec ou sans soufflerie (1000 W) Electric towel radiator Elektrische radiator handdoekdroger (1) Par rapport à un convecteur de 1 génération. ère...
- Page 2 RIVA 3 Radiateur sèche-serviettes Electric towel radiator Elektrische radiator handdoekdroger Nous vous remercions de lire attentivement cette notice de façon à : • rendre votre installation conforme aux normes, • optimiser les performances de fonctionnement de votre appareil. Notre responsabilité ne saurait être engagée pour des dommages...
- Page 3 Sommaire Mise en garde ............2 Installation.
- Page 4 Mise en garde Attention surface très chaude. Caution hot surface. ATTENTION : Certaines parties de ce produit peuvent devenir très chaudes et provoquer des brû- Attention : Surface très lures. Il faut prêter une attention particulière en pré- chaude sence d’enfants et de personnes vulnérables. Caution hot surface Il convient de maintenir à...
- Page 5 A la première mise en chauffe, une légère odeur peu apparaître correspondant à l’évacuation des éventuelles traces liées à la fabrication de l’appareil. La notice d’utilisation de cet appareil est disponible en vous connec- tant sur le site Internet du fabricant indiqué sur le bon de garantie présent dans cette notice.
- Page 6 Installation PRÉPARER L’INSTALLATION DE L’APPAREIL Règles d’installation Cet appareil a été conçu pour être installé dans un local résidentiel. Dans tout autre cas,veuillez consulter votre distributeur. L’installation doit être faite dans les règles de l’art et conforme aux normes en vigueur dans le pays d’installation (NFC 15-100 pour la France).
- Page 7 RACCORDER L’APPAREIL Règles de raccordement L’appareil doit être alimenté en 230 V Monophasé 50Hz. L’alimentation de l’appareil doit être directement raccordée au réseau après le disjoncteur et sans interrupteur intermédiaire. Le raccordement au secteur se fera à l’aide du câble de l’appareil par l’intermédiaire d’un boîtier de raccordement.
- Page 8 Pour vérifier la bonne transmission des ordres de programmation, procédez aux vérifications suivantes : arrêt du confort confort confort hors gel chauffage -1° c -2° c délestage signal à transmettre m e s u r e -115 + 115 volt volt entre le fil volt...
- Page 9 NETTOYAGE DU VENTILATEUR Nettoyez avec un aspirateur les grilles d’entrée et de sortie d’air. Le ventilateur est équipé d’un filtre anti-poussière qui, lorsqu’il est saturé, peut provoquer son arrêt (un code erreur Err 6 s’affiche sur l’écran du boîtier de commande). Pour une meilleure utilisation, nettoyez votre filtre régulièrement.
- Page 10 METTRE EN MARCHE / ARRÊTER L’APPAREIL Pour arrêter l’appareil, faites un appui long sur Confirmez «Eteindre» en appuyant sur Pour mettre en marche l’appareil, faites un appui long sur VERROUILLAGE DES COMMANDES Afin d’éviter les manipulations par des enfants, vous pouvez verrouiller les commandes de votre appareil en faisant un appui long sur Sélectionnez «Verrouiller»...
- Page 11 RÉGLER LA TEMPÉRATURE En mode PROG Inactive : (max 28°C). Augmentez avec Diminuez avec (min 12°C). ° Diminuez encore jusqu’à 7°C (température Hors Gel non modifiable) avec Diminuez encore jusqu’à Eté avec (l’appareil ne chauffe plus. La fonction Boost reste accessible). En mode PROG active : Si l’écran affiche PROG, vous êtes sur une plage de PROG...
- Page 12 Le menu Pour régler les plages de température Confort sur un jour de la semaine (3 plages possibles) puis copier ces plages sur d’autres jours. Consommation Pour régler l’abaissement de température par rapport à la température Confort (de -1°C à -9°C, par défaut à -3.5°C). FONCTIONNEMENT DU BOOST Cette fonction vous permet de lancer le chauffage à...
- Page 13 UTILISER LA PROGRAMMATION INTERNE Anticipation de la chauffe Votre appareil est équipé d’une fonction qui permet à votre appareil d’anticiper la chauffe lorsque vous utilisez la programmation. Lorsque vous réglez la programmation de votre appareil, celui-ci va anticiper la chauffe en fonction du temps de montée en température pour que votre pièce soit à...
- Page 14 Le menu EXPERT Pour accéder aux fonctions avancées de l‘appareil, appuyez en même temps sur pendant plus de 3 secondes. MENU...
- Page 15 Information sur la puissance de l’appareil. Identi cation de l’appareil. Identi cation de la version. Délestage Nos appareils sont compatibles avec différents systèmes de délestage. Vous ne devez toute- fois pas utiliser de délestage par coupure d’alimentation secteur car ce système est incom- patible avec nos appareils.
- Page 16 En cas de problème Problème rencontré Vérifications à faire L’écran du boîtier Vérifiez que l’interrupteur situé à l’arrière de l’appareil est bien de commande ne sur I (marche). s’allume pas. Vérifiez que l’appareil est bien alimenté électriquement. température Il est nécessaire d’attendre 6 heures au minimum pour que la tem- d’ambiance pérature se stabilise.
- Page 17 Problème rencontré Vérifications à faire L’appareil est très Il est normal que l’appareil soit chaud lorsqu’il fonctionne, la tem- chaud en surface. pérature maximale de surface étant limitée conformément à la norme NF Electricité Performance. Si toutefois vous jugez que votre appareil est toujours trop chaud, vérifiez que la puissance est adaptée à...
- Page 18 Caractéristiques Références du modèle Caractéristique Symbole Valeur Unité Puissance thermique Puissance thermique nominale P nom 0,5 à 2 500 à 2000 Puissance thermique minimale P min Puissance thermique maximale continue P max,c 2000 Consommation d’électricité auxiliaire A la puissance thermique nominale el max 0,000 A la puissance thermique minimale...
- Page 35 La garantie s’applique en France métropolitaine uniquement. • La durée de la garantie commerciale accordée par Thermor à ses clients est de 2 ans à compter de la date d’installation ou d’achat et ne saurait excéder 30 mois à partir de la date de fabrication en l’absence de justificatif.
- Page 36 RETROUVEZ LES ACCESSOIRES SALLE DE BAINS EN VENTE SUR LA BOUTIQUE EN LIGNE THERMOR http://www.thermor.fr BOUTIQUE OFFICIELLE THERMOR Produits certifiés d’origine constructeur PAIEMENT 100% SÉCURISÉ LIVRAISON OFFERTE Livraison en France métropolitaine sous 72h...