Publicité
Les langues disponibles
Les langues disponibles
Liens rapides
Publicité

Manuels Connexes pour Moulinex cook'in one


Sommaire des Matières pour Moulinex cook'in one
- Page 2 TABLE DES MATIÈRES Veuillez lire attentivement le livret “Consignes de sécurité et d’utilisation“ avant la première utilisation. • Description Please read the "Use & Safety instructions" booklet • Changement de position carefully before first use. • Présentation du produit Bitte lesen Sie die Broschüre „Gebrauchs- und •...
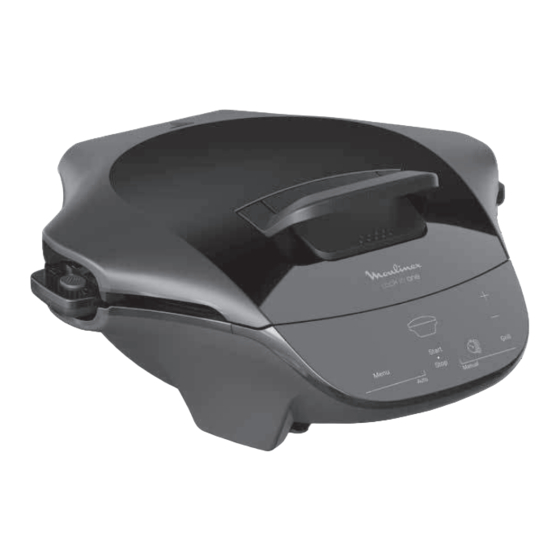
- Page 3 DESCRIPTION 1 Poignée / Support Position ouverte 180° 2 Bouton déverrouillage de la poignée en position 180° 3 Tableau de bord 4 Clips de la plaque supérieure Position fermée 5 Plaque supérieure 6 Bouton charnière ouverture 180° 7 Clips poignée cuve 8 Cuve 9 Indicateur de niveau volume maximum 10 Cordon d’alimentation...
- Page 4 CHANGEMENT DE POSITION Pour ouvrir en position semi - ouverte 1.1 Attraper la poignée de Cook'in One positionnée au dessus de l'appareil 1.2 Ouvrir jusqu'à stabilisation de la partie supérieure Pour ouvrir en position ouverte à 180° 2.1 En position fermée, appuyer sur le bouton poignée.
- Page 5 PRÉSENTATION DU PRODUIT Ecran des menus (selon modèles) Touche Grill (Cf page 13) Touche Menu Touche Moins (-) Touche Start/Stop Touche Plus (+) Indicateur de zone de chauffe Ecran de controle Touche Mode Manuel PRÉPARATION 1. Enlever tous les emballages autocollants ou accessoires divers à l’intérieur comme à...
- Page 6 2 3 4 PRÉSENTATION DES PROGRAMMES 8 Programmes automatiques : Programme Quiche & Gâteaux Programme Viandes Programme Pizza Programme Poissons & Légumes Programme Pâtes & Riz Programme Surgelés Programme Sandwich Gourmand Programme Plancha Astuce de cuisson : Il existe un programme adapté à chaque typologie de recette. Selon le programme choisi, un temps de cuisson est indiqué...
- Page 7 2 fois sur le bouton START/STOP. Pour les programmes Quiche & Gâteaux, Pizza, Viandes, Poisson & Légumes et Surgelés, sans action de votre part le Cook'in One se met en mode maintient au chaud pendant 1 heure...
- Page 8 L’écran indique le temps de cuisson que vous avez sélectionné en étape 5.6. Remarque : Choisissez la position la plus adaptée à votre cuisson. Sans action de votre part, le Cook'in One se met en mode maintient au chaud pendant 1 heure...
- Page 9 C. MODIFICATION DU TEMPS EN COURS DE CUISSON 1. Une fois la cuisson lancée appuyer sur les touches +/- pour modifier le temps de cuisson. Remarque : Le temps de cuisson n'est pas modifiable pendant la phase de préchauffe. D. MODIFICATION DU THERMOSTAT EN COURS DE CUISSON Remarque : Le thermostat de cuisson n'est pas modifiable pendant la phase de préchauffe et en mode automatique.
- Page 10 ENTRETIEN ET NETTOYAGE 8.1 Débrancher l’appareil. 8.2 Laisser refroidir le Cook’in One pendant au moins 2 heures. 8.3 La plaque supérieure et la cuve de cuisson peuvent aller au lave-vaisselle. 8.4 Après utilisation, vider le bac à jus et le rincer à l’eau ou au liquide vaisselle. 8.5 L’appareil et son cordon ne doivent jamais être mis au lave-vaisselle, ni sous l’eau ou tout autre liquide.
- Page 11 La cuisson de liquide doit toujours etre réalisée en mode Ecoulement de liquide sur le plan de travail et/ ouvert afin d'éviter un important dégagement de vapeur à ou sur le contour du Cook'in One. l'ouverture ainsi qu'un éventuel écoulement de liquide sur le plan de travail.
- Page 12 TABLE OF CONTENTS • Description • Change of position • Product overview • Preparation • Installation and connection • Overview of the programmes • A. Using an automatic programme • B. Using the manual programme • C. Changing the cooking time •...
- Page 13 DESCRIPTION 1 Handle/Holder 180° open position 2 Handle unlock button on side of handle 3 Control panel 4 Top plate clips 5 Top plate Closed position 6 180° opening hinge button 7 Pot handle clips 8 Pot 9 Maximum volume level indicator 10 Power cord 11 Juice jug 12 Cord storage...
- Page 14 CHANGE OF POSITION To open to semi-open position 1.1 Catch the Cook'in One handle positioned above the device. 1.2 Open until top stabilization. To open to 180° open position 2.1 In the closed position, press the handle button to unlock it.
- Page 15 INSTALLATION AND CONNECTION The appliance start-up applies to all programmes 3.1. Place your Cook'in one on a flat, stable, heat resistant work surface away from water. 3.2. Plug in your appliance 3.3. Check that the pot and the top plate are installed in the product.
- Page 16 2 3 4 OVERVIEW OF THE PROGRAMMES 8 Automatic programme Quiche & cakes programme Meat programme Pizza programme Fish & vegetable programme Pasta & rice programme Frozen programme Gourmet sandwich programme Plancha programme Cooking tip: There is a programme suited to each recipe style Depending on the programme selected, a default cooking time is indicated.
- Page 17 4.2. The selected pictogram flashes. 4.3. If required, press the + and – buttons to change the time. 4.4. Place the Cook'in one in the correct position and then press Start/Stop. 4.5. The preheating starts. The display will then show a succession of horizontal bars during preheating.
- Page 18 Cook'in One central heat indicator. Press the START/STOP button to confirm and start preheating. 5.8. At the end of preheating, the Cook'in one beeps and cooking starts automatically. The display shows the cooking time you selected in step 5.6.
- Page 19 C. CHANGING THE COOKING TIME 1. Once cooking has started, press the +/- buttons to change the cooking time. Note: The cooking time cannot be changed during preheating. D. CHANGING THE THERMOSTAT DURING COOKING Note: The cooking thermostat cannot be changed during the preheating phase. For the manual programme, once cooking has started.
- Page 20 MAINTENANCE AND CLEANING 8.1 Unplug the appliance. 8.2 Allow the Cook'in One to cool completely for at least two hours. 8.3 The top plate and the cooking pot are dishwasher-safe. 8.4 After use, empty the juice jug and rinse with water or washing-up liquid.
- Page 21 20 min kebab The cooking result is not as expected. Follow the Moulinex recipes available on the app. Cooking of liquids must always be carried out in open mode Liquid flow on the worktop and/or on the in order to prevent a large amount of steam from being contour of the Cook'in one.
- Page 22 INHALTSVERZEICHNIS • Produktbeschreibung • Positionsänderung • Produktübersicht • Vorbereitung • Installation und Anschluss • Übersicht über die Programme • A. Verwenden eines automatischen Programms • B. Verwenden des manuellen Programms • C. Ändern der Garzeit • D. Wechseln des Temperaturreglers während des Garvorgangs •...
- Page 23 PRODUKTBESCHREIBUNG 1 Griff/Haltevorrichtung 180° geöffnet 2 Entriegelungstaste an der Seite des Griffs 3 Bedienfeld 4 Clips der oberen Platte Geschlossene 5 Obere Platte Position 6 Taste zum Öffnen des Scharniers auf 180° 7 Clips am Topfgriff 8 Topf 9 Anzeige der Höhe der Maximalfüllmenge 10 Netzkabel 11 Saftkanne 12 Kabelaufbewahrung...
- Page 24 POSITIONSÄNDERUNG Öffnen in die halboffene Position 1.1 Nehmen Sie den Griff des Cook'in One, der sich oberhalb des Geräts befindet. 1.2 Öffnen Sie den Deckel, bis er sich stabilisiert hat. Zum Öffnen in die 180° offene Position 2.1 Drücken Sie in der geschlossenen Position die Grifftaste, um sie zu entriegeln.
- Page 25 Gehäuse des Geräts mit einem weichen, feuchten Tuch. INSTALLATION UND ANSCHLUSS Der Systemstart gilt für alle Programme. 3.1. Stellen Sie den Cook'in One auf eine flache, stabile und hitzebeständige Arbeitsfläche, die keinem Wasser ausgesetzt ist. 3.2. Schließen Sie Ihr Gerät an das Stromnetz an.
- Page 26 2 3 4 ÜBERSICHT ÜBER DIE PROGRAMME 8 automatische Programme: Programm für Quiche und Kuchen Programm für Fleisch Programm für Pizza Programm für Fisch und Gemüse Programm für Pasta und Reis Programm für „Gefrorenes“ Programm für Gourmet-Sandwiches Programm für Plancha Gartipp: Es gibt ein Programm, das für jeden Rezeptstil geeignet ist.
- Page 27 4.2. Das gewählte Piktogramm blinkt. 4.3. Drücken Sie bei Bedarf die Tasten + und -, um die Zeit zu ändern. 4.4. Bringen Sie den Cook'in One in die richtige Position und drücken Sie dann „Start/Stop“. 4.5. Das Vorheizen beginnt. Das Display zeigt dann während des Vorheizens eine Reihe horizontaler Balken an.
- Page 28 Drücken Sie die „START/STOP“-Taste, um das Vorheizen zu bestätigen und zu starten. 5.8. Am Ende des Vorheizens gibt der Cook'in One einen Signalton aus und der Garvorgang beginnt automatisch. Das Display zeigt die Garzeit an, die Sie in Schritt 5.6 ausgewählt haben.
- Page 29 C. ÄNDERN DER GARZEIT 1. Drücken Sie nach dem Garvorgang die Tasten „+“ und „-“, um die Garzeit zu ändern. Bemerkung: Die Garzeit kann während des Vorheizens nicht geändert werden. D. WECHSELN DES TEMPERATURREGLERS WÄHREND DES GARVORGANGS Bemerkung: Während des Vorheizens kann der Gartemperaturregler nicht gerändert werden.
- Page 30 WARTUNG UND REINIGUNG 8.1 Ziehen Sie den Netzstecker aus der Steckdose. 8.2 Lassen Sie den Cook'in One mindestens zwei Stunden lang vollständig abkühlen. 8.3 Die obere Platte und der Kochtopf sind spülmaschinenfest. 8.4 Leeren Sie die Saftbehälter nach jeder Verwendung aus und spülen Sie sie mit Wasser oder Spülmittel.
- Page 31 Ihren Kundendienst oder eine Reparaturwerkstatt. Befolgen Sie die Anweisungen in den Rezepten von Das Ergebnis ist nicht wie erwartet. Moulinex, die in der App verfügbar sind. Das Kochen von Flüssigkeiten muss immer im geöffneten Es befindet sich Flüssigkeit auf der Modus erfolgen, damit beim Öffnen keine große...
- Page 32 INHOUDSOPGAVE • Beschrijving • Wijziging van positie • Productoverzicht • Voorbereiding • Installatie en aansluiten • Overzicht van de programma's • A. Een automatisch programma gebruiken • B. Het handmatige programma gebruiken • C. De kooktijd veranderen • D. De thermostaat tijdens het koken veranderen •...
- Page 33 BESCHRIJVING 1 Hendel/handvat 180° open stand 2 Ontgrendelknop aan de zijkant van het handvat 3 Bedieningspaneel 4 Klemmen voor de bovenplaat 5 Bovenplaat Gesloten stand 6 Scharnierknop voor 180° open 7 Klemmen voor de handvaten van de pan 8 Pan 9 Niveaucontrolelampje van het maximum volume 10 Netsnoer 11 Sapkan...
- Page 34 WIJZIGING VAN POSITIE Openen naar halfopen stand 1.1 Zet het handvat van de Cook'in One vast boven het apparaat. 1.2 Open totdat de bovenkant stabiel is. Openen tot een open stand van 180° 2.1 Druk in de gesloten stand op de knop van het handvat om te ontgrendelen.
- Page 35 INSTALLEREN EN AANSLUITEN Het starten van het apparaat is voor alle programma’s hetzelfde 3.1. Plaats uw Cook'in one op een droog, vlak, stabiel en hittebestendig werkoppervlak. 3.2. Steek de stekker van het apparaat in het stopcontact. 3.3. Controleer of de pan en de bovenplaat goed in het product zitten.
- Page 36 2 3 4 OVERZICHT VAN DE PROGRAMMA'S 8 Automatisch programma Programma voor quiche en cakes Programma voor vlees Programma voor pizza’s Programma vis en groenten Programma voor pasta en rijst Diepvriesprogramma’s Programma voor luxe sandwiches Plancha-programma’s Kooktip: Er is een programma dat geschikt is voor elke receptstijl. Afhankelijk van het gekozen programma wordt een standaard bereidingstijd aangegeven.
- Page 37 Let op: Er is geen voorverwarming voor de pizza- en quiche- en cakeprogramma's. Het koken begint zodra u op de START-/STOP-knop drukt. 4.6. Zodra het voorverwarmen klaar is, laat de Cook'in one een pieptoon horen. Het bereiden begint automatisch en de display toont de bereidingstijd die u in stap 4.3 gekozen hebt.
- Page 38 LED's branden op de centrale warmte-indicator van de Cook'in One. Druk op de knop START/STOP om te bevestigen en te starten met voorverwarmen. 5.8. Aan het eind van het voorverwarmen geeft de Cook'in one een pieptoon en begint het bereiden automatisch Op het display verschijnt de bereidingstijd die u in stap 5.6 gekozen hebt.
- Page 39 C. DDE KOOKTIJD VERANDEREN 1. Zodra het koken begonnen is, drukt u op de +/- knoppen om de bereidingstijd te veranderen. Opmerking: De bereidingstijd kan niet worden gewijzigd tijdens het voorverwarmen. D. DE THERMOSTAAT TIJDENS HET BEREIDEN WIJZIGEN Opmerking: De kookthermostaat kan niet worden gewijzigd tijdens de voorverwarmingsfase.
- Page 40 ONDERHOUD EN REINIGING 8.1 Haal de stekker uit het stopcontact. 8.2 Laat de Cook'in one ten minste twee uur volledig afkoelen. 8.3 De bovenplaat en de binnenpan zijn vaatwasmachinebestendig. 8.4 Leeg de sapkan na gebruik en spoel deze af met water of afwasmiddel.
- Page 41 Als het probleem blijft bestaan, neemt u contact op met uw klantenservice of een reparatiecentrum. Volg de recepten van Moulinex die beschikbaar zijn in de Het kookresultaat is niet zoals verwacht. app. Het koken van vloeistoffen moet altijd worden uitgevoerd...
- Page 42 TABLA DE CONTENIDOS • Descripción • Cambio de posición • Descripción general del producto • Preparación • Instalación y conexión • Descripción general de los programas • A. Usar un programa automático • B. Usar el programa manual • C. Cambiar el tiempo de cocción •...
- Page 43 DESCRIPCIÓN 1 Asa/soporte con posición de abertura de 180° 2 Botón de desbloqueo del asa en el lateral del asa 3 Panel de control 4 Enganches de la placa superior Posición cerrada 5 Placa superior 6 Botón de la bisagra de la abertura de 180° 7 Enganches del mango del recipiente 8 Recipiente 9 Indicador de nivel de volumen máximo...
- Page 44 CAMBIO DE POSICIÓN Para abrir a la posición semiabierta 1.1 Sujeta el asa del Cook'in One colocada encima del dispositivo. 1.2 Abre hasta que se estabilice la parte superior. Para abrir a la posición abierta de 180° 2.1 En posición de cierre, presiona el botón del asa para desbloquearla.
- Page 45 INSTALACIÓN Y CONEXIÓN La puesta en marcha del aparato se aplica a todos los programas 3.1. Coloca el Cook'in One en una superficie de trabajo plana, estable y resistente al calor lejos del agua. 3.2. Enchufa el aparato.
- Page 46 2 3 4 DESCRIPCIÓN GENERAL DE LOS PROGRAMAS 8 programas automáticos Programa de quiches y tartas Programa de carne Programa de pizza Programa de pescado y verduras Programa de pasta y arroz Programa de congelado Programa de sándwiches gourmet Programa de plancha Consejo de cocina: Hay un programa adecuado para cada estilo de receta.
- Page 47 Precaución: No hay precalentamiento para los programas de pizza y quiches y tartas. La cocción comienza tan pronto como se presiona el botón de INICIAR/DETENER. 4.6. Una vez que se completa el precalentamiento, Cook'in One emite un pitido, la cocción comienza automáticamente y la pantalla muestra el tiempo de cocción que seleccionaste en el paso 4.3.
- Page 48 5.7. El recipiente del aparato siempre se calentará de forma predeterminada. Si deseas utilizar la placa superior, pulsa el botón de grill. Se iluminará una fila de LED rojos en el indicador de calor central de Cook'in One. Pulsa el botón de INICIAR/DETENER para confirmar y comenzar el precalentamiento.
- Page 49 C. CAMBIAR EL TIEMPO DE COCCIÓN 1. Una vez que haya comenzado la cocción, pulsa los botones +/- para cambiar el tiempo de cocción. Nota: El tiempo de cocción no se puede cambiar durante el precalentamiento. D. CAMBIAR EL TERMOSTATO DURANTE LA COCCIÓN Nota: El termostato de cocción no se puede cambiar durante la fase de precalentamiento.
- Page 50 MANTENIMIENTO Y LIMPIEZA 8.1 Desenchufa el artefacto. 8.2 Deja que el Cook'in One se enfríe por completo durante al menos dos horas. 8.3 La placa superior y el recipiente de cocción se pueden lavar en el lavavajillas. 8.4 Después del uso, vacía la jarra de zumo y enjuaga con agua o detergente líquido.
- Page 51 El resultado de la cocción no es el esperado. Sigue las recetas de Moulinex disponibles en la aplicación. La cocción de líquidos debe realizarse siempre en modo Flujo de líquido en la encimera y/o en el abierto para evitar que al abrirse se libere una gran cantidad contorno de la unidad Cook'in one.
- Page 52 INDICE • Descrizione • Cambio di posizione • Panoramica del prodotto • Preparazione • Installazione e collegamento • Panoramica dei programmi • A. Uso di un programma automatico • B. Uso del programma manuale • C. Modifica del tempo di cottura •...
- Page 53 DESCRIZIONE 1 Posizione aperta a 180° della maniglia/staffa 2 Pulsante di sblocco maniglia sul lato della maniglia 3 Pannello di controllo 4 Clip della piastra superiore Posizione chiusa 5 Piastra superiore 6 Pulsante della cerniera di apertura a 180° 7 Clip della maniglia del recipiente 8 Recipiente 9 Indicatore del livello di volume massimo 10 Cavo di alimentazione...
- Page 54 CAMBIO DI POSIZIONE Per aprire parzialmente (posizione semi-aperta) 1.1 Afferra la maniglia di Cook'in One sul dispositivo. 1.2 Apri fino a stabilizzare la parte superiore. Per aprire completamente (180°) 2.1 In posizione chiusa, premi il pulsante della maniglia per sbloccarla.
- Page 55 INSTALLAZIONE E COLLEGAMENTO L'avvio dell'apparecchio si applica a tutti i programmi. 3.1. Posizionare Cook'in one su una superficie di lavoro piana, stabile e resistente al calore, lontana dall'acqua. 3.2. Collegare l'apparecchio alla presa di corrente.
- Page 56 2 3 4 PANORAMICA DEI PROGRAMMI 8 programmi automatici Programma per quiche e torte Programma per pesce e verdura Programma per pizza Programma per surgelati Programma per pasta e riso Programma per cottura alla Programma per panini gourmet plancha Programma per carne Suggerimento per la cottura: Esiste un programma adatto a ogni tipo di ricetta.
- Page 57 Per terminare la fase di preriscaldamento e iniziare subito la cottura, premere due volte il pulsante "Start/Stop". Per i programmi per quiche e torte, pizza, carne, pesce, verdure e surgelati, Cook'in one passa alla modalità "Mantenimento al caldo" per un'ora per impostazione predefinita.
- Page 58 LED rossi. Premere il pulsante AVVIO/ARRESTO per confermare e iniziare a preriscaldare. 5.8. Al termine del preriscaldamento, Cook'in one emette un segnale acustico e la cottura si avvia automaticamente. Il display mostra il tempo di cottura selezionato al punto 5.6.
- Page 59 C. MODIFICA DEL TEMPO DI COTTURA 1. Una volta avviata la cottura, premere i pulsanti +/- per modificare il tempo di cottura. Nota: il tempo di cottura non può essere modificato durante il preriscaldamento. D. MODIFICA DELLA TEMPERATURA DURANTE LA COTTURA Nota: la temperatura di cottura non può...
- Page 60 MANUTENZIONE E PULIZIA 8.1 Scollegare l'apparecchio dalla presa di corrente. 8.2 Lasciare raffreddare completamente Cook'in One per almeno due ore. 8.3 La piastra superiore e il recipiente per la cottura possono essere lavati in lavastoviglie. 8.4 Dopo l'uso, svuotare il vassoio di raccolta dei succhi e risciacquarlo con acqua o detersivo liquido per piatti.
- Page 61 Se il problema persiste, contattare il servizio clienti o il centro di assistenza. Il risultato di cottura non è quello atteso. Seguire le ricette Moulinex disponibili sull'app. La cottura dei liquidi deve sempre essere eseguita in Flusso di liquido sul piano di lavoro e/o sul modalità...
- Page 62 1520012814/02...