Table des Matières
Publicité
Liens rapides
˛
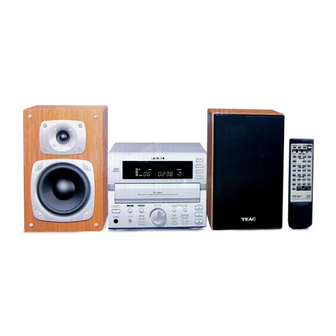
MC - D90
3-CD/Receiver Micro-System
Thanks for buying a TEAC. Read this
manual carefully to get the best
performance from this unit.
Before Use ............................................ 4
Remote Control Unit ............................ 5
Speaker System .................................. 5
Compact Disc........................................ 6
Connection ............................................ 7
Basic Operation.................................. 10
Listening to CDs.................................. 12
Repeat Playback ................................ 14
Shuffle Playback ................................ 15
Program Playback.............................. 16
Listening to the Radio........................ 18
How to Preset Broadcast ..................19
Setting the Clock ................................ 20
Sleep Timer ......................................... 20
Setting the Timer................................ 21
Troubleshooting ................................. 22
Specifications..................................... 23
OWNER'S MANUAL
MANUEL DU PROPRIETAIRE
Nous vous remercions pour l'achat
d'un appareil TEAC. Lire ce manuel
avec attention pour obtenir les
meilleures performances possibles
de cet appareil.
Avant Utilisation .................................. 4
Boîtier detélécommande ................... 5
Système de HAUT-PARLEUR ............. 5
Disque Compacts ................................. 6
Connexions............................................ 7
Fonctionnement de base .................. 10
Lecture des disques compacts........ 12
Lecture répétée.................................. 14
Lecture aléatoire................................ 15
Lecture programmée......................... 16
Ecoute radio........................................ 18
Préréglage des stations.................... 19
Réglage de l'horloge ......................... 20
Temporisation de veille..................... 20
Réglage de la temporisation ............ 21
Guide de dépannage ......................... 22
Spécifications..................................... 23
9A08523100
Publicité
Table des Matières

Manuels Connexes pour Teac MC-D90


Sommaire des Matières pour Teac MC-D90
-
Page 1: Table Des Matières
MC - D90 ˛ 3-CD/Receiver Micro-System OWNER’S MANUAL MANUEL DU PROPRIETAIRE Thanks for buying a TEAC. Read this Nous vous remercions pour l’achat manual carefully to get the best d’un appareil TEAC. Lire ce manuel performance from this unit. avec attention pour obtenir les meilleures performances possibles de cet appareil. -
Page 2: Important Safety Instructions
Plug the equipment into a different outlet so that it is not on the same circuit as the receiver. If necessary, consult the dealer or an experienced radio/TV technician for additional suggestions. CAUTION Changes or modifications to this equipment not expressly approved by TEAC CORPORATION for compliance could void the user's authority to operate this equipment. For CANADA... - Page 3 CAUTION Note to CATV system installer: This reminder is provided to call the CATV system installer’s attention to Section 820-40 of the NEC which provides guidelines for proper grounding and, in particular, specifies that the cable ground shall be < Read all of these Instructions. connected to the grounding system of the building, as close to the point <...
-
Page 4: Before Use
Before Use Avant Utilisation Read this before operation Lire ceci avant de faire fonctionner l'appareil < Place the amplifier on a hard flat surface. < Placer l'amplificateur sur une surface plate rigide. < The ventilation holes should not be < Les trous de ventilation ne doivent pas être covered. -
Page 5: Remote Control Unit
Speaker System Système de HAUT-PARLEUR L'emblem TEAC sur le pannneau avant pu The TEAC emblem on front panel can be este rotatif. rotated. Place le dans la direction qui convient Adjust the direction to fit to your speaker l'emplacement des haut-parleurs. -
Page 6: Compact Disc
Compact Disc Disques Compacts Handling the Discs Manipulation des disques This unit has been designed specifically Cet appareil a été conçu spécialement for sound reproduction from compact pour la reproduction des disques discs bearing the "?" mark. No other audionumériques portant la marque discs can be used. -
Page 7: Connection
< Read instructions of each component you branchements. < Lisez les instructions de chaque appareil intend to use with the MC-D90. que vous avez l’intention d’utiliser avec LINE IN/OUT jacks votre MC-D90. < Make sure to connect :... - Page 8 Connection of antennas and speakers CAUTION Do not plug the power cord of any component into AC outlets and do not turn their POWER switches on until all connections have been performed. FM ANTENNA AM Loop Antenna Connect the FM feeder antenna to the To stand the antenna on a surface, fix the provided matching transformer.
-
Page 9: Connexions De Antennes Et Haut-Parleurs
Connexions de antennes et haut-parleurs AVERTISSEMENT Ne pas brancher aucun composants et ne pas les allumer jusqu'à temps que toutes les connextions soit faites. Antenne cadre AM ANTENNE FM Pour poser l'antenne sur une surface, fixer Branchez le fil de l'antenne FM sur le la griffe dans la rainure. -
Page 10: Basic Operation
Basic Operation ( 1 ) Fonctionnement de base ( 1 ) How to change the source Pour changer de source Press the CD/MD/TAPE or TUNER/AUX Appuyez sur la touche CD/MD/TAPE ou button (or the CD, TUNER, MD, TAPE or TUNER/AUX (ou sur la touche CD, TUNER, AUX button of the remote control unit) to MD, TAPE ou AUX de la télécommande) select the source. -
Page 11: Fonctionnement De Base ( 2 )
Basic Operation ( 2 ) Fonctionnement de base ( 2 ) EEPS (Electronic EQ Preset System) Système électronique de préréglage EQ (EEPS) Every time the EEPS button is pressed, the mode is changed as follows: Chaque pression sur la touche EEPS permet de modifier le mode d'écoute de la façon suivante : FLAT... -
Page 12: Listening To Cds
Listening to CDs ( 1 ) Lecture des disques compacts ( 1 ) Press the CD button to select "CD". Appuyez sur la touche CD pour sélectionner le "CD". < “00 0:00” will be displayed if no disc is set. <... - Page 13 Listening to CDs ( 2 ) Lecture des disques compacts ( 2 ) To stop playback Pour arrêter la lecture. Press the STOP button(H ) to stop Pour arrêter la lecture, appuyez sur la playback. touche STOP(H) . The total number of the tracks and total Le nombre total de plages et la durée play time of the disc is displayed.
-
Page 14: Repeat Playback
Repeat Playback Lecture répétée Every time the REPEAT 1/ALL button is Chaque pression sur la touche REPEAT 1/ALL pressed, the mode is changed as follows: permet de changer de mode selon l'ordre indiqué ci-après : REPEAT OFF REPEAT OFF REPEAT : One track REPEAT : Une plage... -
Page 15: Shuffle Playback
Shuffle Playback Lecture aléatoire Press the SHUFFLE [RANDOM] button in the Appuyez sur la touche SHUFFLE [RANDOM] n stop or play mode. mode arrêt (stop) ou en mode lecture (play). The tracks of all the discs will be played Les plages de tous les disques seront lues randomly. -
Page 16: Program Playback
Program Playback Lecture programmée < < This function allows you to program up to 32 Cette fonction vous permet de programmer tracks for playback in any desired order. jusqu'à 32 plages dans l'ordre de votre choix. Appuyez sur la touche PROGRAM. Press the PROGRAM button in the stop mode. -
Page 17: Listening To The External Sources
TUNER DISC SKIP Program Playback Lecture programmée To Modify the Program Modification du programme 1. Press the PROGRAM button in the stop 1. L'appareil étant à l'arrêt (stop), appuyez mode. sur la touche PROGRAM. Every time the PROGRAM button is A chaque poussée sur la touche pressed, the programmed steps are PROGRAM, les étapes programmées... -
Page 18: Listening To The Radio
Listening to the Radio Ecoute radio Press the TUNER button to select Appuyez sur la touche TUNER pour "TUNER". sélectionner le "TUNER". Press the BAND button to select FM or Appuyez sur la touche BAND pour sélectionner FM ou AM. Press the TUNING MODE button and Appuyez sur le bouton TUNING MODE et select the MANUAL mode. -
Page 19: How To Preset Broadcast
How to Preset Broadcast Préréglage manuel des Manually stations Up to 30 stations (FM + AM) can be stored in Le système permet de mémoriser dans des preset memories. mémoires préréglées jusqu'à 30 stations (FM + AM). Press the BAND button to select FM or Appuyez sur la touche BAND pour sélectionner FM ou AM. -
Page 20: Setting The Clock
TIME Setting the Clock Réglage de l'horloge Press the TIME MODE button. Appuyez sur la touche TIME MODE. The time display becomes active, and L'affichage de l'heure devient actif, et "hour" blinks. l'indication hour clignote. Every time the TIME MODE button is Chaque pression sur la touche TIME TIME MODE SET pressed, the mode is changed as follows:... -
Page 21: Setting The Timer
TIME Setting the Timer Réglage de la temporisation (Timer) Réglez l'heure sur l'horloge avant de régler la Adjust the clock before setting timer. temporisation. Press the TIME MODE button twice. Appuyez 2 fois sur le touche TIME MODE. TIMER TIME MODE "ON TIME"... -
Page 22: Troubleshooting
TEAC service center. revendeur ou le centre de service client TEAC. Amplificateur Amplifier L'appareil ne s'allume pas. -
Page 23: Specifications
Specifications Spécifications AMPLIFIER section Section AMPLIFICATEUR Output Power ....20 W/ch (0.5 %, 6ohms, 1 kHz) Puissance de sortie ... 20W/ch (0,5 %, 6ohms, 1 kHz) Input Sensitivity . - Page 24 7733 Telegraph Road, Montebello, California 90640 Phone: (323) 726-0303 TEAC CANADA LTD. 5939 Wallace Street, Mississauga, Ontario L4Z 1Z8, Canada Phone: (905) 890-8008 TEAC MEXICO, S.A. De C.V Campesions 184, Col.Granjas Esmeralda, 09810, Mexico Phone: (525) 581-5500 TEAC UK LIMITED 5 Marlin House, Croxley Business Park, Watford, Hertfordshire, WD18 8TE, U.K.