Table des Matières
Publicité
Les langues disponibles
Les langues disponibles
Liens rapides
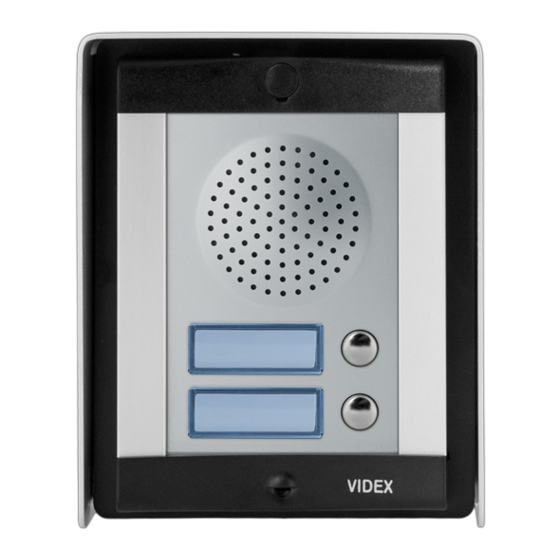
Audiokit 8K Series
Art. 8K-1, 8K-2, 8K-N users
GENERAL DIRECTIONS FOR INSTALLATION
In order to achieve the best results from the schematics described it is necessary to install only original VIDEX equipment, strictly
keeping to the items indicated on each schematic and follow these General Directions for Installation:
• The system must be installed according to national rules in force, in any case the running of cables of any intercom unit must be
carried out separately from the mains (see the next paragraph for connection to mains and power supply installation);
• Use conductors with sections such as to have:
• Cables for speech line and service should have a max resistance of 10Ω
• Lock release wires and power supply wires should have a max resistance of 3Ω;
• Double check the connections before power up;
• Power up the system then check all functions.
CONNECTION TO MAINS AND POWER SUPPLY MOUNTING INSTRUCTIONS
The system must be installed according to national rules in force, in particular we recommend to:
• Connect the system to the mains through an all-pole circuit breaker which shall have contact separation of at least 3mm in each
pole and shall disconnect all poles simultaneously;
• The all-pole circuit breaker shall be placed for easy access and the switch shall remain readily operable.
POWER SUPPLY INSTALLATION
• Remove the terminal side covers by unscrewing the retaining screws;
• Fix the power supply to a DIN bar or directly to the wall using two expansion type screws;
• Switch off the mains using the circuit breaker mentioned above and then make the connections as shown on the installation diagrams;
• Check the connections and secure the wires into the terminals;
• Replace the terminal covers and fix them using the relevant screws;
• When all connections are made, restore the mains.
ATTENTION
In the event of electromagnetic fields, the performances of the production may result slightly degraded, anyway the gen-
eral operation of the system will be acceptable
Art. 8K-1, 8K-2, 8K-N users - Installation instructions
Audiokit
- 1 -
66250840 - V5.2 - 31/03/22
Publicité
Table des Matières

Manuels Connexes pour Videx 8K-1


Sommaire des Matières pour Videx 8K-1
- Page 9 Art. 8K-1, 8K-2, 8K-N users Kit audio NORMES GÉNÉRALES D’INSTALLATION Pour exécuter correctement l’installation, il est nécessaire d’utiliser exclusivement des pièces VIDEX, de suivre scrupuleusement ce qui est indiqué dans les schémas de câblage et de respecter les normes d’installation générales : •...
-
Page 10: Guide Pour Le Câblage
NOUS RECOMMANDONS CET ÉQUIPEMENT EST INSTALLÉ PAR UN ÉLECTRICIEN PROFESSIONNEL OU PAR UN IN- GÉNIEUR DE SÉCURITÉ OU DE COMMUNICATIONS. Si vous avez besoin d’ulterieure assistance veuillez contacter le personnel technique au numero +39 0734631669. - 10 - Art. 8K-1, 8K-2, 8K-N users - Instructions d’installation 66250840 - V5.2 - 31/03/22... -
Page 11: Série 8000 Installation Poste Externe De Surface Ou Incastrable
Fig. 2 Fig. 3 Fig. 4 Fig. 5 Fig. 6 Fig. 7 Fig. 8 Fig. 9 Fig. 10 Fig. 11 Fig. 12 Fig. 13 Fig. 14 - 11 - Art. 8K-1, 8K-2, 8K-N users - Instructions d’installation 66250840 - V5.2 - 31/03/22... - Page 12 (en faisant un mouvement contraire à celui fait pour l'extraire). - 12 - Art. 8K-1, 8K-2, 8K-N users - Instructions d’installation 66250840 - V5.2 - 31/03/22...
- Page 21 ART.3011-3012-3111-3102G • Intercom • Citofono • Poste d’appartement • Intercomunicador الن� ت كم ART.321 • Trasformer • Trasformatore • Transformateur • Transformador دهجلا لوحم Art.8836M-1 • Front panel with built in audio amplifer • Pulsantiera con portiere elettrico • Platine de rue avec groupe phonie •...
- Page 22 ART.3011-3012-3111-3102G • Intercom • Citofono • Poste d’appartement • Intercomunicador الن� ت كم ART.321 • Trasformer • Trasformatore • Transformateur • Transformador دهجلا لوحم Art.8836M-1 • Front panel with built in audio amplifer • Pulsantiera con portiere elettrico • Platine de rue avec groupe phonie •...
- Page 23 - 23 - 66250840 - V5.2 - 31/03/22...
- Page 24 - 24 - 66250840 - V5.2 - 31/03/22...
- Page 25 - 25 - 66250840 - V5.2 - 31/03/22...
- Page 26 The cables which are heavely von mindestens 1mm. Ø auf- Security or outlined have a minimum dia- weisen Communications Engineer meter of 10/10mm. VIDEX VIDEX ELECTRONICS S.p.A. 8K-N COD.FILE: 8K Kit "n" Users with Art.8836M-0 13/07/2010 DENOMINAZIONE: DATA: - 26 -...
-
Page 27: Smaltimento
DISPOSAL In accordance with the Legislative Decree no. 49 of 14 March 2014 “Implementation of the Directive 2012/19/EU on waste electrical and electronic equipment (WEEE)”. The crossed-out bin symbol on the equipment or on the packaging indicates that when the product reaches the end of its lifetime, it must be collected separately from mixed municipal waste.