Brother XL5100 Manuel D'instructions

Manuels Connexes pour Brother XL5100


Sommaire des Matières pour Brother XL5100
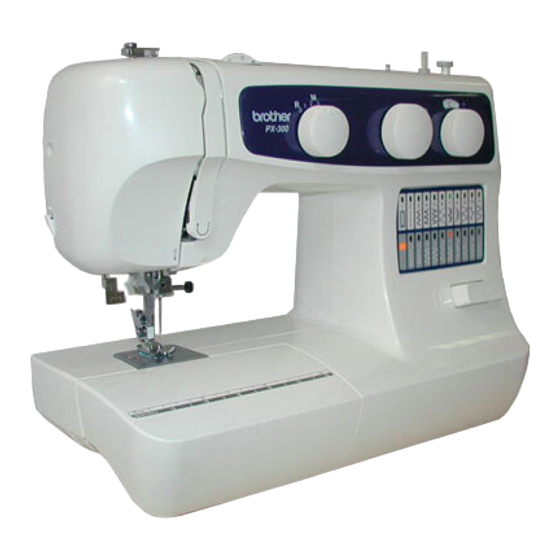
- Page 1 Instruction Manual Manual de instrucciones Manuel d’instructions XL5100/5200/5300 PX100/200/300 XL5300/5200/5100 PX300/200/100...
- Page 3 “IMPORTANT SAFETY INSTRUCTIONS” When using the sewing machine, basic safety precautions should always be followed, including the following: “Read all instructions before using.” DANGER – To reduce the risk of electric shock: The sewing machine should never be left unattended when plugged in. Always unplug this sewing machine from the electrical outlet immediately after using and before cleaning.
- Page 4 “IMPORTANTES INSTRUCCIONES DE SEGURIDAD” Cuando se usa una máquina de coser, debe seguirse unas precauciones básicas y que se detallan a continuación. “Leer todas las instrucciones antes de usarla” PELIGRO – Para reducir el riesgo de una descarga eléctrica. La máquina no debe dejarse nunca desatendida mientras esté conectada. Desconectar la máquina de la red cuando se termine de usar y antes de limpiarla.
- Page 5 “IMPORTANTES CONSIGNES DE SECURITE” Lors de l’utilisation de la machine à coudre, il convient de toujours suivre les consignes de sécurité essentielles et de prendre notamment les précautions suivantes: “Lire toutes les instructions avant d’utiliser la machine.” DANGER – Pour réduire le risque de décharge électrique: Ne jamais laisser la machine sans surveillance lorsqu’elle est branchée.
- Page 6 FOR USERS IN THE UK, EIRE, MALTA AND CYPRUS ONLY. If your sewing machine is fitted with a 3 pin non-rewireable BS plug then please read the following. IMPORTANT The wires in these main leads are coloured in ac- cordance with the following code: If the available socket outlet is not suitable for the plug supplied with this equipment, it should be cut off and Blue...
-
Page 7: Table Des Matières
Making a Buttonhole (XL5300, XL5200, PX300 and PX200 only) ..48 ACCESSORIES ..............3 Making a Buttonhole OPERATING YOUR SEWING (XL5100 and PX100 only) ........50 MACHINE ..............5 Buttonhole Fine Adjustment ....... 53 Connecting Plugs..........5 Button Sewing ............ 55 Main Power and Sewing Light Switches .... - Page 8 ELEMENTOS PRINCIPALES ........2 (Solo XL5300, XL5200, PX300 y PX200) ..49 ACCESORIOS .............. 3 Para coser ojales (Solo XL5100 y PX100) ..50 FUNCIONAMIENTO DE LA MÁQUINA DE COSER ..5 Ajuste fino de los ojales ........54 Conexión de los enchufes ........5 Costura de botones ...........
- Page 9 PX300 et PX200 uniquement) ........49 FONCTIONNEMENT DE LA MACHINE A COUDRE 5 Pour faire une boutonnière Raccordement .............. 5 (Modèles XL5100 et PX100 uniquement) ....50 Interrupteur principal et de la lampe ......6 Equilibrage des boutonnières ........54 Pédale ................6 Pour coudre un bouton ..........
-
Page 10: Principal Parts
PRINCIPAL PARTS 1 Bobbin winding assembly Winds the thread onto the bobbin to be used for the lower thread. 2 Spool pin Holds the spool of thread. 3 Bobbin winding tension disc and thread guide 4 Thread take-up lever 5 Thread cutter 6 Upper tension control dial Controls the tension of the upper thread. -
Page 11: Elementos Principales
ELEMENTOS PRINCIPALES PIÈCES PRINCIPALES 1 Porta bobinas 1 Dévidoir Hace bobina para la canilla que va a ser utilizada como hilo infe- Enroule le fil inférieur sur la canette. rior. 2 Porte-bobine 2 Porta carretes Sert à tenir la bobine de fil à coudre. Soporta el carrete del hilo 3 Disque de tension pour le remplissage de la canette et guide-fil 3 Guía de hilos y disco de tensión de bobinado de la canilla... -
Page 12: Accessories
ACCESSORIES 1 XA4911151 2 X59370-051 3 X59375-051 XL5300/XL5200/PX300/PX200 1 Buttonhole foot (1 pc.) 2 Zipper foot (1 pc.) 3 Button sewing foot (1 pc.) 4 Needle pack (regular single needle HA × 130) (3 pcs.) 5 Twin needle (1 pc.) 6 Bobbins (3 pcs.) 7 Screwdriver (1 pc.) 4 129583-001... - Page 13 XL5100/PX100 1 Buttonhole foot (1 pc.) 2 Zipper foot (1 pc.) 1 X59369-251 2 X59370-051 3 X59375-051 3 Button sewing foot (1 pc.) 4 Needle pack (regular single needle HA × 130) (3 pcs.) 5 Twin needle (1pc.) 6 Bobbins (3 pcs.) 7 Screwdriver (1 pc.)
-
Page 14: Operating Your Sewing Machine
OPERATING YOUR SEWING MACHINE Connecting Plugs 1. Connect the power cord plug into the machine. 2. Connect the power supply plug into a wall outlet. CAUTION: 1. When changing the needle, bobbin or light bulb or when the sew- ing machine is not in use, it is recommended that the power sup- ply plug be disconnected from the wall socket to avoid electrical hazards. -
Page 15: Main Power And Sewing Light Switches
This foot controller can be used for this machine model XL5300/XL5200/ XL5100/PX300/PX200/PX100/XR55/XR53/XR51. ○ ○ ○ ○ ○ ○ ○ ○ ○ ○ ○ ○ ○ ○ ○ ○ ○ ○ ○ ○ ○ ○ ○ ○ ○ ○ ○ ○ ○ ○ ○ ○ ○ ○ ○ ○ ○ ○ ○ ○ ○ ○ ○ ○ ○ ○ ○ ○ ○ ○ ○ ○ ○ ○ ○ ○ ○ ○ ○ ○ ○ ○ ○... -
Page 16: Inserting The Needle
Inserting the Needle Turn power switch to “O”. 1. Remove the power supply plug from the electrical outlet. 2. Raise the needle bar to its highest position. 3. Lower the presser foot. 4. If a needle is already installed, remove it by loosening the needle clamp with a coin and pulling the needle down. -
Page 17: Changing The Presser Foot
Changing the Presser Foot It may be necessary to change the presser foot according to your sew- ing needs. SNAP-ON TYPE Turn power switch to “O”. 1. Raise the needle to its highest position by turning the balance wheel toward you (counterclockwise) and raise the presser foot lever. 2. -
Page 18: Converting To Free-Arm Style
Converting to Free-Arm Style Free-arm sewing is convenient for sewing tubular and hard-to-reach areas on garments. To change your machine to the free-arm style, lift up on the extension table and pull it out. (See fig. A.) 1 Lift the bottom of the extension table up toward you. 2 Pull the extension table out to remove it. -
Page 19: Various Controls
NOTE: Continuing to turn the pattern selection dial counterclockwise selects each pattern in order until the last pattern (“15” on the XL5100, PX100, “17” on the XL5200, PX200 and “21” on the XL5300, PX300) is se- lected, then returns to the first pattern. -
Page 20: Recommended Widths And Lengths For Stitches
RECOMMENDED WIDTHS AND LENGTHS FOR STITCHES XL5300/PX300 PATTERN STITCH NAME RECOMMENDED RECOMMENDED PAGE IN WIDTH LENGTH INSTRUCTIONS [mm (inch)] [mm (inch)] BUTTONHOLE -1.5 (1/8-13/64) (1/64-1/16) STRAIGHT STITCH (Needle position change) (3/64-5/32) ZIGZAG STITCH (0-13/64) (1/64-5/64) BLINDHEM STITCH (1/8-13/64) (1/64-5/64) SHELL TUCK STITCH (1/8-13/64) (1/64-1/8) ELASTIC STITCH... - Page 21 XL5200/PX200 PATTERN STITCH NAME RECOMMENDED RECOMMENDED PAGE IN WIDTH LENGTH INSTRUCTIONS [mm (inch)] [mm (inch)] BUTTONHOLE -1.5 (1/8-13/64) (1/64-1/16) STRAIGHT STITCH (Needle position change) (3/64-5/32) ZIGZAG STITCH (0-13/64) (1/64-5/64) BLINDHEM STITCH (1/8-13/64) (1/64-5/64) SHELL TUCK STITCH (1/8-13/64) (1/64-1/8) ELASTIC STITCH -2.5 (1/8-13/64) (1/64-3/32)
- Page 22 XL5100/PX100 PATTERN STITCH NAME RECOMMENDED RECOMMENDED PAGE IN WIDTH LENGTH INSTRUCTIONS [mm (inch)] [mm (inch)] 1 (A-B-C-D) BUTTONHOLE -1.5 (1/8-13/64) (1/64-1/16) ZIGZAG STITCH (0-13/64) (1/64-5/64) STRAIGHT STITCH (Needle position change) (1/64-5/32) STRETCH BLINDHEM STITCH -1.5 (1/8-13/64) (1/64-1/16) SHELL TUCK STITCH...
-
Page 23: Anchos Y Largos De Puntadas Recomendados
ANCHOS Y LARGOS DE PUNTADAS RECOMENDADOS XL5300/PX300 PUNTADA NOMBRE ANCHO LARGO PÁGINA DEL RECOMENDADO RECOMENDADO MANUAL [mm (pulgadas)] [mm (pulgadas)] OJAL -1,5 (1/8-13/64) (1/64-1/16) PUNTADA RECTA (Cambio de posición de la aguja) (3/64-5/32) PUNTADA ZIGZAG (0-13/64) (1/64-5/64) PUNTADA INVISIBLE (1/8-13/64) (1/64-5/64) PUNTADA ALFORZA DEREFUERZO... - Page 24 XL5200/PX200 PUNTADA NOMBRE ANCHO LARGO PÁGINA DEL RECOMENDADO RECOMENDADO MANUAL [mm (pulgadas)] [mm (pulgadas)] OJAL -1,5 (1/8-13/64) (1/64-1/16) PUNTADA RECTA (Cambio de posición de la aguja) (3/64-5/32) PUNTADA ZIGZAG (0-13/64) (1/64-5/64) PUNTADA INVISIBLE (1/8-13/64) (1/64-5/64) PUNTADA ALFORZA DEREFUERZO (1/8-13/64) (1/64-1/8) PUNTADA ELÁSTICA -2,5 (1/8-13/64)
- Page 25 XL5100/PX100 PUNTADA NOMBRE ANCHO LARGO PÁGINA DEL RECOMENDADO RECOMENDADO MANUAL [mm (pulgadas)] [mm (pulgadas)] 1(A-B-C-D) OJAL -1,5 (1/8-13/64) (1/64-1/16) PUNTADA ZIGZAG (0-13/64) (1/64-5/64) PUNTADA RECTA (Cambio de posición de la aguja) (1/64-5/32) PUNTADA PESPUNTO -1,5 INVISIBLE (1/8-13/64) (1/64-1/16) PUNTADA ALFORZA...
-
Page 26: Longueurs Et Largeurs De Point Recommandées
LONGUEURS ET LARGEURS DE POINT RECOMMANDÉES XL5300/PX300 MODÈLE NOM DU POINT LARGEUR LONGUEUR PAGE RECOMMANDÉE RECOMMANDÉE (en mm) (en mm) MANUEL BOUTONNIÈRE -1,5 POINT DROIT (Changement de position de l’aiguille) POINT ZIGZAG OURLET INVISIBLE DE LINGERIE POINT À COQUILLES POINT ÉLASTIQUE -2,5 OURLET INVISIBLE -1,5... - Page 27 XL5200/PX200 MODÈLE NOM DU POINT LARGEUR LONGUEUR PAGE RECOMMANDÉE RECOMMANDÉE (en mm) (en mm) MANUEL BOUTONNIÈRE -1,5 POINT DROIT (Changement de position de l’aiguille) POINT ZIGZAG OURLET INVISIBLE DE LINGERIE POINT À COQUILLES POINT ÉLASTIQUE -2,5 OURLET INVISIBLE -1,5 ÉLASTIQUE POINT FESTON -1,5 POINT UNIVERSEL...
- Page 28 XL5100/PX100 MODÈLE NOM DU POINT LARGEUR LONGUEUR PAGE RECOMMANDÉE RECOMMANDÉE (en mm) (en mm) MANUEL 1(A-B-C-D) BOUTONNIÈRE -1,5 POINT ZIGZAG POINT DROIT (Changement de position de l’aiguille) OURLET INVISIBLE -1,5 ÉLASTIQUE POINT À COQUILLES POINT ÉLASTIQUE -2,5 POINT UNIVERSEL OURLET INVISIBLE DE...
-
Page 29: Stitch Length Dial
XL5300/XL5200/ PX300/PX200/ XL5100 PX100 ○ ○ ○ ○ ○ ○ ○ ○ ○ ○ ○ ○ ○ ○ ○ ○ ○ ○ ○ ○ ○ ○ ○ ○ ○ ○ ○ ○ ○ ○ ○ ○ ○ ○ ○ ○ ○ ○ ○ ○ ○ ○ ○ ○ ○ ○ ○ ○ ○ ○ ○ ○ ○ ○ ○ ○ ○ ○ ○ ○ ○ ○ ○... -
Page 30: Stretch Stitching
PX300/PX200/ stitching can be sewn at the standard position “ ”. XL5100 PX100 If different types of fabric or thread are used or the pattern does not have the correct shape, turn the dial toward either “+” or “–” to adjust the stitch. -
Page 31: Stitch Width Dial
If the Straight Stitch or the Triple Straight is chosen, the needle position can be changed by adjusting the stitch width dial. XL5300/XL5200/XL5100 PX300/PX200/PX100 ○ ○ ○ ○ ○ ○ ○ ○ ○ ○ ○ ○ ○ ○ ○ ○ ○ ○ ○ ○ ○ ○ ○ ○ ○ ○ ○ ○ ○ ○ ○ ○ ○ ○ ○ ○ ○ ○ ○ ○ ○ ○ ○ ○ ○ ○ ○ ○ ○ ○ ○ ○ ○ ○ ○ ○ ○ ○ ○ ○ ○ ○ ○... -
Page 32: Reverse Sewing Lever
Reverse Sewing Lever To sew in reverse, press down the reverse sewing lever as far as possi- ble and hold it in that position while lightly stepping on the foot con- troller. To sew forward, release the reverse sewing lever. Reverse sew- ing is used for locking and reinforcing seams. -
Page 33: Threading The Machine
THREADING THE MACHINE Winding the Bobbin 1. Place the spool of thread on the spool pin and pass the thread around the bobbin winding tension disc. 1 Bobbin winding tension disc 2 Bobbin winding 2. Pass the end of the thread through the hole in the bobbin from the inside. -
Page 34: Lower Threading
Lower Threading Turn power switch to “O”. 1. Raise the needle to its highest position by turning the balance wheel toward you (counterclockwise) and raise the presser foot lever. 2. Open the shuttle cover behind the extension table on the front of the machine and remove the bobbin case by pulling its latch to- ward you and pulling it out from the shuttle race (fig. -
Page 35: Upper (Needle) Threading
○ ○ ○ ○ ○ ○ ○ ○ ○ ○ ○ ○ ○ ○ ○ ○ ○ ○ ○ ○ ○ ○ ○ ○ ○ ○ ○ ○ ○ ○ Upper (Needle) Threading Turn power switch to “O”. 1. Raise the presser foot lever and turn the balance wheel toward you (counterclockwise) to raise the thread take-up lever to its highest position. -
Page 36: Enhebrado Superior (De La Aguja)
○ ○ ○ ○ ○ ○ ○ ○ ○ ○ ○ ○ ○ ○ ○ ○ ○ ○ ○ ○ ○ ○ ○ ○ ○ ○ ○ ○ ○ ○ ○ ○ ○ ○ ○ ○ ○ ○ ○ ○ ○ ○ ○ ○ ○ ○ ○ ○ ○ ○ ○ ○ ○ ○ ○ ○ ○ ○ ○ ○ ○ ○ ○ Enhebrado superior (de la aguja) Mise en place du fil supérieur (fil de l’aiguille) -
Page 37: Using The Needle Threader (When The Machine Is Equipped With A Needle Threader)
Using the Needle Threader (when the machine is equipped with a needle threader) Turn power switch to “O”. 1. Lower the presser foot lever. 2. Turn the balance wheel toward you (counterclockwise) until the bottom of the needle holder aligns with the bottom of the needle- threading-hook holder. -
Page 38: Utilisation De L'enfileur D'aiguille (Lorsque La Machine Est Équipée D'un Enfileur)
Utilisation de l’enfileur d’aiguille Uso del enhebrador (cuando la máquina está equipada (lorsque la machine est équipée d’un enfileur) con una enhebradora de hilo) Mettre l’interrupteur principal sur “O”. Desenchufar la máquina, interruptor principale a “O”. 1. Abaisser le levier du pied-de-biche. 1. -
Page 39: (When The Machine Is Equipped With A Quick Thread-Setting System)
Quick Thread-setting System FAST START BOBBIN (when the machine is equipped with a quick thread-setting system) This new system allows you to start sewing immediately after inserting the bobbin without drawing up the lower thread. You can, however, pull up the lower thread as explained on page 33 if you wish. Turn power switch to “O”. -
Page 40: Drawing Up Lower Thread
Drawing Up Lower Thread 1. Raise the presser foot and the needle to their highest positions. 2. With your left hand, hold the end of the upper thread. With your right hand, turn the balance wheel toward you (counterclockwise) until the needle moves down and back up again to its highest posi- tion. -
Page 41: Twin-Needle Sewing
Twin-Needle Sewing Your sewing machine is designed for twin-needle sewing, which al- lows you to sew using two upper threads. You can use the same color or two different colors of thread for decorative stitches. Inserting The Twin Needle Insert the twin needle in the same way that a single needle is inserted. (Refer to page 7.) The flat side of the needle should be toward the back and the rounded side should be toward you. -
Page 42: Thread Tension
Thread Tension Thread tension will affect the quality of your stitches. It may need to be adjusted when you change fabric or thread type. NOTE: It is recommended that a test sample be made on a fabric scrap before sewing on your project. The basic thread tension setting is “5”. -
Page 43: Tensión De Los Hilos
Tensión de los hilos Tension des fils La tensión de los hilos es muy importante para la calidad de las La tension des fils va affecter directement la qualité des points et il se peut puntadas y puede requerir un ajuste al cambiar de tejido o de hilo. qu’elle doive être réglée lors du changement de tissu ou de fil. -
Page 44: Chart Of Sewing Fabrics, Needles And Thread Combinations
CHART OF SEWING FABRICS, NEEDLES AND THREAD COMBINATIONS SEWING FABRICS NEEDLE SIZES THREAD SIZES Cotton: 80 VERY THIN Fine tricot, Fine lace, Thin linen, Silk, Organza, Chiffon #70/10 Synthetic Fine Mercerized Cotton Cotton: 60~80 Silk: “A” LIGHTWEIGHT Voile, Taffeta, Synthetics, Silk, Batiste #80/12 Synthetic Mercerized 50... - Page 45 TABLEAU DES COMBINAISONS TISSU/AIGUILLE/FIL CALIBRES TISSUS TAILLES DE FILS D’AIGUILLES Coton: 80 Tricot léger, passementerie fine, lin délicat, soie, tulle, crêpe TRES FINS #70/10 Synthétiques Coton mercerisé fin Coton: 60~80 Voile, taffetas, synthétiques, soie, batiste Soie: “A” LÉGERS #80/12 Synthétiques Mercerisé...
-
Page 46: Straight Stitching
Straight Stitching XL5300 XL5200 XL5100 Pattern Stitch Length Stitch Width PX300 PX200 PX100 Straight Stitch 5-0* Triple Stretch Stitch Fixed 2.5 * Turn the stitch width dial to adjust the needle position. Setting the dial to “5” selects the left needle position; setting the dial to “0” selects the right needle position. - Page 47 Changing Sewing Directions (fig. A) 1. Stop the machine at the point where you wish to change directions with the needle still in the fabric. 2. Raise the presser foot and turn the fabric to line up its new direc- tion using the needle as a turning point.
- Page 48 Le point droit (“2” sur la XL5300, PX300, “2” sur la XL5200, PX200 et “3” La puntada recta (“2” en el modelo XL5300, PX300, “2” en el modelo sur la XL5100, PX100) sert pour les travaux de haute couture et pour la XL5200, PX200 y “3” en el modelo XL5100, PX100) se utiliza para couture de tissus fins.
-
Page 49: Zigzag Stitching
Zigzag Stitching XL5300 XL5200 XL5100 Pattern Stitch Length Stitch Width PX300 PX200 PX100 Zigzag Stitch ZIGZAG STITCH Select the Zigzag Stitch with the pattern selection dial. Then, select the stitch length and the stitch width. It is recommended to sew using the Straight Stitch at the beginning and end of the Zigzag Stitch. -
Page 50: Blindhem Stitching
Blindhem Stitching XL5300 XL5200 XL5100 Pattern Stitch Length Stitch Width PX300 PX200 PX100 Blindhem Stitch Fixed 5 Stretch Blindhem Stitch -1.5 Fixed 3.5 The Blindhem Stitch is used to finish the edge of a project, like the bottom of a pair of pants, so that the stitch does not show. Use the Blindhem Stitch when sewing on non-stretch fabrics, and the Stretch Blindhem Stitch for stretch fabrics. -
Page 51: Shell Tuck Stitching
Shell Tuck Stitching XL5300 XL5200 XL5100 Pattern Stitch Length Stitch Width PX300 PX200 PX100 Shell Tuck Stitch The Shell Tuck Stitch can be used to sew a picot (lace-like) edge on lightweight fabric. 1. Set the pattern selection dial to the Shell Tuck Stitch. -
Page 52: Elastic Stitching
Elastic Stitching XL5300 XL5200 XL5100 Pattern Stitch Length Stitch Width PX300 PX200 PX100 Elastic Stitch -2.5 The Elastic Stitch can be used in three different ways: to mend, to sew elastic, or to join fabric. Each method is explained below. -
Page 53: Scallop Stitching
Scallop Stitching XL5300 XL5200 XL5100 Pattern Stitch Length Stitch Width PX300 PX200 PX100 – Scallop Stitch -1.5 This machine automatically produces a Scallop Stitch which may be used as decorative edging. 1. Set the pattern selection dial to the Scallop Stitch. -
Page 54: Overedge Stitching
Overedge Stitching XL5300 XL5200 XL5100 Pattern Stitch Length Stitch Width PX300 PX200 PX100 Stretch Overlock Stitch Elastic Overlock Stitch Fixed 2.5 Fixed 5 Arrow Head Stitch These stitches are used to join together seams and finish them in one step. The Elastic Overlock is useful when sewing stretch materials, while the Arrow head Stitch is ideal for sewing the edge of a blanket. -
Page 55: Feather Stitching
Feather Stitching XL5300 XL5200 XL5100 Pattern Stitch Length Stitch Width PX300 PX200 PX100 Feather Stitch Fixed 2.5 Fixed 5 Use the Feather Stitch as a decorative top stitch or when hemming blankets, tablecloths or draperies or when embroidering. 1. Set the Pattern Selection Dial. -
Page 56: Triple Zigzag Stretch Stitching
Triple Zigzag Stretch Stitching XL5300 XL5200 XL5100 Pattern Stitch Length Stitch Width PX300 PX200 PX100 Triple Zigzag Stretch Stitch Fixed 2.5 This stitch can be used to sew heavyweight stretch fabrics wherever a Zigzag Stitch would be used. The Triple Zigzag Stretch Stitch can also be used as a decorative topstitch. -
Page 57: Making A Buttonhole (Xl5300, Xl5200, Px300 And Px200 Only)
Making a Buttonhole (XL5300, XL5200, PX300 and PX200 only) XL5300 XL5200 – Pattern Stitch Length Stitch Width Foot PX300 PX200 Buttonhole -1.5 Fixed 5 Buttonhole Foot NOTE: 1. It is recommended to practice making a buttonhole on a scrap piece of fabric before attempting it on the actual garment. -
Page 58: Para Coser Ojales (Solo Xl5300, Xl5200, Px300 Y Px200)
– Para coser ojales Pour coudre une boutonnière (Solo XL5300, XL5200, PX300 y PX200) (modèles XL5300, XL5200, PX300 et PX200 uniquement) XL5300 XL5200 XL5300 XL5200 Número de puntada Largo de puntada Ancho de puntada Prensatelas Modèle Longueur de point Largeur de point Pied-de-biche PX300 PX200 PX300 PX200 Prensatelas... -
Page 59: Making A Buttonhole (Xl5100 And Px100 Only)
○ ○ ○ ○ ○ ○ ○ ○ ○ ○ ○ ○ ○ ○ ○ ○ ○ ○ ○ ○ ○ ○ ○ ○ ○ ○ ○ ○ ○ ○ ○ ○ ○ ○ ○ ○ ○ ○ ○ ○ ○ ○ ○ ○ ○ ○ ○ ○ ○ ○ ○ ○ ○ ○ ○ ○ ○ ○ ○ ○ ○ ○ ○ Para coser ojales Pour faire une boutonnière (Solo XL5100 y PX100) (modèle XL5100 et PX100 uniquement) XL5100 Largo de Ancho de XL5100 Número de puntada... - Page 60 MAKING A BUTTONHOLE Step Sewn Portion Pattern How to Sew 1. Set the pattern selection dial to “A”. Step 1 (Front bar 2. Lower the presser foot and sew 5 to 6 stitches. tack) 3. Stop the machine when the needle is at the left side of the stitches, then raise the needle from the material.
- Page 61 POUR FAIRE UNE BOUTONNIÈRE Phase Partie cousue Modèle Comment coudre 1er temps 1. Mettre le sélecteur de modèle sur “A”. (barre d’arrêt 2. Abaisser le pied-de-biche et coudre 5 ou 6 points. avant de la 3. Arrêter la machine lorsque l’aiguille se trouve à gauche des points et boutonnière) relever l’aiguille du tissu.
-
Page 62: Buttonhole Fine Adjustment
2. If the right side of the buttonhole is too coarse or fine, adjust the feeding of the material with the Stitch Length Dial. XL5300/XL5200/XL5100 PX300/PX200/PX100 1 Right side 2 Stitch length... -
Page 63: Ajuste Fino De Los Ojales
Ajuste fino de los ojales Equilibrage des boutonnières Si las puntadas en ambos lados del ojal no parecen ser idénticas, se Si les points de chaque côté de la boutonnière sont dissemblables, procéder pueden hacer los siguientes ajustes. aux réglages suivants: 1. -
Page 64: Button Sewing
Button Sewing XL5300 XL5200 XL5100 Pattern Stitch Length Stitch Width Foot PX300 PX200 PX100 Zigzag Button Stitch Sewing Foot 1. Measure the distance between the holes and set the appropriate stitch width with the stitch width dial. For example, if the distance between the holes is 1.5 mm (1/16"), set the stitch width to “1.5”. -
Page 65: Costura De Botones
Costura de botones Pour coudre un bouton XL5300 XL5200 XL5100 Número Largo Ancho XL5300 XL5200 XL5100 Longueur Largeur Prensatelas Modèle Pied-de-biche PX300 PX200 PX100 de puntada de puntada ade puntada PX300 PX200 PX100 de point de point Puntada Prensatelas N’importe... -
Page 66: Zipper Inserting
3. Fold the edge of the material 2 cm (3/4") and place the zipper un- der the folded portion. 4. For the XL5100, PX100, XL5200, PX200, XL5300 and PX300, use the stitch width dial to adjust the needle position. Lower the needle into the notch on either the left or right side of the zipper foot. -
Page 67: Inserción De Cremalleras
4. Sur les modèles XL5100, PX100, XL5200, PX200, XL5300 et PX300, 4. En XL5100, PX100, XL5200, PX200, XL5300 y PX300, utilice el utiliser le sélecteur de largeur de point pour régler la position de l’aiguille. -
Page 68: Darning
Darning XL5300 XL5200 XL5100 Pattern Stitch Length PX300 PX200 PX100 Straight Stitch 1. Place the darning plate on the needle plate as shown in fig. A. 1’. Lower the feed dogs by setting the drop feed lever to the up posi- tion. -
Page 69: Appliques
Appliques XL5300 XL5200 XL5100 Pattern Stitch Length Stitch Width PX300 PX200 PX100 Zigzag Stitch An applique is created by cutting a contrasting piece of fabric into a shape to be used as a decoration on a garment or project. 1. Baste the cut design to the fabric in the desired location. -
Page 70: Monogramming And Embroidering
Monogramming and Embroidering XL5300 XL5200 XL5100 Pattern Stitch Length Stitch Width Foot PX300 PX200 PX100 Zigzag Stitch None Preparing for Monogramming and Embroidering 1. Place the darning plate on the needle plate. (When the machine is equipped with a drop feed lever, lower the feed dogs by setting the drop feed lever to the up position.) - Page 71 Monogramming 1. Sew moving the hoop slowly along the lettering at a constant speed. 2. Secure with a few straight stitches at the end of the last letter. Embroidering 1. Stitch the outline of the design by moving the embroidery hoop. 2.
-
Page 72: Changing The Bulb
Changing the Bulb 1. Remove the power supply plug from the outlet. 2. Loosen the face plate screw as shown in fig. A. 3. Remove the face plate from the machine as illustrated in fig. B. 4. Replace the sewing light bulb. (See fig. C.) NOTE: Use only same type of bulb rated 15W. -
Page 73: Oiling
Oiling 1. Remove the power supply plug from the outlet. 2. Remove the needle plate and the face plate. 3. Put 2 to 3 drops of oil at each point indicated by the arrows. 4. Run the machine at a fast speed without thread installed for a short time. -
Page 74: Cleaning
Cleaning Removing the Shuttle Hook 1. Raise the needle to its highest position and remove the power sup- ply plug from the outlet. 2. Remove the extension table and open the shuttle cover on the front of the free arm. 3. -
Page 75: Performance Checklist
Performance Checklist Whenever sewing difficulties are encountered, review the section in this instruction manual that details the operation you are performing to make sure you are correctly using the machine. If the problem continues, the following checklist may help you to improve the operation. If you still have difficulties, contact your nearest service center. - Page 76 FABRIC DOES NEEDLE MACHINE IS MACHINE DOES NOT FEED BREAKS NOISY OR SLOW NOT START PROPERLY Stitch length Lint is clinging to Power supply plug Needle is not dial is set at no the bottom of the is removed from correctly inserted.
-
Page 77: Listado De Posibles Incidencias
Listado de posibles incidencias Cada vez que se encuentre con dificultades al coser, vuelva a consultar la parte de este manual de instrucciones que detalla la operación que está realizando, para comprobar que usa correctamente la máquina. Si el problema persiste, el siguiente listado le puede ayudar a mejorar el funcionamiento. - Page 78 LA MÁQUINA EL TEJIDO NO LA AGUJA SE ES RUIDOSA O LA MÁQUINA ARRASTRA ROMPE FUNCIONA NO ARRANCA BIEN MUY DESPACIO El selector de largo de puntada La aguja está Hay polvo en la Está está puesto para mal colocada. placa de agujas.
- Page 79 Liste de vérification en cas de défaillances En cas de problème, consulter d’abord le chapitre voulu dans le présent manuel pour s’assurer de la bonne utilisation de la machine. Si le problème persiste, la liste de vérification suivante peut vous aider à y remédier. Si vous ne parvenez toujours pas à...
- Page 80 L’ENTRAÎNE- LA MACHINE L’AIGUILLE LA MACHINE NE MENT DU TISSU EST BRUYANTE DEMARRE PAS CASSE N’EST PAS COR- OU LENTE RECT Le sélecteur de Des peluches sont La fiche longueur de point est L’aiguille est mal accrochées sous la d’alimentation est réglé...
-
Page 81: Repacking The Machine
Repacking the Machine Keep the carton and packing materials for future use. It may become necessary to reship the sewing machine. Improper packing or improper packing material could result in damage during shipping. Instructions for repacking the machine are illustrated. IMPORTANT This packing material is designed to prevent damage in transit. - Page 82 Page Page Accessories ................. 3 Oiling ................64 Appliques ................60 Overedge Stitching ............45 Blindhem Stitching ............41 Pattern Lengths ............. 11–13 Bobbin Pattern Selection Dial ............10 Threading ............25, 30 Pattern Widths ............. 11–13 Winding ..............24 Performance Checklist ..........
- Page 83 Página Página Accesorios ................. 3 Largos de puntadas ............ 14-16 Aguja Limpieza ................65 Cambio ..............7 Limpieza de la pista de la lanzadera ........ 65 Enhebrado .............. 27 Listado de posibles incidencias ........68-69 Enhebrador ............. 29 Localización y reparación de averías ......68-69 Verificación ...............
- Page 84 Page Page Accessoires ................... 3 Nettoyage ..................65 Aiguille Nettoyage de la coursière ............65 Enfilage ................27 Enfileur ................29 Remplacement ..............7 Ourlet invisible de lingerie ............41 Vérification ................ 7 Ourlet invisible élastique ............41 Appliques ..................60 Arrêt d’une couture ...............
- Page 87 For Mexico only MAQUINA DE COSER MODELO PX-100/200/300 CONT.1 PZA. IMPORTADOR:BROTHER INTERNATIONAL DE MEXICO S.A.DE C.V. ARQUIMEDES No.219-A COL.CHAPULTEPEC MORALES C.P.11570. MEXICO D.F. R.F.C. BIM-920922-A53 VEA INSTRUCTIVO ANEXO TENSION NOMINAL: 120 V ca FRECUENCIA: 60 Hz POTENCIA CONSUMIDA: 90W...
- Page 88 ENGLISH ESPAÑOL FRANÇAIS 194457-111 Printed in China...