Publicité

Les langues disponibles

Les langues disponibles

Liens rapides

All manuals and user guides at all-guides.com
MP120
Mobile Projector
User
Manual
Support
For further information, download the HP MP120 User
Guide from: https://www.hp.com/support
Global Aiptek Inc. - HP Branded Product Group
1020 Milwaukee Ave, Suite 270, Deerfield, IL 60015, USA
Email: help@hp-projector.com
Web: www.hp-projector.com

Publicité

Table des Matières
loading

Sommaire des Matières pour HP MP120

  • Page 1 All manuals and user guides at all-guides.com MP120 Mobile Projector User Manual Support For further information, download the HP MP120 User Guide from: https://www.hp.com/support Global Aiptek Inc. - HP Branded Product Group 1020 Milwaukee Ave, Suite 270, Deerfield, IL 60015, USA Email: help@hp-projector.com Web: www.hp-projector.com...
  • Page 2: Package Contents

    All manuals and user guides at all-guides.com User Manual Package Contents •MP120 Mobile Projector •Quick Start Guide •Power Adapter •Warranty Card •Tripod Knowing your Mobile Projector Projection Lens Focus Ring Power Volume Down Volume Up LED Indicator Brightness Adjustment Earphone /...
  • Page 3: Getting Started

    All manuals and user guides at all-guides.com User Manual Getting Started Charging the product The projector is built with an embedded battery for mobile use. Please charge the projector for 5 hours prior to its first use. Repeat charging will take around 3 hours. The battery will be charged only when the projector is not in use (Power off).
  • Page 4: Adjusting The Brightness

    All manuals and user guides at all-guides.com User Manual Adjusting the Focus Place the projector on a flat surface and toward a wall or a projection screen. Adjust the focus by turning the focus ring forward or back until you see a sharp and clear image.
  • Page 5 All manuals and user guides at all-guides.com User Manual Wireless projection via Airplay (iOS10) 1.Tap Setting -> WiFi to connect iPhone to Projector-xxxxxxxx shown on the top of projection screen. 2.Swipe up from the bottom bezel of the screen on your iOS device to bring up Control Center.
  • Page 6 All manuals and user guides at all-guides.com User Manual For detailed information, please refer to the section, Connecting the projector to Wi-Fi network for Internet access (page 8), further in this guide. Projecting from the mobile app on Android devices EZCast is a mobile application that runs on your Android device (or iOS) and transmits still images or videos to the projector.
  • Page 7 All manuals and user guides at all-guides.com User Manual For detailed information, please refer to the section, Connecting the projector to Wi-Fi network for Internet access (page 8). 5.After connecting, tap “ Mirror ”to mirror screen to projector. For EZCast user manual, please refer to: http://www.iezvu.com/os_help.php EZMirror projection for Android MiraCast devices EZMirror is the function within the EZCast app and is fully compatible with Miracast,...
  • Page 8 All manuals and user guides at all-guides.com User Manual 3.Upon Miracast connection, the screen will be mirrored on the projector. Note: Depending on how you setup your connection, access to the internet on your device will be via Wi-Fi or mobile internet 3G/4G. Wireless projection from computer 1.
  • Page 9 All manuals and user guides at all-guides.com User Manual 7.Double-click EZCast icon on your computer desktop to start the application then click . When the screen displays available projectors, "Projector-xxxxxxxx", double-click it to connect to the projector. 8.Click“Mirror” to select the projection output method from Off (default) to Mirror or Extension to start the wireless projection.
  • Page 10 All manuals and user guides at all-guides.com User Manual 3. If wireless security is enabled on the Wi-Fi network, please input the password (network key) by using the virtual keyboard on your smartphone or your computer. 4. Click OK to complete set up. It will take a while till the connection is successfully established.
  • Page 11: Hdmi Input

    All manuals and user guides at all-guides.com User Manual HDMI Input The projector has a built-in HDMI input port on the rear side. You can connect an external video Input source to the projector by using the appropriate cable. Note: Apple Lightning Digital AV adapter is not included in the package.
  • Page 12 All manuals and user guides at all-guides.com User Manual Troubleshooting If your projector does not seem to be functioning properly, please check the following before you contact an authorized service center. Symptom Check Point The projector does not Check if HDMI cable is plugged correctly. display when connecting to a smartphone, notebook or PC with...
  • Page 13 All manuals and user guides at all-guides.com User Manual Specifications Item Description Optical Technology Light Source RGB LED Resolution 854 x 480 Pixels (WVGA) Contrast Ratio 1500:1 Projection Image Size 51 cm ~ 305 cm ( 20" ~ 120" ) Projection Distance 50 cm ~ 319 cm ( 20"...
  • Page 14: Projecteur Portable

    Projecteur Portable Manuel d’utilisation Soutien Pour plus d’informations, téléchargez le guide d’utilisation du HP MP120 - https://www.hp.com/support Global Aiptek Inc. - Groupe des produits de marque HP 1020 Milwaukee Ave, Suite 270, Deerfield, IL 60015, USA Email: help@hp-projector.com Web: www.hp-projector.com...
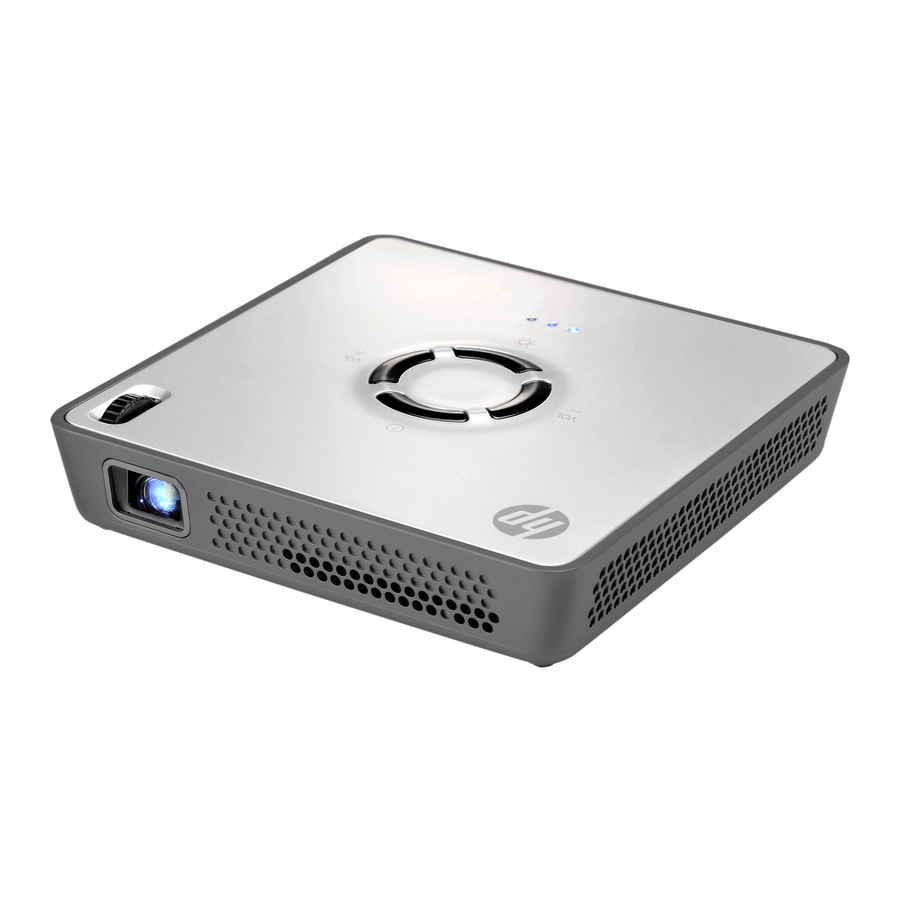
  • Page 15: Contenu De L'emballage

    All manuals and user guides at all-guides.com Manuel d’utilisation Contenu de l'emballage • Projecteur Pico • Manuel d'utilisation • Adaptateur secteur • Trépied • Fiches d'alimentation Découvrir votre projecteur Pico Objectif de Augmenter Alimentation Diminuer volume Augmenter Voyant DEL Réglage de la luminosité...
  • Page 16 All manuals and user guides at all-guides.com Manuel d’utilisation Commencer Recharger le produit Le projecteur dispose d'une batterie intégrée pour une utilisation mobile. Veuillez recharger le projecteur au moins 5 heures avant sa première utilisation. Les recharges suivantes prendront environ 3 heures. La batterie se recharge uniquement lorsque le projecteur n'est pas utilisé...
  • Page 17: Ajuster La Mise Au Point Selon La Distance

    All manuals and user guides at all-guides.com Manuel d’utilisation Ajuster la mise au point selon la distance Placez le projecteur sur une surface plate et en direction d'un mur ou d'un écran de projection. Ajustez la mise en point en tournant la bague de mise au point, pour une image nette et claire.
  • Page 18 All manuals and user guides at all-guides.com Manuel d’utilisation http://www.iezvu.com/download Projection sans fil via Apple Airplay (iOS10) 1.Appuyez sur Paramètres -> Wi-Fi pour connecter l'iPhone au Projecteur-xxxxxxxx affiché sur la partie supérieure de l'écran de projection. 2.Faites glisser vers le haut depuis le bord inférieur de l'écran de votre iPhone pour afficher le Centre de contrôle.
  • Page 19 All manuals and user guides at all-guides.com Manuel d’utilisation 6.Pour connecter le projecteur à un réseau sans fil, il doit pouvoir prendre en charge la projection miroir et l'accès à Internet. Appuyez sur affiché sur l'écran EZCast dans le coin supérieur gauche, puis appuyez sur « Paramètres » et utilisez le clavier affiché sur l'appareil mobile pour connecter le projecteur à...
  • Page 20 All manuals and user guides at all-guides.com Manuel d’utilisation Après connexion au projecteur, une icône de connexion bleue s'affiche sur l'écran de projection, dans le coin supérieur droit. 4.Pour connecter le projecteur à un réseau sans fil, il doit pouvoir prendre en charge la projection miroir et l'accès à...
  • Page 21: Projection Sans Fil À Partir De L'ordinateur

    All manuals and user guides at all-guides.com Manuel d’utilisation 4.Connectez-vous au Projecteur-xxxxxxxx dans les paramètres Wi-Fi de l'appareil Android puis ouvrez l'application EZCast pour cliquer sur l'icône <EZMirror> depuis le menu . L'écran de projection passe à l'écran EZMirror. 5.Appuyez sur le bouton « ON » affiché à l'écran. Une fois activé, un compte à rebours de 60 secondes s'enclenche pour connecter votre téléphone portable au projecteur.
  • Page 22 All manuals and user guides at all-guides.com Manuel d’utilisation téléchargement. suivez les instructions à l'écran pour effectuer la configuration et redémarrer l'ordinateur. 4.Une fois l'installation terminée, une icône, libellée EZCast , s'affichera sur le bureau de votre ordinateur. 6.Connectez votre ordinateur au réseau sans fil du projecteur en sélectionnant le SSID : Projecteur-XXXXXXXX dans la liste réseau, saisissez le mot de passe affiché...
  • Page 23 All manuals and user guides at all-guides.com Manuel d’utilisation 8.Cliquez sur « Miroir » pour sélectionner la méthode de sortie de projection de Off (par défaut) vers Miroir ou Extension pour commencer la projection sans fil Connecter le projecteur à un réseau Wi-Fi pour accéder à Internet Il est conseillé...
  • Page 24 All manuals and user guides at all-guides.com Manuel d’utilisation 3.Si la sécurité sans fil est activée sur votre réseau Wi-Fi, vous devez saisir le mot de passe (clé réseau) en utilisant le clavier virtuel sur le smartphone ou clavier de PC. 4.Cliquez sur OK pour configurer le point d'accès à...
  • Page 25: Entrée Hdmi

    All manuals and user guides at all-guides.com Manuel d’utilisation Entrée HDMI Le projecteur dispose d'un port d'entrée HDMI intégré sur la face arrière. Vous pouvez connecter votre source d'entrée vidéo externe au projecteur ou diffuser l'écran du projecteur vers un écran LCD ou une HDTV avec le bon câble.
  • Page 26: Guide De Dépannage

    All manuals and user guides at all-guides.com Manuel d’utilisation Guide de dépannage I Si votre projecteur ne fonctionne pas correctement, veuillez vérifier les éléments ci-dessous avant de contacter un centre de réparation agréé Problème À vérifier Le projecteur ne fonctionne pas lors de Vérifiez que le câble HDMI est bien branché.
  • Page 27 All manuals and user guides at all-guides.com Manuel d’utilisation Spécifications Élément Description Technologie optique RGB LED Source de lumière 854 x 480 Pixels (WVGA) Résolution 1500:1 Rapport de contraste 51 cm ~ 305 cm ( 20" ~ 120" ) Taille de l'image projetée 50 cm ~ 319 cm ( 20"...
  • Page 28 Soporte Para obtener más información, descargue la guía del usuario del proyector HP MP120 - https://www.hp.com/support Global Aiptek Inc. - Grupo de productos marca HP 1020 Milwaukee Ave, Suite 270, Deerfield, IL 60015, USA Email: help@hp-projector.com Web: www.hp-projector.com...
  • Page 29: Contenido Del Paquete

    All manuals and user guides at all-guides.com Manual del usuario Contenido del paquete • Proyector Pico • Manual del usuario • Adaptador de alimentación • Trípode • Enchufes de alimentación Familiarícese con el proyector Pico Lente de proyección Anillo de enfoque Alimentación Bajar volumen Subir volumen...
  • Page 30: Procedimientos Iniciales

    All manuals and user guides at all-guides.com Manual del usuario Procedimientos iniciales Cargar el producto El proyector tiene integrada una batería para uso móvil. Cargue el proyector durante 5 horas antes de su primer uso. Repetir la carga tarda aproximadamente 3 horas. La batería se cargará...
  • Page 31: Pantalla Principal

    All manuals and user guides at all-guides.com Manual del usuario Ajustar el enfoque Coloque el proyector sobre una superficie plana y la lente orientada hacia una pared o una pantalla de proyección. Ajuste el enfoque mediante la rueda de enfoque situada en el lateral inferior para obtener una imagen más nítida.
  • Page 32 All manuals and user guides at all-guides.com Manual del usuario Proyección inalámbrica a través de Apple Airplay (iOS10) 1.Pulse Setting (Ajustes) -> WiFi para conectar su iPhone al Proyector-xxxxxxxx mostrado en la parte superior de la pantalla de proyección. 2.Deslice hacia arriba desde el marco inferior de la pantalla de su iPhone para abrir el Centro de control.
  • Page 33 All manuals and user guides at all-guides.com Manual del usuario 6.Para conectar el proyector a una red inalámbrica, puede admitir la proyección reflejada y el acceso a Internet. Pulse el icono que se muestra en la pantalla de EZCast en la esquina superior izquierda. A continuación, pulse "Settings" (Ajustes) y utilice el teclado mostrado en el dispositivo móvil para conectar el proyector a una red inalámbrica disponible.
  • Page 34 All manuals and user guides at all-guides.com Manual del usuario 4.Para conectar el proyector a una red inalámbrica, puede admitir la proyección reflejada y el acceso a Internet. Pulse el icono que se muestra en la pantalla de EZCast en la esquina superior izquierda. A continuación, pulse "Settings" (Ajustes) y utilice el teclado mostrado en el dispositivo móvil para conectar el proyector a una red inalámbrica disponible.
  • Page 35 All manuals and user guides at all-guides.com Manual del usuario 1.Establezca un vínculo con Projector-xxxxxxxx (Proyector-xxxxxxxx) en la configuración Wi-Fi del dispositivo Android y, a continuación, abra la aplicación EZCast y haga clic en el icono <EZMirror> en el menú de La pantalla de proyección se convertirá...
  • Page 36 All manuals and user guides at all-guides.com Manual del usuario la dirección IP http://www.iezvu.com/download en la barra de direcciones de dicho explorador. 3.Seleccione el controlador para Windows o Mac OS dependiendo de su sistema operativo y, a continuación, haga clic en <Download> (Descargar) para entrar en la página de descarga.
  • Page 37 All manuals and user guides at all-guides.com Manual del usuario 8.Haga clic en “Mirror” (Reflejar) para seleccionar el método de salida de proyección, desde: Off (Desactivado) (predeterminado), a Mirror (Reflejar) o Extension (Extensión) para iniciar la proyección inalámbrica. Conectar el proyector a la red Wi-Fi para acceso a Internet IEs recomendable conectar el proyector a una red Wi-Fi (red doméstica) para que su ordenador, tableta y teléfono inteligente pueda acceder a Internet al mismo tiempo.
  • Page 38 All manuals and user guides at all-guides.com Manual del usuario 3.Si la seguridad inalámbrica está habilitada en la red Wi-Fi, deberá escribir la contraseña (clave de red) utilizando el teclado virtual del teléfono inteligente o el teclado de su ordenador. 4.Haga clic en OK (Aceptar) para configurar el punto de acceso a Internet y realizar la conexión.
  • Page 39 All manuals and user guides at all-guides.com Manual del usuario Entrada HDMI El proyector tiene un puerto de entrada HDMI integrado en el lado posterior. Puede conectar la fuente de entrada de vídeo externa al proyector o enviar la pantalla de este a un monitor LCD o HDTV utilizando el cable apropiado.
  • Page 40: Solucionar Problemas

    All manuals and user guides at all-guides.com Manual del usuario Solucionar problemas Si su PadUnit no funciona correctamente, compruebe lo siguiente antes de ponerse en contacto con un centro de servicio técnico autorizado. Síntoma Soluciones El proyector no funciona Compruebe el cable HDMI está conectado cuando se conecta un correctamente teléfono inteligente,...
  • Page 41 All manuals and user guides at all-guides.com Manual del usuario Especificaciones del producto Elemento Descripción Tecnología óptica Fuente luminosa RGB LED Resolución 854 x 480 Pixels (WVGA) Flujo luminoso Up to 120 Lumens Vida útil del LED Hasta 20.000 h Contraste 1500:1 Tamaño de la imagen de...
  • Page 42 All manuals and user guides at all-guides.com MP120 行动投影仪 使用手冊 技术支援 如需更多使用资讯,可至网站下载HP MP120使用者 手册: https://www.hp.com/support Global Aiptek Inc. - HP品牌制造商团队 1020 Milwaukee Ave, Suite 270, Deerfield, IL 60015, USA Email: help@hp-projector.com Web: www.hp-projector.com...
  • Page 43 All manuals and user guides at all-guides.com 使 用 手 冊 包装内含 ·行动投影仪 ·电源变压器 ·交换式电源接头 ·使用手册 ·三脚架 行动投影仪各部名称 投影镜头 调焦环 电源 降低音量 加大音量 LED 指示 亮度调整 耳机插孔 HDMI 输出接头 插孔 HDMI 输入接头 维护专用插孔 通风孔 重置孔 三脚架孔 喇叭...
  • Page 44 All manuals and user guides at all-guides.com 使 用 手 冊 开始使用 充电产品 本行动投影仪内建电池,方便携 带使用。第一次使用投影仪之前 ,请充电 5 小时,电池只会在未 使用投影仪(电源关闭)时充电 。再次电大约需要 3小时可充满。 如果所在国家的电源插座类型不同,您可换用适合的 AC 电源变压器插头(欧规 、美规等)。 充电 LED 指示灯 在充电期间,LED 指示灯会以跑马灯形式闪烁。电池充满时,LED 指示灯会亮起 蓝灯。 LED 指示灯 LED 状态 电量指示 100% 个蓝色 亮起 电量介于...
  • Page 45 All manuals and user guides at all-guides.com 使 用 手 冊 调整投影仪的亮度 投影仪上亮度调整按钮提供三种亮度选项。 电池续航力 模式 亮度 (HDMI 模式) 70 分钟 高 标准 120 分钟 省电 低 开机画面 开启投影仪电源,投影仪系统开机后会显示以下画面。 第一次使用时,请先在计算机或智能型手机上安装无线应用程序软件。 行动装置请扫描 QR 码,或将 IP 地址输入至浏览器的网址列,下载应用程序。 http://www.iezvu.com/download iOS装置使用 Airplay 进行无线投影 1.开启iOS装置,进入设定→wifi,并连结至下图的SSID名称,并输入密码。...
  • Page 46 All manuals and user guides at all-guides.com 使 用 手 冊 2.在主画面由下往上滑动,开启设定快捷。 3.点选 AirPlay Mirroring,选择第一步骤投影仪名称。 4.连结成功后即镜像投影。 *iOS使用者亦可使用EZCast投影,可参考下列Android设定步骤。 5.如联机时需上网功能:镜像投影成功后,此时如手机有3G/4G网络则可直接 使用网络相关应用功能。或者透过投影仪连接无线网络上网。 6.如需透过投影仪连接无线网络功能,请在与投影仪镜像投影状态下,透过 EZCast设定可连结至投影仪后,将投影仪链接至无线网络可以方便同时使用 镜像投影与无线上网。在智能型手机EZCast主画面点选左上方的 或由屏幕 左侧向右滑动,在滑出选单中点选“设定”,并使用智能型手机显示的键盘, 操控投影仪以连结上附近可用的无线网络。详细设定请参考 :使用投影仪连 接Wi-Fi 上网。...
  • Page 47 All manuals and user guides at all-guides.com 使 用 手 冊 Android 装置使用 EZCast 进行无线投影 EZCast 应用程序可在 Android 智能型手机或 iOS 装置上执行,并将静态影像或 简报传送至投影仪。 1.请先下载EZCast应用程序,可参考开机画面的说明进行下载并安装。 2.安装完成后开启EZCast应用程序,并按下画面上方符号 ,搜寻可用装置。 3.选择投影仪主画面上显示的SSID投影仪名称并输入主画面上显示的密码,连 结完成手机端会自动回至主画面,同时投影仪主画面右上角会显示蓝色的链 接符号。...
  • Page 48 All manuals and user guides at all-guides.com 使 用 手 冊 4.连结至投影仪后如将投影仪链接至无线网络可以方便同时使用镜像投影与无 线上网。在智能型手机EZCast主画面点选左上方的 或由屏幕左侧向右滑动, 在滑出选单中点选“设定”,并使用智能型手机显示的键盘,操控投影仪以连 结上附近可用的无线网络。详细设定请参考 : 使用投影仪连接Wi-Fi 网络上网。 EZCast 设定完成后开启 “镜像”手机画面即可镜像到投影仪。关于 详细功 能请参考 http://www.iezvu.com/os_help.php Miracast装置使用EZMirror进行无线镜像投影 后,开启 EZCast Wi-Fi Projector-xxxxxxxx app. 在安卓手机的 设定里先连接 <EZMirror> EZMirror 在 选单里单击 图示,投影仪会进入 画面 接着在您的智能型手机屏幕上会点选「开启」按钮,一旦开启后有 秒倒数...
  • Page 49 All manuals and user guides at all-guides.com 使 用 手 冊 3.Miracast 链接成功后,屏幕会直接镜像到投影仪。此时手机仍然可以透过 WiFi 3G/4G 或 连接因特网。 从计算机进行无线投影 输入密码,然后单击 <确定> 进行确认。 将计算机连接至可用的网络,存取因特网。 计算机上开启因特网浏览器,并在浏览器的网址列中输入 地址 http://www.iezvu.com/download。 Windows Mac OS 根据操作系统选择 或 适用的驱动程序,然后单击 <下载> 进入下载页面,接着请依照画面指示进行操作完成设定、下载与安装。 EZCast 完成安装时, 图标将会出现在计算机桌面上。 开启投影仪电源并进 入主画面。 SSID:Projector-XXXXXXXX 选择网络列表中的 连接计算机与投影仪无线网...
  • Page 50 All manuals and user guides at all-guides.com 使 用 手 冊 EZCast 双击计算机桌面上的 图标,启动应用程序。执行” ” "Projector-xxxxxxxx" ,当画面出现 的装置选项后,以鼠标点击两次以便建立连结。 “Mirror” 点选 从关闭(预设)、镜像或延伸选择投影输出方式,开始无线投影。 使用投影仪连接 Wi-Fi 上网 Wi-Fi 建议您将投影仪联机至 网络,以便计算机、平板计算机及智能型手机同时 连上因特网。您只需要在第一次输入网络密钥,设定联机。下次开机时,投影仪 将会自动联机至网络。 前往设定选单、选择并进入「因特网」。 Wi-Fi 选择您要联机的 网络 (SSID),并使用「确定」按钮进行确认开启密码对 话方块,然后输入密码。...
  • Page 51 All manuals and user guides at all-guides.com 使 用 手 冊 Wi-Fi 如果 网络有启用无线加密,请使用智能型手机的虚拟键盘或计算机的 键盘输入密码(网络密钥)。 单击「确定」设定因特网存取点并建立联机。成功建立联机将会需要一些时 间。在主画面中,您将可在右上方看见联机状态。 Wi-Fi 投影仪联机至 网络后,请关闭智能型手机/计算机中的应用程序。接 Wi-Fi 着,请将智能型手机联机至 网络并再次开启应用程序,使用搜寻按钮重 新连接至投影仪。 注: 因特网存取效能受许多因素影响,例如物体、距离、相似的频率、频带宽有限等或其 他设备的干扰。因此,如果在投影期间发生因特网速度变慢或间歇性中断,建议您选择其 他讯号较强的存取点,或停用因特网存取,以确保获得最佳的无线投影体验。...
  • Page 52 All manuals and user guides at all-guides.com 使 用 手 冊 HDMI输入 HDMI 投影仪的背面具有内建的 输入接 口。您可使用适当的缆线,将外部视讯 输入来源连接至投影仪输入端进行投影 。 注: Apple Lightning Digital AV 转接器未随附于 包装内。 HDMI 输出 HDMI HDMI HDMI 投影仪的背面具有内建的 输出接口。您可将 缆线由 输入端移 HDMI 到输出端将投影仪连接至具有 输入端口的 显示器或电视机,透过投 影仪的无线连接手机或平板功能,传统电视就成为一台智能型电视机。 在外部 LCD 显示器上显示影像 HDMI HDMI 使用...
  • Page 53 All manuals and user guides at all-guides.com 使 用 手 冊 疑难解答 若您的投影仪无法正常运作,在您联络授权维修中心之前,请检查下列项目。 徵狀 檢查重點 使用缆线连接HDMI装置时 检查 HDMI缆线是否已插妥。 ,投影仪无法正常运作。 • 启用计算机或智能型手机的 WLAN,并选择名为 执行 EZCast 应用程序时无 「Projector-XXXXXXXX」的存取点,与投影仪建立联机。 法侦测到投影仪。 • 从计算机拔出以太网络缆线,避免影响无线网络联机。 • 在光线较暗的环境中使用投影仪。 • 投影影像太暗。 使用电源变压器提高亮度。 • 缩小投影影像大小。 1. 调整焦距。请参阅「调整焦距」一节。 投影影像模糊。 2. 检查镜头是否不干净。 本投影仪的高亮度...
  • Page 54 All manuals and user guides at all-guides.com 使 用 手 冊 规格 项目 说明 光学技术 RGB LED 光源 854 x 480 像素 (WVGA) 分辨率 1500:1 对比率 51 ~ 30 公分 ( 20" ~ 120" ) 投影大小 50 ~ 319 公分 ( 20" ~ 125" ) 投影距离...

Table des Matières