Publicité

Les langues disponibles

Les langues disponibles

Liens rapides

IP400
Intelligent Projector
User
Manual
Support
For further information, download the HP IP400 User
Guide from: https://www.hp.com/support
Global Aiptek Inc. - HP Branded Product Group
1020 Milwaukee Ave, Suite 270, Deerfield, IL 60015, USA
Email: help@hp-projector.com
Web: www.hp-projector.com

Publicité

Table des Matières
loading

Sommaire des Matières pour HP IP400

  • Page 1 IP400 Intelligent Projector User Manual Support For further information, download the HP IP400 User Guide from: https://www.hp.com/support Global Aiptek Inc. - HP Branded Product Group 1020 Milwaukee Ave, Suite 270, Deerfield, IL 60015, USA Email: help@hp-projector.com Web: www.hp-projector.com...
  • Page 2: Package Contents

    User Manual Package Contents •IP400 Intelligent Projector (Windows Tablet + Projector + Power Bank) •Power Adapter •HDMI Cable •Carry Bag •Quick Start Guide •Warranty Card Getting to know your Intelligent Projector Projector Front Pogo Pins Vents Focus Wheel Projection Lens...
  • Page 3 User Manual Tablet Touch Panel Power Key Vents MicroUSB Conector USB Conector Bottom Pogo Pins Micro SD Slot Power Bank On/Off Pogo Pins USB Connector LEDs DC In...
  • Page 4: Getting Started

    User Manual Getting Started 1. Projector only (Power Adapter required) 2. Tablet + Projector (Power Adapter required) 3. Projector + PowerBank 4. Tablet + Projector + PowerBank Operating the Projector: The Projector needs to be plugged with a power adapter into a power source or stacked with the Power Bank (with sufficient power capacity) to operate.
  • Page 5: Adjusting The Focus

    Adjust the focus by toggling the focus wheel to achieve a sharp and clear picture at your desired projection distance. IP400 can project clearly from 50 to 319cm (20” ~ 125”) distance and with projection size from 51 to 305cm (20” ~ 120”)
  • Page 6 User Manual Keystoning: Used to correct the projection image from trapezoid to rectangular at any projection angle. Automatically corrects the projection shape (default). AUTO Manually adjust the keystone Up or Down. Projection Placement: Selects the way the projector faces the screen so the image is oriented correctly.
  • Page 7 User Manual Projecting Source: from an external device via HDMI or Tablet Projection from a external HDMI device takes higher priority, compared to the Tablet. To ensure projection from the tablet, please disconnect any external HDMI connection. Projecting from an External Device via HDMI Use the HDMI cable to connect the HDMI port of the projector to the external HDMI signal source.
  • Page 8 User Manual Tablet Power ON/OFF 1. Power ON: Press and hold ‘Power Key’ of the Tablet for 3 secs to turn on. 2. Power OFF: Press and hold ‘Power Key’ of the Tablet for 3 secs till the screen shows “Slide to shut down your PC” then slide down the screen of the touch panel or select Start button to initiate shutdown.
  • Page 9 User Manual Troubleshooting If your projector does not seem to be functioning properly, please check the following before you contact an authorized service center. Symptom Check Point The projector does not • Check the HDMI cable is plugged correctly. display when connecting •...
  • Page 10 User Manual Specifications - Projector Item Description Optical technology Light Source RGB LED Native Resolution 1280 x 720 Pixel (720P) LED Lifetime Up to 20,000h Contrast 500:1 Throw Ratio Aspect Ratio 16:9 Lens Offset 100 % Projection Image Size 51 ~ 305cm ( 20" ~ 120" ) (Diagonal) Projection Distance 50 ~ 319cm ( 20"...
  • Page 11 User Manual Specifications - Windows Tablet Item Description Intel Z3735F Quad Core , 1.33 GHZ Memory Flash Storage 32GB Display 4.5" LCD IPS , 1280 x 720 pixels Touch Screen Multi-Point, Capacitive Bluetooth Wi-Fi 802.11b/g/n MicroUSB ( OTG supported ) Connection USB 2.0 (Type A ) Micro SD ( Class 10 /UHS-1 up support )
  • Page 12 User Manual Specifications - Power Bank Item Description DC-In 12V / 3.5A DC-Out Pogo Pin: 11V / 3A Battery Embedded 3.7V / 13,200 mAH Lithium-ion Dimensions ( L x W x H ) 125 x 95 x 25mm(4.92" x 3.74" x 0.98" ) Weight 405g / 0.89 lb Operating Temperature...
  • Page 13: Projecteur Intelligent

    Projecteur Intelligent Manuel d’utilisation Soutien Pour plus d’informations, téléchargez le guide d’utilisation du HP IP400 - https://www.hp.com/support Global Aiptek Inc. - Groupe des produits de marque HP 1020 Milwaukee Ave, Suite 270, Deerfield, IL 60015, USA Email: help@hp-projector.com Web: www.hp-projector.com...
  • Page 14: Contenu De L'emballage

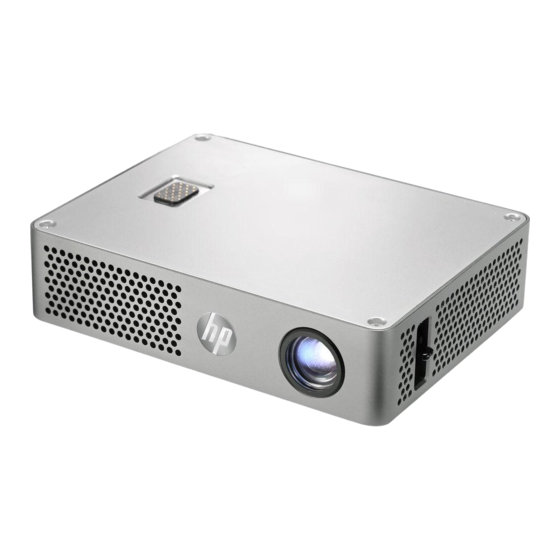
    Manuel d’utilisation Contenu de l'emballage •IP400 Projecteur (tablette Windows + projecteur + chargeur portable) •Adaptateur électrique •Câble HDMI •Sac de transport •Guide de démarrage rapide •Carte de garantie Getting to know your Intelligent Projector Projecteur Avant Broches Pogo Fentes Roulette de réglage...
  • Page 15: Chargeur Portable

    Manuel d’utilisation Tablette Haut Panneau tactile Touche d’alimentation Fentes Connecteur MicroUSB Connecteur USB Broches Pogo Emplacement MicroSD Chargeur portable Interrupteur Broches Pogo Connecteur USB Entrée CC...
  • Page 16: Utilisation Du Projecteur

    Manuel d’utilisation Commencer Configuration 1. Projecteur uniquement ( adaptateur d’alimentation requis ) 2. Tablette + Projecteur ( adaptateur d’alimentation requis ) 3. Projecteur + chargeur portable 4. Tablette + Projecteur + chargeur portable Utilisation du projecteur Le projecteur doit être branché avec un adaptateur secteur ou empilé avec un Power Bank Unit (contenant une capacité...
  • Page 17: Réglage De La Mise Au Point

    51 à 305 cm (20” ~ 120”) Menu de l’affichage à l’écran du projecteur Le IP400 prend en charge les réglages du volume audio, de la luminosité, de la correction du trapèze et du placement de la projection.
  • Page 18 Manuel d’utilisation Correction du trapèze: Utilisé pour corriger l'image de projection de trapézoïde à rectangulaire à n'importe quel angle de projection. Corrige automatiquement la forme de la projection (par défaut). AUTO Augmentez ou diminuez manuellement le trapèze. Placement de la projection: Sélectionne la façon dont le projecteur fait face à...
  • Page 19: Source De Projection À Partir D'un Appareil Externe Par L'intermédiaire D'un Hdmi Ou De La Tablette

    Manuel d’utilisation Source de projection à partir d’un appareil externe par l’intermédiaire d’un HDMI ou de la tablette La projection à partir d’un appareil HDMI externe est établie comme prioritaire, par rapport à la tablette.veuillez débrancher les connexions HDMI externes. Projection depuis un appareil externe via HDMI Utilisez le câble HDMI pour connecter le port HDMI du projecteur à...
  • Page 20: Mise Sous Tension Ou Hors Tension De La Tablette

    Manuel d’utilisation Mise sous tension ou hors tension de la tablette 1. Mise sous tension : Appuyez et maintenez la « Touche d'alimentation » du tablette enfoncée pendant 3 secondes pour l'allumer. 2. Mise hors tension : Appuyez sur la « Touche d’alimentation » de la tablette et maintenez-la enfoncée pendant trois secondes jusqu’à...
  • Page 21: Guide De Dépannage

    Manuel d’utilisation Guide de dépannage Si votre projecteur ne fonctionne pas correctement, veuillez vérifier les éléments ci-dessous avant de contacter un centre de réparation agréé. Problème À vérifier Le projecteur ne fonctionne • Vérifiez que le câble HDMI est bien branché. pas lors de la connexion à...
  • Page 22: Spécifications - Projecteur

    Manuel d’utilisation Spécifications - Projecteur Élément Description Technologie optique DEL RVB Source de lumière 1280 x 720 Pixels (720P) Résolution Jusqu'à 20,000h Durée de vie LED 500:1 Rapport de contraste 1.2(Distance de projection/Largeur de l'image) Rapport de projection 16:9 Rapport d'aspect 100 % Décalage 51cm ~ 305cm (20"...
  • Page 23: Spécifications - Tablette Windows

    Manuel d’utilisation Spécifications - Tablette Windows Élément Description Intel Core Z3735F Quad Core, 1,33 GHZ Mémoire 2 Go Stockage Flash 32 Go Affichage IPS LCD 4,5 ", 1280 x 720 pixels Écran tactile Multi-Point, Capacitif Bluetooth WiFi 802.11b/g/n MicroUSB (OTG pris en charge) USB 2.0 (Type A ) Connexion Micro SD ( Class 10 /UHS-1 up support )
  • Page 24: Spécifications - Chargeur Portable

    Manuel d’utilisation Spécifications - Chargeur portable Élément Description DC-in 12V / 3.5A DC-out Pogo Pin: 11V / 3A Type de batterie 3.7V intégré / 13,200 mAH batterie Lithium-ion Dimensions (L x l x H) 125 x 95 x 25mm(4.92" x 3.74" x 0.98" ) Poids 405g / 0.89 lb Humidité...
  • Page 25 Soporte Para obtener más información, descargue la guía del usuario del proyector HP IP400 - https://www.hp.com/support Global Aiptek Inc. - Grupo de productos marca HP 1020 Milwaukee Ave, Suite 270, Deerfield, IL 60015, USA Email: help@hp-projector.com Web: www.hp-projector.com...
  • Page 26: Contenido Del Paquete

    Manual del usuario Contenido del paquete •Proyector IP400(Tableta Windows + Proyector + Batería externa) •Adaptador de alimentación(Tableta Windows + Proyector + Batería externa) •Cables de alimentación •Cable HDMI •Bolsa de transporte •Guía de inicio rápido •arjeta de garantía Conozca su proyector inteligente...
  • Page 27 Manual del usuario Tableta Lado superior Panel táctil Botón de alimentación Rejillas de ventilación Conector MicroUSB Conector USB Lado inferior Contactos Pogo Ranura MicroSD Batería externa Encendido y apagado Contactos Pogo Conector USB Entrada de CC...
  • Page 28 Manual del usuario Procedimientos iniciales Configuración 1. Solo proyector (se necesita adaptador de alimentación) 2. Tableta + Proyector (se necesita adaptador de alimentación) 3. Proyector + Batería externa 4. Tableta + Proyector + Batería externa Usar el proyector El proyector necesita enchufarse mediante un cable de alimentación o apilarse con su Power Bank Unit (que contiene suficiente capacidad energética) para funcionar.
  • Page 29: Ajustar El Enfoque

    IP400 puede proyectar claramente desde una distancia de 50 a 319 cm (20” ~ 125”) y un tamaño de proyección de 51 a 305 cm (20” ~ 120”) Menú...
  • Page 30 Manual del usuario Corrección de deformación trapezoidal: Se utiliza para corregir la imagen de proyección para pasar de una imagen trapezoidal a rectangular en cualquier ángulo de proyección. Permite corregir automáticamente la forma de proyección AUTO (predeterminado). Permite ajustar manualmente la corrección trapezoidal arriba o abajo.
  • Page 31 Manual del usuario Fuente de proyección de un dispositivo externo a través de HDMI o tableta La proyección desde un dispositivo HDMI externo está establecida como de mayor prioridad si se compara con la tableta.Desconecte cualquier conexión HDMI externa. Proyección desde un dispositivo externo a través de HDMI Utilice el cable HDMI para conectar el puerto HDMI del proyector a la fuente de señal HDMI externa.
  • Page 32: Encender El Proyector

    Manual del usuario Encender el proyector El proyector se puede utilizar sin un adaptador de alimentación si la batería externa tiene capacidad de energía suficiente (consulte el indicador de la luz de LED). • El adaptador de alimentación incluido con el proyector puede enchufarse a un conector de entrada de CC del proyector o de su Power Bank Unit.
  • Page 33: Solucionar Problemas

    Manual del usuario Solucionar problemas Si su PadUnit no funciona correctamente, compruebe lo siguiente antes de ponerse en contacto con un centro de servicio técnico autorizado. Síntoma Soluciones El proyector no funciona • Compruebe el cable HDMI está conectado cuando se conecta a un correctamente .
  • Page 34 Manual del usuario Especificaciones de Proyector Elemento Descripción Tecnología óptica RGB LED Fuente luminosa 1280 x 720 Pixeles (720P) Resolución Hasta 400 lúmenes sensual Flujo luminoso Hasta 20.000 h Vida útil del LED 500:1 Contraste Cociente del tiro 16:9 Relación de aspecto 100 % Desplazamiento de la lente 51cm ~ 305cm (20"...
  • Page 35 Manual del usuario Especificaciones - Tableta Windows Elemento Descripción Intel Bay Trail Z3735 Memoria RAM Memoria flash 32GB Pantalla 4.5 "LCD IPS, 1280 x 720 píxeles Pantalla táctil Multipunto, capacitivo Bluetooth Sí WiFi 802.11b/g/n MicroUSB ( compatible con OTG) Conexión USB 2.0 (Tipo A) Micro SD (Soporte de clase 10 / UHS-1) Sistema operativo...
  • Page 36 Manual del usuario Especificaciones de Batería externa Elemento Descripción DC-in 12V / 3.5A DC-out Pogo Pin: 11V / 3A Tipo de batería 3.7V incorporado batería de litio-ion / 13200 mAH Dimensiones (L x P x A) 125 x 95 x 25mm(4.92" x 3.74" x 0.98" ) Peso 405g / 0.89 lb Temperatura de...
  • Page 37 IP400 智慧投影仪 使用手冊 技术支援 如需更多使用资讯,可至网站下载HP IP400使用者 手册: https://www.hp.com/support Global Aiptek Inc. - HP品牌制造商团队 1020 Milwaukee Ave, Suite 270, Deerfield, IL 60015, USA Email: help@hp-projector.com Web: www.hp-projector.com...
  • Page 38 使 用 手 冊 包装内含 ·微型投影仪 ·电源变压器 ·电源线 ·HDMI ·使用手册 ·保固卡 投影仪 上 弹簧探针 通风孔 对焦环 投影镜头 背面 电源键 喇叭 聲音輸出口 HDMI接口 电源接口 通风孔 弹簧探针 加大音量 按键 模式 选择 Mode Select 降低音量...
  • Page 39 使 用 手 冊 平板电脑 上 觸控螢幕 电源键 通风孔 MicroUSB 接口 USB 接口 底 弹簧探针 MicroSD 插槽 行动电源 USB 电源键 弹簧探针 USB 接口 指示灯 电源接口...
  • Page 40 使 用 手 冊 开始使用 使用组合 1. 投影仪 (需要电源变压器) 2. 平板 + 投影仪(需要电源变压器) 3. 投影仪 + 行动电源 4. 平板 + 投影仪 + 行动电源 投影仪的操作 使用投影仪前需要先接上电源变压器或堆栈在充饱电的行动电源上。 开启投影仪: 按下电源键 2 秒可开启投影仪电源。 开启/关闭画面: 短暂按住电源键可关闭投影仪光源,再按一次电源键即可开启投影仪光源。 关闭投影仪: 按住电源键 3 秒即可关闭投影仪电源。...
  • Page 41 使 用 手 冊 调整对焦 将投影仪放在平坦的表面上,镜头对着 墙壁或投影幕。在不同投影距离透过旋 转对焦环可调整焦距让投影画面更锐利 清晰。 IP400 可以清晰的投影距离为 50 到 319公分 (20”- 25”), 影像大小为 51 to 305公分 (20”- 120”) 投影仪画面功能选单 投影仪支持亮度,梯形校正和投影位置的调整。先按“MODE”以切换亮度, 梯形校正和投影位置模式,然后按“SELECT” 以便变更设定。 按 和 可调整音量输出的大小。 亮度: 可根据环境和功耗设定亮度 增强模式为最亮的投影性能模式。 最佳模式(内定)为投影性能和电池电力之间的平衡模 式。 经济模式,比较省电的模式。...
  • Page 42 使 用 手 冊 梯形校正: 校正影像让梯形画面恢复成方形的功能 自动更正投影形状(内定) AUTO 向上或向下手动调节 投影位置: 选择投影仪面向屏幕的方式,以便影像可以正确呈现 前投 内定值 背投 选择此模式投影仪图像反转,适合从半透明屏幕背后投影。 反向前投 此模式下投影仪图像会上下颠倒。 反向背投 此模式下投影仪反向从半透明屏幕后面投影。...
  • Page 43 使 用 手 冊 投影输入来源 IP400 可投影外部的 HDMI 装置或专用的平板装置。 从外部 HDMI 装置投影的优先权高于上方堆栈的平板装置。要从上方堆栈的 平板装置投影实需移除外部的 HDMI 连接。 从HDMI外部的装置投影 使用 HDMI 缆线将投影仪的 HDMI 接口连接到外部 HDMI 讯 号来源。完成连接后,画面会自动切换至 HDMI 来源。 Blu Ray 从iOS智能型手机或平板计算机投影 1.透过 Apple Lightning Digital AV 转接器及 A 对 A type HDMI 缆线,将iPhone X, 8/8 Plus, 7/7 Plus, 6/6S Plus, 6/6S, 5/5S, iPad Pro 12.9, iPad Pro 10.5, iPad Air, Air 2,...
  • Page 44 使 用 手 冊 开启/关闭平板装置 1.开启: 按压平板装置的电源键3秒即可开启。 2.关闭: 按压平板装置的电源键3秒直到画面显示”滑动关闭计算机”然后 下滑触控屏幕或至 Windows 的任务栏选择关机。 先关闭平板装置再关闭投影仪。 3.开启平板装置后须几秒后画面才会被投影出来。 电源供应 1.将投影仪迭在行动电源上方。 2.如果行动电源有足够电力(参考LED 指示灯)投影仪可以不需要电源变压 器即可运作。 • 投影仪随附的电源变压器可以做投影仪和行动电源的电源输入 。 • 当投影仪和行动电源迭在一起时,如果需要供电,请将电源变压器接 到行动电源的DC-in 接口。 支持输入时序 分辨率 频率 (Hz) 640x480 800x600 1024x768 1280x720 1280x768 1280x800 1366x768 1600x1200 1920x1080 1920x1200...
  • Page 45 使 用 手 冊 疑难解答 若您的投影仪无法正常运作,在您联络授权维修中心之前,请检查下列 项目。 征状 检查重点 使用缆线连接至智能型手 1.检查 HDMI缆线是否已插妥。 机、笔记本电脑或计算机 2.检查电源线或行动电源是否连接妥当。 时,投影仪无法正常运作。 3.检查行动电源是否有充饱电。 1.在光线较暗的环境中使用投影仪。 投影影像太暗。 2.使用电源变压器提高亮度。 3.缩小投影影像大小。 1. 调整焦距。请参阅「调整焦距」一节。 投影影像模糊。 2. 检查镜头是否不干净。 本投影仪的高亮度 LED 在长时间使用下会发 热,此为正常现象,此现象并不会影响投影 投影仪的表面温度变高。 仪的效能。请避免通风孔附着脏污或受到阻 挡,并在通风良好的环境中使用投影仪。 如果投影仪在投影时出现速度变慢、画面冻 从异常状态中恢复正常。 结、当机或死机情形,请卸下电源线或Power Bank Unit,然后重新启动投影仪。...
  • Page 46 使 用 手 冊 规格- 投影仪 说明 项目 光学技术 光源 RGB LED 分辨率 1280 x 720像素 (720P) 光源寿命 高达 20,000小时 对比率 500:1 投影比 画面长宽比 16:9 偏移 100 % 投影大小 51cm ~ 305cm (20" ~ 120") 投影距离 50cm ~ 319cm (20" ~ 125") 亮度...
  • Page 47 使 用 手 冊 规格 - Windows 平板电脑 说明 项目 Intel Z3735F Quad Core , 1.33 GHZ 记忆体 储存容量 32GB 4.5" LCD IPS , 1280 x 720 pixels 萤幕尺寸 触控面板 电容式面板,多点式触控 蓝芽功能 有 无线功能 802.11b/g/n无线网路 microUSB 插孔,支援OTG USB 2.0 (Type A ) 连接方式...
  • Page 48 使 用 手 冊 规格- 行动电源 说明 项目 输入电源 12V / 3.5A 输出电源 Pogo Pin: 11 V / 3A 电池种类 内建 3.7V / 13,200 mAH锂离子电池 125 x 95 x 25mm(4.92" x 3.74" x 0.98" ) 机身尺寸 ( 长 x 宽 x 高 ) 重量...

Table des Matières