Klarstein FIGO Mode D'emploi
Masquer les pouces Voir aussi pour FIGO:

Publicité

Les langues disponibles
  • FR

Les langues disponibles

Liens rapides

FIGO
Deckenventilator
Ceiling Fan
Ventilateur de plafond
Ventilador de techo
Ventilatore a soffitto
10029345 10029346 10033505
www.klarstein.com

Publicité

Table des Matières
loading

Sommaire des Matières pour Klarstein FIGO

  • Page 1 FIGO Deckenventilator Ceiling Fan Ventilateur de plafond Ventilador de techo Ventilatore a soffitto 10029345 10029346 10033505 www.klarstein.com...
  • Page 3: Table Des Matières

    Sehr geehrter Kunde, wir gratulieren Ihnen zum Erwerb Ihres Gerätes. Lesen Sie die folgenden Hinweise sorgfältig durch und befolgen Sie diese, um möglichen Schäden vorzubeugen. Für Schäden, die durch Missachtung der Hinweise und unsachgemäßen Gebrauch entstehen, übernehmen wir keine Haftung. Scannen Sie den folgenden QR-Code, um Zugriff auf die aktuellste Bedienungsanleitung und weitere Informationen rund um das Produkt zu erhalten.
  • Page 4: Sicherheitshinweise

    SICHERHEITSHINWEISE • Befestigen Sie den Ventilator niemals an einer Steckdose, sondern an der Decke selbst. • Der Mindestabstand zwischen den Ventilatorblättern und dem Boden muss mehr als 2,3 m betragen. Die Mindesttragfähigkeit des Hakens, an dem der Ventilator aufgehängt wird, muss 100 kg betragen. •...
  • Page 5: Installation

    INSTALLATION Befestigen Sie die Befestigen Sie die Stecken Sie den Montageplatte mit zwei Ventilator-Bauteile an Empfänger für die Schrauben, Federringen der Montageplatte. Fernbedienung zwischen und Unterlegscheiben Richten Sie das die Klammer und das an einem Deckenbalken. Kugelgelenk des Kugelgelenk. Der Deckenbalken Ventilators an der muss stark genug Aufhänglasche der...
  • Page 6 Befestigen Sie die Verbinden Sie die Befestigen Sie die Rotorblätter mit den Lampenkabel, Lampenfassung an den Federringen und indem sie die zwei Montageklammern und Schrauben, die sich Plastikanschlüsse fixieren Sie sie mit drei bereits am Motor zusammenstecken, bis Fixierschrauben und befinden.
  • Page 7: Inbetriebnahme Und Bedienung

    INBETRIEBNAHME UND BEDIENUNG • Drücken Sie auf die Speed-Taste an der Fernbedienung um eine Geschwindigkeit auszuwählen: HI: Hoch - MED: Mittel - LOW: Niedrig - OFF: Aus. • Mit dem Schalter am Motorgehäuse lässt sich die Richtung des Luftstroms beeinflussen, den die Rotorblätter erzeugen. Achtung: Schalten Sie den Ventilator aus, bevor Sie die Richtung des Luftstroms ändern und warten Sie bis der Ventilator angehalten hat, damit Sie sich nicht verletzen oder den Motor beschädigen.
  • Page 8: Spezielle Entsorgungshinweise Für Verbraucher In Deutschland

    SPEZIELLE ENTSORGUNGSHINWEISE FÜR VERBRAUCHER IN DEUTSCHLAND Entsorgen Sie Ihre Altgeräte fachgerecht. Dadurch wird gewährleistet, dass die Altgeräte umweltgerecht verwertet und negative Auswirkungen auf die Umwelt und menschliche Gesundheit vermieden werden. Bei der Entsorgung sind folgende Regeln zu beachten: • Jeder Verbraucher ist gesetzlich verpflichtet, Elektro- und Elek- tronikaltgeräte (Altgeräte) sowie Batterien und Akkus getrennt vom Hausmüll zu entsorgen.
  • Page 9 • Bei einem Vertrieb unter Verwendung von Fernkommunikationsmitteln ist die unentgeltliche Abholung am Ort der Abgabe auf Elektro- und Elektronikgeräte der Kategorien 1, 2 und 4 gemäß § 2 Abs. 1 ElektroG, nämlich „Wärmeüberträger“, „Bildschirmgeräte“ (Oberfläche von mehr als 100 cm²) oder „Großgeräte“...
  • Page 10: Hinweise Zur Entsorgung

    HINWEISE ZUR ENTSORGUNG Wenn es in Ihrem Land eine gesetzliche Regelung zur Entsorgung von elektrischen und elektronischen Geräten gibt, weist dieses Symbol auf dem Produkt oder auf der Verpackung darauf hin, dass dieses Produkt nicht im Hausmüll entsorgt werden darf. Stattdessen muss es zu einer Sammelstelle für das Recycling von elektrischen und elektronischen Geräten gebracht werden.
  • Page 11: Technical Data

    Dear Customer, Congratulations on purchasing this device. Please read the following instructions carefully and follow them to prevent possible damages. We assume no liability for damage caused by disregard of the instructions and improper use. Scan the QR code to get access to the latest user manual and more product information.
  • Page 12: Safety Instructions

    SAFETY INSTRUCTIONS • Never attach the fan to a power point,but to the ceiling itself. • The minimum distance between the blades of the fan and the floor must be more than 2.3 m. The minimum carrying capacity of the hook from which the fan is hung must be 100 kg.
  • Page 13 INSTALLATION Fasten the mounting Attach the fan Insert the remote control plate to a ceiling joist components to the receiver between the with two screws, lock mounting plate. Align clamp and the ball joint. washers and washers. the ball joint of the fan The ceiling joist must with the suspension lug be strong enough to...
  • Page 14 Attach the rotor blades Connect the lamp Attach the lamp socket with the spring washers cables by plugging the to the mounting and screws that are two plastic connectors brackets and fix it with already on the motor. together until they snap three fixing screws and into place.
  • Page 15: Commissioning And Operation

    COMMISSIONING AND OPERATION • Press the Speed button on the remote control to select a speed: HI: High • MED: Medium • LOW: Low • OFF: Off. • The switch on the motor housing can be used to influence the direction of the airflow generated by the rotor blades.
  • Page 16: Disposal Considerations

    DISPOSAL CONSIDERATIONS If there is a legal regulation for the disposal of electrical and electronic devices in your country, this symbol on the product or on the packaging indicates that this product must not be disposed of with household waste. Instead, it must be taken to a collection point for the recycling of electrical and electronic equipment.
  • Page 17: Fiche Technique

    Chère cliente, cher client, Toutes nos félicitations pour l’acquisition de ce nouvel appareil. Veuillez lire attentivement et respecter les instructions de ce mode d’emploi afin d’éviter d’éventuels dommages. Nous ne saurions être tenus pour responsables des dommages dus au non-respect des consignes et à la mauvaise utilisation de l’appareil.
  • Page 18: Consignes De Sécurité

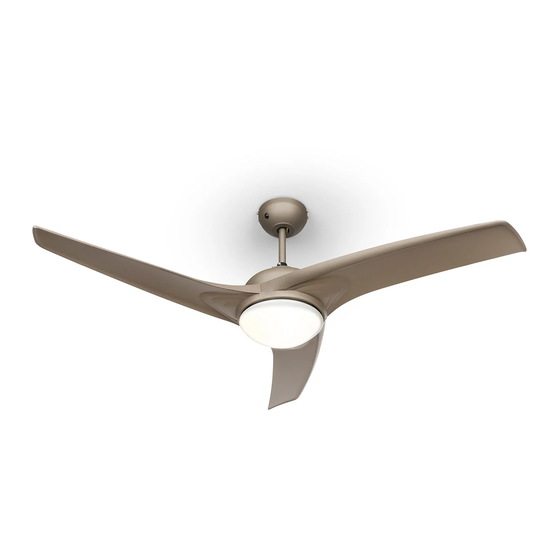
    CONSIGNES DE SÉCURITÉ • Ne connectez jamais le ventilateur à une prise électrique, mais au plafond lui-même. • La distance minimale entre les pales du ventilateur et le sol doit être supérieure à 2,3 m. La capacité de charge minimale du crochet sur lequel le ventilateur est suspendu doit être de 100 kg.
  • Page 19 INSTALLATION Fixer la plaque de Fixer la tige du Installer le récepteur montage au mur ventilateur à la plaque de la télécommande avec deux vis, deux de montage. Aligner la entre les fixations et la rondelles élastiques coupole du ventilateur coupole.
  • Page 20 Fixer les pales avec les Raccorder les câbles de Fixer les douilles de rondelles élastiques et la lampe en branchant lampe aux attaches de les vis qui se trouvent et encliquetant les montage et les visser déjà sur le moteur. deux connecteurs en avec des vis et des plastique.
  • Page 21: Mise En Marche Et Utilisation

    MISE EN MARCHE ET UTILISATION • Appuyer sur la touche Speed de la télécommande pour sélectionner la vitesse : HI : rapide - MED : moyen - LOW : lent - OFF : éteint. • L’interrupteur au niveau du moteur permet d’influencer la direction du courant d’air produit par le mouve- ment des pales.
  • Page 22: Informations Sur Le Recyclage

    INFORMATIONS SUR LE RECYCLAGE S‘il existe une réglementation pour l‘élimination ou le recyclage des appareils électriques et électroniques dans votre pays, ce symbole sur le produit ou sur l‘emballage indique que cet appareil ne doit pas être jeté avec les ordures ménagères.
  • Page 23: Dati Tecnici

    Gentile Cliente, La ringraziamo per aver acquistato il dispositivo. La preghiamo di leggere attentamente le seguenti istruzioni per l’uso e di seguirle per evitare possibili danni tecnici. Non ci assumiamo alcuna responsabilità per danni scaturiti da una mancata osservazione delle avvertenze di sicurezza e da un uso improprio del dispositivo.
  • Page 24: Avvertenze Di Sicurezza

    AVVERTENZE DI SICUREZZA • Non fissare mai il ventilatore a una presa elettrica, ma al soffitto stesso. • La distanza minima tra le pale del ventilatore e il pavimento deve essere maggiore di 2,3 m. La capacità di carico minima del gancio a cui viene fissato il ventilatore deve essere di 100 kg.
  • Page 25 MONTAGGIO Fissare la piastra di Fissare i componenti del Inserire il ricevitore per il montaggio alla trave ventilatore alla piastra telecomando tra la staffa del soffitto utilizzando di montaggio. Allineare e il giunto sferico. due viti, le rondelle il giunto sferico del elastiche e le rondelle.
  • Page 26 Fissare le pale rotanti Collegare i cavi della Fissare il portalampada utilizzando le rosette lampada assemblando alle staffe di montaggio elastiche e le viti che si i due connettori in utilizzando le viti di trovano già sul motore. plastica, fino al loro com- fissaggio e le rondelle.
  • Page 27: Messa In Funzione E Utilizzo

    MESSA IN FUNZIONE E UTILIZZO • Premere il tasto Speed del telecomando per selezionare una velocità: HI: alta –MED: media – LOW: bassa – OFF: spento. • È possibile direzionare la corrente d’aria generata dalle pale tramite l’interruttore posto sul motore. Attenzi- one: spegnere il ventilatore e attendere che le pale si arrestino prima di cambiare la direzione della corrente d’aria, per evitare di farsi male o di danneggiare il motore.
  • Page 28: Produttore E Importatore (Uk)

    AVVISO DI SMALTIMENTO Se nel proprio paese si applicano le regolamentazioni inerenti lo smaltimento di dispositivi elettrici ed elettronici, questo simbolo sul prodotto o sulla confezione segnala che questi prodotti non possono essere smaltiti con i rifiuti normali e devono essere portati a un punto di raccolta di dispositivi elettrici ed elettronici.
  • Page 29: Datos Técnicos

    Estimado cliente: Le felicitamos por la adquisición de este producto. Lea atentamente el siguiente manual y siga cuidadosamente las instrucciones de uso con el fin de evitar posibles daños. La empresa no se responsabiliza de los daños ocasionados por un uso indebido del producto o por haber desatendido las indicaciones de seguridad.
  • Page 30: Indicaciones De Seguridad

    INDICACIONES DE SEGURIDAD • Nunca fije el ventilador a una toma de corriente, sino al techo. • La distancia mínima entre las hojas del ventilador y el suelo debe ser superior a 2,3 m. La capacidad de carga mínima del gancho al que se cuelgue el ventilador debe ser de 100 kg.
  • Page 31 INSTALACIÓN Fije la placa de montaje Fije los componentes Encaje el receptor para con dos tornillos, del ventilador a la placa el mando a distancia arandelas elásticas y de montaje. Oriente entre las pinzas y la arandelas a una viga la rótula mecánica del rótula mecánica.
  • Page 32 Fije las aspas del rotor Una el cable de la Fije el portalámparas a con las arandelas lámpara encajando los soportes de montaje elásticas y los tornillos las dos conexiones con tornillos de fijación que ya se encuentran en de plástico hasta que y arandelas de estrella.
  • Page 33: Puesta En Funcionamiento

    PUESTA EN FUNCIONAMIENTO • Pulse el botón Speed del mando a distancia para seleccionar una velocidad: Hi: alta - MED: media - LOW: baja - OFF: apagado. • Con el interruptor de la carcasa del motor se puede modificar la orientación de la corriente de aire que generan las aspas del rotor.
  • Page 34: Indicaciones Sobre La Retirada Del Aparato

    INDICACIONES SOBRE LA RETIRADA DEL APARATO Si en su país existe una disposición legal relativa a la eliminación de aparatos eléctricos y electrónicos, este símbolo estampado en el producto o en el embalaje advierte que no debe eliminarse como residuo doméstico. Debe depositarse en un punto de recogida de reciclaje de aparatos eléctricos y electrónicos.

Ce manuel est également adapté pour:

100293451002934610033505

Table des Matières