Rola 59842 Guide D'installation
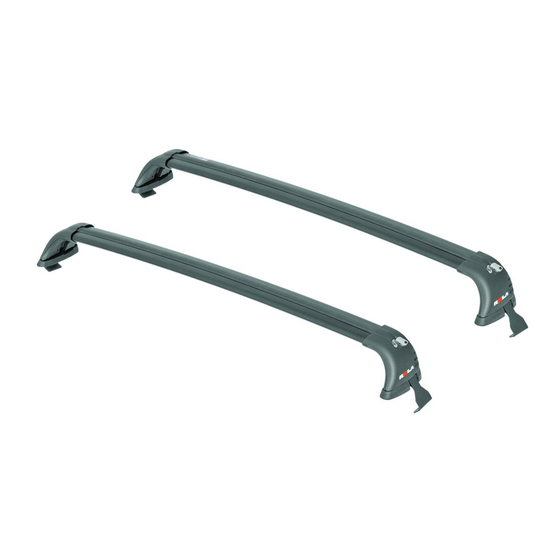
Kia soul without side rails 2010 and up roof rack installation guide
Les langues disponibles
Les langues disponibles
Liens rapides
Front Straps
1 Notch
Fitting Straps into End Supports
Prior to Assembly, check that your Roof Rack Box contains all the parts
as shown above. Ensure that the vehicle roof is clean and dry.
Please note that some illustrations depicted in these instructions are
only representative and your items may look different.
Read these instructions carefully before commencing.
You can use a protective cloth when installing your racks to protect
of vehicle's finish.
Ensure your straps correspond with the mounting positions on
the vehicle before installing them into the End Supports. Use
strap notches as shown above to identify the correct car position
1. Un‐fasten and rotate the Covers off the End Supports. The
Covers can remain attached to the Hinge on the Supports.
2. Remove the Gasket Pads by carefully pulling them off the
End Supports (Pads are clipped on by "T" clips).
3. Feed the Strap neck through the cavity in the End Support (Fig 1a).
When the Neck is through rotate the Strap down and then push up to
align the bolt hole and the cage nut.
4.Use the supplied "L" wrench to feed the bolts into the cage
nuts (Fig 1b).
5. Leave approximately 1" (25mm) of gap between the top of
the Strap and the bolt head . This will aid in installation to the
door frame (Fig 1c)
Placement of End Supports onto Vehicle Roof
6. The Gasket Pads all have vehicle roof
position text on the top inside surface.
Left (Drivers side), Right (Passenger side)
These can now be replaced on the end
supports. Re‐fasten using the T clips
7. Using the vehicles B pillar place the
U i
h
hi l
ill
cross bars as specified in ( Fig 2 a & b)
Note: Gasket only shown for clarity.
59842N Rel. 6/4/10
KIA SOUL without Side Rails
Roof Rack Installation Guide
Rear Straps
2 Notches
d i h h
i
i i
l
h
2010 and Up
Gasket Pads are pre‐
attached to the Supports
Fig 1a
i 1
1
Front
Fig 2a
Note‐ You may place the cross bar
position labels in the door frame
below the Straps for future reference.
PART No.
Carrying Capacity
N
Note: Keys may be
packaged separately
in the kit
TIP: Pull the Buffer Strips back
approximately 1‐1/2" (40mm)
to allow good access for the "L"
wrench to fit into the bolt
2
head.
Fig 1b
25mm
(1")
(1 )
Fig 1c
790mm (31‐ 1/8" )
59842
50 kgs
110 lbs
K
b
Fig 2b
225mm
(8‐7/8")
Front
Page 1 of 2

Manuels Connexes pour Rola 59842


Sommaire des Matières pour Rola 59842
- Page 3 No PIÈCE 59842 KIA SOUL sans barres de toit 2010 et plus récent 50 kg Guide d'installation du porte‐bagages de toit Capacité de charge 110 lb Remarque : Dans l'ensemble, les clés peuvent se trouver dans un emballage séparé Sangles avant Sangles arrière Une encoche Deux encoches Les coussinets de joints sont pré‐attachés aux supports Insertion des sangles dans les supports d'extrémité Avant le montage, vérifier que la boîte du porte‐bagages de toit contient toutes les pièces illustrées ci‐dessus. S'assurer que le toit du véhicule est propre et sec. Veuillez noter que les illustrations de ces instructions ne sont CONSEIL : Tirer sur les bandes présentées qu'à titre indicatif et que vos articles peuvent avoir un d'isolement sur environ 1‐1/2 aspect différent. po (40 mm) pour permettre à la Lire ces instructions attentivement avant de commencer. clé en “L” de s'insérer dans la Vous pouvez utiliser une linge protecteur au moment d'installer tête du boulon. votre porte‐bagages afin de protéger le fini du véhicule. Fig. 1a S'assurer que les sangles correspondent aux positions de montage sur le véhicule avant de les poser dans les supports d'extrémité. Utiliser les encoches de sangle tel qu'illustré ci‐ dessus pour identifier la position correcte. Fig. 1b 1. Desserrer et tourner les capuchons pour les retirer des supports ...
- Page 4 Instructions d'installation : KIA Soul 2010 et plus récent 8. Avec une sangle attachée autour du cadre de porte d'une Fig. 2c Fig. 2d manière lâche, tenir la sangle de l'autre côté à l'extérieur de la paroi de la carosserie, puis la placer dans le cadre de POUSSER TIRER portière. (Fig. 2c) portière. (Fig. 2c) S'assurer que les coussinets de caoutchouc des sangles soient bien en place pour éviter d'endommager le fini. 9. À l'aide de la clé en “L” fournie, serrer les boulons pour Avant du véhicule tirer les sangles vers le haut, vers le cadre de portière. (Fig. 2d) Conseil : Tout en serrant les sangles, alterner d'un côté à l'autre pour obtenir une tension uniforme. Avant du véhicule S'assurer que les traverses sont parallèles et que les S'assurer que les crochets de sangles sont bien tendues. Effectuer un test en secouant support coïncident avec les fentes des coussinets de joints. les traverses. Fixation des capuchons sur les supports d'extrémité Si l'on doit enlever les capuchons GTX, suivre la Fig. 3b procédure suivante concernant la remise en place et l'emploi. 10. Placer les extrémités de charnière sur les trous de charnière du capuchon. Fléchir les extrémités de Fig. 3a charnière en les introduidant et les pousser à travers les trous de capuchon jusqu'à ce que les extrémités les trous de capuchon jusqu'à ce que les extrémités ...