
Manuels Connexes pour Bernina Overlocker Jerger 700D


Sommaire des Matières pour Bernina Overlocker Jerger 700D
- Page 1 Instruction Manual Manual de instrucciones Bedienungsanleitung Manuel d’instructions 700D 800DL...
- Page 2 “IMPORTANT SAFETY INSTRUCTIONS” When using an electrical appliance, basic safety precautions should always be followed, including the following: Read all instructions before using this overlock sewing machine. “DANGER _____To reduce the risk of electric shock:” 1. The appliance should never be left unattended when plugged in. 2.
- Page 3 “NORMAS DE SEGURIDAD IMPORTANTES” Cuando se usa un aparato eléctrico deben respetarse las siguientes normas de seguridad. “PELIGRO _____Para reducir el riesgo de electrochoque:” 1. No dejar nunca la máquina overlock sin vigilancia si ella está enchufada. 2. Después de coser y antes de los trabajos de mantenimiento, la máquina debe desconectarse quitando el enchufe de la red eléctrica.
- Page 4 “WICHTIGE SICHERHEITSHINWEISE” Beim Gebrauch eines elektrischen Gerätes sind folgende Sicherheitsmassnahmen zu beachten: “GEFAHR _____Zum Schutz vor elektrischem Schlag:” 1. Die Overlockmaschine nie unbeaufsichtigt stehen lassen, solange sie am Stromnetz angeschlossen ist. 2. Nach Gebrauch und vor einer Reinigung die Maschine immer vom Stromnetz trennen. 3.
- Page 5 “PRESCRIPTIONS DE SECURITE IMPORTANTES” L’emploi d’un appareil électrique exige d’observer les mesures de sécurité suivantes: “DANGER _____Pour la protection contre tout choc électrique:” 1. Ne pas laisser la surjeteuse sans surveillance tant qu’elle est raccordée au réseau. 2. Après usage et avant un nettoyage, séparer toujours la machine du réseau. 3.
-
Page 6: Table Des Matières
Congratulations on your choice! Le felicitamos por la compra de su nueva BERNINA 800DL/700D. Your BERNINA 800DL/700D is made to the highest standards. It will La BERNINA 800DL/700D es una máquina overlock polifacética. Corta, cut, sew and neaten for you in one smooth operation giving a professional sobrehila y cose en una fase de trabajo y da a su guardarroba un toque look to anything you make. - Page 7 Vous venez de faire l’acquisition d’une BERNINA 800DL/700D. Die BERNINA 800DL/700D ist eine vielseitige Overlockmaschine. Sie La BERNINA 800DL/700D est une surjeteuse à usages multiples. Elle schneidet, versäubert und näht in einem Arbeitsgang und verleiht Ihrer coupe, surfile et coud en une seule opération et donne, à la garde-robe selbstgeschneiderten Garderobe ein professionelles Aussehen.
-
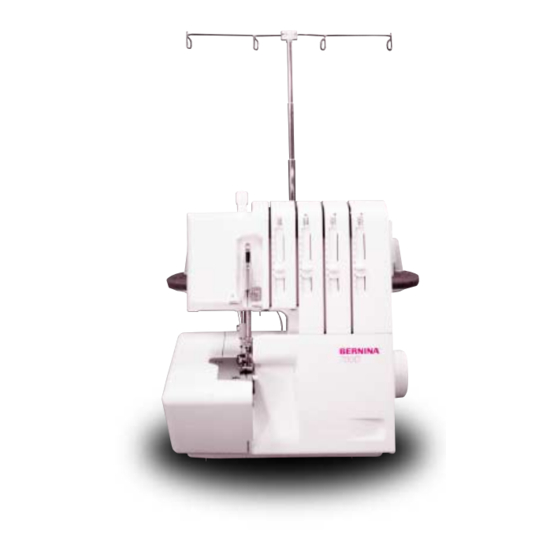
Page 8: Details Of The Machine
Details of the machine / Detalles de la máquina/ D Details der Maschine / Détails de la machinedella 800DL Details of the machine Detalles de la máquina 1. Looper cover with built in knife guard 1. Tapa de la lanzadera con protección 2. -
Page 9: Accessories
Details of the machine / Detalles de la máquina/ D Details der Maschine / Détails de la machinedella etails van de View with looper cover open Vista con la tapa de la lanzadera abierta 1. Selection lever for overlocking or rollhemming 1. -
Page 10: Preparing The Machine
Preparing the machine / Preparación de la máquina Maschine bereitstellen / Préparation de la machine Attaching the foot control Plug foot control into the machine socket (A) and then into the main socket (B). The foot control regulates the sewing speed. The sewing speed can be adjusted by increasing or decreasing the pressure on the foot control. -
Page 11: Thread, Cones, Spools
Preparing the machine / Preparación de la máquina Maschine bereitstellen / Préparation de la machine Thread / cones / spools The anti-vibration cone should be used with the wider edge at the bottom on the spool holder pin when sewing with cones. Colocación de las bobinas Para los conos normales colocar los antivibradores en las espigas con la parte ancha hacia abajo. -
Page 12: Using The Machine
Using the machine / Puesta en marchan d Inbetriebnahme / Mise en service machinee Power/light switch The power/light switch is conveniently placed on the handwheel side of the machine in front of the socket. O = Off I = On with light Interruptor principal y de la luz El interruptor principal y de la luz se encuentra en la parte del volante. -
Page 13: Cambio Del Pie Prensatelas
Using the machine / Puesta en marchan d Inbetriebnahme / Mise en service machinee Changing the presser foot • Switch the machine off (Power switch to “0”). • Raise the presser foot. • Turn the handwheel towards you until needles are fully raised. Press the catch (C) to release the presser foot from the clamp. -
Page 14: Tapa De La Mesa De Trabajo
Using the machine / Puesta en marchan d Inbetriebnahme / Mise en service machinee Cloth plate cover Opening and closing the cloth plate: Opening: Push the cloth plate to the left. Closing: Push the cloth plate to the right. Tapa de la mesa de trabajo Abrir y cerrar la tapa de la mesa de trabajo: Abrir: empujar la tapa de la mesa de trabajo hacia la izquierda. -
Page 15: Colocación De Las Agujas
70 - 90 on your machine. Agujas y máquina La máquina overlock BERNINA está dotada con el sistema de agujas 130/705 H (agujas domésticas de máquina de coser). Cuando Ud. compre agujas nuevas para su máquina asegúrese de comprar agujas del sistema 130/705H. -
Page 16: Enhebrado
Using the machine, Threading / Puesta en marcha, enhebrado Inbetriebnahme, Einfädeln / Mise en service, Enfilage Preparation / Tips Preparación • Switch the machine off (Power switch to “0”). • Desenchufar la máquina ! Interruptor principal a “O”. • Disconnect machine from electricity supply. •... - Page 17 Threading / Enhebrado Einfädeln / Enfilage 1. Upper looper thread, blue markings Place the spool on the spool holder pin as illustrated. (1) Bring the thread up from the spool and lay it from back to front into the guide (second from right).
- Page 18 Threading / Enhebrado Einfädeln / Enfilage 2. Lower looper thread, red markings Place the spool on the spool holder pin as illustrated. 700D (1) Bring the thread up from the spool and lay it from back to front into the guide (right one).
- Page 19 Threading / Enhebrado Einfädeln / Enfilage 2. Lower looper thread, red markings Place the spool on the spool holder pin as illustrated. 800DL (1) Bring the thread up from the spool and lay it from the back to the front into the guide (right one).
- Page 20 Threading / Enhebrado Einfädeln / Enfilage 3. Right-hand needle, green markings Place the spool on the spool holder pin as illustrated. (1) Bring the thread up from the spool and lay it from back to front into the guide (second from left) (2) Take the thread with both hands and lay it in the groove.
- Page 21 Threading / Enhebrado Einfädeln / Enfilage 4. Left-hand needle, yellow markings Place the spool on the spool holder pin as illustrated. (1) Bring the thread up from the spool and lay it from back to front into the guide (left one). (2) Take the thread with both hands and lay it in the groove.
-
Page 22: Trial Sewing
Trial sewing, Thread tension / Costura de prueba, Tensión del hilo Nähprobe, Fadenspannung / Essai de couture, tension de fil Sewing test Costura de prueba After threading make a trail run. Always use Después del enhebrado, hacer una costura a double layer of fabric to properly check the de prueba sobre tela doble para poder stitch formation and thread tension. -
Page 23: Tensión Del Hilo
Trial sewing, Thread tension / Costura de prueba, Tensión del hilo Nähprobe, Fadenspannung / Essai de couture, tension de fil Thread tension Tensión del hilo Thread tension should be adjusted to suit the La tensión del hilo tiene que adaptarse a los various types of work. -
Page 24: Largo Del Punto
Adjustments and settings / Regulación y manejo Einstellen und Bedienen / Réglage et utilisation 800DL Stitch length Largo del punto It can be adjusted while sewing. The stitch length is El largo del punto puede regularse sin escalas entre infinitely variable from 1-4mm. Most overlock work is 1 y 4, también durante la costura. -
Page 25: Transporte Diferencial
Adjustments and settings / Regulación y manejo Einstellen und Bedienen / Réglage et utilisation Differential feed 800DL There are two feed dogs, one front (C) and one rear (D). The two feed dogs travel independently and the distance each feed dog travels during one complete movement can be adjusted. The differential feed prevents fluting or waving in knitted or stretch fabrics and or closely woven fabric (E). -
Page 26: Fruncimiento
Adjustments and settings / Regulación y manejo Einstellen und Bedienen / Réglage et utilisation Adjusting the differential feed The differential feed can be adjusted by simply turning the differential feed adjustment dial in the direction desired. Always make a trial run. The differential feed is infinitely variable and can be adjusted while sewing. -
Page 27: Transformador Lanzadera Ciega
Adjustments and settings / Regulación y manejo Einstellen und Bedienen / Réglage et utilisation Upper looper converter (800DL) Transportador lanzadera ciega (800DL) Use the upper looper converter to sew stitches with El transportador lanzadera ciega hace posible la one looper thread, such as 2-thread roll hem, 2- costura de puntos con un sólo hilo de lanzadera, thread flatlock and 2-thread overlock. -
Page 28: Presión Del Pie Prensatelas
Adjustments and settings / Regulación y manejo Einstellen und Bedienen / Réglage et utilisation Presser foot pressure Presión del pie prensatelas The presser foot pressure is factory adjusted to a El fabricante ha ajustado la presión del pie medium setting. prensatelas a una regulación media. - Page 29 Stitch chart Stitch Stitch width Thread tension Basic settings 4-Thread overlock with 5-7 mm, Stitch length: 2.5 Left needle (yellow) 3-5 integrated safety seam right and left needles Right needle (green) 3-5 Cutting width: 2 Differential: N-2 (knits) 0.7-N (wovens) Upper looper (blue) 3-5 Lower looper (red) 3-5 3-Thread super stretch (800DL)
-
Page 30: Tabla De Puntos
Tabla de puntos Ancho del punto Tensión del hilo Regulación de base Punto Overlock de 4 hilos con costura 5-7mm Largo del punto: 2.5 Aguja izquierda (amarillo) 3-5 de seguridad integrada aguja derecha e izquierda Aguja derecha (verde) 3-5 Posición de la cuchilla: 2 Diferencial: N-2 (tejido de punto) Lanzadera superior (azul) 3-5... - Page 31 Stichübersicht Stich Stichbreite Fadenspannung Grundeinstellung 4-Faden Overlock mit 5-7mm Stichlänge: 2.5 Linke Nadel (gelb) 3-5 integrierter Sicherheitsnaht recht und linke Nadel Rechte Nadel (grün 3-5 Messerposition: 2 Differential: N-2 (Maschenware) Obergreifer (blau) 3-5 0.7-N (Webstoff) Untergreifer (rot) 3-5 3-Faden Super-Stretch (800DL) 5-7mm Stichlänge: 2.5 Linke Nadel (gelb) 3-5...
-
Page 32: Récapitulation Des Points
Récapitulation des points dei punti Point Largeur de point Tension de fil Réglage de base Surjet à 4 fils avec point de 5 - 7 mm Longueur de point: 2.5 Aiguille de gauche (jaune) 3 - 5 sécurité intégré Aiguille de droite et de Aiguille de droite (vert) 3 - 5 Position du couteau: 2 gauche... -
Page 33: Cambio De Las Cuchillas
Klinge doch einmal beschädigt, das Obermesser normalmente non deve essere sostituito. vervangen worden. Als het mes toch ooit au S.A.V de BERNINA qui changera le couteau im BERNINA-Fachgeschäft auswechseln lassen. Se dovesse però rompersi lo stesso, beschadigd is, moet het door uw BERNINA supérieur. -
Page 34: Replacing The Bulb
La potencia eléctrica de la bombilla es and max.10 Watt for 220-240V machines. They de máximo 15 vatios para máquinas de 120 are available from your local BERNINA dealer. voltios, y máximo 10 vatios para máquinas de 220-240 voltios. - Page 35 Trouble shooting, Technical data Problem Cause Solution Page The machine does not ..The main switch is not on. Switch machine on. (power switch to “I”)..........11 The machine is not plugged in. Insert plug in main socket..............9 Fabric does not feed ..
-
Page 36: Ayuda En Caso De Averías
Ayuda en caso de averías, Da tos técnicos storingen • Technische Problema Causa Solución Página La máquina no cose El interruptor principal no esta enchegado. Enchegar la máquina, interruptor principal a “I”........11 La máquina no está enchufada. Enchufar el cable de la máquina a la red eléctrica........ 9 La tela no avanza El transporte diferencial no esta ajustado Controlar la regulación del transporte diferencial. - Page 37 Hilfe bei Störungen, Tech-Daten Problem Ursache Lösung Seite Die Maschine näht nicht Der Hauptschalter ist nicht eingestellt. Maschine einschalten, Hauptschalter auf “I”........11 Der Maschine ist nicht eingesteckt. Maschinenkabel mit Netzsteckdose verbinden........9 Stoff wird nicht Differentialtransport ist nicht richtig eingestellt. Einstellung des Differentialtransportes kontrollieren.
- Page 38 Eliminer les défauts, Caractéristiques techniques Remède Page Défaut Cause La machine L’interrupteur principal n’est pas Mettre la machine sous tension, puis ........... 11 ne coud pas enclenché. l’interrupteur principal sur “I”. La machine n’est pas branchée. Relier le cordon de la machine avec la ..........9 prise femelle du secteur.
-
Page 39: Accesorio Especial
Optional Accessories / Accesorio especial Sonder zubehör / Accessoires spéciaux Blind stitch foot Cording foot Pie prensatelas para Pie prensatelas punto invisible para cordoncillo Blindstichfuss Schnureinnähfuss Pied pour point invisible Pied à cordon Elasticator Multipurpose foot Pie prensatelas Pie prensatelas para para coser cinta elástica ribetear, coser hilo con Gummibandeinnähfuss... - Page 40 © Copyright 2001 by Fritz Gegauf AG CH-8266 Steckborn No. A915080L00A GB/E/D/F...