Table des Matières

Publicité

Les langues disponibles
  • FR

Les langues disponibles

  • FRANÇAIS, page 19

Liens rapides

ABS UPRIGHT
Instruction manual
GB
Mode d'emploi
FR
Manual de instruções
PT
Manual de instrucciones
ES
Manuale di installazione,
IT
uso e manutenzione
Bedienungsanleitung
DE
RC200/RCX200/RCG200/RCXG200
RN200/RNX200/RNG200/RNXG200
RC400/RCX400/RCG400/RN400/RNX400
RC600/RCX600/RCG600/RN600/RNX600
P2M000STD Ver1.5

Publicité

Table des Matières
loading

Sommaire des Matières pour Nordcap RC200

  • Page 1 ABS UPRIGHT Instruction manual Mode d’emploi Manual de instruções Manual de instrucciones Manuale di installazione, uso e manutenzione Bedienungsanleitung RC200/RCX200/RCG200/RCXG200 RN200/RNX200/RNG200/RNXG200 RC400/RCX400/RCG400/RN400/RNX400 RC600/RCX600/RCG600/RN600/RNX600 P2M000STD Ver1.5...
  • Page 2: Table Des Matières

    Original Instruction Dear Customer, Congratulations on your purchase of this product. Like all our products , this product has also been developed on the basis of the latest technology and produced using reliable and modern electrical components. Please take a few minutes before starting operation of the appliance and read the following operating instructions. Save this manual for further reference.
  • Page 3: Safety Tips

    Safety Tips...
  • Page 4: Intended Use

    Intended Use Only use this appliance for cooling and storage of food and beverage for commercial purposes. Parts Freezer RN400 RN600 9. Plug 1. Main switch (Optional) 10. Door support 2. Front panel 11. Down panel 3. Lock 12. Door down hinge 4.
  • Page 5: Parts

    Parts Refrigerator RC400 RC600 RC200 12. Small shelf Main switch (optional) 2. Front panel 13. Door down hinge 3. Lock 14. Down panel 4. Controller 15. Door support 5. Fan panel 16. Plug 6. Fan 17. Evaporator 18. Water container 7.
  • Page 6: Location And Installation

    Location and Installation The cabinet should be placed in a room that is dry and sufficiently ventilated. To operate efficiently it should not be positioned in direct sunlight or near warm appliances. Please note that optimal cabinet performance is obtained at an ambient temperature between +16 °C and +35 °C.
  • Page 7: Operation

    Main switch Lock Thermostat Display Plug in the cabinet. The display shows the actual cabinet temperature Servicing Make sure the appliance is switched off at the mains before service is performed on electrical parts. Operation Storing food To get the best results from your appliance, follow these instructions: •...
  • Page 8: Temperature Setting And Control(Evco)

    Temperature setting and control (EVCO) The front panel of the thermostat Compressor operation light Defrosting light Energy saving light Stand-by light Programming key (service agent only) Machine On/Stand -by (keep pushed) Manual defrost (keep pushed) How to unlock the keyboard (»Loc» message) Push any button for more than 2s, «UnL»...
  • Page 9: Defrosting Procedure

    Defrosting Procedure Refrigerator: Automatic Defrosting using automatic water evaporation. Automatic defrost The appliance will automatically run defrost cycles Note: The cycle starts from the time the appliance is initially powered up. To manually defrost the appliance: • Press and hold the DEFROST button for 5 seconds. •...
  • Page 10 3. Take off the door...
  • Page 11: Changing The Door Hinge

    Changing the Door Hinge 4. Remove hinge 1 Hinge 2 Hinge 1 5. Change the two hinge positions Hinge 2 Hinge 1 6. Fix hinge1...
  • Page 12 Changing the Door Hinge 7. Remove Hinge 4 (Lower door hinge) 8. Remove Hinge 3 (Upper door hinge)
  • Page 13 Changing the Door Hinge 9. Exchange the position of Hinge 3 and Hinge 4 Hinge 4 Hinge 3 Hinge 3 Hinge 4 10. Fix Hinge 3 and Hinge 4 on the door Hinge 3 Hinge 4...
  • Page 14 Changing the Door Hinge 11. Turn the door up side down and connect to the upper hinge. 12. Fix Hinge2...
  • Page 15: Cleaning, Care & Maintenance

    Cleaning, Care & Maintenance Before cleaning, switch off the cabinet and disconnect from the mains. The cabinet should be kept clean using a mild soap solution. Do not use abrasive cleansers. The plastic parts cannot withstand boiling water (max. temperature +85 °C). When regular cleaning is performed, be sure to wipe clean the rubber door gasket to ensure any sticky substances are removed that would otherwise damage the gasket.
  • Page 16: Trouble Shooting

    Trouble shooting If your Refrigerator, Freezer appliance develop a fault, please check the following table. Fault Probable Cause Action Check that the unit is plugged in The unit is not switched on The appliance is not working correctly and switched on Call our agent or qualified Plug and/or lead are damaged technician...
  • Page 17 Model RC200 RCX200 RCG200 RCGX200 RN200 RNX200 RNG200 RNGX200 Climate Class Temp.Range (°C) 0 ~ +8°C 0 ~ +8°C +2 ~ +8°C +2 ~ +8°C -23 ~ -18°C -23 ~ -18°C -23 ~ -18°C -23 ~ -18°C Refrigerant R134/R600a R134/R600a...
  • Page 18: Warranty

    Environmental Protection Discarded electric appliances are recyclable and should not be discarded in the domestic waste! Please actively support us in conserving resources and protecting the environment by retur ning this appliance to the collection centres (if available). CAUTION: RISK OF FIRE AND EXPLOSION WITH FLAMMABLE REFRIGERANT R600a. WARRANTY A statutory warranty applies for this product.
  • Page 19 Traduction du mode d’emploi d’origine Chère cliente, Cher client, Toutes nos félicitations pour l’achat de ce produit . Comme tous les produits , celui-ci a été fabriqué selon les connaissances techniques les plus récentes et avec des éléments électriques et électroniques modernes et sûrs. Avant d’utiliser cet appareil, prenez le temps de lire ce mode d’emploi.
  • Page 20: Conseils De Sécurité

    Conseils de sécurité Cet appareil est destiné à un usage commercial, ou autres de meme type (par ex. par des non-spécialistes dans les magasins). N’utilisez PAS l’appareil à l‘extérieur. NE tentez PAS de réparer l’appareil vous-même. N’utilisez PAS l‘appareil s‘il est endommagé. Si vous avez un doute sur l’état de l’ap- pareil, consultez un technicien.
  • Page 21: Usage Prévu

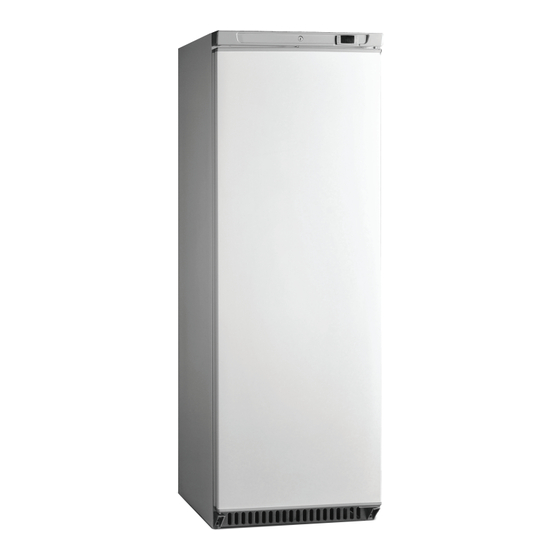
    Usage Prévu Cet appareil ne doit être utilisé que pour le refroidissement et l‘entreposage des aliments et des boissons à des fi ns commerciales. Description des pièces Congélateur RN400 RN600 9. Prise d’alimentation 1. Interrupteur principal(optionnel) 10. Support de porte 2.
  • Page 22 Description des pièces Réfrigérateur RC600 RC400 RC200 12. Petite étagère 1. Interrupteur principal(optionnel) 13. Charnière inférieure de la porte 2. Panneau avant 14. Panneau inférieur 3. Verrouillage 15. Support de porte 4. Boutons de contrôle 16. Prise 5. Panneau de ventilation 17.
  • Page 23: Emplacement Et Installation

    Emplacement et Installation L’appareil doit être placé dans une pièce qui est sèche et suffi samment aérée. Pour fonctionner effi cacement, il ne doit pas êt re placé directement au soleil ou près d‘appareils produisant de la chaleur. Veuillez noter que les performances optimales de cet appareil sont obtenues à...
  • Page 24: Démarrage

    Démarrage interrupteur principal Verrouillage Af fi chage du thermostat Branchez le réfrigérateur. L‘écran d’affi chage indiquera la température du réfrigérateur en cours. Réparation Assurez-vous que l‘appareil est éteint avant d’effectuer toute réparation sur les parties électriques. Utilisation Entreposage des aliments Pour obtenir les meilleurs résultats de votre appareil, suivez ces instructions: •...
  • Page 25: Guide D'utilisation Et Réglage Du Point De Consigne Du Thermostat(Evco)

    Guide d’utilisation et réglage du point de consigne du thermostat(EVCO) La façade du thermostat 1. Led fonctionnement Compresseur 2. Led Dégivrage 3. Led Energy saving 4. Led Stand-by 5. Touche programmation (seulement pour les utilisateurs autorisés) 6. Touche On/Stand-by (maintenir appuyer ) 7.
  • Page 26: Procédure De Dégivrage

    Procédure de dégivrage Réfrigérateur : Dégivrage automatique avec évaporation des eaux automatique. Dégivrage automatique Les appareils exécuteront automatiquement un cycle de dégivrage. Remarque : le cycle de dégivrage commence à la première mise en service de l‘appareil. Pour dégivrer manuellement l’appareil : •...
  • Page 27 Changement de la charnière de la porte 2. Détachez la charnière 2 3. Enlevez la porte...
  • Page 28 Changement de la charnière de la porte 4. Détachez la charnière 1 Cha rnière 2 Cha rnière 1 5. Changez la position des deux charnières Cha rnière 2 Cha rnière 1 6. Fixez la charnière 1...
  • Page 29 Changement de la charnière de la porte 7. Détachez la charnière 4 (charnière inférieure de la porte) 8. Détachez la charnière 3 (charnière supérieure de la porte)
  • Page 30 Changement de la charnière de la porte 9. Échangez la position des charnières 3 et 4. Charnière 4 Charnière 3 Cha rnière 3 Charnière 4 10. Fixer sur la porte les charnières 3 et 4. Charnière 3 Charnière 4...
  • Page 31 Changement de la charnière de la porte 11. Placez la porte à l’envers et connectez la charnière supérieure. 12. Fixez la charnière 2...
  • Page 32: Entretien Et Nettoyage

    Entretien et nettoyage Avant le nettoyage, l‘appareil doit être complètement débranché du réseau électrique ! L’appareil doit être maintenu propre en utilisant une solution de savon doux. N’utilisez pas de produits nettoyants abrasifs. L es pièces en plastique ne peuvent pas résister à l‘eau bouillante (température maximale : +85 ° C). Lorsque le nettoyage régulier est effectué, n‘oubliez pas de nettoyer le joint en caoutchouc de la porte afi n d‘assurer que toutes les substances collantes sont enlevées car elles pourraient endommager le joint.
  • Page 33: Guide De Dépannage

    Guide de dépannage En cas de dysfonctionnements de votre appareil réfrigérateur, congélateur, veuillez consulter le tableau suivant. Vérifi ez que la prise est correctement L’appareil ne fonctionne pas. L’appareil n'est pas mis en marche branchée, et que la prise est bien sous tension Consultez notre agent de service La prise ou le câble est endommagé...
  • Page 34: Données Techniques

    Données techniques Modèle RC200 RCX200 RCG200 RCGX200 RN200 RNX200 RNG200 RNGX200 Classe climatique Échelle de température 0 ~ +8°C 0 ~ +8°C +2 ~ +8°C +2 ~ +8°C -23 ~ -18°C -23 ~ -18°C -23 ~ -18°C -23 ~ -18°C Réfrigérant...
  • Page 35: Garantie

    Informations sur la protection de l’environnement Tout appareil électrique usé est une matière recyclable et ne fait pas pas partie des ordures ménagères! Nous vous demandons de bien vouloir nous soutenir en contribuant activement au ménagement des ressources et à la protection de l’environnement en déposant cet appareil dans des sites de collecte (si existants).
  • Page 36: Tradução Das Instruções Originais

    Tradução das instruções originais Estimado Cliente Parabéns pela sua compra. Como todos os nossos produtos, este também foi desenvolvido tendo em conta a tecnología atual e fabricado utilizando componentes eléctricos de alta fiabilidade. Antes de colocar o aparelho em funcionamento, disponha de alguns minutos para ler as seguintes instruções de utilização. Índice Informações de segurança importantes ...............................36 Finalidade a que se destina ......................
  • Page 37: Informações De Segurança Importantes

    Informações de segurança importantes 1. O aparelho foi criado para um uso comercial ou semelhante (por ex., em lojas). 2. NUNCA utilize o aparelho no exterior. 3. NUNCA tente reparar você mesmo o aparelho. 4. NUNCA utilize o aparelho se apresentar danos. Se tiver dúvidas, consulte o agente de serviço. 5.
  • Page 38: Finalidade A Que Se Destina

    Finalidade a que se destina Este aparelho foi concebido exclusivamente para o arrefecimento e armazenagem de alimentos e bebidas no local de comércio. Elementos de controlo Freezer Congelador RN400 RN600 1. interrutor principal (opcional) 9. Ficha 2. Painel dianteiro 10. Apoio da porta 3.
  • Page 39 Elementos de controlo Frigorífico RC400 RC600 RC200 1. interrutor principal (opcional) 12. Prateleira pequena 13. Dobradiça inferior da porta 2. Painel dianteiro 14. Painel inferior 3. Fecho 15. Apoio da porta 4. Controlador 16. Ficha 5. Painel da ventoinha 17. Evaporador 6.
  • Page 40: Localização E Instalação

    Localização e instalação O aparelho deve ser colocado numa divisão seca e sufi cientemente ventilada. Para garantir um funcionamento efi caz, ã à ç ã ideal do aparelho é obtido a uma temperatura ambiente entre os 16 °C e 35 °C. í...
  • Page 41: Primeira Utilização

    Primeira utilização interrutor principal Indicador do termóstato Fecho Ligar o aparelho à corrente eléctrica. O indicador mostra a temperatura actual do aparelho. Atenção Certifi que-se que o aparelho está desligado da rede eléctrica antes de realizar manutenção nas peças eléctricas. Funcionamento Armazenar alimentos Para obter os melhores resultados do seu aparelho, siga estas instruções:...
  • Page 42: Controle E Ajuste De Temperatura(Evco)

    Controle e ajuste de temperatura(EVCO) Painel frontal do controlador 1. LED de compressor ativo 2. LED de degelo ativo 3. LED de modo econômico ativo 4. LED de Stand-by ativo 5. Tecla de programação (somente agente de manutenção) 6. Equipamento Ligado/Stand-by (Manter pressionado) 7.
  • Page 43: Descongelação

    Descongelação Frigorífico: Descongelamento automático usando a evaporação automática da água. Descongelamento automático O aparelho executa automaticamente um ciclo de descongelar. Nota: O ciclo começa, mal ligue o aparelho à alimentação. Para descongelar manualmente o aparelho: • premida durante 5 segundos. •...
  • Page 44 Mudar a dobradiça da porta 2. Remova a dobradiça 2 3. Retire a porta...
  • Page 45 Mudar a dobradiça da porta 4. Remova a dobradiça 1 Dobradiça 2 Dobradiça 1 5. Altere as posições das dobradiças 1 e 2 Dobradiça 2 Dobradiça 1 6. Tape a dobradiça 1...
  • Page 46 Mudar a dobradiça da porta 7. Remova a dobradiça 4 (dobradiça inferior da porta) 8. Remova a dobradiça 3 (dobradiça superior da porta)
  • Page 47 Mudar a dobradiça da porta 9. Altere as posições das dobradiças 3 e 4 Dobradiça 4 Dobradiça 3 Dobradiça 3 Dobradiça 4 10. Fixe a dobradiça3 e dobradiça4 na porta. Dobradiça 3 Dobradiça 4...
  • Page 48: Mudar A Dobradiça Da Porta

    Mudar a dobradiça da porta 11. Vire a porta ao contrário e ligue à dobradiça superior 12. Tape a dobradiça 2...
  • Page 49: Limpeza, Cuidado E Manutenção

    Limpeza, cuidado e manutenção Antes de proceder à limpeza, desligue o aparelho e retire a fi cha da tomada. O aparelho deve ser mantido limpo ao utilizar uma solução de detergente suave. Não utilize produtos de limpeza que possam ser abrasivos. As peças de plástico não suportam água a ferver (temperatura máxima 85 ºC).
  • Page 50: Solução Do Problema

    Solução do problema Se o seu aparelho RC400/RN400/RC600/RN600 tiver algum problema, consulte a seguinte tabela. Erro Motivo possível Medidas O aparelho não funciona O aparelho não está ligado Verifi que se o aparelho está devidamente ligado à tomada eléctrica e no interruptor. fi...
  • Page 51: Dados Técnicos

    é t Modelo RC200 RCX200 RCG200 RCGX200 RN200 RNX200 RNG200 RNGX200 Classe climática Intervalo de temperatura 0 ~ +8°C 0 ~ +8°C +2 ~ +8°C +2 ~ +8°C -23 ~ -18°C -23 ~ -18°C -23 ~ -18°C -23 ~ -18°C...
  • Page 52: Garantia

    Indicações para a protecção do meio ambiente Aparelhos eléctricos antigos são materiais que não pertencem ao lixo doméstico! Por isso pedimos para que nos apoie, contribuindo activamente na poupança de recursos e na protecção do ambiente ao entregar este aparelho nos pontos de recolha existentes. AVISO: RISCO DE INCÊNDIO E DE EXPLOSÃO COM REFRIGERANTE INFLAMÁVEL R600a.
  • Page 53: Traducción De Las Instrucciones Originales

    Traducción de las instrucciones originales Estimado cliente: Enhorabuena por la compra de este producto. Como todos nuestros artículos, este producto ha sido desarrollado con las últimas tecnologías y fabricado usando los componentes eléctricos más modernos y fiables. Antes de poner en marcha el aparato, lea detenidamente las siguientes instrucciones de uso. Tabla de contenidos Instrucciones importantes de seguridad ..............................
  • Page 54: Instrucciones Importantes De Seguridad

    Instrucciones importantes de seguridad Este aparato es apto para el uso comercial o similares (por ejemplo, para utilizarse en tiendas). NUNCA utilizar el aparato al aire libre No realizar NUNCA trabajos de mantenimiento en este aparato. NO utilizar el aparato si presenta daños. En caso de dudas contactar con el distribui- dor.
  • Page 55: Destinación De Uso

    Destinación de uso Este aparato está destinado únicamente a la conservación de alimentos y bebidas. Nombre de las piezas RN400 RN600 9. Enchufe 1. Interruptor principal(opcional) 10. Soporte de la puerta 2. Panel frontal 11. Panel inferior 3. Cierre 12. Bisagra inferior de la puerta 4.
  • Page 56 RC600 1. Interruptor principal(opcional) 12. Pequeño estante 2. Panel frontal 13. Bisagra inferior de la puerta 3. Cerradura 14. Panel inferior RC200 4. Controlador 15. Soporte de la puerta 5. Panel del ventilador 16. Enchufe 6. Ventilador 17. Vaporizador 7. Soporte del estante 18.
  • Page 57: Colocación Y Alineación

    Colocación y alineación El aparato deberá colocarse en un lugar seco y bien aireado. Para garantizar una capacidad funcional perfecta, el aparato no debe exponerse a luz solar directa o cerca de fuentes de calor. Por favor, asegurarse que la temperatura ambiente quede entre 16 °C y 35 °C.
  • Page 58: Puesta En Funcionamiento

    Puesta en funcionamiento Interruptor principal Cierre Indicador termostato Conectar el aparato a la toma de corriente. El indicador muestra la temperatura actual. Mantenimiento: Asegurarse que el aparato esté desenchufado antes de operar en las partes eléctricas. Conservación de alimentos Para obtener mejores resultados, respete las instrucciones siguientes: •...
  • Page 59: Ajuste E Control De Temperatura(Evco)

    Ajuste e control de temperatura (EVCO) Panel frontal del termostato 1. Luz de compresor activo 2. Luz deshielo activo 3. Luz ahorro energético activo 4. Luz de stand -by 5. Tecla de programación (mantenimiento solamente) 6. Equipo ON (encendido)/Stand-by (mantener presionado) 7.
  • Page 60: Deshielo

    Deshielo Refrigerador: á c i t ó i á c i t Defrost automático e l l á r á c i t Nota: el proceso empieza desde el momento en que el aparato se ha encendido. Para el deshielo manual proceder como a continuación: •...
  • Page 61 Cambiar la manija de la puerta 2. Retirar la bisagra 2 3. Retirar la puerta...
  • Page 62 Cambiar la manija de la puerta 4. Retirar la bisagra 1 Bisagra 2 Bisagra 1 5. Modifi car la posición de las bisagras 1 y 2 Bisagra 2 Bisagra 1 6. Asegurar la bisagra 1...
  • Page 63 Cambiar la manija de la puerta 7. Retirar la bisagra 4 (ángulo inferior de la puerta) 8. Retirar la bisagra 3 (ángulo superior de la puerta)
  • Page 64 Cambiar la manija de la puerta 9. Modifi car la posición de las bisagras 3 y 4 Bisagra 4 Bisagra 3 Bisagra 3 Bisagra 4 10. Fijar la manija3 y manija4 en la puerta. Bisagra 3 Bisagra 4...
  • Page 65 Cambiar la manija de la puerta 11. Girar la puerta y colocar las bisagras superiores 12. Asegurar la bisagra 2...
  • Page 66: Limpieza Y Mantenimiento

    Limpieza y mantenimiento Antes de limpiar, apagar el aparato y desconectarlo. Limpiar el aparato con una solución jabonosa suave. No utilizar líquidos de limpieza que pueden dañar la superfi cie. Las partes de plástico no resisten al agua muy caliente (temperatura máxima +85 °C). En la limpieza rutinaria también limpiar las juntas en la puerta, para eliminar sustancias que pueden dañar la junta.
  • Page 67: Resolución De Problemas

    Resolución de problemas Si su aparato RC400, RN400, RC600, RN600 genera un problema, chequear la tabla a continuación. Problemas Causa posible Medidas El aparato no funciona. El aparato está apagado. Asegurarse que el aparato esté conectado a la red eléctrica y encendido. El enchufe o el cable están dañados.
  • Page 68 é t Modelo RC200 RCX200 RCG200 RCGX200 RN200 RNX200 RNG200 RNGX200 Clase climática Rango de temperatura 0 ~ +8°C 0 ~ +8°C +2 ~ +8°C +2 ~ +8°C -23 ~ -18°C -23 ~ -18°C -23 ~ -18°C -23 ~ -18°C...
  • Page 69: Garantía

    Advertencia para la protección del medio ambiente ¡Los aparatos eléctricos desechables son materiales que no son parte de la basura doméstica! Por ello pedimos para que nos ayude a contribuir activamente en el ahorro de recursos y en la protección del medio ambiente entregando este aparato en los puntos de recogida existentes.
  • Page 70 Traduzione delle istruzioni originali Egregio cliente Complimenti per l’acquisto di questo prodotto . Come tutti i prodotti , questo apparecchio è stato sviluppato secondo le tecnologie più recenti ed è stato prodotto utilizzando componenti elettrici affidabili e moderni. Prima di mettere in funzione l’apparecchio leggere attentamente il presente libretto di istruzioni. Molte grazie! Indice i t n...
  • Page 71: Importanti Indicazioni Di Sicurezza

    Importanti indicazioni di sicurezza Questo apparecchio è concepito per l‘uso commerciale o usi simili (ad es. da parte di personale esperto in negozi). NON usare l‘apparecchio all‘aperto Per evitare situazioni pericolose e far eseguire i lavori di manutenzione solo da personale debitamente qualificato. Non utilizzare l‘apprecchio se la spina, il cavo di alimentazione o l‘apparecchio stesso sono danneggiati.
  • Page 72 Importanti indicazioni di sicurezza 19. Questo apparecchio non è previsto per l‘uso da parte di persone (inclusi i bambini) con ridotte capacità fisiche, sensoriali e mentali, né da parte di persone senza esperienza e conoscenza, a meno che tali persone non siano controllate e non abbiano ricevuto istruzioni da parte di una persona responsabile della loro sicurezza.
  • Page 73: Descrizione Articolo

    Destinazione d‘uso Questo apparecchio è concepito esclusivamente per il raffreddamento e la conservazione di generi alimentari e di bevande. Descrizione articolo RN400 RN600 Spina Interruttore generale (Facoltativo) 10. Supporto per sportello Pannello frontale 11. Pannello inferiore Serratura 12. Cerniera sportello inferiore Regolatore 13.
  • Page 74 Descrizione articolo RC600 RC400 Interruttore generale (Facoltativo) 12. Ripiano piccolo RC200 Pannello frontale 13. Cerniera sportello inferiore Serratura 14. Pannello inferiore Regolatore 15. Supporto per sportello Piastra ventilatore 16. Spina Ventilatore 17. Evaporatore Supporto per ripiano 18. Serbatoio acqua Ripiano 19.
  • Page 75: Posizionmessamento E N I T S L L Messa Z Messa O I

    Posizionamento e installazione Il frigorifero deve essere collocato in un locale asciutto e sufficientemente ventilato. Per garantire una funzionalità ottimale, l‘apparecchio non deve essere esposta alla luce diretta del sole né posizionato in prossimità di apparecchiature che sviluppano calore. Va considerato che la temperatura ottimale dell‘ambiente è tra 16 °C e 35 °C. Congelatore , Frigorifero : In un ambiente con elevata umidità...
  • Page 76: Messa In Funzione

    Messa in funzione Interruttore generale Serratura Display termostato Collegare il frigo alla rete elettrica. Il display indica la temperatura attuale. Manutenzione: Accertarsi che l‘apparecchio sia stato staccato completamente dalla rete elettrica prima di eseguire la manutenzione componenti elettrici. Conservazione di generi alimentari Rispettare le seguenti norme per ottenere il migliore risultato possibile: •...
  • Page 77: Funzionamento

    FUNZIONAMENTO(EVCO) Il pannello anteriore del termostato 1. Spia di funzionamento del compressore 2. Spia di sbrinamento 3. Spia di risparmio energetico 4. Spia di stand-by 5. Tasto di programmazione (solo per l’addetto all’assistenza) 6. Macchina accesa / Stand-by (tenere premuto) 7.
  • Page 78: Sbrinamento

    Sbrinamento Frigorifero: Sbrinamento automatico con evaporazione automatica della brina. Sbrinamento automatico L‘apparecchio esegue un processo di sbrinamento ogni 6 ore. Nota: Il ciclo di sbrinamento inzia con la prima messa in funzione dell‘apparecchio. Per lo sbrinamento manuale procedere come segue: •...
  • Page 79 Cambiare la cerniera dello sportello 2. Rimuovere la cerniera 2 3. Togliere lo sportello...
  • Page 80 Cambiare la cerniera dello sportello 4. Rimuovere la cerniera 1 Cerniera 2 Cerniera 1 5. Scambiare la posizione delle cerniere 1 e 2 Cerniera 2 Cerniera 1 6. Fissare la cerniera 1...
  • Page 81 Cambiare la cerniera dello sportello 7. Rimuovere la cerniera 4 (bordo inferiore dello sportello) 8. Rimuovere la cerniera 3 (bordo superiore dello sportello)
  • Page 82 Cambiare la cerniera dello sportello 9. Scambiare la posizione delle cerniere 3 e 4 Cerniera 4 Cerniera 3 Cerniera 3 Cerniera 4 10. Fissare le cerniere 3 e 4 sullo sportello. Cerniera 3 Cerniera 4...
  • Page 83: Cambiare A L E C N R E I A R D E

    Cambiare la cerniera dello sportello 11. Girare lo sportello e agganciarlo alla cerniera superiore 12. Fissare la cerniera 2...
  • Page 84: Pulizia, Cura E Manutenzione

    Pulizia, cura e manutenzione Prima della pulizia staccare l‘apparecchio completamente dalla corrente! Pulire il frigorifero con una soluzione di acqua e sapone. I componenti in plastica perdono la loro resistenza se viene utilizzare acqua calda (temperatura max +85°C). Rimuovere tutte le sostanze collose effettuando la pulizia della guarnizione di gomma presente all‘interno dello sportello. Per garantire un ottimo funzionamento del compressore l‘uscita dell‘aria del ventilatore del condensatore deve essere priva di foglie, ca Il condensatore sulla parte posteriore del frigorifero deve essere pulito regolarmente.
  • Page 85: Risoluzione Guasti

    Risoluzione guasti In presenza di anomalie all‘apparecchio Congelatore, Frigorifero consultare la seguente tabella. Anomalia Eventuale causa Rimedio Il frigorifero non funziona. L'apparecchio non è acceso. Accertarsi che l'apparecchio sia collegato alla rete elettrica e acceso. Spina e cavo danneggiati. Contattare il nostro agente o un tecnico qualificato.
  • Page 86: Dati Tecnici

    Dati tecnici Modello RC200 RCX200 RCG200 RCGX200 RN200 RNX200 RNG200 RNGX200 Classe climatica Campo di temperatura 0 ~ +8°C 0 ~ +8°C +2 ~ +8°C +2 ~ +8°C -23 ~ -18°C -23 ~ -18°C -23 ~ -18°C -23 ~ -18°C...
  • Page 87: Garanzia

    Dati tecnici Avvertenze per la tutela dell’ambiente I dispositivi elettrici usati possono contenere sostanze dannose per l’ambiente e quindi non devono essere smaltiti come rifiuti domestici. Siete pertanto pregati di consegnare l’apparecchio esausto presso gli appositi centri di raccolta o presso i centri autorizzati al ritiro al fi ne di proteggere l’ambiente.
  • Page 88 Übersetzung der Originalbetriebsanleitung Sehr geehrte Kundin, sehr geehrter Kunde, herzlichen Glückwunsch zum Kauf dieses Produktes. Bitte nehmen Sie sich einige Minuten Zeit, bevor Sie das Gerät in Betrieb nehmen und lesen Sie die nachfolgende Gebrauchsanweisung durch. Inhaltsverzeichnis: Sicherheitshinweise…………………………………………………………………………………………………………………………88-90 Bestimmungsgemäßer Gebrauch ……………………………………………………………………………….…………………………..90 Bedienelemente……………………………………………......................91-92 Platzierung und Installation……………………………………………...
  • Page 89: Sicherheitshinweise

    Sicherheitshinweise 1. Dieses Gerät ist für die kommerzielle Anwendung o. ä. konzipiert (z.B. durch Laien in Geschäften). 2. Verwenden Sie das Gerät NIEMALS im Freien 3. Führen Sie NIEMALS eigenhändig Wartungsarbeiten an diesem Gerät durch. 4. Verwenden Sie das Gerät NICHT, wenn es Beschädigungen aufweist.Wenden Sie sich im Zweifel an Ihren Kundendienst.
  • Page 90 Sicherheitshinweise 12. Lagern Sie in diesem Gerät unter keinen Umständen medizinische Substanzen. 13. Reinigen Sie das Gerät NIEMALS mit einem Hochdruckreiniger. 14. Kinder dürfen nicht mit dem Verpackungsmaterial spielen. Entsorgen Sie die Kunststoffbeutel vorschriftsgemäß. 15. Flaschen mit hochprozentigem Alkohol müssen dichtschließend sein und vertikal in den Gefrierschrank gestellt werden.
  • Page 91: Bestimmungsgemäßer Gebrauch

    Sicherheitshinweise 21. Das Gerät ist nur für den Gebrauch in Innenräumen konzipiert. Es darf nicht in der Nähe von einem Wasserstrahl aufgestellt werden und unter keinen Umständen mit einem Hochdruckreiniger gereinigt werden. 22. Um einen sicheren Betrieb des Gerätes zu gewährleisten, muss dieses wie in dieser Anleitung beschrieben montiert und angeschlossen werden.
  • Page 92: Bedienelemente

    Bedienelemente Freezer RN400 RN600 RN200 1. Ein -/Ausschalter (Optional) 9. Stromkabel/ Stromstecker 2. Frontblende 10. Türhalterung 3. Schloss 11. Untere Frontblende 4. Temperaturregler 12. Unteres Türscharnier 5. Druckventil*(siehe Hinweis) 13. Kompressor 6. Verdampfer Regal 14. Kondensator 7. Türdichtung 15. Kondensatorventilator (Nur für 400l) 8.
  • Page 93 Bedienelemente Refrigerator RC400 RC600 RC200 Ein/Ausschalter (Optional) 12. Unteres Türscharnier 2. Frontblende 13. Untere Frontblende 3. Schloss 14. Türhalterung 4. Ventilatorgehäuse 15. Stromkabel/ Stromstecker 5. Ventilator 16. Verdampfer 6. Regal schiene 17. Wasserauffangbehälter 7. Regal 18. Ablauf 8. Regalhalterung 19. Kompressor 9.
  • Page 94 Platzierung und Installation Das Gerät sollte in einem trockenen und ausreichend belüfteten Raum aufgestellt werden. Um eine optimale Funktionstätigkeit zu gewährleisten, sollte das Gerät nicht direktem Sonnenlicht ausgesetzt oder nahe Wärme entwickelnder Geräte positioniert werden. Bitte beachten Sie, dass die ideale Umgebungstemperatur bei zwischen 16 °C und 35 °C liegt.
  • Page 95: Platzierung Und Installation

    Platzierung und Installation Hinweis:Sollte das Gerät nicht in aufrechter Position gelagert oder transportiert worden sein, lassen Sie es vor der Inbetriebnahme ca. 12 Stunden aufrecht stehen. Hinweis:Reinigen Sie die Regale und das Innere des Gerätes vor der ersten Inbetriebnahme mit Seifenwasser. Stromanschluss Das Gerät ist für den Anschluss an Wechselstrom konzipiert.
  • Page 96: Bedienung

    Bedienung Aufbewahrung von Lebensmitteln Halten Sie die folgenden Hinweise ein, um ein bestmögliches Ergebnis zu erzielen: Füllen Sie das Gerät erst dann mit Lebensmitteln, wenn es die gewünschte Betriebstemperatur erreicht hat. Stellen Sie niemals unverschlossene heiße Speisen oder Flüssigkeiten in das Gerät. Lebensmittel sollten immer gut verpackt oder abgedeckt sein.
  • Page 97: Abtauen

    Bedienung T e m p e ra tu re in s te llu n g u n d B e d ie n p a n e l (E V C O ) Das Bedienpanel des Thermostats: Kompressorfunktionsindikator Abtauindikator Energiesparindikator Stand By Indikator S E T Taste Ein -/ Aus Taste (gedrückt halten)
  • Page 98: Wechseln Des Türanschlags

    Wechseln des Türanschlages Die Tür kann sowohl rechts- als auch linksöffnend installiert werden. Bitte gehen Sie beim Wechseln des Türanschlages wie folgt vor: Das Gerät am Netzschalter ausschalten und von der Stromversorgung trennen. Scharnier 3 (obere Türkante) Scharnier 4 Scharnier 2 Scharnier 1* (siehe Anmerkung) *Anmerkung: Verfügt uber eine kleine Rolle, die das Schließen der Tür erleichtert und die als Stütze der Tür fungiert.
  • Page 99 Wechseln des Türanschlages 3. Die Tür herausnehmen 4. Scharnier 1 entfernen Scharnier 2 Scharnier 1...
  • Page 100 Wechseln des Türanschlages 5. Die Position der Scharniere 1 und 2 vertauchen Scharnier 2 Scharnier 1 6. Scharnier 1 befestigen 7. Scharnier 4 (untere Türkante) entfernen...
  • Page 101 Wechseln des Türanschlages 8. Scharnier 3 (obere Türkante) entfernen 9. Die Position der Scharniere 3 und 4 vertauschen Scharnier 4 Scharnier 3 10. Scharniere 3 und 4 an der Tür befestigen Scharnier 3 Scharnier 4...
  • Page 102 Wechseln des Türanschlages Scharnier 3 11. Die Tür umdrehen und am oberen Scharnier einhängen Scharnier 4...
  • Page 103: Reinigung, Pflege Und Wartung

    Wechseln des Türanschlages 12. Scharnier 2 befestigen Reinigung, Pflege und Wartung Vor der Reinigung muss das Gerät vollständig vom Stromnetz getrennt werden! Der Kühlschrank sollte mit einer milden Seifenlösung gesäubert werden. Verwenden Sie keine Reinigungsmittel, die Kratzer verursa- chen können. Die Plastikteile halten kochendem Wasser nicht stand (Höchsttemperatur +85 °C). Bei der routinemäßigen Reinigung säubern Sie bitte auch die Gummidichtung an der Tür um sicherzustellen, dass jegliche klebrige Substanzen entfernt worden sind, die ansonsten die Dichtung beschädigen könnten.
  • Page 104: Fehlerbehebung

    Reinigung, Pflege und Wartung Spezielle Wartung Die folgenden Anweisungen müssen von qualifizierten Fachleuten durchgeführt werden • Reinigen Sie den Kondensator regelmäßig mit einem geeigneten Hilfsmittel (Staubsauger oder weiche Bürste) um die Lebensdauer des Gerätes zu verlängern. • Elektrische Verbindungen dürfen nicht locker sein. •...
  • Page 105: Entsorgung

    Alt-Elektrogeräte sind Wertstoffe, sie gehören daher nicht in den Hausmüll! Wir möchten Sie daher bitten, uns mit Ihrem aktiven Beitrag bei der Ressourcenschonung und beim Umweltschutz zu unterstützen und dieses Gerät bei den -falls vorhanden- eingerichteten Rücknahmestellen abzugeben. Entsorgen Sie die Verpackung gemäß den geltenden gesetzlichen Bestimmungen. Technische Daten Modell RC200 RCX200 RCG200 RCGX200 RN200 RNX200...
  • Page 106: Gewährleistung

    Technische Daten VORSICHT: FEUER- UND EXPLOSIONSGEFAHR MIT BRENNBAREM KÜHLMITTEL R600a/R290. Gewährleistung Für dieses Produkt gilt die gesetzliche Gewährleistung. Schäden, die durch unsachgemäße Behandlung oder Bedienung, durch falsches Aufstellen oder Aufbewahren, durch unsach- gemäßen Anschluss oder Installation, sowie durch höhere Gewalt oder sonstige äußere Einflüsse entstehen, fallen nicht unter die Gewährleistung.

Table des Matières