Nice Moon MC824HR Instructions Et Avertissements Pour L'installation Et L'utilisation
Masquer les pouces
Voir aussi pour Moon MC824HR:
Table des Matières
Publicité
Les langues disponibles
Les langues disponibles
Liens rapides
Moon
Control unit
MC824HR
EN -
Instructions and warnings for installation and use
IT -
Istruzioni ed avvertenze per l'installazione e l'uso
FR -
Instructions et avertissements pour l'installation et l'utilisation
ES -
Instrucciones y advertencias para la instalación y el uso
DE -
Installierungs-und Gebrauchsanleitungen und Hinweise
PL -
Instrukcje i ostrzeżenia do instalacji i użytkowania
NL -
Aanwijzingen en aanbevelingen voor installatie en gebruik
Publicité
Chapitres
Table des Matières

Manuels Connexes pour Nice Moon MC824HR


Sommaire des Matières pour Nice Moon MC824HR
- Page 1 Moon Control unit MC824HR EN - Instructions and warnings for installation and use IT - Istruzioni ed avvertenze per l’installazione e l’uso FR - Instructions et avertissements pour l’installation et l’utilisation ES - Instrucciones y advertencias para la instalación y el uso DE - Installierungs-und Gebrauchsanleitungen und Hinweise PL -...
-
Page 3: Table Des Matières
1 - PRODUCT DESCRIPTION AND INTENDED USE ....1 oc curs, suspend installation immediately and contact the Nice Service Centre. • Never make modifications to any part of the product. Operations other than as 2 - INSTALLATION . -
Page 4: Product Application Limits
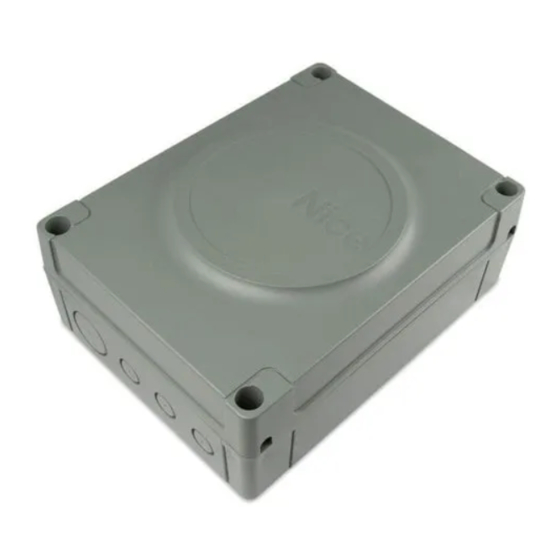
01. Open the control unit box by undoing the relevant screws (fig. 3-A); 02. Prepare the electrical cable routing holes (fig. 3-B); Fig. 2a shows an example of an automation system set up with Nice components: 03. Mount the box (fig. 3-C);... -
Page 5: Connection Of Other Devices To Mc824Hr
a) connect the motor that activates the lower leaf (the second to start the through the self-learning procedure and detect possible faults. For this reason opening manoeuvre) to terminal M1 and then the respective encoder to it is necessary to perform self-learning every time a new device is added or an terminals 1-2;... -
Page 6: Learning In Manual Mode
– If the first two manoeuvres (a and b) are not “closing” but are “opening”, 3.7.3 - Learning in combined mode press key “ ” or “ ” to stop the learning phase. At this point, on the gear- Perform this procedure after completing the automatic learning cycle: motor that completed the opening manoeuvre, invert the polarity of the two 01. -
Page 7: Programming
All the first level functions can be programmed by default on “OFF” except for the always close function which is “ON”. The functions may be changed at For all the above-mentioned documentation, Nice provides instruction any time. To check the various functions see Table 4. For the programming manuals, guides and pre-filled forms through its technical support service. -
Page 8: Level Two Programming (Adjustable Parameters)
5.2 - Level two programming (adjustable parameters) procedure, the maximum time interval that can elapse between activation of one key and the next is 10 seconds. When this time elapses, the procedure All level 2 functions are set by default as highlighted in grey in Table 6, and terminates automatically, memorising the modifications made up until then. -
Page 9: Special Functions
Mainte- Controls the number of manoeuvres: nance when this number is exceeded, the 1000 warning control unit signals an automation 1500 maintenance request; see paragraph 5.3.2. – Maintenance warning. 2500 5000 10000 15000 20000 List of Manoeuvre 1 result (most recent) The type of fault that has occurred in faults the last 8 manoeuvres can be esta-... -
Page 10: What To Do If
flash at intervals of 1 second during a manoeuvre. If faults occur, the flashing WHAT TO DO IF… light will emit a sequence of two shorter flashes separated by a 1 second pau- (troubleshooting guide) se. Table 9 shows the cause and solution for each type of signal. The LEDs on the control unit also emit signals. -
Page 11: Further Details
TABLE 11 - Fault log 01. Press and hold down the “Set” key for approx. 3 seconds; 02. Release the key when LED “L1” starts flashing; 03. Press keys “ ” or “ ” to move from the flashing LED to L8 LED (“input LED”) for the “Fault log” parameter; 04. -
Page 12: Product Maintenance
TECHNICAL CHARACTERISTICS OF THE PRODUCT WARNINGS: • All technical characteristics stated refer to an ambient temperature of 20°C (±5°C). • Nice S.p.a reserves the right to modify the product at any time while maintaining the same functionalities and intended use. - Page 13 Prima di iniziare il lavoro è necessario leggere attenta- mente tutte le parti del manuale. In caso di dubbi, sospendere l’installazione e richiedere chiarimenti al Servizio Assistenza Nice. • ATTENZIONE! – Istruzioni importanti: conservare questo manuale per eventuali interventi futuri di manutenzione e di smaltimento del prodotto.
-
Page 14: Installazione
P.P. ingresso per dispositivi di comando che intervenendo, provocano la co mando, deve essere effettuato tramite il sistema “Bluebus” di Nice. manovra con modalità Passo Passo; possibilità di collegare contatti di tipo NA 3.1 - Descrizione dei collegamenti elettrici (fig. -
Page 15: Collegamento Di Altri Dispositivi A Mc824Hr
consentire la disconnessione completa, nelle condizioni sancite dalla cate- • verificare che i Led delle fotocellule (fig. 7), sia TX sia RX, emettano lampeggi. goria di sovratensione III, conformemente alle regole di installazione. In caso Il tipo di lampeggio emesso, in questa fase, non è significativo; di necessità, questo dispositivo garantisce una veloce e sicura sconnessione •... -
Page 16: Apprendimento In Modo Manuale
c - apertura lenta del motoriduttore M2 e del motoriduttore M1 fino all’ar- Per comandare e portare il motore 2 nella posizione 1 (fig. B): premere resto meccanico e tenere premuto il tasto “ ” o “ ”. Raggiunta la posizione, rilasciare il d - Chiusura veloce dei motoriduttori M1 e M2 tasto per fermare la manovra. -
Page 17: Messa In Servizio
10 secondi tra la pressione di un tasto e l’altro. Trascorso questo tempo, Per tutta la documentazione citata, Nice attraverso il proprio servizio di assisten- la procedura termina automaticamente memorizzando le modifiche fatte fino a za tecnica, mette a disposizione: manuali d’istruzioni, guide e moduli precompi-... -
Page 18: Programmazione Secondo Livello (Parametri Regolabili)
5.2 - Programmazione secondo livello (parametri regolabili) IMPORTANTE – La procedura di programmazione presenta un tempo massi- mo di 10 secondi tra la pressione di un tasto e l’altro. Trascorso questo tempo, Tutti i parametri del secondo livello sono programmati di fabbrica come eviden- la procedura termina automaticamente memorizzando le modifiche fatte fino a ziato in colore grigio nella Tabella 6 e possono essere modificate in qualsiasi quel momento. -
Page 19: Funzioni Speciali
Avviso di Regola il numero di manovre: quan- manuten- do viene superato questo numero, la 1000 zione centrale segnala la richiesta di manu- 1500 tenzione dell’automazione; vedere paragrafo 5.3.2. – Avviso di manu- 2500 tenzione. 5000 10000 15000 20000 Elenco Esito 1 manovra (la più... -
Page 20: Cosa Fare Se
cadenza di 1 secondo. Se si verificano delle anomalie, il lampeggiane emette COSA FARE SE... dei lampeggi più brevi; questi vengono ripetuti due volte divisi da una pausa (guida alla risoluzione dei problemi) di 1 secondo. Nella Tabella 9 sono descritte la causa e la soluzione per ogni tipo di segnalazione. -
Page 21: Approfondimenti
TABELLA 11- Elenco storico delle anomalie 01. Premere e tenere premuto il tasto “Set” per circa 3 secondi; 02. Rilasciare il tasto quando il led “L1” inizia a lampeggiare; 03. Premere il tasto “ ” o “ ” per spostarsi dal led che sta lampeggiando sul led L8 (“led di entrata”) per il parametro “Elenco anomalie”;... -
Page 22: Manutenzione Del Prodotto
CARATTERISTICHE TECNICHE DEL PRODOTTO AVVERTENZE: • Tutte le caratteristiche tecniche riportate, sono riferite ad una temperatura ambientale di 20°C (± 5°C). • Nice S.p.a. si riserva il diritto di apportare modifiche al prodotto in qualsiasi momento lo riterrà necessario, mantenendone comunque la stessa funzionalità e destinazione d’uso. - Page 23 Avant de procéder à l’installation, il faut lire attentivement toutes les parties du guide. En cas de doutes, suspendre l’installation et demander des éclaircissements au Service Assistance Nice. • ATTENTION ! – Instructions importantes : conserver avec soin ce guide pour faciliter les éventuelles interventions futures de mainte-...
-
Page 24: Installation
être effectuée à travers le système « Blue- constante 8,2 kΩ. S’il y a plus de 2 dispositifs, il faut les connec- bus » de Nice. ter en cascade avec 1 seule résistance terminale de 8,2 kΩ ;... -
Page 25: Connexions Électriques De La Logique De Commande Mc824Hr
3.2 - Connexions électriques de la logique de commande FOTO 2 MC824HR Photocellule intérieure avec intervention en ouverture (ferme et inverse le mouvement) Après avoir fixé le boîtier de la logique et préparé les trous pour le passage des FOTO 2 II câbles électriques (chap. -
Page 26: Reconnaissance En Mode Automatique
moins 3 s puis la relâcher (au bout de 2 s la led L4 reste allumée et quand Position A Position d’ouverture désirée : position dans laquelle le van tail on relâche la touche « Set » la led L5 commence à clignoter). (moteur 1) connecté... -
Page 27: Essai
La séquence d’opérations à effectuer pour l’essai, décrite ci-après, se réfère à une installation typique (fig. 2a) : Pour toute la documentation citée, Nice, à travers son service après-vente, met à disposition des notices d’instructions, des guides et des formulaires 1 Vérifier que tout ce qui est prévu dans le chapitre « Recommandations préremplis. -
Page 28: Programmation Deuxième Niveau (Paramètres Réglables)
TABLEAU 5 - Procédure de programmation premier niveau 01. Presser et maintenir enfoncée la touche « Set » pendant environ 3 s ; 02. Relâcher la touche quand la led « L1 » commence à clignoter ; 03. Presser la touche « » ou « » pour déplacer la led clignotante sur la led qui correspond à la fonction à modifier ; 04. -
Page 29: Fonctions Spéciales
Force Niveau 1 - Force minimum Règle la force des deux moteurs. moteurs Niveau 2 - ... Niveau 3 - ... Niveau 4 - ... Niveau 5 - ... Niveau 6 - ... Niveau 7 - ... Niveau 8 - Force maximum Ouverture Piétonne 1 (ouverture du vantail M2 à... -
Page 30: Effacement De La Mémoire
5.4 - Effacement de la mémoire QUE FAIRE SI… Pour effacer la mémoire de la logique de commande et rétablir les configura- (guide pour la résolution des problèmes) tions d’usine, procéder de la façon suivante :presser et maintenir enfoncées les touches «... -
Page 31: Approfondissements
L1 - L2 Clignotement lent Variation du nombre de dispositifs Il faut effectuer la reconnaissance des dispositifs connectés au Bluebus ou recon- (voir paragraphe 3.5) naissance du dispositif non effectuée L3 - L4 Clignotement lent La reconnaissance des positions des Il faut effectuer la reconnaissance (voir paragraphe 3.6). -
Page 32: Maintenance Du Produit
CARACTÉRISTIQUES TECHNIQUES DU PRODUIT AVERTISSEMENTS : • Toutes les caractéristiques techniques indiquées se réfèrent à une température ambiante de 20 °C (± 5 °C). • Nice S.p.a. se réserve le droit d’apporter des modifications au produit à tout moment si elle le jugera nécessaire, en garantissant dans tous les cas les mêmes fonctions et le même type d’utilisation prévu. -
Page 33: Advertencias Y Precauciones Generales
Antes de comenzar a trabajar es ne cesario leer detenidamente todas las partes del manual. Si tuviera dudas, su spenda la instalación y solicite aclaraciones al Servicio de Asistencia de Nice. • ¡ATENCIÓN! – Instrucciones importantes: guarde este manual para cuando deba llevar a cabo los trabajos de mantenimiento o cuando deba eliminar el producto. -
Page 34: Límites De Empleo Del Producto
8,2 kΩ en serie al contacto NC (esto permite la con la central de mando, debe hacerse mediante el sistema “Bluebus” de Nice. combinación entre tres dispositivos NA - NC y 8,2 kΩ). -
Page 35: Conexión De Otros Dispositivos A Mc824Hr
– Las operaciones de conexión deben ser realizadas exclusivamente 3.5 - Primer encendido y control de las conexiones por personal cualificado. Después de haber conectado la energía eléctrica de la Central de mando, lleve – En la línea eléctrica de alimentación es necesario montar un dispositivo que a cabo los siguientes controles: asegure la desconexión completa del automatismo de la red. -
Page 36: Aprendizaje En Modo Automático
3.7.1 - Aprendizaje en modo automático • el led L7 destella: posición 1 de M1 Para accionar y colocar el motor 1 en la posición 1 (fig. B): pulse y 01. Pulse y mantenga pulsados simultáneamente los pulsadores “Set” y “ ”; mantenga pulsado el pulsador “... -
Page 37: Puesta En Servicio
6 Antes de poner en servicio el automatismo, informe adecuadamente al dueño sobre los peligros y riesgos residuales presentes. Para toda la documentación mencionada, Nice pone a disposición, a través de su servicio de asistencia técnica: manuales de instrucciones, guías y for- mularios preimpresos. -
Page 38: Programación Del Segundo Nivel (Parámetros Regulables)
TABLA 5 - Procedimiento de programación del primer nivel 01. Pulse y mantenga pulsado el pulsador “Set” durante unos 3 segundos; 02. Suelte el pulsador cuando el led “L1” comience a destellar; 03. Pulse el pulsador “ ” o “ ” para pasar del led intermitente al led que representa la función a modificar; 04. -
Page 39: Funciones Especiales
Fuerza Nivel 1 - Fuerza mínima Regula la fuerza de ambos motores. motores Nivel 2 - ... Nivel 3 - ... Nivel 4 - ... Nivel 5 - ... Nivel 6 - ... Nivel 7 - ... Nivel 8 - Fuerza máxima Apertura Peatones 1 (apertura de la hoja M2 a 1/4 de la apertura total) Regula el tipo de apertura asociado al... -
Page 40: Qué Hacer Si
durante la ejecución de un movimiento, ésta destellará una vez por segundo. QUÉ HACER SI… Si se produjera algún desperfecto, la luz intermitente emitirá destellos más cor- (guía para solucionar los problemas) tos que se repetirán dos veces, divididos por una pausa de 1 segundo. En la Tabla 9 se describe la causa y la solución para cada tipo de señal. -
Page 41: Otras Informaciones
TABLA 11 - Lista historial de los desperfectos 01. Pulse y mantenga pulsado el pulsador “Set” durante unos 3 segundos; 02. Suelte el pulsador cuando el led “L1” comience a destellar; 03. Pulse el pulsador “ ” o “ ” para desplazarse desde el led que está destellando al led L8 (“led de entrada”) para el parámetro “Lista desperfectos”;... -
Page 42: Mantenimiento Del Producto
CARACTERÍSTICAS TÉCNICAS DEL PRODUCTO ADVERTENCIAS: • Todas las características técnicas indicadas se refieren a una temperatura de 20°C (± 5°C). • Nice S.p.a. se reserva el derecho de modificar el producto en cual- quier momento que lo considere necesario, manteniendo las mismas funcionalidades y el mismo uso previsto. - Page 43 Installation schwer verletzt werden. Daher ist es wichtig, alle Ab schnitte des Handbuchs vor Installationsbeginn zu lesen. Im Zweifelsfall die Installation unterbrechen und den Nice Kundendienst um Erklärungen bitten. • ACHTUNG! – Wichtige Anweisungen: Bewahren Sie das vorliegende Handbuch auf, um zukünftige Entsorgungs- oder Wartungsarbeiten...
-
Page 44: Einsatzgrenzen Des Produktes
Seite des Gehäuses der Steuerung gebohrt werden. Anmer- kung – Wenn notwendig, kann der seitliche Kabeleingang verwendet werden, Die Abb. 2a zeigt als Beispiel eine mit Teilen von Nice ausgeführte Automati- aber nur bei Anwendung geeigneter Rohranschlüsse. -
Page 45: Stromanschlüsse Der Steuerung Mc824Hr
3.2 - Stromanschlüsse der Steuerung MC824HR FOTO 2 Lichtschranke innen mit Auslösung während Nachdem das Gehäuse der Steuerung befestigt wurde und die Bohrungen für Öffnung (stoppt und kehrt die Bewegung um) den Durchgang der Stromkabel vorgesehen wurden (Kap. 2.4 und Abb. 3), die elektrischen Anschlüsse ausführen: FOTO 2 II Lichtschranke innen mit Auslösung während... -
Page 46: Manuelles Erlernungsverfahren
Um den Motor 2 zu steuern und in die Position A (Abb. B) zu bringen: Position A Gewünschte Öffnungsposition Position, in der der mit dem Mo tor Die Taste “ ” oder “ ” drücken und gedrückt halten. Nach Erreichen (Motor 2) 2 verbundene Flügel am Ende einer Öffnungsbewegung anhalten der Position, die Taste freigeben, um die Bewegung zu stoppen. -
Page 47: Abnahme
4.1 - Abnahme Bezüglich der oben genannten Dokumentation stellt Nice über seinen tech- nischen Kundendienst folgendes zur Verfügung: Gebrauchsanleitungen, Die für die Abnahme wie folgt beschriebenen Vorgänge beziehen sich auf eine Anleitungen und teilweise ausgefüllte Formulare. Siehe auch: www.nice- typische Anlage (Abb. 2): service.com... -
Page 48: Zweites Niveau: Programmierung (Einstellbare Parameter)
TABELLE 5 - Programmierung erstes Niveau 01. Mindestens 3 Sekunden lang auf die Taste “Set” drücken und gedrückt halten; 02. Die Taste freigeben, wenn die Led “L1” zu blinken beginnt; 03. Auf Taste “ ” oder “ ” drücken, um das Blinken auf die LED zu verschieben, welche die zu ändernde Funktion darstellt; oder 04. -
Page 49: Spezielle Funktionen
Motorkraft Stufe 1 - Mindestkraft Regelt die Kraft beider Motoren. Stufe 2 - … Stufe 3 - … Stufe 4 - … Stufe 5 - … Stufe 6 - … Stufe 7 - … Stufe 8 - Höchstkraft Fußgän- Fußgänger 1 (Öffnung des Flügels M2 zu 1/4 der Gesamtöffnung) Regelt die Öffnungsweise, die der geröff- Steuerung “Teilöffnung 1”... -
Page 50: Löschen Des Speichers
5.4 - Löschen des Speichers WAS TUN, WENN ... Um das Archiv der Steuerung zu löschen und alle Werkseinstellungen erneut (Leitfaden zum Lösen von Problemen) zu erhalten, wie folgt vorgehen: Die Tasten “ ” und “ ” drücken und gedrückt halten, bis die Leds L1 und L2 zu blinken beginnen. -
Page 51: Weitere Auskünfte
L1 - L2 blinkt langsam Änderung der Anzahl der mit Bluebus Es ist notwendig, die Erlernung der Vorrichtungen auszuführen verbundenen Vorrichtungen oder Erler- (siehe Abschn. 3.6) nung Vorrichtung nicht ausgeführt L3 - L4 blinkt langsam Änderung der Erlernung der Motorenar- Die Erlernung der Positionen der mechanischen Anschläge wurde nie au- ten oder der Positionen der mechani- sgeführt. -
Page 52: Wartung Des Produktes
TECHNISCHE MERKMALE DES PRODUKTS HINWEISE: • Alle angegebenen technischen Merkmale beziehen sich auf eine Temperatur von 20°C (± 5°C). • Nice S.p.a. behält sich das Recht vor, jederzeit als nötig betrachtete Änderungen am Produkt vorzunehmen, wobei Funktionalitäten und Einsatzzweck beibehalten werden. - Page 53 2.4 - Montaż centrali sterującej ........2 zagrożenia. Jeżeli doszłoby do którejś z opisanych wyżej sytuacji, natych- miast przerwij montaż i zwróć się o pomoc do Serwisu Technicznego Nice. • Nie modyfikuj żadnej części urządzenia. Operacje niedozwolone mogą...
-
Page 54: Montaż
ściance obudowy centrali. Uwaga – Jeżeli to konieczne Na rys. 2a przedstawiona jest przykładowa instalacja automatu, wykonana z możesz wykorzystać boczne wejście dla przewodów ale tylko w przypadku zastosowaniem komponentów firmy Nice: zastosowania odpowiednich złączek przeznaczonych dla osłon kablowych - w a - centrala sterująca celu uszczelnienia połączenia. -
Page 55: Podłączenia Elektryczne Do Centrali Mc824Hr
3.2 - Podłączenia elektryczne do centrali MC824HR FOTO 2 Fotokomórka wewnętrzna aktywna podczas Po przymocowaniu obudowy centrali i wykonaniu otworów umożliwiających otwierania (zatrzymuje i zmienia kierunek ruchu) ułożenie przewodów elektrycznych, (rozdz. 2.4 i rys. 3), wykonaj połączenia elektryczne: FOTO 2 II UWAGA! Fotokomórka wewnętrzna aktywna podczas otwierania (zatrzymuje i zmienia kierunek ruchu) -
Page 56: Programowanie W Trybie Automatycznym
cisk “ ” lub “ ”. Po uzyskaniu wymaganego położenia zwolnij przycisk, Położenie A Wybrane położenie otwierania: położenie, w którym skrzy- aby za trzymać wykonywany manewr. Aby wczytać położenie wciśnij i (siłownik 2) dło podłączone do siłownika 2 musi zatrzymać się po przytrzymaj przycisk “Set”... -
Page 57: Odbiór Techniczny
Aby umożliwić przygotowanie całej zacytowanej wyżej dokumentacji fir- ma Nice, poprzez własny serwis techniczny oddaje do Twojej dyspozycji: instrukcje obsługi, przewodniki i wstępnie wypełnione formularze. Przejrzyj również stronę internetową: www.nice-service.com... -
Page 58: Programowanie Drugiego Poziomu (Parametry Regulowane)
TABELA 5 - Procedura programowania pierwszego poziomu 01. Wciśnij i przytrzymaj przycisk “Set” przez około 3 sekundy; 02. Zwolnij przycisk, kiedy dioda “L1” zacznie migać; 03. Wciskając przycisk “ ” lub “ ” przesuń migającą diodę na pozycję odpowiadającą funkcji, którą należy zmienić; 04. -
Page 59: Funkcje Szczególne
Siła Poziom 1 - Siła minimalna Reguluje siłę obu silników. siłowników Poziom 2 - ... Poziom 3 - ... Poziom 4 - ... Poziom 5 - ... Poziom 6 - ... Poziom 7 - ... Poziom 8 - Siła maksymalna Furtka Furtka 1 (otwarcie skrzydła 2 na 1/4 pełnego otwarcia) Reguluje rodzaj otwarcia połączonego... -
Page 60: Kasowanie Pamięci
5.4 - Kasowanie pamięci Jeżeli do wyjścia FLASH, znajdującego się w centrali, zostanie podłączona lampa ostrzegawcza, będzie ona migać podczas wykonywania manewru Aby skasować pamięć centrali i zresetować wszystkie ustawienia fabryczne w odstępach 1- sekundowych. W przypadku wystąpienia anomalii, lampa postępuj w następujący sposób: wciśnij i przytrzymaj przyciski “... -
Page 61: Rozszerzenie Wiadomości
L1 - L2 Wolne miganie Zmiana ilości urządzeń odłączonych do Wykonaj rozpoznawanie urządzeń (przeczytaj paragraf 3.6) Bluebus lub rozpoznawanie urządzenia nie wykonane L3 - L4 Wolne miganie Zmiana podczas rozpoznawania typu Rozpoznawanie pozycji ograniczników mechanicznych nie zostało wykonane siłowników lub pozycji ograniczników me- chanicznych TABELA 11 - Historia anomalii 01. -
Page 62: Konserwacja Urządzenia
PARAMETRY TECHNICZNE URZĄDZENIA ZALECENIA: • Wszystkie podane parametry techniczne dotyczą temperatury środowiskowej 20°C (± 5°C). • Firma Nice S.p.a. zastrzega sobie prawo do wprowadzenia zmian do urządzenia w każdej chwili, kiedy uzna je za konieczne, zachowując te same funkcje i przeznaczenie. - Page 63 Alvorens met de werkzaamheden te beginnen dient u de handleiding volledig door te lezen. In geval van twijfel, het product niet instal- leren en opheldering vragen aan de klantenservice van Nice. • LET OP! – Belangrijke aanwijzingen: bewaar deze handleiding voor eventuele toekomstige onderhoudswerkzaamheden of de verwerking als afval van het afgedankte product.
-
Page 64: Gebruikslimieten Van Het Product
“Bluebus” systeem van Nice. – parallelle aansluiting van 2 inrichtingen met uitgang met con- stante weerstand 8,2 kΩ. Als er meer dan 2 inrichtingen zijn, 3.1 - Beschrijving van de elektrische aansluitingen (afb. -
Page 65: Elektrische Aansluitingen Van De Besturingseenheid Mc824Hr
3.2 - Elektrische aansluitingen van de besturingseenheid FOTO 1 II MC824HR Interne fotocel h = 100 met activering zowel in sluitbeweging (onderbreking en omkering van de beweging) als in Na de kast van de besturingseenheid te hebben bevestigd en de gaten voor openingsbeweging (onderbreking en hervatting van de het doorvoeren van de elektriciteitskabels te hebben geboord (hoofdstuk 2.4 beweging op het moment dat de fotocel weer vrij wordt... -
Page 66: Zelflering In Automatische Modus
is, de toets loslaten om de manoeuvre te stoppen. Om de positie in het Positie A Gewenste openingspositie: positie waarin de met motor 1 ver- geheugen op te slaan, de toets “Set” minstens 3 sec. ingedrukt houden (motor 1) bonden vleugel moet stoppen na afloop van een openingsma- en vervolgens weer loslaten (na 2 sec. -
Page 67: Eindtest
4.1 - Eindtest de te informeren over de gevaren en restrisico’s die nog aanwezig zijn. Voor alle vermelde documentatie stelt Nice, via haar technische assisten- De hierna beschreven handelingen die moeten worden uitgevoerd voor de tiedienst, ter beschikking: instructiehandleidingen, gidsen en vooringevulde eindtest hebben betrekking op een typische installatie (afb. -
Page 68: Programmering Tweede Niveau (Instelbare Parameters)
TABEL 5 - Procedure voor programmering eerste niveau 01. Houd de toets “Set” circa 3 seconden ingedrukt; 02. Laat de toets los wanneer de led “L1” begint te knipperen; 03. Druk op de toets “ ” of “ ” om de knipperende led te verplaatsen naar de led die de te wijzigen functie vertegenwoordigt; 04. -
Page 69: Speciale Functies
Kracht Niveau 1 - Minimumkracht Regelt de kracht van beide motoren. motoren Niveau 2 - ... Niveau 3 - ... Niveau 4 - ... Niveau 5 - ... Niveau 6 - ... Niveau 7 - ... Niveau 8 - Maximumkracht Opening Voetganger 1 (opening van de vleugel M2 op 1/4 van de totale opening) Regelt het type opening dat wordt... -
Page 70: Wissen Van Het Geheugen
5.4 - Wissen van het geheugen Als op de uitgang FLASH op de besturingseenheid een knipperlicht wordt aangesloten, zal dit gedurende het uitvoeren van een manoeuvre knipperen Om het geheugen van de besturingseenheid te wissen en alle fabrieksinstellin- met tussenpozen van 1 seconde. Als er zich een storing voordoet, zal het gen te herstellen, gaat u als volgt te werk: de toetsen “... -
Page 71: Verdere Details
L1 - L2 Langzaam knipperen Variatie van het aantal De zelfleringprocedure van de inrichtingen moet worden uitgevoerd met Bluebus verbonden inrichtingen of (zie paragraaf 3.6) zelflering inrichting niet uitgevoerd L3 - L4 Langzaam knipperen Non è mai stato eseguito l’appren- De zelflering van de posities van de mechanische stops werd nooit uitge- dimento delle posizioni degli arresti voerd. -
Page 72: Onderhoud Van Het Product
TECHNISCHE GEGEVENS VAN HET PRODUCT WAARSCHUWING: • Alle vermelde technische kenmerken hebben betrekking op een omgevingstemperatuur van 20°C (± 5°C). • Nice S.p.a. behoudt zich het recht voor om, op elk moment dat dit noodzakelijk geacht wordt, wijzigingen aan het product aan te brengen, waarbij hoe dan ook de functionaliteit en de gebruiksbestemming ervan gelijk blijven. - Page 73 Declaration in accordance with Directives: 2004/108/EC (EMC); 2006/42/EC (MD) annex II, part B Note - The content of this declaration corresponds to the declaration made in the official document filed in the offices of Nice S.p.a., and particularly the latest version thereof available prior to the printing of this manual.
- Page 74 Nota: el contenido de la presente declaración se corresponde con cuanto se declara en el documento oficial presentado en la sede de Nice S.p.a. y, en particular, con la última revisión disponible antes de la impresión de este manual. El texto aquí contenido se ha adaptado por cuestiones editoriales. No obstante, se puede solicitar una copia de la declaración original a Nice S.p.a. (TV) I.
- Page 75 Erklärung in Übereinstimmung mit den Richtlinien: 2004/108/EG (EMC); 2006/42/EG (MD) Anlage II, Teil B Hinweis - Der Inhalt dieser Erklärung entspricht den Angaben im offiziellen Dokument, das im Sitz der Nice S.p.A. hinterlegt ist und der letzten verfügbaren Revision vor dem Druck dieser Anlei- tung.
- Page 76 Verklaring conform Richtlijnen: 2004/108/CE (EMC); 2006/42/EG (MD) bijlage II, deel B Opmerking - De inhoud van deze verklaring komt overeen met hetgeen is vastgelegd in het officiële document dat is gedeponeerd ten kantore van Nice S.p.a., en in het bijzonder met de laatste herziene en beschikbare versie ervan, vóór het drukken van deze handleiding.
- Page 77 Instructions and warnings for the user Before using the automation for the first time, ask the installer to activated accidentally, before proceeding release the automation explain the origin of residual risks and devote a few minutes to reading manually (as described in the relevant manual). this user instruction and warning manual given to you by the installer.
- Page 78 Istruzioni ed avvertenze destinate all’utilizzatore Prima di usare per la prima volta l’automazione, fatevi spiegare dall’in- 03. Dopo 2 secondi circa, il cancello effettuerà la manovra ri chiesta in stallatore l’origine dei rischi residui e dedicate qualche minuto alla lettu- modalità...
- Page 79 Instructions et recommandations destinées à l’utilisateur Avant d’utiliser pour la première fois l’automatisme, faites-vous expli- ment, le portail bougera régulièrement, en cas contraire procéder quer par l’installateur l’origine des risques résiduels et consacrez comme suit : quelques minutes à la lecture de ce guide d’instructions et d’avertis- 02.
-
Page 80: Instrucciones Y Advertencias Destinadas Al Usuario
Instrucciones y advertencias destinadas al usuario Antes de utilizar por primera vez el automatismo, pida a su instalador re querido en modalidad “hombre presente”, es decir que la can- que le explique el origen de los riesgos residuales y lea este manual cela se guirá... - Page 81 Anweisungen und Hinweise für den Benutzer Bevor Sie die Automatisierung zum ersten Mal verwenden, lassen Sie funktioniert, bewegt sich das Tor regulär, ansonsten wie folgt vor- sich von Ihrem Installateur erklären, wie Restrisiken entstehen können, gehen; und widmen Sie dem Lesen der Anweisungen und Hinweise für den 02.
- Page 82 Instrukcje i zalecenia przeznaczone dla użytkownika Przed użyciem automatyki po raz pierwszy poproś instalatora o wyja- cjonuje prawidłowo brama będzie się poruszać prawidłowo, w śnienie źródła ryzyka szczątkowego i poświęć kilka minut na przeczy- przeciwnym przypadku należy postępować jak opisano niżej: tanie niniejszej instrukcji i zaleceń...
- Page 83 Aanwijzingen en aanbevelingen voor de gebruiker Laat u, voordat u de automatisering voor de eerste keer gaat gebrui- normaal bewegen, als dit niet zo is gaat u als volgt te werk: ken, door de installateur uitleggen welke restrisico’s er zijn en besteed 02.
- Page 84 232 mm 122 mm...
- Page 85 24V 4W NC NO NO NC P.P. STOP – 24 Vcc FLASH S.C.A. BLUEBUS P.P. STOP OPEN CLOSE XIII...
- Page 88 Nice SpA Oderzo TV Italia www.niceforyou.com info@niceforyou.com...