
Manuels Connexes pour Advance Paris MyConnect 150


Sommaire des Matières pour Advance Paris MyConnect 150
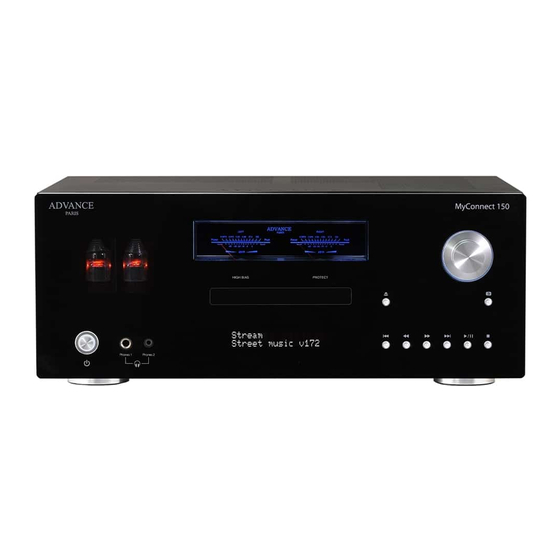
- Page 1 MyConnect 150 “ALL IN ONE“ SYSTEM WITH TUBES CHAINE INTÉGRÉ “ALL IN ONE“ À TUBES “ALLES IN EINEM“- RÖHREN SYSTEM U“““TUTTO“ IN UN SISTEMA...
-
Page 2: Disposal Of Your Old Appliance
RECYCLING IN EUROPEAN UNION COUNTRIES Disposal of your old appliance English Swedish Märkningen av produkter och fôrpackningar med denna This symbol on the product or on its packaging means that symbol betyder att elektrisk och elektronisk utrustning your electrical and electronic equipment should be maste tasom hand séparât fràn hushàlissopor nàr disposed at the end of life separately from your household utrustningen har förbrukats. - Page 3 WARNING ATTENTION WARNUNG ATTENZIONE ATTENTION: afin de réduire tout risques de chocs électriques ou de feu, ne pas exposer votre appareil à l’humidité ou à toutes sortes de liquides WARNING: to reduce the risk of fire or electric shock, do not expose this appliance to rain or moisture.
- Page 4 CONSIGNES DE SECURITE - ISTRUZIONI DI SICUREZZA LIRE LES INSTRUCTIONS LEGGERE ATTENTAMENTE TUTTE LE ISTRUZIONI Toutes les consignes de sécurité et instructions quand à l’utilisation de notre produit doivent faire sulla sicurezza e sul funzionamento prima di l’objet d’une lecture attentive. utilizzare l’apparecchio.
- Page 5 SAFETY INSTRUCTIONS READ INSTRUCTIONS All the safety and operating instructions should be read before the appliance is operated. RETAIN INSTRUCTIONS The safety anil operating instructions should be retained for future use. HEED WARNINGS All warnings on the appliance and in the operating instructions should be adhered to. FOLLOW INSTRUCTIONS All operating and use instructions should be followed.
- Page 6 SICHERHEITSHINWEISE HINWEISE LESEN Bedienungsanleitung Alle Sicherheits- und Bedienungshinweise beschrieben oder auf dem Gerät angegeben sind. müssen gelesen werden, bevor das Gerät in Betrieb genommen wird. ERDUNG UND POLUNG HINWEISE AUFBEWAHREN Es ist dafür zu sorgen, dass die Mittel zur Die Sicherheitshinweise und die Bedienungsan- ordnungsgemäßen Erdung und Polung des Geräts nicht beeinträchtigt werden.
- Page 7 RÉGLAGES FACE AVANT - FRONT PANEL CONTROLS FRONTSEITIGE ANZEIGEN - PANNELLO FRONTALE BOUTON STANDBY ON / OFF Appuyez sur ce bouton pour mettre en marche votre appareil (éclairage blanc de votre bouton après sa temporisation). La mise en marche de votre appareil ne peut se faire que si le bouton Marche/ Arrêt général situé...
- Page 8 TIROIR D’INSERTION DU DISQUE Placez un CD ou tout autre disque compatible après avoir appuyé sur la touche pour ouvrir le tiroir. Placez le disque sur le plateau en le centrant, l’étiquette sur la face supérieure. DISC TRAY Push this button to open the tray then, insert a CD or other compatible media disc face down onto the tray.
- Page 9 Ce bouton permet aussi le réglage du volume de sortie de l’appareil. MULTIFUNCTIONS BUTTON You can easily navigate in the menus of your MyConnect 150 with this multifunction button. You can configure your device by pressing this button. This button handles short presses, long presses, right rotation and left rotation.
- Page 10 6,35 mm STEREO JACK HEADPHONES The headphone terminal provides a stereo audio signal sufficient for driving all conventional stereo headphones except electrostatic headphones which generally require signal from a high level ouputs. (Headphones not included) KOPFHÖRER-BUCHSE (6,35 mm Stereo-Klinke) Der Kopfhörer-Anschluss bietet ein Stereo-Audiosignal für den Betrieb aller herkömmlichen Stereo- Kopfhörer außer elektrostatischer Kopfhörer, die in der Regel einen höheren Signalpegel erfordern.
- Page 11 plusieurs fois sur cette touche pour accéder à l’ensemble des morceaux précédents. PREVIOUS / PREVIOUS TRACK Press this button to go to the previous track. You can also press several times this button in order to jump to all previous track of your disc. TITELSPRUNG ZURÜCK Durch Betätigung dieser Taste springt die Wiedergabe zum Anfang des laufenden Titels.
- Page 12 TECHNOLOGIE HYBRIDE À TUBES Le MyConnect 150 possède un étage de préamplification à tubes associé à une amplification à transistors, en quelques sorte le meilleur des deux mondes ! Cette solution hybride est un gage de musicalité et de fiabilité.
- Page 13 PROTECT LED When this led is continiusly ON, it indicates that the MyConnect 150 has detected a fault on the amplifier. SCHUTZ ANZEIGE Wenn diese LED kontinuierlich leuchtet, bedeutet dies, dass MyConnect 150 einen dauerhaften Fehler an der Verstärkereinheit festgestellt hat.
- Page 14 Vous devez vous assurer de la bonne tension secteur de votre pays. Par défaut et par sécurité, le sélecteur a été configuré pour 230 V. Avant de relier le MyConnect 150 au secteur, vérifiez que le commutateur général est sur “OFF”.
- Page 15 Il MyConnect 150 richiede una connessione Internet a banda larga, un modem o una casella ADSL o un dispositivo che si connetta al circuito a banda larga e conduca comunicazioni su Internet. Sono necessari DHCP e 100 Mbps. Utilizzare un cavo Ethernet (CAT. Min.) Tra il MyConnect 150 e il rou- ter.
- Page 16 FM/DAB ANTENNA Your MyConnect 150 has an antenna input for receiving FM signals. Screw on the connector of the FM antenna and determine with the antenna wire the best position possible, where the reception...
- Page 17 PRE OUT / PREAMPLIFIER OUTPUTS If you want to use a more powerful power amplifier and use the MyConnect 150 as a preamplifier, connect it to the PRE OUT jacks, and connect all speakers to the power amplifier. You need to remove the U bridge first between PRE-OUT and AMP IN.
- Page 18 être au minimum de 8 Ohms sous peine de créer des dommages à l’amplificateur de votre MyConnect 150. On peut utiliser les bornes serre-fils pour courants élevés comme bornes à vis pour les câbles comportant des cosses plates, des broches, des prises “banane“, ou pour des câbles comportant des...
- Page 19 If using 3 pairs at same time, the impedance must not be under 8 Ohms. The high current binding post terminals can be used as a screw terminal for cables terminating in spade or pin connectors or for cables with bare wire ends. SPADE CONNECTORS These should be slotted under the terminal’s screw bushing, which is then fully tightened.
- Page 20 Vous pouvez adapter votre cellule à l’entrée phono de votre préamplificateur MyConnect 150. Cellule à aimant mobile (MM) ou bobine mobile (MC), haut et bas niveau (MC LOW ou MC HIGH).
- Page 21 AMP. IN / POWER AMPLIFIER IN If you only want to use the power amplifier section of your MyConnect 150, you can connect another preamplifier or audio mixer on L/R AMP. IN jacks. AMP. IN / POWER AMPLIFIER IN Über diesen Eingang ist es möglich nur den Leistungsverstärker Ihres Gerätes zu nutzen, zum...
- Page 22 MyConnect 150. 0 Ω = Quand vous connectez des casques avec une basse impédance de 32 Ω. 100 Ω = Quand vous connectez des casques avec une impédance moyenne ou haute de 600 Ω. GAINS AND IMPEDANCES OF HEADPHONES 1 & 2 You can adjust the gain and impedance for headphone 1 or headphone 2 independently.
- Page 23 Equipaggiato di uno stadio di preamplificazione a valvole, MyConnect 150 garantisce prestazioni di eccezionale musicalità. Dotato di una potenza di 150 Watt per canale, MyConnect 150 è in grado di pilotare anche i diffusori più difficili e offre un suono genuinamente audiofilo. È estremamente versatile e incorpora diverse funzionalità...
- Page 24 Options and menus arborescence Menüstruktur und Optionen Menu e le opzioni WHEN SWITCHING ON THE MyConnect 150 FOR THE FIRST TIME A LA PREMIÈRE MISE EN MARCHE DE VOTRE MyConnect 150 WENN DER MyConnect 150 ERSTMALS EINSCHALTET QUANDO SI ACCENDE MyConnect 150 PER LA PRIMA VOLTA IMPORTANT Votre MyConnect nécessite un temps de préchauffage des tubes...
- Page 25 QUICK LEARNING PLAY CD A partir du menu des sources sélectionner le CD en confirmant votre choix par un appui court sur le bouton multifonction. From the sources menu, select CD and confirm your choice with a short press on the multifunction button.
- Page 26 Sélectionner votre réseau WiFi personel (dans notre exemple ADVANCE) puis taper le mot de passe de celui-ci. Votre MyConnect 150 tente de se connecter à celui-ci (écran connecting puis connecté). Le paramétrage est terminé lorsque l’écran affiche la source Streaming/USB.
- Page 27 WiFi Protected Setup, better known as WPS. If you do not want to use the Network Wizard method, you can use the WPS that allows your MyConnect 150 to pair with your box by pressing the WPS button on your box.
-
Page 28: Télécharger L'application Advance Playstream
Store (Apple) ou sur Google Play (Android) l’application Advance Playstream. To control your MyConnect 150, please download the app ADVANCE PLAYSTREAM on the App Store (if you are using Apple devices) or on Google Play (if you are using an Android device). -
Page 29: L'application Advance Playstream Contrôle Votre Lecteur Réseau Myconnect 150
L’application Advance Playstream contrôle votre STEP lecteur réseau MyConnect 150 Advance Playstream app controls the MyConnect 150 network player Die Advance Playstream App steuert den MyConnect 150 Network Player L’application permet d’accéder aux réglages, renommage, des infos des HPs, des mots de passe, langues, timer, alarme, multiroom. - Page 30 Per creare un nuovo pezzo, premi il + e inizia la creazione. La version actuelle de du MyConnect 150 intègre le multiroom mais pas le multimode. The current version of the MyConnect 150 integrates the multiroom but not the multimode.
- Page 31 Vos sources audio STEP Your audio sources Deine Audioquellen Le tue fonti audio Ma musique: Votre musique locale, musique partagée, listes de lecture. Vos musiques en réseau n’apparaissent que si elles sont connectées et visibles sur le réseau. Certains services de streaming nécessitent la souscription d’un abonnement pour l’utilisation sur service (Qobuz, Deezer, Spotify, etc...) L’utilisation de Spotify se fait via Spotify connect.
- Page 32 -5- Click on this symbol, appears a small window: Perform a conversion of type (cast) to the device. -6- Place your cursor on it and click on your MyConnect 150 which appears on the left, a window opens and proposes to you the reading of your music. Your music is...
- Page 33 -5- Fare clic su questo simbolo, appare una piccola finestra: Eseguire una conversione di tipo (cast) sul dispositivo. -6- Posiziona il cursore su di esso e fai clic sul tuo MyConnect 150 che appare a sinistra, una finestra si apre e ti propone la lettura della tua musica. La tua musica...
- Page 34 QUICK LEARNING PLAY DIGITAL INPUTS A partir du menu des sources sélectionner DIGITAL INPUTS en confirmant votre choix par un appui court sur le bouton multifonction. From the sources menu, select DIGITAL INPUTS and confirm your choice with a short press on the multifunction button.
- Page 35 QUICK LEARNING PLAY ANALOG INPUTS A partir du menu des sources sélectionner Analog inputs en confirmant votre choix par un appui court sur le bouton multifonction. From the sources menu, select Analog inputs and confirm your choice with a short press on the multifunction button.
- Page 36 QUICK LEARNING PLAY USB AUDIO VERY IMPORTANT NE PAS CONNECTER VOTRE ORDINATEUR A VOTRE PÉRIPHÉRIQUE (AMPLI, DAC; PREAMPLI) AVANT D’AVOIR INSTALLER VOTRE DRIVER. DON’T CONNECT YOUR PC TO YOUR PERIPHERICAL (AMPLIFIER, DAC, PREAMPLIFIER) BEFORE INSTALLATION OF YOUR USB B DRIVER VERBINDEN SIE IHREN PC NICHT MIT IHREM PERIPHERISCHEN (VERSTÄRKER, DAC,PREAMPLIFIER) vor Einbau der USB B DRIVER NON COLLEGARE IL TUO PC AL TUO PERIFERICO (AMPLIFICATORE, DAC, PREAMPLIFICATORE) PRIMA DELL’INSTALLAZIONE DEL DRIVER USB B Vous pouvez télécharger le driver XMOS DRIVER dans l’onglet téléchargement de la fiche produit correspondante à votre produit. Les utilisateurs Windows 10 à partir de la release 1703 peuvent utiliser...
-
Page 37: Analog Inputs
A partir du menu des sources sélectionner USB AUDIO en confirmant votre choix par un appui court sur le bouton multifonction. From the sources menu, select USB AUDIO and confirm your choice with a short press on the multifunction button. Wählen Sie im Quellenmenü... - Page 38 QUICK LEARNING PLAY USB STORAGE INFORMATION Ce port USB-A est multifonction. Il permet à la fois de lire un fichier contenu dans une clé USB via l’entrée USB ou via l’application Advance PlayStream. This USB-A port is multifunction. It allows both to read a file contained in a USB key via the USB input or via the Advance PlayStream app.
- Page 39 Utilisation d’un disque dur USB ou disque dur réseau NAS: connecter votre disque dur formaté en FAT32 d’une capacité maximum de 128Go. Dans le cas où vous souhaiteriez une capacité supérieure, vous devez unitiliser un disque réseau de type NAS. La lecture des différents morceaux de musique stockés sur ce NAS se fait via l’application Advance PlayStream.
- Page 40 QUICK LEARNING PLAY DAB RADIO A partir du menu des sources sélectionner DAB en confirmant votre choix par un appui court sur le bouton multifonction. From the sources menu, select DAB and confirm your choice with a short press on the multifunction button.
- Page 41 MEM on the remote control. Using the numeric keypad, press 1. When the source selected on your MyConnect 150 is the DAB, all you have to do is press button 1 on your remote control to listen to the corresponding radio. You must repeat this operation for all the radios you want to preset.
- Page 42 Nell’elenco delle radio trovate durante la ricerca, selezionare la prima radio che si desidera memorizzare e premere brevemente MEM sul telecomando. Utilizzando il tastierino numerico, premere 1. Quando la sorgente selezionata su MyConnect 150 è DAB, è sufficiente premere il pulsante 1 sul telecomando per ascoltare la radio corrispondente. È necessario ripetere questa operazione per tutte le radio che si desidera preselezionare.
- Page 43 QUICK LEARNING FM RADIO A partir du menu des sources, sélectionner FM en confirmant votre choix par un appui court sur le bouton multifonction. From the sources menu, select FM and confirm your choice with a short press on the multifunction button.
- Page 44 MEM on the remote control. Using the numeric keypad, press 1. When the source selected on your MyConnect 150 is the DAB, all you have to do is press button 1 on your remote control to listen to the corresponding radio. You must repeat this operation for all the radios you want to preset.
- Page 45 Manual scan DAB/FM source selector Autoscan Selection of presets (Preset + and preset -) Numeric keypad Numeric keypad Si aucune radio FM n’a été trouvée, vous pouvez relancer une recherche en appuyant sur le bouton AUTOSCAN de votre télécommande. L’absence de radio peut avoir plusieurs raisons,...
- Page 46 MyConnect 150 to enable pairing. Rufen Sie das Bluetooth-Setup-Menü Ihres Geräts (Smartphone, Tablet, PC oder Mac) auf und wählen Sie MyConnect 150, um die Kopplung zu aktivieren. Vai al menu di impostazione Bluetooth del tuo dispositivo (smartphone, tablet, PC o Mac) e...
- Page 47 NOTE...
-
Page 48: Factory Reset
System Einstellung Menüs Arboreszenz Menu di impostazione del sistema arborescenza System info MENU System info Device Name MCU Version BT Version CD VERSION DAB VERSION MyConnect 150 1.03 0101 2.57 1.A2 Firmware version APP Version SSID MAC Address IP1 Adress 2.8.5820... - Page 49 TELECOMMANDE REMOTE CONTROL...
-
Page 50: Bluetooth
SPECIFICATIONS POWER OUTPUT 8Ω, 4Ω and 2,66Ω 130W, 190W and 250W CLASS AB OUTPUT POWER OUTPUT LEVEL Unbalanced (max volume) 9 volts NIVEAU DE SORTIE Asymétrique FREQUENCY RESPONSE (+/-3dB) 20Hz - 80 kHz RÉPONSE EN FRÉQUENCE (+/-3dB) DISTORTION < 0.006% @1KHz/1W DISTORSION <... -
Page 51: Declaration Of Conformity
2011/65/EU, LVD directive 2014/35/EU, EMC directive 2014/30/EU e RED 2014/53/EU. The Bluetooth frequency band is 2.402GHz~2.480GHz ISM Band. RF TX Output Power is 4dBm (Class II). Advance Paris Sarl, 13 rue du coq gaulois - 77170 Brie Comte Robert - France... - Page 52 Design and development in France by Advance Paris Sarl 13 rue du coq gaulois - 77390 Brie Comte Robert - FRANCE Tel. +33 (0) 160 185 900 - Fax +33 (0) 160 185 895 email: info@advanceparis.com www.advanceparis.com...