Beko GN1406231XBN Mode D'emploi
Masquer les pouces Voir aussi pour GN1406231XBN:
Table des Matières

Publicité

Les langues disponibles
  • FR

Les langues disponibles

Liens rapides

Refrigerator
User Manual
Gefrierschrank
Bedienungsanleitung
Chłodziarka
Instrukcja użytkowania
GN1406231XBN
EN/DE/PL
58 4402 0000/AC-1/2-EN-DE-PL

Publicité

Table des Matières
loading

Sommaire des Matières pour Beko GN1406231XBN

  • Page 1 Refrigerator User Manual Gefrierschrank Bedienungsanleitung Chłodziarka Instrukcja użytkowania GN1406231XBN EN/DE/PL 58 4402 0000/AC-1/2-EN-DE-PL...
  • Page 2 Please read this manual before using the product! Dear Customer, We'd like you to make the best use of our product, which has been manufactured in modern facilities with care and meticulous quality controls. Thus, we advice you to read the entire user manual before you use the product. In case the product changes hands, do not forget to hand the guide to its new owner along with the product.
  • Page 3: Table Des Matières

    1. Safety and environment instructions 3 5 Operating the product 5.1 Indicator panel ..... .13 2 Your Refrigerator 5.2 Indicator panel.....18 5.3 Freezing fresh food.
  • Page 4: Safety And Environment Instructions

    Safety and environment instructions This section provides the safety mental disabilities, without sufficient instructions necessary to prevent the risk knowledge and experience or by of injury and material damage. Failure to children. The device can only be used observe these instructions will invalidate by such persons under supervision all types of product warranty.
  • Page 5 Important instructions regarding safety and environment Do not wash the product by spraying or pouring water on it! Danger of electric shock! In case of malfunction, do not use the product, as it may cause electric shock. Contact the authorised service before doing anything.
  • Page 6 Important instructions regarding safety and environment 1.6. Package information 1.2. Intended use Packaging materials of the product are This product is designed for home use. manufactured from recyclable materials in It is not intended for commercial use. accordance with our National Environment The product should be used to store Regulations.
  • Page 7: Your Refrigerator

    Your Refrigerator 1- Control and indicator panel 7- Chiller compartment 2- Butter & Cheese section 8- Icebox drawer 3- 70 mm moving door shelf 9- Multizone compartment glass shelf/cooler 4- Fridge compartment glass shelf 10- Freezer compartment drawers 5- Fridge compartment crisper 11- Multizone Compartment's drawer 6- Gallon door shelf * OPTIONAL...
  • Page 8 Your Refrigerator 1- Control and indicator panel 7- Chiller compartment 2- Butter & Cheese section 8- Icebox drawer 3- 70 mm moving door shelf 9- Multizone compartment glass shelf/cooler 4- Fridge compartment glass shelf 10- Freezer compartment drawers 5- Fridge compartment crisper * OPTIONAL 6- Gallon door shelf Figures in this user manual are schematic and may not match the product exactly.
  • Page 9: Installation

    Installation 1. To install the wedges, remove the screws on the 3.1 Appropriate location product and use the screws supplied together with the for installation wedges. Contact an Authorized Service for the installation of the product. In order to prepare the product for use, refer the information in the user manual and ensure that electrical installation and water installation are appropriate.
  • Page 10: Adjusting The Feet

    Installation 3.3 *Adjusting the feet To adjust the doors vertically, If the product stands unbalanced after installation, Loosen the fixing nut located at the bottom. adjust the feet on the front by rotating them to the Rotate the adjusting nut according to the position right or left.
  • Page 11: Electric Connection

    Installation -Upper hinge group is fixed with 3 screws. 3.4 Electric connection -The hinge cover is attached after the sockets are installed. WARNING: Do not make connections via - Then the hinge cover is fixed with two screws. extension cables or multi-plugs. WARNING: Damaged power cable must be replaced by the Authorized Service...
  • Page 12: Preparation

    Preparation 4.1 Things to be done for Thawing the frozen foods in the fridge saving energy compartment both saves energy and reserves the quality of the foods. Connecting your refrigerator to systems Temperature of the room where your that save energy is dangerous as they may refrigerator is located should at least cause damage on the product.
  • Page 13: Initial Use

    Preparation 4.3 Initial use Before using the product, make sure that all preparations have been made in accordance with the instructions given in the "Important instructions regarding safety and environment" and "Installation" chapters. Clean the interior of the refrigerator as recommended in the “Maintenance and cleaning”...
  • Page 14: Operating The Product

    Operating the product 5.1 Indicator panel Touch-controlled indicator panel allows you to set the temperature and control the other functions related to the refrigerator without opening the door of the product. Just press the relevant buttons for function settings. 10 11 Quick Cool Quick Freeze 3 “...
  • Page 15 Operating the product 1. Quick cooling function indicator 8. Joker freezer icon It turns on when the quick fridge function is Hover over the Joker freezer icon using the FN button; the activated. icon will start to flash. When you press the OK key, joker 2.
  • Page 16 Operating the product 21. Setting the Celsius and Fahrenheit 14. FN button indicator Using this key, you can switch between the Hover over this key using the FN key and select functions that you want to select. Upon pressing Fahrenheit and Celsius via the OK key. When this key, the icon, whose function is required to be the relevant temperature type is selected, the activated or deactivated, and this icon's indicator...
  • Page 17 Operating the product 29. Temperature change cabin icon hover over the icon and the indicator again and press the OK key. Thus, both the eco fuzzy function Indicates the cabin whose temperature is to be icon and the indicator will start flashing. If you do changed.
  • Page 18 Operating the product Use quick cooling function when you want to quickly cool the food placed in the fridge compartment. If you want to cool large amounts of fresh food, activate this function before putting the food into the product. If you do not cancel it, quick cooling will cancel itself automatically after 8 hours at the most or when the fridge...
  • Page 19: Indicator Panel

    Operating the product 5.2 Indicator panel Touch-control indicator panel allows you to set the temperature and control the other functions related to the refrigerator. Just press the relevant buttons for function settings. 26 25 25, 24 ). Whichever cabin icon is power on, the 1-On/Off function cabin, whose temperature set value you want to Press the On/Off button for 3 seconds to turn off or...
  • Page 20 Operating the product 9. Joker fridge icon 16. FN button When you select the joker fridge icon using the FN Using this key, you can switch between the button (16) and press the OK button (17) the joker functions that you want to select. Upon pressing cabin turns into a fridge cabin and operates as a this key, the icon, whose function is required to be cooler.
  • Page 21 Operating the product 22. Ice machine off icon Press the FN key (until it reaches the ice icon) to switch off the ice machine. The ice machine off icon start flashing when you hover over it, thus you can understand whether the ice machine will be turned on or off.
  • Page 22: Freezing Fresh Food

    Operating the product Freezer Fridge Compartment Compartment Remarks Setting Setting -18°C 4°C This is the normal recommended setting. -20, -22 or These settings are recommended when the ambient temperature 4°C -24°C exceeds 30°C. Use when you wish to freeze your food in a short time. Your product Quick Freeze 4°C will return to its previous mode when the process is over.
  • Page 23: Placing The Food

    Operating the product Boil the vegetables and drain their water in order 5.8 Chiller compartment to store vegetables for a longer time as frozen. Chiller compartments allow you to prepare the food After draining their water, put them in air-proof for freezing.
  • Page 24: Egg Tray

    Operating the product Never leave the vegetables in their plastic bags in 3-Movable middle section is closed when the left the crisper. If they are left in their plastic bags, this door of the fridge compartment is opened. will cause them to rot in a little while. If you not 4-It must not be opened manually.
  • Page 25: Blue Light/Harvestfresh

    Operating the product 5.14 Blue light/HarvestFresh *May not be available in all models For the blue light, Fruits and vegetables stored in the crispers that are illuminated with a blue light continue their pho- tosynthesis by means of the wavelength effect of blue light and thus preserve their vitamin content.
  • Page 26: Wine Cellar Compartment

    Operating the product 5.16 Wine cellar compartment (This feature is optional) 1 – Fill your cellar compartment Wine cellar was built to contain up to 28 front bottles + 3 bottles accessible using a telescopic rack. These maximum quantities declared are given for information purpose only and correspond to tests carried out with a “Bordelaise 75cl”...
  • Page 27 Operating the product 3- Suggestions relating to the opening of a wine bottle before tasting: White wines About 10 minutes before serving Young red wines About10 minutes before serving Thick and mature red wines About 30 to 60 minutes before serving 4- How long can an open bottle be preserved? Unfinished bottles of wine must be cocked properly and can be preserved in a cold and dry place during the following periods:...
  • Page 28: Use Of Internal Water Dispenser And Water Dispenser At The Door

    Operating the product 5.18 Dispensing water 5.17 Use of internal water dispenser Hold a container under the dispenser spout while and water dispenser at the door pressing the dispenser pad. (in some models) Release the dispenser pad to stop dispensing. After connecting the refrigerator to a water source Quick Cool Quick Freeze...
  • Page 29: For Using Water Dispenser

    Operating the product 5.20 Icematic 5.19 For using water dispenser (in some models) Before using your fridge first time and To get ice from the icematic, fill the water tank after replacing your water filter, water in the fridge compartment with water up to the dispenser may drip drops of water.
  • Page 30: Icematic And Ice Storage Container

    Operating the product 5.21 Icematic and ice storage container (in some models) Using the Icematic Fill the Icematic with water and place it into its seat. Your ice will be ready approximately in two hours. Do not remove the Icematic from its seating to take ice.
  • Page 31: Maintenance And Cleaning

    Maintenance and cleaning Cleaning your fridge at regular intervals will To remove door and body shelves, extend the service life of the product. remove all of its contents. Remove the door shelves by pulling them up. After cleaning, slide them from top to bottom to install.
  • Page 32: Troubleshooting

    Troubleshooting Check this list before contacting the service. The product’s operating performance may Doing so will save you time and money. This list vary depending on the ambient temperature includes frequent complaints that are not related to variations. This is normal and not a malfunction. faulty workmanship or materials.
  • Page 33 Troubleshooting Hot or humid weather will increase icing and The food items kept in cooler compartment condensation. This is normal and not a malfunction. drawers are frozen. The doors were opened frequently or kept open for long The cooler compartment temperature is set periods.
  • Page 34 Bitte lesen Sie zuerst diese Anleitung! Liebe Kundin, lieber Kunde, Wir möchten, dass Sie optimale Effizienz von unserem Produkt erhalten, das in modernen Einrichtungen mit sorgfältigen Qualitätskontrollen hergestellt wurde. Bitte lesen Sie die Bedienungsanleitung zu diesem Zweck vor Benutzung des Produktes vollständig und bewahren Sie sie zum Nachschlagen auf.
  • Page 35 Inhalt 1 Hinweise zu Sicherheit und Umwelt 3 5 Betrieb des Geräts 1.1 Allgemeine Sicherheitshinweise ..3 5.1 Anzeigetafel ..... . 14 5.2 Anzeigefeld .
  • Page 36: Hinweise Zu Sicherheit Und Umwelt

    Hinweise zu Sicherheit und Umwelt beaufsichtigt werden oder angeleitet Dieser Abschnitt bietet die zur Vermeidung von worden. Kinder dürfen nicht mit Verletzungen und Materialschäden erforderlichen diesem Gerät spielen. Sicherheitsanweisungen. Bei Nichtbeachtung Ziehen Sie bei Fehlfunktionen den dieser Anweisungen erlöschen jegliche Netzstecker des Gerätes.
  • Page 37 Wichtige Hinweise zur Sicherheit und zum Umweltschutz Benutzen Sie keine Dampfreiniger Stellen Sie keine mit Flüssigkeiten gefüllten Behälter (z. B. Vasen) auf oder ähnliche Gerätschaften dem Gerät ab. Falls Wasser oder zum Reinigen oder Abtauen andere Flüssigkeiten an unter Ihres Gerätes. Der Dampf kann Spannung stehende Teile gelangen, in Bereiche eindringen, die unter kann es zu Stromschlägen oder...
  • Page 38 Wichtige Hinweise zur Sicherheit und zum Umweltschutz 1.1.1 Wichtige Hinweise Vermeiden Sie durch Einhaltung zum Kältemittel der folgenden Anweisungen Lebensmittelkontamination: Wenn das Gerät über ein Kühlsystem mit R600a- Durch langes Öffnen der Tür kann Gas verfügt, achten Sie darauf, das Kühlsystem und den dazugehörigen Schlauch während die Temperatur in den Fächern des Gerätes drastisch ansteigen.
  • Page 39 Wichtige Hinweise zur Sicherheit und zum Umweltschutz mindestens 0,6°C (33°F) bis hin zu Dieses Gerät wurde aus hochwertigen maximal 38°C (100°F ). Materialien hergestellt, die Nutzen Sie ausschließlich Trinkwasser. wiederverwendet und recycelt werden 1.2 Bestimmungsgemäßer Einsatz können. Entsorgen Sie das Gerät am Dieses Gerät ist für den Einsatz im Ende seiner Einsatzzeit nicht mit dem Haushalt vorgesehen.
  • Page 40: Ihr Kühlschrank

    Ihr Kühlschrank 1- Bedien- und Anzeigefeld 7- Kältefach 2- Butter- & Käsefach 8- Eisbehältereinschub 3- Bewegliche Türeinlage 70 mm 9- Glaszwischenboden für Multizonenfach/ Kühler 4- Glaszwischenboden für Kühlschrankfach 10- Gefrierfacheinschübe 5- Glaszwischenboden für Gemüsefach 11- Einschub für Multizonenfach 6- Getränkeeinsatz für die Tür * OPTIONAL (Je nach Modell) Die Abbildungen in dieser Bedienungsanleitung sind schematische Zeichnungen und stimmen mit dem Gerät nicht exakt überein.
  • Page 41 Ihr Kühlschrank 1- Bedien- und Anzeigefeld 7- Kältefach 2- Butter- & Käsefach 8- Eisbehältereinschub 3- Bewegliche Türeinlage 70 mm 9- Glaszwischenboden für Multizonenfach/ Kühler 4- Glaszwischenboden für Kühlschrankfach 10- Gefrierfacheinschübe 5- Glaszwischenboden für Gemüsefach * OPTIONAL (Je nach Modell) 6- Getränkeeinsatz für die Tür Die Abbildungen in dieser Bedienungsanleitung sind schematische Zeichnungen und stimmen mit dem Gerät nicht exakt überein.
  • Page 42: Installation

    Installation 3.1 Geeignete Aufstellungsorte an denen die Temperaturen unter den Wert von für das Gerät -5 °C sinken können. Kontaktieren Sie den zuständigen Kundendienst für die Installation. Um das Gerät für die 3.2 Installation der Kunststoffkeile Benutzung vorzubereiten, lesen Sie sich Die im Lieferumfang enthaltenen Kunststoffkeile zuerst entsprechenden Abschnitte in der dienen zur Abstandssicherung für die freie...
  • Page 43: Justierung Der Füße

    Installation Senkrechte Ausrichtung der Türen, 3.3* Justierung der Füße Lösen Sie die Fixiermutter, die sich auf der Wenn das Gerät nach der Installation nicht Unterseite befindet. vollständig ausbalanciert ist, müssen die Füße Drehen Sie die Einstellmutter, um die Position durch Drehen nach links bzw. rechts nachjustiert der Tür anzupassen (im Uhrzeigersinn/gegen den werden.
  • Page 44: Elektrischer Anschluss

    Installation 3.4 Elektrischer Anschluss - Obere Scharniergruppe wird mit 3 Schrauben befestigt. WARNUNG: Stellen Sie keine - Die Scharnierabdeckung wird angebracht, Verbindungen über Verlängerungskabel nachdem die Steckdosen installiert sind. oder Mehrfachstecker her. - Dann wird die Scharnierabdeckung mit zwei Schrauben befestigt. WARNUNG: Ein beschädigtes Kabel darf nur von einem Mitarbeiter des zuständigen...
  • Page 45: Vorbereitung

    Vorbereitung 4.1 Maßnahmen für den sparsamen Energieverbrauch Der Luftstrom darf nicht dadurch behindert werden, dass man Lebensmittel vor die Lüfter Das ungeprüfte Anschließen des des Gefrierfachs und des Multizonenfachs Kühlschranks an Systeme zum stellt. Die Lebensmittel sind so einzustellen, Energiesparen ist gefährlich, da dies das dass mindestens 5 cm Abstand vor dem Gerät beschädigen kann.
  • Page 46: Vor Der Ersten Verwendung

    Vorbereitung 4.2 Empfehlungen zum Fach für frische Lebensmittel Achten Sie darauf, dass die Lebensmittel nicht mit dem Temperatursensor im Fach für frische Lebensmittel in Berührung kommen. Um die ideale Lagerungstemperatur im Fach für frische Lebensmittel aufrechtzuerhalten, darf der Sensor nicht durch Lebensmittel verstellt werden.
  • Page 47: Betrieb Des Geräts

    Betrieb des Geräts 5.1 Anzeigetafel Das Bedienfeld mit Touchfunktion dient zur Einstellung der Temperatur und die Steuerung der weiterer Kühlschrankfunktionen, ohne dass die Gerätetür geöffnet werden muss. Sie müssen nur die entsprechenden Tasten zur Einstellung der Funktionen drücken. 10 11 Quick Cool Quick Freeze 3 “...
  • Page 48 Produktbedienung 1. Anzeige der Schnellkühlfunktion 6. Symbol „Filter zurücksetzen“ Diese schaltet sich ein, wenn die Diese Symbol schaltet sich, wenn der Filter zurück- Schnellkühlfunktion aktiviert ist. gesetzt werden muss. 2. Temperaturanzeige des Kühlschrankfachs 7. Symbol Fach mit Temperaturänderung Die Temperatur im Kühlschrankfach wird Zeigt das Fach an, dessen Temperatur sich angezeigt, diese kann auf 8,7,6,5,4,3,2,1 gerade ändert.
  • Page 49 Produktbedienung 18. Symbol Fach mit Temperaturänderung Wenn Sie diese nicht zuvor Zeigt das Fach an, dessen Temperatur sich ausschalten, stellt sich die Schnellgefrierfunktion automatisch gerade ändert. Wenn das Symbol Fach mit nach spätestens 4 Stunden ab oder Temperaturänderung zu blinken beginnt, bedeutet wenn das Gefrierfach die gewünschte das, dass das jeweilige Fach ausgewählt wurde.
  • Page 50 Produktbedienung Urlaubsfunktion als auch die Anzeige an zu blinken Zeigt an, ob die Eismaschine ein- und die Urlaubsfunktion wird abgebrochen. oder ausgestellt ist. 25. Symbol für Zusatzkühlfunktion Wenn Sie das Symbol für die Zusatzkühlfunktion Der Wasserfluss vom Wassertank mit Hilfe der FN-Taste auswählen und die OK- stoppt, wenn diese Funktion Taste drücken, schaltet das Zusatzfach in den ausgewählt wurde.
  • Page 51 Produktbedienung 31. Auswahltaste Verwenden Sie die Schnellkühlfunktion, wenn die in Nutzen Sie diese Taste, um das Fach auswählen, das Kühlschrankfach gelegten dessen Temperatur Sie ändern möchten. Schalten Lebensmittel schnell abkühlen Sie zwischen den Fächern, indem Sie diese Taste möchten. Wenn Sie größere Mengen drücken.
  • Page 52: Anzeigefeld

    Produktbedienung 5.2 Anzeigefeld Das berührungsempfindliche Anzeigefeld ermöglicht Ihnen die Einstellung der Temperatur und die Steuerung anderer Funktionen, ohne dass Sie die Tür des Kühlschranks öffnen müssen. Drücken Sie einfach die entsprechenden Tasten zur Funktionseinstellung. 26 25 3. Auswahltaste 1 - Ein/Aus-Funktion Verwenden Sie diese Taste, um das Fach Drücken Sie zum Ein- oder Ausschalten des auszuwählen, dessen Temperatur Sie ändern...
  • Page 53 Produktbedienung 7. Temperaturanzeige erkennen Sie, dass die Urlaubsfunktion jetzt aktiviert oder deaktiviert werden kann. Zeigt den Temperaturwert des ausgewählten Wenn Sie die OK-Taste drücken, leuchtet das Fachs. Urlaubsfunktionssymbol kontinuierlich, was 8. Fahrenheit-Anzeige anzeigt, dass diese Funktion jetzt aktiv ist. Drücken Dies ist die Fahrenheit-Anzeige.
  • Page 54 Produktbedienung 21. Öko-Fuzzy-Funktionssymbol Nach Ausschalten dieser Funktion Drücken Sie die FN-Taste (bis der Buchstaben wird ihr kein Wasser mehr aus e erreicht ist), um die Öko-Fuzzy-Funktion zu dem Tank zugeführt. Bereits aktivieren. Wenn Sie das Öko-Fuzzy-Symbol bereitetes Eis kann aber nach erreichen, beginnt es zu blinken.
  • Page 55: Einfrieren Frischer Lebensmittel

    Produktbedienung 5.3 Einfrieren frischer Lebensmittel 1. Legen Sie die eingepackten Lebensmittel so rasch wie möglich in das Gefriergerät, um ein Um die Qualität der Lebensmittel zu bewahren, Antauen zu verhindern. sollten diese nach dem so schnell wie möglich 2. Kontrollieren Sie die Angaben für eingefroren, nachdem sie in das Gefrierfach „Zu verbrauchen bis“...
  • Page 56: Einlegen Von Lebensmitteln

    Produktbedienung Gefrierfa Kühlfac Bemerkungen cheinstellung heinstellung -18°C 4°C Das ist die normale, empfohlene Einstellung. Diese Einstellungen werden empfohlen, wenn die -20, -22 oder -24°C 4°C Umgebungstemperaturen 30°C überschreiten. Wird verwendet, um Lebensmittel in kürzester Zeit Schnellgefrierfunktion 4°C einzufrieren. Das Gerät schaltet sich am Ende dieses Vorgang in den vorherigen Normalbetrieb zurück.
  • Page 57: Gemüsefach Mit Kontrollierter

    Produktbedienung 5.11 Gemüsefach mit kontrollierter Luftfeuchtigkeit (FreSHelf) (Diese Funktion ist optional) Das Gemüsefach mit kontrollierter Feuchtigkeit dient dazu, ein Austrocknen des Obsts und Gemüses zu verhindern, sodass dieses länger frisch bleibt. Wir empfehlen, dass Sie blattähnliche Gemüsesorten, wie beispielsweise Salat und Spinat wie auch empfindliche Gemüsesorten mög- 5.13 Beweglicher Mittelbereich lichst in waagerechter Position im Gemüsefach in...
  • Page 58: Blaues Licht/Harvestfresh

    Produktbedienung 5.16 Geruchsfilter zwischen 0 und 10 als Erweiterung des Kühlfachs oder auf einen Wert von -6 als Erweiterung des Der Geruchsfilter in der Luftleitung des Kühlschrankfachs verhindert die Bildung Gefrierfachs eingestellt werden.0 Grad dienen unangenehmer Gerüche im Kühlschrank. zur verlängerten Lagerung von Feinkostprodukten und -6 Grad ermöglicht die Lagerung von Fleisch für bis zu 2 Wochen in einem gut schneidbaren Zustand.
  • Page 59: Weinfach

    Produktbedienung 5.17 Weinfach (Diese Funktion gibt es nur bei bestimmten Geräten.) 1 – Ihr Weinfach füllen Das Weinfach wurde so gebaut, dass es bis zu 28 Flaschen vorne + 3 über ein Teleskopgestell zugängliche Flaschen aufnehmen kann. Die angegebenen maximalen Mengen dienen nur als Referenzwerte und entsprechen den mit einer Standardflasche „Bordelaise 75 cl“...
  • Page 60: Verwendung Von Internem Wasserspender Und Wasserspender An Der Tür

    Produktbedienung 3- Empfehlungen zum Öffnen einer Weinflasche vor der Verkostung: Weißweine Etwa 10 Minuten vor dem Servieren Junge Rotweine Etwa 10 Minuten vor dem Servieren Schwere, ausgereifte Rotweine Etwa 30 bis 60 Minuten vor dem Servieren 4- Wie lang kann eine geöffnete Flasche aufbewahrt werden? Geöffnete Weinflaschen mit einem Korken verschlossen und maximal die folgende Anzahl Tage an einem kühlen, trockenen Ort aufbewahrt werden: Weißweine...
  • Page 61: Wasser Ausgeben

    Produktbedienung 5.19 Wasser ausgeben 5.20 Wasserspender verwenden Halten Sie einen Behälter unter den Ausguss des Möglicherweise tropft vor der ersten Wasserspenders, während Sie den Hebel gedrückt Inbetriebnahme Ihres Kühlschranks halten. und nach Auswechslung des Zum Stoppen der Ausgabe lassen Sie den Hebel Wasserfilters etwas Wasser aus dem los.
  • Page 62: Eisbereiter Und Eisbehälter

    Produktbedienung 5.22 Eisbereiter und Eisbehälter Sie sollten nicht verbrauchtes Wasser im Wassertank des Kühlschranks (bei bestimmten Modellen) spätestens nach 2 bis 3 Wochen Füllen Sie den Eisbereiter mit Wasser, setzen Sie austauschen. ihn in seine Halterung. Ihr Eis ist nach etwa zwei Stunden fertig.
  • Page 63: Pflege Und Reinigung

    Pflege und Reinigung Eine regelmäßige Reinigung erhöht die Andernfalls werden die Einprägungen auf den Lebensdauer des Geräts. Plasteteilen möglicherweise beschädigt oder deformiert. Verwenden Sie warmes Wasser und HINWEIS: Trennen Sie Ihren einen weichen Lappen zum anschließenden Kühlschrank vor der Reinigung Trockenreiben.
  • Page 64: Problemlösung

    Problemlösung vivo Wenn ein Stromausfall auftritt oder der Bitte schauen Sie sich zunächst diese Liste an, Netzstecker gezogen und wieder angeschlossen bevor Sie sich an den Kundendienst wenden. wird, ist der Gasdruck im Kühlsystem Das kann Ihnen Zeit und Geld sparen. In der Liste des Gerätes nicht ausgeglichen, was den finden Sie Lösungsvorschläge für allgemeine Temperaturschutz des Kompressors auslöst.
  • Page 65 Fehlerbehebung Ihr neues Gerät ist vielleicht etwas grö0er als sein Die Kühlbereichtemperatur ist sehr niedrig Vorgänger. Größere Produkte arbeiten länger. eingestellt. >>> Tiefkühlbereichtemperatur höher Die Umgebungstemperatur ist sehr hoch. >>> Das einstellen, Temperatur nach einer Weile prüfen. Gerät arbeitet bei höheren Umgebungstemperaturen Die Temperatur im Kühl- oder Tiefkühlbereich normalerweise länger.
  • Page 66 Fehlerbehebung Das Gerät macht windartige Geräusche. Die Lebensmittel berühren den oberen Das Produkt nutzt einen Lüfter zur Kühlung. Bereich der Schublade. >>> Lebensmittel in der Dies ist völlig normal und keine Fehlfunktion. Schublade neu anordnen. Es befindet sich Kondenswasser an den Wenn Die Produktoberfläche Heiss Ist.
  • Page 67 Drogi kliencie, Chcemy, abyś mógł uzyskać optymalną efektywność naszego produktu, który został wyprodukowany w nowoczesnym zakładzie i przy drobiazgowej kontroli jakości. W tym celu prosimy przeczytać całą instrukcję obsługi przed użyciem produktu i przechowywać ją do ewentualnego użycia w przyszłości. Jeśli ten produkt zostanie przekazany innej osobie, prosimy przekazać...
  • Page 68 Spis treści 1 Instrukcje dotyczące bezpieczeństwa i 5 Korzystanie z produktu środowiska 5.1. Panel wskaźników....13 1.1. Bezpieczeństwo ogólne ....3 5.2.
  • Page 69: Instrukcje Dotyczące Bezpieczeństwa I Środowiska

    Instrukcje dotyczące bezpieczeństwa i środowiska Ten rozdział zawiera instrukcje dotyczące być używane przez takie osoby pod bezpieczeństwa służące unikaniu obrażeń nadzorem i z użyciem wskazówek i szkód materialnych. Nieprzestrzeganie osoby odpowiedzialnej za ich tych instrukcji spowoduje unieważnienie bezpieczeństwo. Dzieciom nie wolno wszelkich typów gwarancji produktu.
  • Page 70 Instrukcje dotyczące bezpieczeństwa i środowiska Narażenie produktu na deszcz, śnieg, bezpośrednie promienie słoneczne i wiatr spowoduje zagrożenie elektryczne. Podczas przemieszczania produktu nie wolno ciągnąć za uchwyt drzwiowy. Uchwyt może nie wytrzymać. Należy uważać, aby uniknąć pochwycenia ręki lub innej części ciała przez ruchome części wewnątrz produktu.
  • Page 71: Ostrzeżenie Hc

    Instrukcje dotyczące bezpieczeństwa i środowiska – Oczyścić zbiorniki wody, jeśli nie były kPa (80 psi), należy zastosować zawór używane przez 48 godz.; przepłukać ograniczający ciśnienie w Państwa system wodny podłączony do dopływu, sieci wodociągowej. Jeśli nie wiedzą jeśli woda nie była pobierana przez 5 Państwo w jaki sposób sprawdzić...
  • Page 72: Bezpieczeństwo Dzieci

    Instrukcje dotyczące bezpieczeństwa i środowiska 1.3. Bezpieczeństwo dzieci Materiały opakowaniowe należy przechowywać poza zasięgiem dzieci. Nie wolno pozwalać dzieciom na zabawę produktem. Jeśli drzwi produktu mają zamek, klucz należy przechowywać poza zasięgiem dzieci 1.4. Zgodność z dyrektywą WEEE i utylizacja odpadowego produktu Symbol na wyrobie lub opakowaniu oznacza, że wyrób ten nie może być...
  • Page 73: Lodówka

    Lodówka 1- Panel sterowania i wskaźników 6- Półka w drzwiach (galon) 2- Miejsce na masło i sery 7- Komora schładzania 3- Ruchoma półka w drzwiach 70 mm 8- Szuflada z pudełkiem na kostki lodu 4- Szklana półka w komorze chłodniczej 9- Półka szklana do komory wielostrefowej / 5- Pojemnik na świeże warzywa w komorze chłodziarka...
  • Page 74 Lodówka 6- Półka w drzwiach (galon) 1- Panel sterowania i wskaźników 7- Komora schładzania 2- Miejsce na masło i sery 8- Szuflada z pudełkiem na kostki lodu 3- Ruchoma półka w drzwiach 70 mm 9- Półka szklana do komory wielostrefowej / 4- Szklana półka w komorze chłodniczej chłodziarka 5- Pojemnik na świeże warzywa w komorze...
  • Page 75: Instalacja

    Instalacja 3.1. Odpowiednie miejsce instalacji 3.2. Podkładanie plastikowych klinów Skontaktuj się z autoryzowanym serwisem w Za pomocą plastikowych klinów należy ustawić sprawie instalacji produktu. Aby przygotować odpowiedni odstęp między produktem i ścianą na produkt do instalacji, zapoznaj się z informacjami cyrkulację...
  • Page 76: Podłączenie Zasilania

    Instalacja – Górna grupa zawiasów jest zamocowana 3 śrubami. – Pokrywa zawiasu jest zaczepiana po zainstalowaniu gniazd. – Następnie pokrywa zawiasu jest mocowania dwiema śrubami. W celu regulacji drzwiczek w pionie Poluzuj dolną nakrętkę mocującą Przykręć nakrętkę regulacyjną (w prawo/lewo), w zależności od położenia drzwiczek Dokręć...
  • Page 77: Przygotowanie

    Przygotowanie 4.1. Co robić, aby zaoszczędzić energię mehmet Podłączenie produktu do elektronicznych układów oszczędzania energii jest szkodliwe, ponieważ może uszkodzić produkt. Wprzypadku urządzenia wolnostojącego; „Urządzenie chłodnicze nie jest przeznaczone do stosowania jako urządzenie wbudowane”. Nie zostawiaj drzwiczek lodówki otwartych na dłużej.
  • Page 78: Pierwsze Użycie

    Przygotowanie 4.3 Pierwsze użycie Temperatura w pomieszczeniu, w którym Zanim zaczniesz używać urządzenie, upewnij znajduje się lodówka, powinna wynosić 10ºC /50°F co najmniej . Ze względu się, że wszystkie przygotowania przeprowadzono na wydajność lodówki nie zaleca się zgodnie z instrukcjami zawartymi w rozdziałach użytkowania jej w niższych temperaturach.
  • Page 79: Korzystanie Z Produktu

    Korzystanie z produktu 5.1. Panel wskaźników Panele wskaźników mogą się różnić w zależności od modelu produktu. Funkcje dźwiękowe i optyczne panelu wskaźników pomagają korzystać z lodówki. 10 11 Quick Cool Quick Freeze 3 “ Select 3 “ *34.1 *34.2 Quick Cool Quick Freeze 3 “...
  • Page 80 Korzystanie z produktu zacznie migać, oznacza to, że właściwa kabina 1. Wskaźnik funkcji szybkiego chłodzenia została wybrana. Włącza się, kiedy aktywna jest funkcja szybkiego chłodzenia. 8. Ikona zamrażalnika Joker 2. Wskaźnik temperatury w komorze Najedź na ikonę zamrażalnika Joker za pomocą przycisku FN;...
  • Page 81 Korzystanie z produktu 14. Przycisk FN 21. Ustawienie wskaźnika skali Celsjusza i Tym klawiszem można przełączać funkcje do Fahrenheita wybrania. Po naciśnięciu tego klawisza zacznie Najedź na ten przycisk za pomocą przycisku FN, migać ikona, której funkcja jest wymagana do a następnie wybierz skalę...
  • Page 82 Korzystanie z produktu 29. Ikona zmiany temperatury w kabinie będą nadal świecić. Funkcja eco fuzzy zostaje Wskazuje kabinę, której temperaturę należy aktywowana. Aby anulować funkcję eco fuzzy, zmienić. Jeżeli ikona zmiany temperatury w kabinie najedź ponownie na ikonę i wskaźnik, a następnie zacznie migać, oznacza to, że właściwa kabina naciśnij przycisk OK.
  • Page 83 Korzystanie z produktu Korzystaj z funkcji szybkiego chłodzenia, kiedy chcesz szybko schłodzić żywność umieszczoną w komorze chłodzenia. Jeśli schłodzona ma być znaczna ilość świeżej żywności, zaleca się uruchomienie tej funkcji przed włożeniem żywności do chłodziarki. Jeśli nie wyłączysz szybkiego chłodzenia, funkcja wyłączy się automatycznie po 8 godzinach lub gdy temperatura w komorze chłodziarki osiągnie żądaną...
  • Page 84: Panel Wskaźników

    Korzystanie z produktu 5.2. Panel wskaźników Panele wskaźników mogą się różnić w zależności od modelu produktu. Funkcje dźwiękowe i optyczne panelu wskaźników pomagają korzystać z lodówki. 26 25 1. Funkcja włączania/wyłączania Wybraną kabinę można rozróżnić na podstawie Przytrzymaj przycisk On/Off (Wł./Wył.) przez 3 ikon kabiny (6, 25, 24).
  • Page 85 Korzystanie z produktu 8. Wskaźnik skali Fahrenheita 15. Wskaźnik funkcji szybkiego chłodzenia Jest to wskaźnik skali Fahrenheita. Kiedy wskazanie Włącza się, kiedy aktywna jest funkcja szybkiego skali Fahrenheita jest aktywne, wartości zadane chłodzenia. temperatury wyświetlają się w skali Fahrenheita oraz 16.
  • Page 86 Korzystanie z produktu 26. Wskaźnik komory zamrażalnika zostaje aktywowana. Aby anulować funkcję eco fuzzy, najedź ponownie na ikonę i naciśnij klawisz Jeżeli ten wskaźnik jest aktywny, temperatura OK. Ikona funkcji eco fuzzy zacznie migać. Jeżeli komory zamrażalnika jest wyświetlana na nie naciśniesz żadnego przycisku przez 20 sekund, wskaźniku wartości temperatury.
  • Page 87: Zamrażanie Świeżej Żywności

    Korzystanie z produktu 5.3. Zamrażanie świeżej żywności 5.4. Zalecenia dotyczące przechowywania mrożonej żywności Aby zachować jakość żywności, żywność umieszczona w komorze zamrażarki musi Temperatura komory musi być ustawiona zostać jak najszybciej zamrożona , w tym celu przynajmniej na -18°C. należy użyć funkcji szybkiego zamrażania. 1.
  • Page 88: Rozmieszczanie Żywności

    Korzystanie z produktu 5.7. Alert otwarcia drzwi Warzywa należy zagotować i odcedzić wodę, aby (opcjonalny) wydłużyć czas zamrażania. Umieść żywność w Alarm dźwiękowy rozlegnie się, jeśli drzwi produktu hermetycznych opakowaniach po odfiltrowaniu pozostaną otwarte przez minutę. Alarm dźwiękowy i włóż do zamrażarki. Banany, pomidory, sałata, ucichnie po zamknięciu drzwi lub naciśnięciu seler, gotowane jajka, kartofle i podobna żywność...
  • Page 89: Pojemnik Na Świeże Warzywa Z Kontrolowaną

    Korzystanie z produktu 5.11 Pojemnik na świeże warzywa Nie umieszczać gruszek, moreli, brzoskwiń itd., z kontrolowaną wilgotnością a zwłaszcza owoców wytwarzających dużą ilość etylenu, w tym samym pojemniku na świeże (FreSHelf) warzywa co inne owoce i warzywa. Etylen (Funkcja jest opcjonalna) wydzielany przez te owoce może spowodować...
  • Page 90: Komora Z Regulowanym Chłodzeniem

    Korzystanie z produktu 5.14 Komora z regulowanym 5.15 Niebieskie światło/Harvest Fresh chłodzeniem * Funkcja nie jest dostępna w niektórych Komorę Cool Control tej chłodziarki można używać modelach w dowolnym wybranym trybie, nastawiając ją na temperatury chłodzenia (2/4/6/8 °C) lub W przypadku niebieskiego światła, zamrażania (-18/-20/-22/-24).
  • Page 91: Komora Piwniczki Winnej

    Korzystanie z produktu 5.16 Komora piwniczki winnej (Funkcja jest opcjonalna) 1 – Wypełnianie komory piwniczki winnej Piwniczka winna została skonstruowana na maksymalnie 28 butelek z przodu + 3 butelki dostępne dzięki uchwytowi teleskopowemu. Maksymalna zadeklarowana liczbą jest podawana tylko do celów informacyjnych i jest zgodna z testami wykonanymi ze standardową...
  • Page 92: Zastosowanie Wewnętrznego Dozownika Wody I Dozownika Wody Przy Drzwiach

    Korzystanie z produktu 3- Sugestie dotyczące otwierania butelki wina przed spróbowaniem: Białe wina Około 10 minut przed podaniem Młode wina czerwone Około 10 minut przed podaniem Gęste i dojrzałe wina czerwone Około 30–60 minut przed podaniem 4- Jak długo otwarta butelka jest przydatna do spożycia? Nieopróżnione butelki wina należy prawidłowo zatkać...
  • Page 93: Dozowanie Wody

    Korzystanie z produktu 5.19 Używanie dozownika wody 5.18 Dozowanie wody Przed użyciem chłodziarki po raz pi- Przytrzymać zbiornik pod wypływem dozownika, erwszy i po wymianie filtra wody naciskając podkładkę dozownika. Puścić podkładkę dozownika, aby zatrzymać z dozownika mogą ściekać krop- dozowanie.
  • Page 94: Kostkarka Do Lodu Icematic

    Korzystanie z produktu 5.20 Kostkarka do lodu Icematic 5.21 Kostkarka do lodu Icematic i pojemnik na lód (w niektórych modelach) Aby uzyskać lód z kostkarki Icematic, napełnij (w niektórych modelach) zbiornik wody znajdujący się w komorze Obsługa kostkarki do lodu Icematic zamrażalnika, tak aby osiągnąć...
  • Page 95: Konserwacja I Czyszczenie

    Konserwacja i czyszczenie Regularne czyszczenie produktu przedłuży jego 6.1. Unikanie nieprzyjemnych okres eksploatacji. zapachów Wyprodukowany produkt jest wolny od OSTRZEŻENIE: Przed czyszczeniem wszelkich materiałów zapachowych. Jednak lodówki należy wyłączyć zasilanie. przechowywanie żywności w nieodpowiednich komorach i niepoprawne czyszczenie powierzchni wewnętrznych może wywoływać nieprzyjemne Do czyszczenia nie wolno używać...
  • Page 96: Rozwiązywanie Problemów

    Rozwiązywanie problemów Przed skontaktowaniem się z serwisem należy W przypadku nagłej awarii zasilania lub sprawdzić tę listę. Umożliwi to zaoszczędzenie wyciągnięcia kabla zasilającego z gniazda czasu i pieniędzy. Ta lista zawiera często spotykane i podłączenia go z powrotem ciśnienie problemy niezwiązane z wadami jakości wykonania gazu w układzie chłodzenia produktu jest lub materiałów.
  • Page 97 Rozwiązywanie problemów Nowy produkt może być większy niż Temperatura komory chłodziarki jest poprzedni. Większe produkty pracują dłużej. ustawiona bardzo nisko. >>> Ustaw wyższą Temperatura w pomieszczeniu może być temperaturę komory chłodziarki i sprawdź wysoka. >>> Produkt będzie normalnie działał ponownie. przed dłuższy czas przy wyższej temperaturze w Żywność...
  • Page 98 Rozwiązywanie problemów Podłoże nie jest poziome lub wytrzymałe. Produkt nie jest regularnie czyszczony. >>> >>> Jeśli produkt się kołysze podczas Czyść wnętrze regularnie za pomocą gąbki, powolnego przemieszczania, wyreguluj nóżki ciepłej wody i wody z węglanem. w celu zrównoważenia produktu. Upewnij się Niektóre pojemniki i opakowania mogą...
  • Page 99 . Zarejestruj swój produkt. Załóż konto oraz zarejestruj teraz swój produkt marki BEKO objęty gwarancją na naszej stronie internetowej www.beko.pl w sekcji serwis. Dzięki temu nie będziesz musiał się martwić w sytuacji gdy zgubisz dowód zakupu. Ponadto będziesz miał możliwość...
  • Page 100 Réfrigérateur Manuel d’utilisation Frigorífico Manual do Utilizador GN1406231XBN FR/PT 58 4402 0000/AC-2/2-FR-PT...
  • Page 101 Veuillez d’abord lire ce manuel d’utilisation ! Chère cliente, cher client, Nous espérons que votre produit, qui a été fabriqué dans des usines modernes et vérifié au terme des procédures de contrôle de qualité les plus méticuleuses, vous aidera efficacement. Le présent manuel vous permettra d'utiliser votre appareil rapidement et en toute sécurité.
  • Page 102 Table des matières 1 Consignes importantes relatives à la 5 Fonctionnement de l’appareil sécurité et à l’environnement 5.1 Ecran en façade....15 5.2 Ecran en façade.
  • Page 103: Consignes Importantes Relatives À La Sécurité Et À L'environnement

    Consignes importantes relatives à la sécurité et à l’environnement Cette section comporte des informations – les environnements de type chambres de sécurité qui vous aideront à éviter les d’hôtes ; risques de blessures ou de dommages – la restauration et les usages similaires matériels.
  • Page 104 Instructions importantes en matière de sécurité et d’environnement – Les compartiments à aliments surgelés deux étoiles conviennent à la conservation d’aliments pré-congelés, à la conservation ou à la fabrication de glace et glaçons. – Les compartiments une, deux et trois étoiles ne conviennent pas à la congélation des aliments frais.
  • Page 105 Instructions importantes en matière de sécurité et d'environnement électrique ou un risque d’incendie. N’utilisez jamais de la vapeur ou des Évitez de ranger les éléments qui nettoyants à vapeur pour nettoyer ou nécessitent un réglage précis de la dégivrer le réfrigérateur. Tout contact température (tels que les vaccins, les entre la vapeur et les éléments sous médicaments sensibles à...
  • Page 106 Instructions importantes en matière de sécurité et d’environnement 1.1.1 Mise en garde concernant professionnel. les hydrocarbures En cas de risque d’impact causé par Si le système de refroidissement de d’eau dans votre installation, utilisez votre appareil contient du R600a : toujours un dispositif de protection Ce gaz est inflammable.
  • Page 107 Instructions importantes en matière de sécurité et d'environnement 1.6. Informations relatives Ne laissez pas les enfants jouer avec à l’emballage l’appareil. Les matériaux d’emballage de cet appareil sont DANGER : fabriqués à partir de matériaux recyclables, Avant de mettre au rebut conformément à...
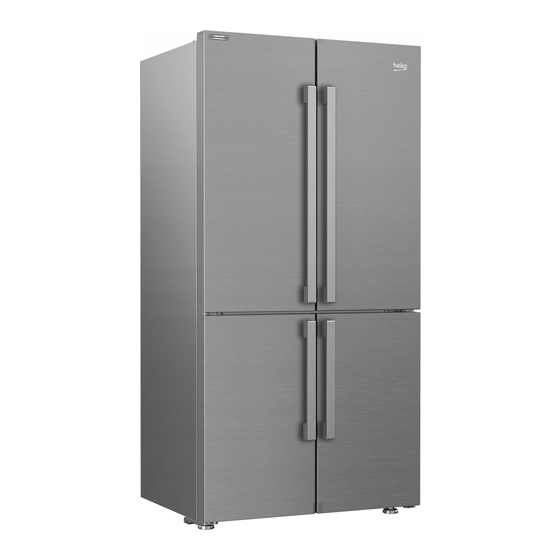
  • Page 108: Votre Réfrigérateur

    Votre réfrigérateur 1- Ecran de contrôle 6- Balconnet grande capacité 2- Balconnet pour bac à oeufs 7- Compartiment Zone fraîcheur 3- Balconnet ajustable de 70 mm 8- Twist ice maker 4- Clayette en verre du compartiment 9- Tiroirs du compartiment multizone réfrigérateur 10- Tiroirs du compartiment congélateur 5- Bac à...
  • Page 109 Votre réfrigérateur* 1- Ecran de contrôle 6- Balconnet grande capacité 2- Balconnet pour bac à oeufs 7- Compartiment Zone fraîcheur 3- Balconnet ajustable de 70 mm 8- Tiroir de la fabrique automatique de glaçons 4- Clayette en verre du compartiment 9- Clayette en bois du compartiment cave à...
  • Page 110: Installation

    Installation 3.2 Installation des cales en plastique 3.1 Emplacement approprié Les cales en plastique fournies à la livraison pour l’installation permettent de créer une distance afin que l'air Contactez un service autorisé pour installer circule entre l'appareil et le mur arrière. l'appareil.
  • Page 111 Installation -Fixez la charnière supérieure à l'aide de 3 vis -Fixez ensuite les caches après l’installation des supports -Serrez alors les caches à l'aide de 2 vis. Pour le réglage vertical des portes, Desserrez l’écrou de fixation situé dans la partie inférieure.
  • Page 112: Branchement Électrique

    Installation 3.4. Branchement électrique AVERTISSEMENT : Ne réalisez pas de branchements en utilisant des rallonges ou des multiprises. AVERTISSEMENT : Les câbles d’alimentation endommagés doivent être remplacés par des prestataires de services agréés. Si deux réfrigérateurs sont installés côte à côte, laissez une distance minimale de 4 cm entre les deux.
  • Page 113: Préparation

    Préparation 4.1 Mesures d’économie d’énergie Comme l’air chaud et humide ne pénètre pas directement dans votre produit lorsque Il est dangereux de brancher votre les portes ne sont pas ouvertes, votre produit réfrigérateur aux systèmes électriques optimisera son fonctionnement en fonction d'économie d'énergie, car ils pourraient des conditions pour protéger vos aliments.
  • Page 114: Première Utilisation

    Préparation 4.3 Première utilisation Avant d’utiliser cet appareil, rassurez-vous que toutes les préparations sont effectuées conformément aux instructions contenues dans les chapitres « Instructions importantes en matière de sécurité et d’environnement » et « Installation ». Nettoyez l’intérieur du réfrigérateur comme indiqué...
  • Page 115: Fonctionnement De L'appareil

    Fonctionnement de l’appareil 5.1 Ecran en façade L’écran de contrôle à commandes tactiles vous permet de régler la température et de contrôler les autres fonctions liées au réfrigérateur sans ouvrir la porte de l’appareil. Appuyez simplement sur le bouton approprié pour régler des fonctions. 10 11 Quick Cool Quick Freeze...
  • Page 116 Fonctionnement de l’appareil 1. Indicateur de fonction de refroidissement Veuillez consulter la section « Solutions conseillées rapide pour le dépannage » de votre manuel si vous Il s’allume lorsque la fonction de réfrigération constatez que cet indicateur est allumé. rapide est activée. 6.
  • Page 117 Fonctionnement de l’appareil 17. Icône de changement de température du Utilisez la fonction de congélation compartiment congélateur* rapide lorsque vous souhaitez congeler Indique le compartiment dont la température doit rapidement les aliments placés dans être modifiée. Lorsque l’icône de changement de le compartiment congélateur.
  • Page 118 Fonctionnement de l’appareil après 20 secondes, l’icône et l’indicateur restent la fonction Vacances reste allumée en permanence allumés. Et, la machine à glaçons s’arrête. Pour et la fonction Vacances s’active. L’indicateur remettre la machine en marche, effleurez l’icône et clignote pendant ce processus. Appuyez sur le l’indicateur ;...
  • Page 119 Fonctionnement de l’appareil s’allume et le mode Verrouillage des commandes 33. Bouton de fonction de refroidissement rapide s’active. Les boutons ne fonctionnent pas lorsque Ce bouton est doté de deux fonctions. Appuyez le mode Verrouillage des commandes est actif. brièvement sur ce bouton pour activer ou Appuyez à...
  • Page 120: Ecran En Façade

    Fonctionnement de l’appareil 5.2 Ecran en façade L’écran de contrôle à commandes tactiles vous permet de régler la température et de contrôler les autres fonctions liées au réfrigérateur sans ouvrir la porte de l’appareil. Appuyez simplement sur le bouton approprié pour régler des fonctions. 26 25 3.
  • Page 121 Fonctionnement de l’appareil 7. Indicateur de valeur de température comprendre si la fonction de vacances est activée ou désactivée. Appuyer sur le bouton OK active Affiche la valeur de température du compartiment la fonction vacances et le voyant est allumé en sélectionné.
  • Page 122 Fonctionnement de l’appareil 21. Icône de fonction eco fuzzy 24. Indicateur Celsius Appuyer sur la touche FN (jusqu’à ce qu’elle Il s’agit de l’indicateur Celsius. Lorsque l’indicateur atteigne l’icône de lettre e) pour activer la fonction Celsius est activé, les valeurs de réglage de la eco fuzzy.
  • Page 123: Congélation Des Aliments Frais

    Fonctionnement de l’appareil 5.3 Congélation des aliments frais 5.5 Informations concernant Pour préserver la qualité des aliments, il faut la congélation les congeler aussi rapidement que possible Conformément aux normes CEI 62552, le lorsqu’ils sont placés dans le compartiment réfrigérateur congèle au moins 4,5 kg d’aliments congélateur, pour cela, utilisez la fonction de par volume de 100 litres de congélation en moins congélation rapide.
  • Page 124: Disposition Des Aliments

    Fonctionnement de l’appareil Réglage du Réglage du compartiment compartiment Remarques congélateur réfrigérateur -18 °C 4°C Voici le réglage normal recommandé. -20, -22 ou Ces réglages sont recommandés lorsque la température 4°C -24 °C ambiante dépasse 30 °C. Cet indicateur est utilisé lorsque vous voulez congeler vos Congélation denrées pendant une courte période.
  • Page 125: Compartiment Zone Fraîcheur

    Fonctionnement de l’appareil 5.9 Compartiment Zone fraîcheur Retirez toujours les légumes du bac de leurs sacs Les compartiments zone fraîcheur vous permettent en plastique. Lorsqu’ils restent dans leurs sacs de conserver vos aliments fragiles (viande, en plastique, ils pourrissent rapidement. Si vous poisson, froimage, charcuterie) à...
  • Page 126: Compartiment Multizone

    Fonctionnement de l’appareil 5.15 Lumière bleue/HarvestFresh *Peut ne pas être disponible sur tous les modèles À propos de la lumière bleue, Les fruits et légumes stockés dans les bacs à légumes éclairés par une lumière bleue continuent leur photosynthèse grâce à l’effet de longueur d’onde de la lumière bleue et préservent ainsi leur teneur en vitamine.
  • Page 127: Compartiment Cave À Vin

    Fonctionnement de l’appareil 5.17 Compartiment cave à vin* (Cette caractéristique est en option) 1 – Charger votre cave Le compartiment cave à vins a été conçu pour charger jusqu’à 28 bouteilles de front + 3 bouteilles accessibles par une clayette télescopique. Ces quantités maximales annoncées sont données à titre indicatif et correspondent a des tests effectués avec une bouteille étalon, de type «...
  • Page 128: Utilisation Du Distributeur D'eau Interne Et Du Distributeur D'eau À La Porte

    Fonctionnement de l’appareil 3- Suggestions relatives à l’ouverture d’une bouteille de vin avant la dégustation : Vins blancs Environ 10 minutes avant de servir Vins rouges jeunes Environ 10 minutes avant de servir Vins rouges denses et matures Environ 30 à 60 minutes avant de servir 4- Combien de temps se conserve une bouteille ouverte ? Les bouteilles de vin que vous n’avez pas terminées doivent être fermées correctement et peuvent être conservées dans un endroit frais et sec pendant les périodes suivantes :...
  • Page 129: Utilisation Du Distributeur D'eau

    Fonctionnement de l’appareil Lors de la première utilisation, patientez pendant 5.21 Distributeur de glaçons environ 24 heures afin que l’eau refroidisse. (pour certains modèles) Enlevez le verre peu de temps après avoir tiré sur Pour obtenir des glaçons grâce à cette machine, la gâchette.
  • Page 130 Fonctionnement de l’appareil 5.22 Distributeur et récipient de conservation de glaçons (dans certains modèles) Utilisation du distributeur Remplissez le distributeur de glaçons avec de l'eau et remettez-le à sa place. Vos glaçons seront prêts dans environ deux heures. Ne pas retirer le distributeur de glaçons de son logement pour prendre de la glace.
  • Page 131: Entretien Et Nettoyage

    Entretien et nettoyage Le nettoyage régulier du produit prolonge sa durée du benzène, de la cire, ect. ; autrement, les de vie. marques sur les pièces en plastique pourraient s’effacer et les pièces elles-mêmes pourraient AVERTISSEMENT: Débranchez présenter des déformations. Utilisez de l’eau l’alimentation avant de nettoyer le tiède et un torchon doux pour nettoyer et réfrigérateur.
  • Page 132 Dépannage vivo Parcourez la liste ci-après avant de contacter le En cas de coupure soudaine de courant ou service de maintenance. Cela devrait vous éviter de débranchement intempestif, la pression de perdre du temps et de l'argent. Cette liste du gaz dans le système de réfrigération répertorie les plaintes fréquentes ne provenant pas de l'appareil n'est pas équilibrée, ce qui déclenche la fonction de conservation...
  • Page 133: Dépannage

    Dépannage Il se peut que le nouvel appareil soit plus La température du réfrigérateur est très basse, alors que celle du congélateur est grand que l'ancien. Les appareils plus grands appropriée. fonctionnent plus longtemps. La température de la pièce est probablement La température du compartiment congélateur élevée.
  • Page 134 Dépannage La température du compartiment Un climat chaud ou humide accélère le réfrigérateur est réglée à un degré très processus de givrage et de condensation. élevé. >>> Le réglage de la température du Ceci est normal et ne constitue pas un compartiment réfrigérateur a un effet sur la dysfonctionnement.
  • Page 135 Dépannage Il est possible que les aliments soient en contact avec la section supérieure du tiroir. >>> Reclassez les aliments dans le tiroir. Si La Surface De L’appareil Est Chaude Vous pouvez observer une élévation de la température entre les deux portes, sur les panneaux latéraux et au niveau de la grille arrière pendant le fonctionnement de l’appareil.
  • Page 136 Leia este manual antes de utilizar o produto! Caro cliente, Gostaríamos que desfrutasse do nosso produto da melhor forma possível, tendo este sido fabricado em instalações modernas com extremo cuidado e segundos os mais meticulosos controlos de qualidade. Assim, aconselhamos a leitura do manual do utilizador na íntegra antes da utilização do produto. Na eventualidade de o produto mudar de proprietário, deve entregar este guia ao novo proprietário juntamente com o produto.
  • Page 137 1 Instruções de segurança e 5.17 Uso de dispensador de água interno e ambientais dispensador de água na porta ..27 5.18 Dispensador de água ....27 2 O seu frigorífico 5.19 Para utilizar o dispensador de água.
  • Page 138: Instruções De Segurança E Ambientais

    Instruções de segurança e ambientais Depois de desligar, aguarde pelo menos 5 Esta secção fornece as instruções de segurança minutos antes de ligar novamente. Desligar o necessárias para prevenir risco de lesões e danos produto quando não está em uso. Não tocar na materiais.
  • Page 139 Instruções importantes relativas à segurança e ao ambiente Em caso de mau funcionamento, não usar o produto, porque pode provocar um choque eléctrico. Contactar a assistência autorizada antes de fazer alguma coisa. Ligar o produto a uma tomada com ligação à terra.
  • Page 140 Instruções importantes relativas à segurança e ao ambiente – se o aparelho de refrigeração ficar vazio 1.2. Utilização prevista durante longos períodos de tempo, desligue, Este produto é concebido para utilização descongele, limpe, seque e deixe a porta doméstica. Não está previsto para utilização aberta para evitar a formação de bolor no comercial.
  • Page 141 Instruções importantes relativas à segurança e ao ambiente 1.5. Em conformidade com a Directiva RSP Este produto está em conformidade com a Directiva UE REEE (2011/65/UE). Não contém materiais nocivos e proibidos especificados na Directiva. 1.6. Informação da embalagem Os materiais de embalagem do produto são fabricados com materiais recicláveis de acordo com os nossos Regulamentos Ambientais Nacionais.
  • Page 142: Seu Frigorífico

    O seu frigorífico 1- Painel indicador e de controlo 6- Prateleira da porta para pacotes/garrafas 2- Secção de manteiga e queijo 7- Compartimento de refrigeração 3- Prateleira da porta movível, 70 mm 8- Gaveta para caixa de gelo 4- Prateleira de vidro do compartimento do 9- Prateleira de vidro/compartimento de frigorífico arrefecimento multizona...
  • Page 143: Seu Frigorífico

    O seu frigorífico 1- Painel indicador e de controlo 6- Prateleira da porta para pacotes/garrafas 2- Secção de manteiga e queijo 7- Compartimento de refrigeração 3- Prateleira da porta movível, 70 mm 8- Gaveta para caixa de gelo 4- Prateleira de vidro do compartimento do 9- Prateleira de vidro/compartimento de frigorífico arrefecimento multizona...
  • Page 144: Instalação

    Instalação 1. Para instalar os calços, remova os parafusos no 3.1 Localização adequada produto e utilize os parafusos fornecidos juntamente para instalação com os calços. Contacte a Assistência Autorizada para a instalação do produto. Para preparar o produto para utilização, consulte as informações no manual do utilizador e certifique-se de que a instalação elétrica e a instalação de água são adequadas.
  • Page 145 Instalação Para ajustar as portas verticalmente, desaperte a porca de fixação localizada na parte inferior. Rode a porca de ajuste de acordo com a posição da porta (para a direita/para a esquerda). Aperte a porca de fixação para fixar a posição. Para ajustar as portas horizontalmente, desaperte a porca de fixação localizada na parte superior.
  • Page 146: Ligação Elétrica

    Instalação 3.4 Ligação elétrica - O grupo de dobradiças superiores é fixado com 3 parafusos. - A tampa da dobradiça é fixada após a instalação AVISO: Não efetue ligações através de das tomadas. cabos de extensão ou fichas múltiplas. - De seguida, a tampa da dobradiça é fixada com dois parafusos.
  • Page 147: Preparação

    Preparação 4.1 Atitudes a adotar para A temperatura ambiente do local onde o poupança de energia seu frigorífico está localizado não deve 10 ºC/50 °F ser inferior a . Utilizar o seu Ligar o seu frigorífico a sistemas que frigorífico em condições de temperatura poupam energia é...
  • Page 148: Utilização Inicial

    Preparação 4.3 Utilização inicial Antes de utilizar o produto certifique-se de que foram realizados todos os preparativos de acordo com as instruções constantes nos capítulos "Instruções importantes relativas à segurança e ao ambiente" e "Instalação". Limpe o interior do frigorífico conforme recomendado na secção "Manutenção e limpeza".
  • Page 149: Utilizar O Produto

    Utilizar o produto 5.1 Painel indicador O painel indicador tátil permite-lhe definir a temperatura e controlar as outras funções relacionadas com o frigorífico, sem abrir a porta do mesmo. Baste pressionar os botões relevantes para as definições de função. 10 11 Quick Cool Quick Freeze 3 “...
  • Page 150 Utilizar o produto 6. Ícone de reposição do filtro 1. Indicador de função de arrefecimento rápido Este ícone acende-se quando é necessário efetuar Acende-se quando a função de refrigeração rápida a reposição do filtro. é ativada. 7. Ícone de compartimento de alteração da 2.
  • Page 151 Utilizar o produto 17. Ícone de compartimento de alteração da Use a função de congelação temperatura rápida quando quiser congelar Indica o compartimento cuja temperatura deve ser rapidamente os alimentos colocados alterada. Quando o ícone de compartimento de al- no compartimento do congelador. Se quiser congelar grandes quantidades teração da temperatura começa a piscar, parte-se de alimentos frescos, ative esta função...
  • Page 152 Utilizar o produto processo. Se não pressionar qualquer botão após confirmar se a função de férias será ativada ou 20 segundos, o ícone e o indicador permanecem desativada. Ao pressionar o botão OK, o ícone da ligados. Desta forma, a máquina de gelo desliga- função de férias ilumina-se continuamente e a se.
  • Page 153 Utilizar o produto irá acender-se e o modo de bloqueio de teclas Use a função de arrefecimento ficará ativado. Os botões não funcionarão se o rápido quando quiser arrefecer rapidamente os alimentos colocados modo de Bloqueio de teclas estiver ativado. Prima no compartimento do frigorífico.
  • Page 154: Painel Indicador

    Utilizar o produto 5.2 Painel indicador O painel indicador tátil permite-lhe definir a temperatura e controlar as outras funções relacionadas com o aparelho sem abrir a porta do frigorífico. Baste pressionar os botões relevantes para as definições de função. 26 25 3.
  • Page 155 Utilizar o produto 7. Indicador do valor da temperatura da função de férias ilumina-se continuamente e a função de férias é ativada. Pressione a tecla OK Apresenta o valor da temperatura do para cancelar a função de férias. Desta forma, o compartimento selecionado.
  • Page 156 Utilizar o produto 21. Ícone de função Eco Fuzzy 24. Indicador Celsius Pressione o botão FN (até chegar ao ícone da letra É um indicador de Celsius. Quando a indicação "e") para ativar a função Eco Fuzzy. Ao passar Celsius é ativada, os valores definidos da pelo ícone Eco Fuzzy, o mesmo começará...
  • Page 157: Congelar Alimentos Frescos

    Utilizar o produto Definição do Definição do compartimento compartimento Observações do congelador do frigorífico -18 °C 4 °C Esta é a definição normal recomendada. -20, -22 ou -24 Estas definições são recomendadas quando a temperatura 4 °C °C ambiente excede 30 ºC. Congelação Utilize quando quiser congelar os seus alimentos rapidamente.
  • Page 158: Colocar Os Alimentos

    Utilizar o produto Os alimentos a serem congelados não devem 5.8 Compartimento de refrigeração entrar em contacto com os artigos congelados Os compartimentos de refrigeração permitem- anteriormente para evitar a sua descongelação lhe preparar os alimentos para congelação. parcial. Também pode utilizar estes compartimentos para Ferva os vegetais e escorra a água para os armazenar os seus alimentos a uma temperatura armazenar congelados durante um período de...
  • Page 159: Bandeja Para Ovos

    Utilizar o produto 5.12 Secção do meio movível Deve ter em atenção o peso dos vegetais aquando da substituição dos mesmos. Os vegetais pesados A secção do meio movível foi concebida para e duros devem ser colocados no fundo da gaveta impedir que o ar frio no interior do seu frigorífico para vegetais e fruta e os vegetais leves e macios escape para fora.
  • Page 160: Luz Azul

    Utilizar o produto secção fechada (Compartimento do compressor) atrás do frigorífico. Durante o funcionamento deste elemento podem ser ouvidos sons semelhantes aos sons dos segundos de um relógio analógico. Esta situação é normal e não é causa de problema. 5.14 Luz azul (em alguns modelos) A gaveta para vegetais e fruta está...
  • Page 161 Utilizar o produto 16 - 17 °C Vinhos de Bordéus (Bordeaux) - tinto 15 - 16 °C Vinhos da Borgonha - tinto 14 - 16 °C Grand crus (grande crescimento) - vinhos brancos secos 11 - 12 °C Vinhos tintos leves, frutados e jovens 10 - 12 °C Vinhos rosé...
  • Page 162: Uso De Dispensador De Água Interno E

    Utilizar o produto 5.17 Uso de dispensador de 5.18 Dispensador de água água interno e dispensador Coloque um recipiente sob o cano do dispensador de água na porta enquanto pressiona a alavanca. Solte a alavanca do dispensador para parar. (em alguns modelos) Depois de ligar o frigorífico a uma fonte de água É...
  • Page 163: Para Utilizar O Dispensador De Água

    Utilizar o produto 5.19 Para utilizar o 5.20 Icematic dispensador de água (em alguns modelos) Antes de utilizar o frigorífico pela Para obter gelo da icematic, encha o depósito de primeira vez e depois de substituir o água no compartimento do frigorífico com água filtro de água, o dispensador de água até...
  • Page 164: Icematic E Reservatório De Armazenamento De

    Utilizar o produto 5.21 Icematic e reservatório de 5.22 Blue light/HarvestFresh armazenamento de gelo *Pode não estar disponível em todos os modelos (em alguns modelos) Usar o Icematic * Encha o Icematic com água e coloque-o no seu Para a Blue Light, lugar devido.
  • Page 165 Manutenção e Limpeza Não utilize água com cloro ou A limpeza regular do produto irá prolongar a vida produtos de limpeza na superfície útil do mesmo. exterior ou nas peças do produto AVISO: Desligue a alimentação antes com revestimento cromado. O cloro de proceder à...
  • Page 166 Resolução de problemas Em caso de falta de energia repentina ou Verificar a lista antes de contactar a assistência. retirar a ficha de alimentação e colocar Fazer isto poupa-lhe tempo e dinheiro. Esta de novo, a pressão do gás no sistema de lista inclui queixas frequentes que não estão refrigeração do produto não é...
  • Page 167 Resolução de problemas A temperatura do compartimento de O novo produto pode ser maior do que o refrigeração está definida para um grau anterior. Produtos maiores funcionam por muito baixo. >>> Definir a temperatura do períodos mais longos. A temperatura da sala pode ser elevada. compartimento de refrigeração para um grau >>>...
  • Page 168 Resolução de problemas O chão não está nivelado ou não é resistente. O produto não é limpo regularmente. >>> Limpar o interior regularmente usando uma >>> Se o produto vibra quando movido esponja, água quente e água com carbonato. lentamente, ajustar os pés para equilibrar o Alguns recipientes e materiais de embalagem produto.

Table des Matières