ONKRON G70 Mode D'emploi
Support de bureau à ressort à gaz pour un moniteur
Table des Matières
Les langues disponibles
Les langues disponibles
Liens rapides
Настольный кронштейн для одного монитора с системой газлифт
Soporte de escritorio brazo móvil (con el resorte de gas) para monitor individual
360°
USER GUIDE
EN
BENUTZERHANDBUCH
DE
MODE D'EMPLOI
FR
GUIDA UTENTE
IT
GUÍA DEL USUARIO
ES
РУКОВОДСТВО ПОЛЬЗОВАТЕЛЯ
RU
ПАЙДАЛАНУШЫ НҰСҚАУЛЫҒЫ
KZ
Monitor-Tischhalterung für einen Monitor mit Gaslift-System
Support de bureau à ressort à gaz pour un moniteur
Supporto per monitor da scrivania con molla a gas
Single monitor desk mount with gas lift
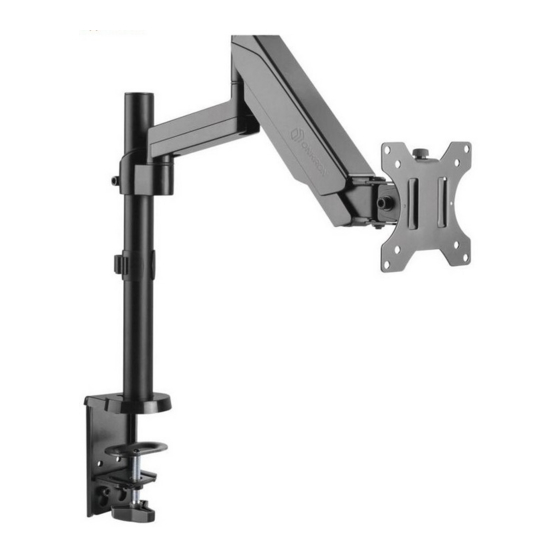
G70
Chapitres
Table des Matières

Manuels Connexes pour ONKRON G70


Sommaire des Matières pour ONKRON G70
- Page 1 Single monitor desk mount with gas lift Настольный кронштейн для одного монитора с системой газлифт Monitor-Tischhalterung für einen Monitor mit Gaslift-System Support de bureau à ressort à gaz pour un moniteur Soporte de escritorio brazo móvil (con el resorte de gas) para monitor individual Supporto per monitor da scrivania con molla a gas 360°...
- Page 16 Si vous avez des questions, n’hésitez pas à nous contacter à tout moment et nous vous aiderons dès possible: États-Unis: sale@onkron.us / +13159682278 Europe: sale@onkron.de / +494029996807 Russie: support@onkron.ru / +78007772176 Lisez attentivement le guide d’installation avant de commencer l’assemblage et...
- Page 17 PAGE CONTENU: Le contenu du kit installation................17 1. Choisissez le type d’installation du support.............18 a) L’installation en bordure de table à l’aide de pinces de table........18 b) IL’installation à travers le trou dans la table............19 2. Assemblage de bras de support..............20 3.
-
Page 18: Choisissez Le Type D'installation Du Support
1. Choisissez le type d’installation du support: a) L’installation en bordure de table à l’aide de pinces de table: Prenez la pince (B), elle se compose de deux pièces fixées par deux boulons. Si l’épaisseur de votre table est de 35~80 mm (1.3” – 3.1”), utilisez les deux trous inférieurs, si de 10 à... -
Page 19: Il'installation À Travers Le Trou Dans La Table
b) L’installation à travers le trou dans la table: Tout d’abord démontez la pince (B) comme l’indique l’image. Fixez la pièce (J) au tuyau de support (E) à l’aide d’un seul boulon (H). Installez le panneau décoratif en plastique (C). Faites glisser la vis de serrage (de la pince B démontée) a travers la plaque (I) et dans le trou de la table, puis vissez la vis de serrage dans le tuyau du support (E). -
Page 20: Assemblage De Bras De Support
2. Assemblage de bras de support Placez le clip de câble (F) sur le tuyau du support (E). Puis installez le bras de support (A) à la hauteur souhaitée et serrez les boulons avec la clé (L). -
Page 21: L'installation De La Plaque Vesa Sur L'écran
3. L’installation de la plaque VESA sur l’écran Installez la plaque VESA (D) sur votre écran en utilisant les boulons appropriés. Assurez- vous que la plaque VESA est bien fixée. D’autres boulons, rondelles (M-E) et joints en plastique (M-F) peuvent être utilisés si nécessaire. Consultez attentivement l’image ci-dessous. -
Page 22: L'ajustement Du Bras De Support
5. L’ajustement du bras de support Ajustez la souplesse du bras en fonction du poids de l'écran. Pour le faire, tournez la vis de forage vers (+) pour des écrans lourds, vers (-) pour des écrans légers. Ajustez le boulon d’inclinaison si nécessaire.