Publicité

Les langues disponibles

Les langues disponibles

Manual Square Flame Torch
Handleiding Flame Torch
Anleitung Flame Torch
Manual Flame Torch
SFT15 – Flame Torch black
(UK)
(NL)
(DU)
(FR)
www.sunred.nl

Publicité

Table des Matières
loading

Sommaire des Matières pour Sunred Flame Torch SFT15

  • Page 1 Manual Square Flame Torch (UK) Handleiding Flame Torch (NL) Anleitung Flame Torch (DU) Manual Flame Torch (FR) SFT15 – Flame Torch black www.sunred.nl...
  • Page 2 All measurements are approximate Certified by international recognized standards. Gas heat wave outdoor heater. Variable control gas valve with electric push igniter. Steel with powder coated or stainless steel. 2180mm total height. Please keep this manual for future references www.sunred.nl...
  • Page 3: Table Des Matières

    Manufacturer or supplier will not be responsible for user’s negligence. TABLE OF CONTENTS 1. Caution 2. Heater Stand and Location 3. Gas Requirements 4. Leakage Test 5. Fuel Gas Odour 6. Operation and Storage 7. Assembly Instructions 8. Construction and Specifications 9. Assembly Procedures 10. Problems Check List www.sunred.nl...
  • Page 4: Caution

    Clothing or other flammable materials should not be hung on the heater or placed on or near the heater. Use may replace the rubber hose by himself and note the length of the hose is 60cm. The hose must be required by the national regulations and conditions. www.sunred.nl...
  • Page 5: Gas Requirements

    A dented, rusted or damaged propane tank may be hazardous and should be checked by your tank supplier. Never use a propane tank with a damaged valve connection. The propane tank must be arranged to provide for vapor withdrawal from the operating cylinder. Never connect an unregulated propane tank to the heater. www.sunred.nl...
  • Page 6 LP gas and natural gas have manmade odorants added specifically for detection of fuel gas leaks. If a gas leak occurs you should be able to smell the fuel gas. Since Propane (LP)is heavier than air you should smell for the gas odours low to the floor. www.sunred.nl...
  • Page 7: Leakage Test

    Turn the gas supply ON. In case of a leak, turn off the gas supply. Tighten any leaking fittings, then turn the gas supply on and recheck. Contact your dealer for assistance if bubbles continue to appear. Never leak test while smoking. www.sunred.nl...
  • Page 8: Operation And Storage

    ”. 2. Turn the knob to “HI” position for big flame . See picture of “ ”. 4. Press and turn the variable control knob to OFF position. 3. Turn off the valve on the gas supply cylinder completely. www.sunred.nl...
  • Page 9 Wipe off powder coated surfaces with a soft, moist rag. For lacquer surface, use suitable cleaners. Do not clean heater with cleaners that are combustible or corrosive. Remove debris from the burner to keep it clean and safe for use. Components www.sunred.nl...
  • Page 10 3+(28-30/37) 3B/P(30) 3B/P(37) 3B/P(50) Injector size 1.5mm Reference gas G30/G31 G30/G31 G30/G31 Pressure(mbar) 28-30 Nominal heat input (Hs) 9.0KW 650g/hr 10.5KW 12.5KW Ignition power 0.22KW Country Destination for BE-CH-ES-FR-GB-GR-IE-IT-PT 28-30/37mbar for CY-CZ-DK-EE-FI-LT-LV-MT-NL-NO-SE-SI-SK-BG-RO-TR 30mbar for PL 37mbar for AT-CH-DE 50mbar www.sunred.nl...
  • Page 11: Assembly Instructions

    3.1 Slide two reflector panels together. Insert one bolt M6x10 (II). Slide One washer (HH) Over treaded end of bolt M6x10 (II) and screw on cap nut (JJ) Loosely. www.sunred.nl...
  • Page 12 5.3. Attached 4 washers (HH) to the top of reflector spacers and put the reflector onto the 4 reflector spacers. Make sure each washer is inserted well. Then attach 4 washers (HH) on the top of the reflector and put 4 wing nuts (KK) to the spacer and tightened. www.sunred.nl...
  • Page 13 (E). Move and sit the glass tube (E) through the hole of the plate cover on the middle plate (K), check and ensure that the glass tube(E)cover the center hole of the middle plate www.sunred.nl...
  • Page 14  Connect the regulator with the LPG gas tank in counter-clockwise direction and tighten it by adjustable wrench.  Put LPG gas tank into stand. Make soap testing for the connection after exchanging the gas tank. www.sunred.nl...
  • Page 15 Place the dust cap on the cylinder valve outlet whenever the cylinder valve is not in use. Only install the type of dust cap on the cylinder valve that is provided with the cylinder valve. Other type of caps or plugs may result in leakage of propane. www.sunred.nl...
  • Page 16: Problems Check List

    To clean the pilot, remove the burner and pilot cover as detai1ed above, Inspect the pilot injector and tubing for blockage. If obstructed clean with compressed air. Clean the flame failure device. Assembly is a reversal of the above procedure. www.sunred.nl...
  • Page 17 Certificaten: CE, Hoogte: H218 cm Gecertificeerd door internationaal erkende normen. Traploos regelbare gas heater. Variabele controle gasklep met elektrische ontsteker. Staal met poedercoating of roestvrij staal. 2180mm totale hoogte. Hoed met uitgebreid verwarmingsgebied Bewaar deze gebruiksaanwijzing voor eventueel toekomstig gebruik www.sunred.nl...
  • Page 18 De fabrikant of leverancier is niet verantwoordelijk voor de nalatigheid van de gebruiker. INHOUDSOPGAVE 1. Tips 2. Heater stand en locatie 3. Gasbehoeften 4. Lekkage Test 5. Brandstof Geur 6. Werking en opslag 7. Montage-instructies 8. Bouw en specificaties 9. Montage Procedures 10. Problemen Check List www.sunred.nl...
  • Page 19 Kleding of andere brandbare materialen mogen nooit worden opgehangen aan de heater of op of nabij de heater gehouden worden. De rubberen slang kan vervangen worden. Let op; de lengte van de slang is 60cm. De slang moet voldoen aan de landelijke eisen. www.sunred.nl...
  • Page 20 Het gebruik van dit apparaat in gesloten ruimten kan gevaarlijk zijn en is "verboden". 1) Voor gebruik buitenshuis of in goed geventileerde ruimtes. 2) Een goed geventileerde ruimte moet minimaal 25% van de oppervlakte open hebben. 3) De oppervlakte is de som van de muren. www.sunred.nl...
  • Page 21 Gebruik nooit de heater in een explosieve omgeving, zoals gebieden waar benzine of andere ontvlambare vloeistoffen en gassen worden opgeslagen. Om de heater te beschermen tegen sterke wind, kan de voet veilig aan de grond worden verankerd met schroeven. www.sunred.nl...
  • Page 22 Lekkagetest punten. Zie foto's hieronder. Draai de gastoevoer naar ON. In het geval van een lek, schakelt u de gastoevoer uit. Draai lekkende fittingen aan, draai de gastoevoer opnieuw open en controleer opnieuw. Neem contact op met uw dealer voor hulp als luchtbellen blijven verschijnen. Nooit een lek test doen tijdens het roken. www.sunred.nl...
  • Page 23 1. Draai de knop naar "LOW" positie voor een kleine vlam. Zie het beeld van de " ". 2. Draai de knop naar "HI" positie voor een grote vlam. Zie de afbeelding van de " 3. Druk en draai de variabele regelknop op OFF. 4. Zet het ventiel van de gas cilinder volledig dicht. www.sunred.nl...
  • Page 24 Veeg de gepoedercoate oppervlakten met zachte, vochtige doek af. Voor het gelakte oppervlakte, gebruik de geschikte reinigingsmiddelen. Maak de heater niet schoon met reinigingsmiddelen die brandbaar of bijtend zijn. Verwijder vuil van de brander om het schoon en veilig voor gebruik te houden. Componenten www.sunred.nl...
  • Page 25 Roestvrij staal vlammenscherm Warmte-emissie van reflector Specificaties: Met CE-certificaat Uitsluitend voor gebruik buitenshuis Maakt alleen gebruik van propaan of butaan gas Max. wattage: 12.5KW Verbruik: 900 g / uur Gewicht: Roestvrij staal model G.W. 25 kg Hoogte: 2180 mm inclusief voet www.sunred.nl...
  • Page 26 Montage-instructies www.sunred.nl...
  • Page 27 4. to fix the upper plate to upper support by screws (AA) M*8. www.sunred.nl...
  • Page 28 www.sunred.nl...
  • Page 29 www.sunred.nl...
  • Page 30 www.sunred.nl...
  • Page 31 Er moet altijd voor worden gezorgd dat schade aan de gasleidingen en de piëzo-ontsteking wordt voorkomen. De brander en mesh scherm kan dan worden gereinigd door perslucht. De montage is een omkering van de bovengenoemde procedure. www.sunred.nl...
  • Page 32 Voor het reinigen van de waakvlam, verwijder de brander en de waakvlam afdekking, zoals hierboven is aangegeven, inspecteer de waakvlam injector en buizen op verstopping. Als deze verstopt zijn, maak deze schoon met perslucht. De montage is dan weer een omkering van de bovenstaande procedure. www.sunred.nl...
  • Page 33 Sollten die Warnungen und Anweisungen in diesem Handbuch nicht eingehalten werden, können ernsthafte Verletzungen, Tot oder materielle Schäden die Folge sein. Wenn Sie die Anweisungen nicht verstehen, wenden Sie sich bitte an Ihren Händler. Der Lieferant haftet nicht für Nachlässigkeit des Anwenders. www.sunred.nl...
  • Page 34 Änderung in der Temperatur bewirkt, die Risse oder Bruch führen können. • Verwenden Sie das Gerät nie während Regen. Die Glasröhre können brechen, wenn es plötzlich Wasser auf der Röhre kommt. Schalten Sie das Gerät während Regen ab. www.sunred.nl...
  • Page 35 Die Gasflasche abkoppeln, wenn das Gerät längere Zeit nicht benutzt wird. • Der Gasschlauch soll nicht länger wie 60cm sein. • Der Gasschlauch soll CE Marke haben und soll Hitze beständig sein zwischen -20 Grad und 80 Grad Celsius. www.sunred.nl...
  • Page 36 Löcher reparieren und prüfen für weitere Lecken und danach sollen sie für Ihnen das Gerät wieder anzünden. BENÜTZUNG Beleuchtung Anweisungen überprüfen Sie und stellen Sie sicher, dass eine AA-Batterie in der Zündung-Kammer ist und funktioniert. Die Anode (+) muss nach außen gedreht sein. www.sunred.nl...
  • Page 37 Entfernen Sie den verschiebbaren Deckel zur Seite, um der Flamme mit Anzünder anzuzünden. SO DEAKTIVIEREN SIE DIE HEIZUNG 1. Drücken und schalten Sie der Variablen Taste auf „OFF“ Position. 2. Drehen Sie das Ventil komplett zu auf der Gas Flasche. www.sunred.nl...
  • Page 38 Heizung nicht mit brennbaren oder ätzenden Reinigungsmitteln. • Entfernen Sie Schmutz aus dem Brenner, um ihn sauber und sicher für den Einsatz zu halten. • Decken Sie die Brennereinheit mit der optionalen Schutzabdeckung zu, wenn die Heizung nicht in Betrieb ist. www.sunred.nl...
  • Page 39 www.sunred.nl...
  • Page 40 Befestigen Sie der Platte (N) an die Bodenplatte (F) mit GG Schrauben. 2. Nehmen Sie den Hut aus der Verpackung. Wenn notwendig für eine gute Montierung der Hut Platten drehen Sie den Muttern etwas lose und drehen Sie diese wieder fest wenn die Positionierung richtig ist. www.sunred.nl...
  • Page 41 10 (II). Schieben Sie eine Ringe (HH) über die Schraube und setzen Sie Schraube (II) mit Schraube (JJ) darüber fest. Wiederholen Sie diese Methode bis alle 4 Sektionen fertig sind. Danach können Sie alle Schrauben fest drehen. 4. Setzen sie die obenste Panel fest mit Schraube (AA) M*8. www.sunred.nl...
  • Page 42 Platzieren Sie den Ringen 3 (HH) an den Hut und setzen Sie diese fest mit 3 Schrauben (LL). Setzen Sie diese gut fest. Danach 4 Ringen (HH) anbringen und diese festdrehen mit 3 Schrauben (KK). Platzieren Sie den Körper (K) auf den Flaschen Aufbewahrung (F) mit Schrauben (GG). www.sunred.nl...
  • Page 43 Platzieren Sie der Glass Röhre in das Loch in der Unterste Platte (K). Machen Sie sicher das das der Glas Röhre das komplette Loch in der Mitte bedeckt. Platzieren Sie der Schütz Gitter (D) an dem Körper, und stecken Sie den Hacken durch den Löcher vom Körper. Setzen Sie diese fest und benützen Sie den Löcher (P). www.sunred.nl...
  • Page 44 Anschluss vom Gerät. Befestigen Sie den Regler mit der Gas Flasche und setzen Sie diese fest. Setzen Sie die Gas Flasche in der untere Teil. Machen Sie der Test mit Seife wie angegeben vor Sie der Gas Flasche wechseln. www.sunred.nl...
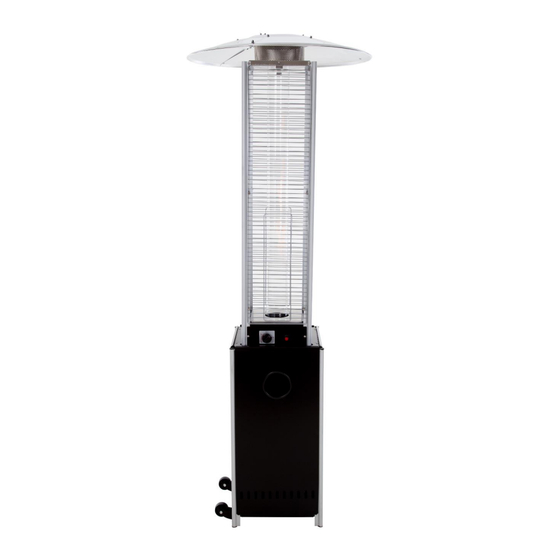
  • Page 45 Certifié selon les normes reconnues au niveau international Chauffage à gaz réglable en continu. Volet de gaz de contrôle variable avec détonateur électrique. Acier époxy ou en inox. hauteur totale de 2180 mm. Chapeau avec zone de chauffage prolongé Ces instructions doivent être conservées pour référence ultérieure. www.sunred.nl...
  • Page 46 -La bouteille de gaz doit être entreposée conformément aux règlements applicables. -Ne déplacez jamais l'appareil lorsqu'il est en fonctionnement. -Fermez le robinet de la bouteille de gaz ou le contrôleur avant de déplacer l'appareil. -Le tube ou le tuyau flexible doit être renouvelé dans les intervalles prescrits. www.sunred.nl...
  • Page 47 N’utilisez jamais de vérin avec un anneau de corps, vanne, collier ou pied endommagé. Lorsque le chauffage n'est pas en service, éteignez la vanne de régulation. Fermez le robinet de la bouteille de gaz ou le contrôleur après utilisation. www.sunred.nl...
  • Page 48 Le chauffage est principalement pour l'usage extérieur. Vérifiez toujours qu'il y a une ventilation suffisante d'air frais est présent. Gardez toujours la bonne distance aux matériaux combustibles, c'est-à-dire au-dessus de 45 cm (18 ") et sur les côtés moins de 70 cm (28"). www.sunred.nl...
  • Page 49 ON. Dans le cas d'une fuite, coupez l'alimentation de gaz. Serrez les raccords de fuites, rétablissez l'alimentation en gaz à nouveau ouvert et vérifier de nouveau. Contactez votre revendeur si les bulles d'air continuent d'apparaître. Ne faites jamais un test de fuite au cours de l'usage du tabac. www.sunred.nl...
  • Page 50 Vérifiez la masse volumique de la valve de gaz et sur des dommages. Si vous doutez un dégât, laissez-le changer par votre fournisseur de gaz. N'entreposez jamais de bouteille de gaz liquide dans un sous-site sur, ou dans des endroits sans aération suffisante. www.sunred.nl...
  • Page 51 Essuyez les surfaces époxy avec un chiffon doux et humide. Pour la surface peinte, utilisez des produits de nettoyage appropriés. Ne nettoyez pas le radiateur avec des produits de nettoyage qui sont inflammables ou corrosifs. Enlevez la saleté du brûleur pour le maintenir propre et pour l'usage en sécurité. Composants www.sunred.nl...
  • Page 52 Avec le certificat de Exclusivement pour l'usage extérieur. Utilisez seulement gaz propane ou butane. Puissance maximale : 12.5 KW. Consommation : 900 g/heure. Poids : modèle d'inox 25 kg G.W. Hauteur : 2180 mm y compris pied. Instructions de montage www.sunred.nl...
  • Page 53 6.3. to fix the upper plate to upper support by screws (AA) M*8. www.sunred.nl...
  • Page 54 www.sunred.nl...
  • Page 55 www.sunred.nl...
  • Page 56 Placez le capuchon de protection sur le gaz d'échappement du cylindre, Si celui-ci n'est pas en usage. Installez uniquement le capuchon de protection sur le robinet de la bouteille qui est inclus. Autres types de fermetures ou bouchons peuvent entraîner des fuites de propane. www.sunred.nl...
  • Page 57 à l'air comprimé. Le montage est une inversion de la procédure ci-dessus. www.sunred.nl...
  • Page 58 Manual gasheater Flame Torch (UK) Handleiding gasheater Flame Torch (NL) Handbuch gasheizung Flame Torch (DU) Manual chauffage au gaz Flame Torch (FR) OutTrade BV De Grift 1A 7711EP Nieuwleusen Tel: +31 (0)529-482808 Fax: +31 (0)529-484910 Email: info@outtrade.eu Website: www.outtrade.eu SFT15 20-02-2017 www.sunred.nl...

Ce manuel est également adapté pour:

0063cn7201Hmxd-e-hsHmxd-eglass-hsFlame torch sft15b

Table des Matières