Publicité
Les langues disponibles
Les langues disponibles
Liens rapides
Limited One Year Warranty
T&S warrants to the original purchaser (other
than for purposes of resale) that such product is
free from defects in material and workmanship
for a period of one (1) year from the date of pur-
chase. During this one-year warranty period, if
the product is found to be defective, T&S shall,
at its options, repair and/or replace it. To obtain
warranty service, products must be returned to...
T&S Brass and Bronze Works, Inc.
Attn: Warranty Repair Department
2 Saddleback Cove
Travelers Rest, SC 29690
Shipping, freight, insurance, and other trans-
portation charges of the product to T&S and the
return of repaired or replaced product to the pur-
chaser are the responsibility of the purchaser.
Repair and/or replacement shall be made within
a reasonable time after receipt by T&S of the
returned product. This warranty does not cover
Items which have received secondary finishing
or have been altered or modified after purchase,
or for defects caused by physical abuse to or
misuse of the product, or shipment of the prod-
ucts.
Any express warranty not provided herein,
and any remedy for Breach of Contract which
might arise, is hereby excluded and disclaimed.
Any implied warranties of merchantability or fit-
ness for a particular purpose are limited to one
year in duration. Under no circumstances shall
T&S be liable for loss of use or any special con-
sequential costs, expenses or damages.
Some states do not allow limitations on how
long and implied warranty lasts or the exclusion
or limitation of incidental or consequential dam-
ages, so the above limitations or exclusions may
not apply to you. Specific rights under this war-
ranty and other rights vary from state to state.
P/N:
098-012285-45
Date:
990317
Drawn:
CW
Checked:
MAB 4/6/99
Approved:
MW 4/6/99
Installation and
Maintenance
Instructions
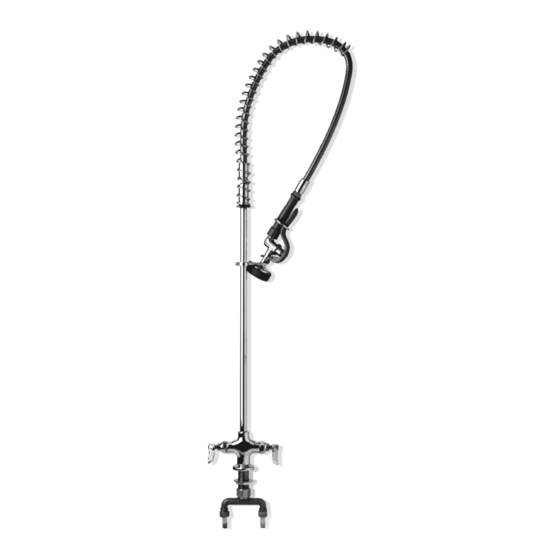
PRE-RINSE UNIT
B-0113
Deutsch:
Installations- und
Wartungsanleitungen
Español:
la Instalación y las
Instrucciones de
Mantenimiento
Français:
les Instructions
d'Installation et
d'Entretien
Publicité

Sommaire des Matières pour T&S PRE-RINSE UNIT B-0113
- Page 1 Installation and Maintenance Instructions Limited One Year Warranty T&S warrants to the original purchaser (other than for purposes of resale) that such product is free from defects in material and workmanship for a period of one (1) year from the date of pur- chase.
- Page 2 Exploded View Some items are listed for instructional purposes and may not be sold as separate parts.
- Page 3 Part Number Guide Base Faucet Assembly - 002824-40 Body, Faucet Asm, Spdl LH - Eterna w/ Spring Checks 002711-40 Asm, Spdl RH - Eterna w/ Spring Checks 002712-40 Asm, Lever Handle (LH) 006090-45 Lever Handle, Zinc - Hot 001637-45 Index Button, Red - Hot 001661-45 Screw, Lever Handle 000922-45...
- Page 4 General Instructions Faucet Installation: 4. Place no.1 through hole in sink, align hot and cold sides parallel to sink 1. Shut off water supply and drain lines. line Drill a hole approximately 1-1/4” diameter in countertop where you are installing no.1. 2.
- Page 5 General Instructions Pre-Rinse Installation: Note: If new no.22 is being installed on no.21, make sure it’s installed in the 1. Shut off water supply and drain upright position. lines.Apply Teflon tape or pipe joint compound to threads on both ends of no.24.
- Page 6 Instrucciones Generales Instalación de la canilla: 4. Coloque la parte No.1 a través del hueco en el mostrador, aline la llave 1. Cierre la fuente principal de agua y caliente y fría paralelo con el desagüe las tuberias. Con el taladro mostrador.
- Page 7 Instrucciones Generales Instalación De Pre- Enjuague: Nota: Si esta instalando la parte No.22 nueva en la parte No.21, 1. Cierre la fuente de agua y desagüe asegúrese que sea instalada en la las tuberías. Aplique cinta de Teflon o posición correcta. compuesto de coyuntura a las roscas de ambos extremos de la parte No.24.
- Page 8 Instructions Générales Installation du Robinet: 4. Mettre le Nº.1 dans le trou de l’évier, aligner les côtés chauds et 1. Couper l’alimentation d’eau et froids parallèles au tuyau du robinet. purger la tuyauterie. Percer un trou d’environ 1-1/4” de diamètre dans le support ou vous installer le Nº.1.
- Page 9 Instructions Générales L’Installation De L’Élément Noter: Si vous installer un N°.22 Pre-Rinçage: nouveau sur N°.21, soyez certain de l’installer dans une position verticale. 1. Fermer la réserve de l’eau et égoutter la tuyauterie. Appliquer le ruban en Téflon ou le composé pour les tuyaux a chaque extrémité...
- Page 10 Allgemeine Anleitungen Wasserhahninstallation: 4. Nr. 1 durch das Loch im Waschbecken führen, Warm- und 1. Wasser abstellen und Kaltwasser- armatur parallel zur Wasserleitungen entleeren. In die Waschbeckenkante anordnen. Abdeckplatte des Waschtisches ein ungefähr 1-1/4” großes Loch bohren, in das Nr. 1 installiert wird. 2.
- Page 11 Allgemeine Anleitungen Installation der Vorspüleinheit: Anmerkung: Falls ein neues Teil Nr. 22 auf Teil Nr. 21 montiert wird, ist 1. Wasser absperren und Wasserleitungen sicherstellen, aufrecht installiert wird. entleeren. Teflonband oder Rohrkitt an beiden Seiten des Gewindes von Nr. 24 anbringen.
- Page 12 RELATED T&S BRASS PRODUCT LINE B-0100 PRE-RINSE UNIT W/ FLEXIBLE S-STEEL HOSE B-0111 PRE-RINSE B-10-K B-20K PARTS KIT PARTS KIT T&S BRASS AND BRONZE WORKS, INC. A firm commitment to application-engineered plumbing products 2 Saddleback Cove, P.O. Box 1088, T & S Brass-Europe Travelers Rest, SC 29690 ‘De Veenhoeve’...

