Logitech Harmony Mode D'emploi
Masquer les pouces
Voir aussi pour Harmony:
- Mode d'emploi (116 pages) ,
- Guide d'installation (25 pages) ,
- Guide d'installation (33 pages)
Les langues disponibles
Les langues disponibles
Logitech Harmony afstandsbediening toepassen op Nikobus
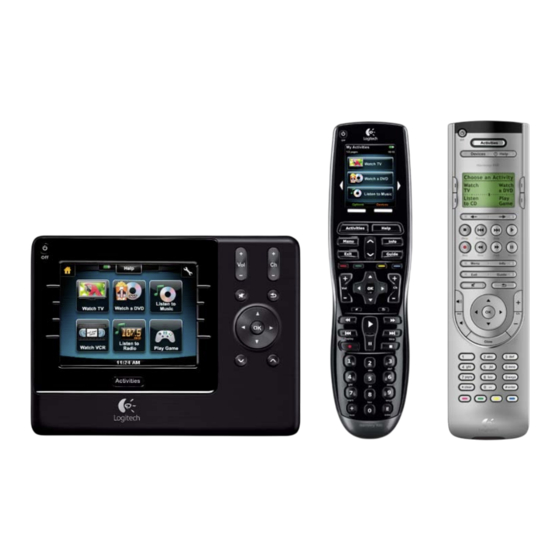
Een volledig overzicht van het gamma Logitech Harmony afstandsbedieningen en hun onderlinge verschillen vindt u op www.logitech.com
nv Niko sa
Industriepark West 40, BE-9100 Sint-Niklaas, Belgium — tel. +32 3 778 90 00 — fax +32 3 777 71 20 — e-mail: support@Niko.be — www.niko.be
PHlogitechR10113
Table des Matières

Manuels Connexes pour Logitech Harmony


Sommaire des Matières pour Logitech Harmony
- Page 14 Logitech Harmony pour Nikobus Pour un aperçu complet de la gamme de télécommandes Logitech Harmony et de leurs différentes caractéristiques, rendez-vous sur www.logitech.com. nv Niko sa Industriepark West 40, BE-9100 Sint-Niklaas, Belgium — tel. +32 3 778 90 00 — fax +32 3 777 71 20 — e-mail: support@Niko.be — www.niko.be...
-
Page 15: Configuration Rapide
Logitech Harmony pour Nikobus mode d’emPLoi de La ProgrammatioN : Configuration de la télécommande Harmony (le modèle Harmony 900 est utilisé comme exemple). Votre télécommande Logitech doit être configurée à l’aide du logiciel fourni. Pour cela, vous avez besoin d’une connexion à Internet afin d’accéder à une base de données des appareils contenant des milliers de modèles différents. Pour plus d’informations et le mode d’emploi : www.logitech.com Configuration rapide : La configuration comprend les étapes suivantes (décrites en détail aux pages suivantes) : - Création d’un compte... - Page 16 Logitech Harmony pour Nikobus Configuration pas à pas : Installez le logiciel de configuration fourni sur un ordinateur. Le logiciel va établir une connexion avec le serveur Logitech Harmony via Internet. 1. Création d’un compte 2. Enregistrement de votre télécommande 3. Préparation de tous les appareils que vous souhaitez commander à l’aide de votre télécommande Harmony. Sélectionnez « Ajouter un dispositif ». 4. Sélectionnez « Domotique – Console d’éclairage ».
- Page 17 Logitech Harmony pour Nikobus 5. Sélectionnez le fabricant « Niko ». 6. Comme modèle, indiquez « Nikobus », puis appuyez sur « Suivant ». nv Niko sa Industriepark West 40, BE-9100 Sint-Niklaas, Belgium — tel. +32 3 778 90 00 — fax +32 3 777 71 20 — e-mail: support@Niko.be — www.niko.be PHlogitechR10113...
- Page 18 Logitech Harmony pour Nikobus 7. Vérifiez le ou les appareils sélectionnés avant d’appuyer sur « Suivant ». 8. La « Console d’éclairage » Nikobus est ajoutée à votre télécommande ! 9. Préparation des activités. Sélectionnez « Ajouter une activité ». 10. Sélectionnez « Ajouter manuellement ». nv Niko sa Industriepark West 40, BE-9100 Sint-Niklaas, Belgium — tel. +32 3 778 90 00 — fax +32 3 777 71 20 — e-mail: support@Niko.be — www.niko.be PHlogitechR10113...
- Page 19 Logitech Harmony pour Nikobus 11. Choisissez le type d’activité « Utilitaire ». 12. Choisissez le type d’activité « Générique ». 13. Contrôlez le réglage « Générique » et appuyez sur « Suivant ». nv Niko sa Industriepark West 40, BE-9100 Sint-Niklaas, Belgium — tel. +32 3 778 90 00 — fax +32 3 777 71 20 — e-mail: support@Niko.be — www.niko.be PHlogitechR10113...
- Page 20 Logitech Harmony pour Nikobus 14. Sélectionnez les appareils qui seront utilisés dans le cadre de l’activité (pour Nikobus, il s’agit de l’appareil « Niko Console d’éclairage » que nous avons créé à cet effet). 15. Votre sélection est confirmée. nv Niko sa Industriepark West 40, BE-9100 Sint-Niklaas, Belgium — tel. +32 3 778 90 00 — fax +32 3 777 71 20 — e-mail: support@Niko.be — www.niko.be PHlogitechR10113...
- Page 21 Logitech Harmony pour Nikobus 16. Appuyez sur « Enregistrer ». 17. Cliquez sur « Suivant ». nv Niko sa Industriepark West 40, BE-9100 Sint-Niklaas, Belgium — tel. +32 3 778 90 00 — fax +32 3 777 71 20 — e-mail: support@Niko.be — www.niko.be PHlogitechR10113...
- Page 22 Logitech Harmony pour Nikobus 18. Appuyez sur « Prêt ». 19. Votre « activité » est créée. 20. Pour donner un nom à votre activité, allez dans « Paramètres ». 21. Sélectionnez « Renommer Activité génériqque ». 22. Saisissez le nom de votre choix. Vous devez créer une « activité » pour chaque lieu dans lequel vous désirez utiliser la télécommande. Le nom le plus logique pour cette activité est donc le nom de l’endroit où elle aura lieu. Cliquez ensuite sur « Prêt ». nv Niko sa Industriepark West 40, BE-9100 Sint-Niklaas, Belgium — tel. +32 3 778 90 00 — fax +32 3 777 71 20 — e-mail: support@Niko.be — www.niko.be...
- Page 23 Logitech Harmony pour Nikobus 23. Pour définir les « touches », sélectionnez « Personnaliser ». attribution des codes infrarouges Nikobus aux touches « dures » (les « vraies » touches de la télécommande). a. Choisissez la touche à laquelle vous désirez attribuer un code infrarouge. b. Sélectionnez l’appareil « Console d’éclairage ». c. Choisissez le code infrarouge dans la liste des codes disponibles pour la « Console d’éclairage ». (Vous trouverez des informations plus détaillées sur la composition des codes infrarouges plus loin dans ce mode d’emploi.) nv Niko sa Industriepark West 40, BE-9100 Sint-Niklaas, Belgium — tel. +32 3 778 90 00 — fax +32 3 777 71 20 — e-mail: support@Niko.be — www.niko.be...
- Page 24 Logitech Harmony pour Nikobus attribution des codes infrarouges Nikobus aux touches « souples » de votre télécommande (en fonction de votre type de télécommande) : à choisir en sélectionnant l’onglet « Touches souples ». Sur chaque page de l’écran, vous avez la possibilité de créer un certain nombre de touches. a. Donnez aux touches un nom qui indique leur fonction. b. Sélectionnez éventuellement une illustration pour la touche. c. Sélectionnez l’appareil « Console de’éclairage ».
- Page 25 Logitech Harmony pour Nikobus Programmation sur Nikobus : Remarque : la programmation sur Nikobus doit être confiée à une personne possédant les connaissances nécessaires au sujet du système Nikobus et de la pro- grammation par ordinateur. Ce mode d’emploi n’est donc qu’un complément de nos modes d’emploi techniques Nikobus. Chaque bouton-poussoir Nikobus avec récepteur infrarouge intégré peut recevoir 39 codes permettant de changer de canal. Sur chaque canal, il est possible d’attribuer une programmation au code A, B, C ou D. Cette programmation offre les mêmes possibilités qu’un bouton-poussoir à 4 contacts. La base de données Logitech Harmony contient tous les codes infrarouges reconnus par Nikobus, à savoir : - 39 codes permettant de sélectionner le canal - 4 codes « action » correspondant aux positions A, B, C et D d’un bouton-poussoir à 4 contacts...
- Page 26 Logitech Harmony pour Nikobus Dans l’exemple qui précède, en mode 1, la sortie 1 du télévariateur est reliée à la position 9AB du récepteur infrarouge. Cette sortie fonctionnera donc lorsque vous sélectionnerez le canal 9 sur votre télécommande avant d’utiliser les « touches action » A et B. remarque importante : - Vous pouvez procéder en deux étapes : sélectionner d’abord un canal, puis appuyer sur A, B, C ou D. - Vous pouvez également programmer la combinaison sur une seule touche, par exemple 17C (sélectionnez le canal 17, puis transmettez le code C). o Attention : les touches qui renferment une combinaison ne permettent pas de transmettre des commandes longues. o Par conséquent, vous ne pouvez pas utiliser ces touches : • Pour augmenter ou réduire l’intensité lumineuse...